
1. పరిచయం
This manual provides essential information for the safe installation, operation, and maintenance of your Ducasa Ducaverre White 1200W Glass Radiant Panel Heater. Please read these instructions carefully before use and retain them for future reference.
1.1 భద్రతా సమాచారం
- విద్యుత్ భద్రత: Always ensure the heater is connected to a properly grounded electrical outlet. Do not operate with a damaged cord or plug.
- ప్లేస్మెంట్: Maintain a safe distance from flammable materials (curtains, furniture) as indicated in the installation section. Do not cover the heater.
- నీటి బహిర్గతం: Do not install the heater near water sources (bathrooms, laundry rooms) unless specifically rated for such environments. Avoid direct water spray.
- పిల్లలు మరియు హాని కలిగించే వ్యక్తులు: ఈ ఉపకరణాన్ని 8 సంవత్సరాలు మరియు అంతకంటే ఎక్కువ వయస్సు ఉన్న పిల్లలు మరియు తక్కువ శారీరక, ఇంద్రియ లేదా మానసిక సామర్థ్యాలు లేదా అనుభవం మరియు జ్ఞానం లేని వ్యక్తులు సురక్షితమైన మార్గంలో ఉపకరణాన్ని ఉపయోగించడం గురించి పర్యవేక్షణ లేదా సూచనలను అందించినట్లయితే మరియు ప్రమాదాలను అర్థం చేసుకుంటే వాటిని ఉపయోగించవచ్చు. . పిల్లలు ఉపకరణంతో ఆడకూడదు. పర్యవేక్షణ లేకుండా పిల్లలచే శుభ్రపరచడం మరియు వినియోగదారు నిర్వహణ చేయరాదు.
- నిర్వహణ: Disconnect from power before cleaning or performing any maintenance.
1.2 ప్యాకేజీ విషయాలు
ప్యాకేజింగ్లో అన్ని భాగాలు ఉన్నాయని నిర్ధారించుకోండి:
- Ducasa Ducaverre 1200W Glass Radiant Panel Heater
- Wall Mounting Bracket(s)
- మౌంటు స్క్రూలు మరియు వాల్ ప్లగ్లు
- వినియోగదారు మాన్యువల్ (ఈ పత్రం)
2. సెటప్ మరియు ఇన్స్టాలేషన్
Proper installation is crucial for the safe and efficient operation of your heater. If you are unsure about any step, consult a qualified electrician.
2.1 వాల్ మౌంటు
The Ducasa Ducaverre heater is designed for wall mounting. Choose a suitable location away from direct drafts, windows, and areas where it might be accidentally covered. Ensure there is sufficient clearance around the heater as specified in the diagram below.
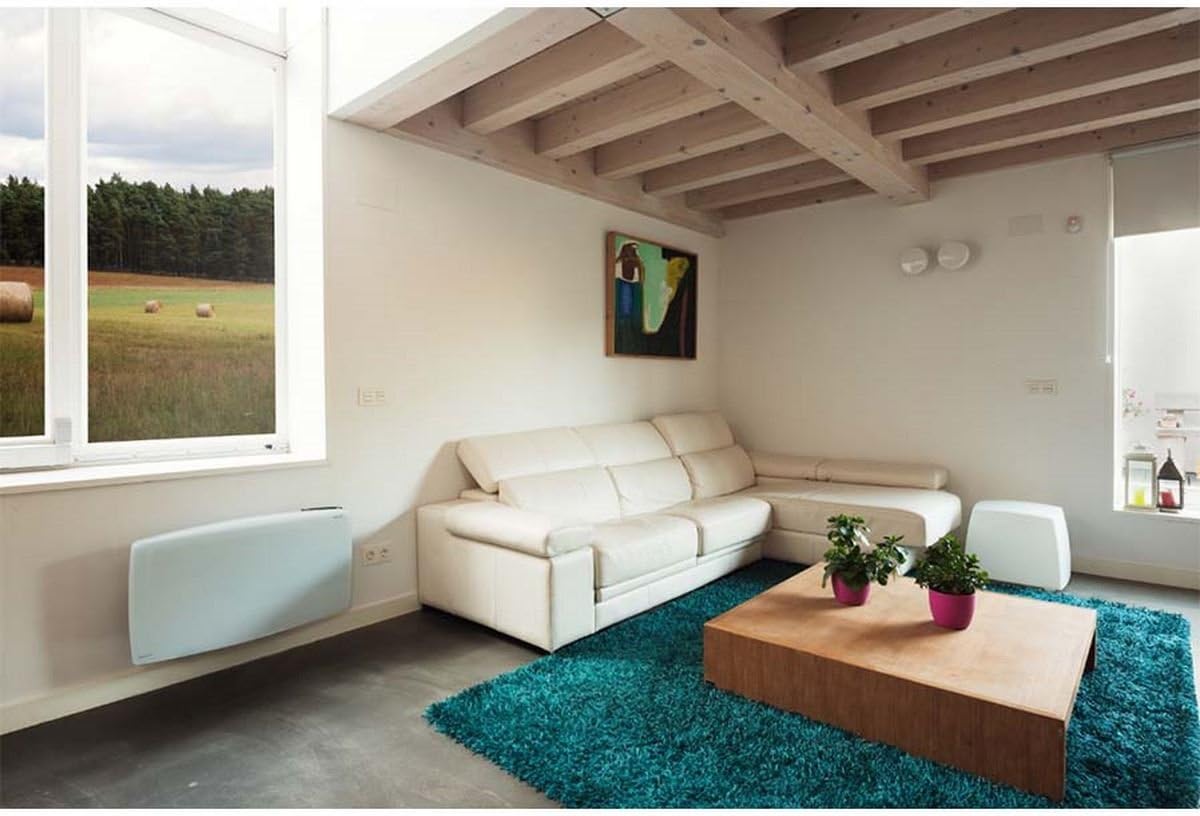
చిత్రం 1: Ducasa Ducaverre 1200W Glass Radiant Panel Heater mounted on a wall in a modern living room setting. The heater is white and rectangular, positioned low on the wall, illustrating a typical installation scenario.
- మార్కింగ్: Hold the mounting bracket against the wall at the desired height. Use a pencil to mark the drilling points.
- డ్రిల్లింగ్: మీ గోడ రకానికి తగిన డ్రిల్ బిట్ని ఉపయోగించి గుర్తించబడిన పాయింట్ల వద్ద రంధ్రాలు వేయండి. గోడ ప్లగ్లను చొప్పించండి.
- బ్రాకెట్ను అటాచ్ చేయండి: అందించిన స్క్రూలను ఉపయోగించి మౌంటు బ్రాకెట్ను గోడకు బిగించండి. అది సమతలంగా మరియు గట్టిగా జతచేయబడిందని నిర్ధారించుకోండి.
- మౌంట్ హీటర్: Carefully lift the heater and hook it onto the mounting bracket. Ensure it clicks securely into place. Some models may require additional screws to fix the heater to the bracket from below.
2.2 ఎలక్ట్రికల్ కనెక్షన్
Once mounted, connect the heater to a standard electrical outlet. Ensure the outlet is easily accessible and rated for the heater's power consumption (1200W). Do not use extension cords or multi-plugs unless absolutely necessary and only if they are rated for the heater's power.
3. ఆపరేటింగ్ సూచనలు
Your Ducasa Ducaverre heater features an intuitive control panel for setting temperature and operating modes.

చిత్రం 2: ఒక క్లోజప్ view of the black control panel located on the top right side of the white Ducasa Ducaverre heater. The panel features a digital display and several buttons labeled 'OK', '+', '-', 'MODE', and 'PROG', indicating user interface for settings and programming.
3.1 కంట్రోల్ ప్యానెల్ ఓవర్view
- డిజిటల్ ప్రదర్శన: Shows current temperature, set temperature, and operating mode.
- మోడ్ బటన్: Cycles through operating modes (Comfort, Eco, Frost Protection, Program).
- '+' / '-' బటన్లు: ఉష్ణోగ్రత సెట్టింగ్లను సర్దుబాటు చేయండి లేదా మెను ఎంపికలను నావిగేట్ చేయండి.
- సరే బటన్: ఎంపికలను నిర్ధారిస్తుంది.
- PROG బటన్: Accesses programming functions.
3.2 సమయం మరియు రోజు సెట్ చేయడం
Before using programmed modes, set the current time and day:
- నొక్కండి మరియు పట్టుకోండి మోడ్ button until the time setting appears.
- ఉపయోగించండి '+' or '-' గంటను సర్దుబాటు చేయడానికి, ఆపై నొక్కండి OK.
- వారంలోని నిమిషాలు మరియు రోజు కోసం పునరావృతం చేయండి.
3.3 ఆపరేటింగ్ మోడ్లు
- కంఫర్ట్ మోడ్ (C): Maintains your desired set temperature. Use '+' or '-' ఉష్ణోగ్రత సర్దుబాటు చేయడానికి.
- Eco Mode (E): Maintains a temperature typically 3-4°C lower than the Comfort setting, saving energy.
- Frost Protection Mode (F): గడ్డకట్టకుండా నిరోధించడానికి కనిష్ట ఉష్ణోగ్రతను (ఉదా. 7°C) నిర్వహిస్తుంది.
- Program Mode (P): Follows a pre-set weekly heating schedule.
3.4 Programming a Weekly Schedule
To set a custom heating schedule:
- నొక్కండి PROG button. The display will show the current day and a time segment.
- ఉపయోగించండి మోడ్ to select the desired operating mode (Comfort, Eco, Frost Protection) for that specific hour.
- ఉపయోగించండి '+' to advance to the next hour or '-' తిరిగి వెళ్ళడానికి.
- Repeat for all 24 hours of the day.
- నొక్కండి PROG again to move to the next day.
- Once all days are programmed, press OK సేవ్ మరియు నిష్క్రమించడానికి.
4. నిర్వహణ
క్రమం తప్పకుండా శుభ్రపరచడం వల్ల మీ హీటర్ యొక్క సరైన పనితీరు లభిస్తుంది మరియు దాని జీవితకాలం పెరుగుతుంది.
4.1 శుభ్రపరచడం
- పవర్ డిస్కనెక్ట్ చేయండి: Always unplug the heater from the electrical outlet before cleaning.
- బాహ్య: Wipe the glass panel and exterior surfaces with a soft, damp రాపిడి క్లీనర్లు, ద్రావకాలు లేదా కఠినమైన రసాయనాలను ఉపయోగించవద్దు, ఎందుకంటే ఇవి ముగింపును దెబ్బతీస్తాయి.
- దుమ్ము: Use a soft brush or vacuum cleaner with a brush attachment to remove dust from air inlets and outlets.
- ఎండబెట్టడం: హీటర్ను తిరిగి ప్లగ్ చేసే ముందు పూర్తిగా పొడిగా ఉందని నిర్ధారించుకోండి.
4.2 నిల్వ
If storing the heater for an extended period, ensure it is clean and dry. Store it in its original packaging or a protective cover in a cool, dry place, away from direct sunlight and extreme temperatures.
5. ట్రబుల్షూటింగ్
మీ హీటర్తో మీరు సమస్యలను ఎదుర్కొంటే, ఈ క్రింది సాధారణ సమస్యలు మరియు పరిష్కారాలను చూడండి:
- హీటర్ ఆన్ చేయదు:
- పవర్ కార్డ్ పనిచేసే అవుట్లెట్లోకి సురక్షితంగా ప్లగ్ చేయబడిందో లేదో తనిఖీ చేయండి.
- సర్క్యూట్ బ్రేకర్ ట్రిప్ కాలేదని ధృవీకరించండి.
- Ensure the heater is not in standby mode.
- Heater is on but not heating:
- Check the set temperature; it might be lower than the ambient room temperature.
- Ensure the heater is not in Frost Protection mode if you expect higher heat output.
- Verify that no objects are obstructing the air vents.
- అసాధారణ శబ్దాలు:
- Minor expansion/contraction noises are normal during heating and cooling cycles.
- If noises are loud or persistent, disconnect power and contact support.
- ఎర్రర్ కోడ్లు: If an error code appears on the display, note the code and consult the manufacturer's support or a qualified technician.
If the problem persists after attempting these solutions, disconnect the heater from the power supply and contact customer support.
6. స్పెసిఫికేషన్లు
- మోడల్: Ducasa Ducaverre 1200W
- రకం: Glass Radiant Panel Heater
- పవర్ అవుట్పుట్: 1200W
- వాల్యూమ్tage: 230V ~ 50Hz (Standard European)
- మెటీరియల్: గ్లాస్ ముందు ప్యానెల్
- సంస్థాపన: వాల్-మౌంటెడ్
- కొలతలు: Refer to product packaging or manufacturer's website for exact measurements.
- ASIN: B01HZMXDAY

చిత్రం 3: A full, slightly angled view of the Ducasa Ducaverre 1200W Glass Radiant Panel Heater. The heater is white with a sleek glass surface, and the 'ducasa' brand name is visible on the top right, along with the small digital control panel.
7. వారంటీ మరియు మద్దతు
Your Ducasa Ducaverre heater is covered by a manufacturer's warranty. Please refer to the warranty card included with your purchase or visit the official Ducasa webవివరణాత్మక నిబంధనలు మరియు షరతుల కోసం సైట్.
For technical assistance, spare parts, or warranty claims, please contact Ducasa customer support through their official channels. Have your product model and ASIN (B01HZMXDAY) ready when contacting support.