
1. ఉత్పత్తి ముగిసిందిview
The TRQ PSA55128 Front Tie Rod Set is a direct-fit, OE replacement steering component kit designed for specific Chevrolet, Pontiac, and Saturn vehicle models. This kit includes all necessary inner and outer tie rods for both the front driver and passenger sides, ensuring a complete replacement solution for your vehicle's steering system.
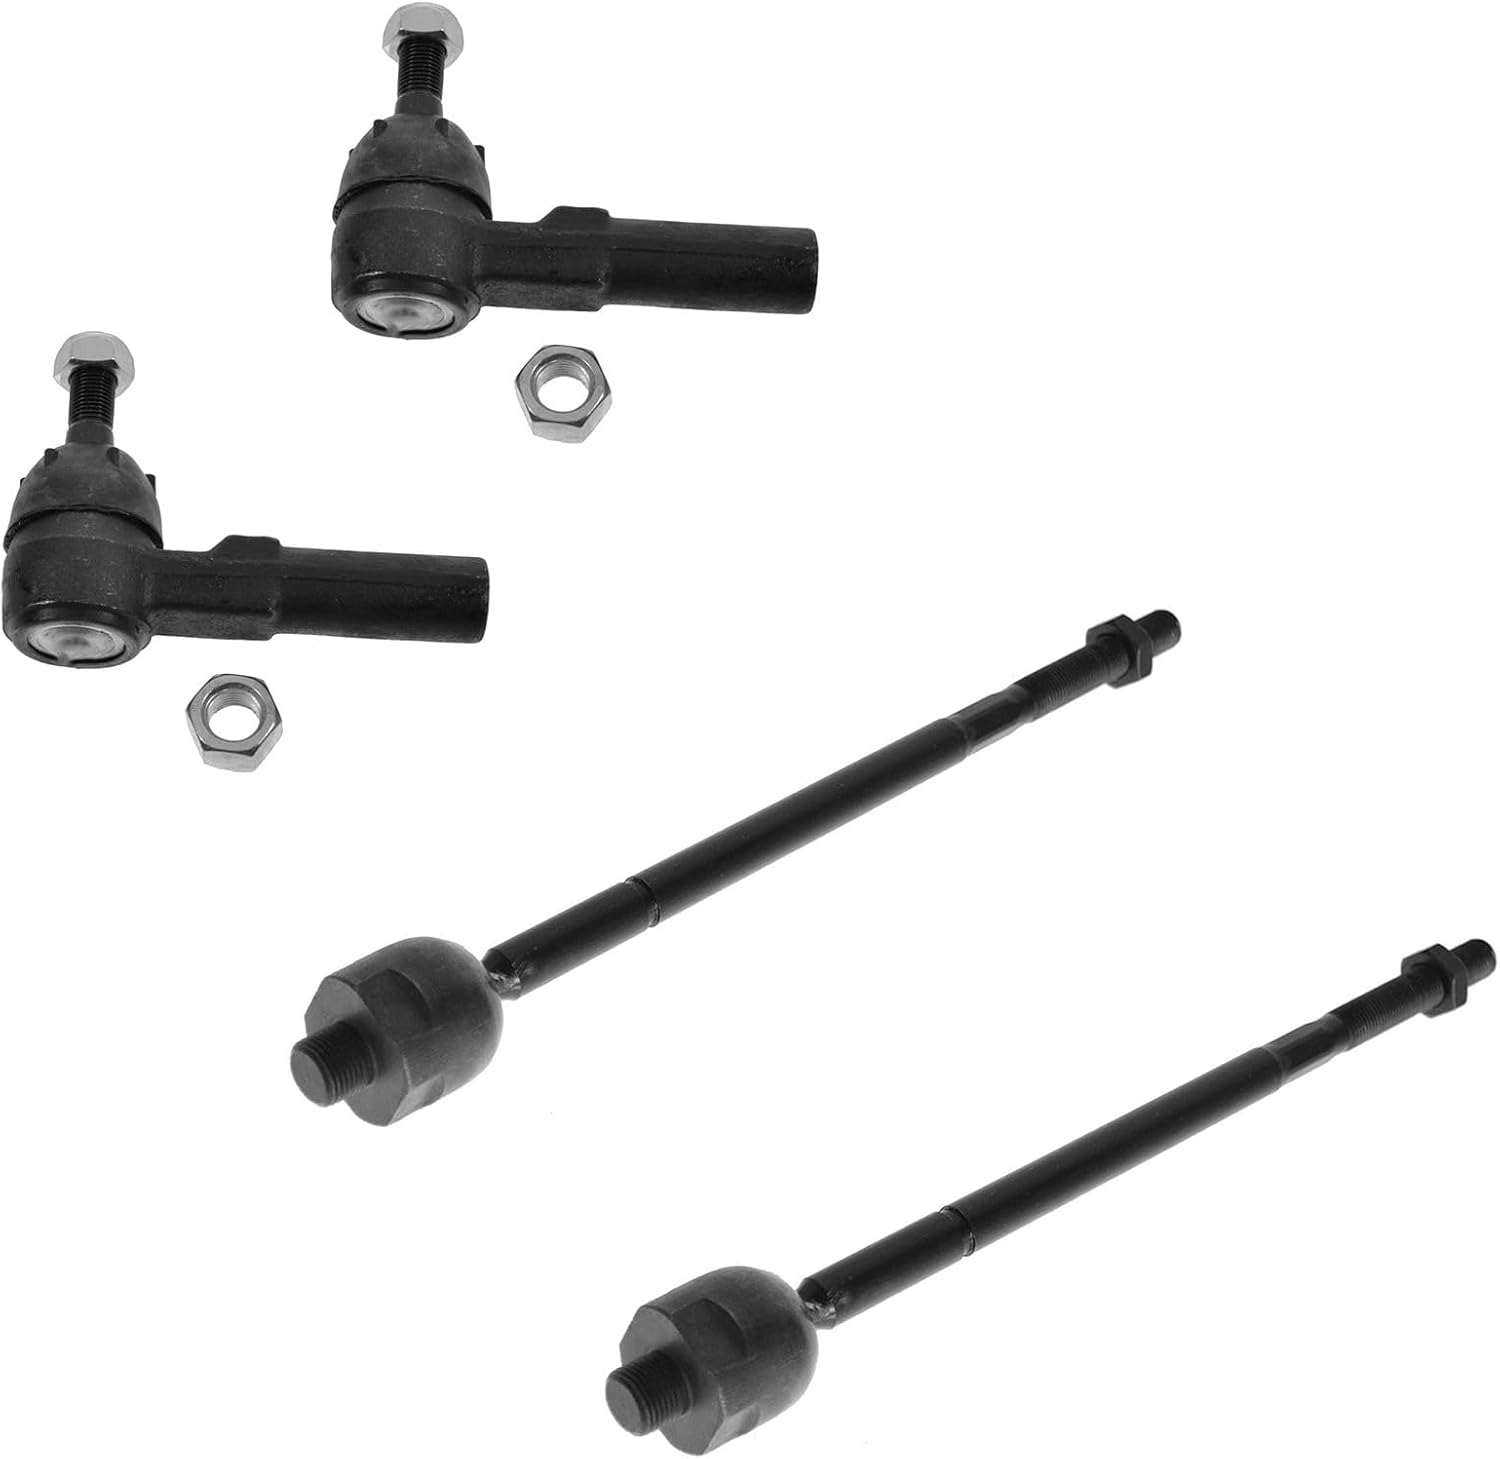
Image: Complete TRQ Front Tie Rod Set (Model PSA55128).
2. ప్యాకేజీ విషయాలు
Your TRQ Front Tie Rod Set (PSA55128) package should contain the following components:
- 2x Front Inner Tie Rods
- 2x Front Outer Tie Rods

Image: Kit Part Details illustrating the included components.
3. అనుకూలత మరియు అమరిక
This TRQ Front Tie Rod Set (PSA55128) is compatible with the following vehicle models and years:
- 1993-2002 Chevrolet Camaro (Front Driver & Passenger Side Inner & Outer)
- 1993-2002 Pontiac Firebird (Front Driver & Passenger Side Inner & Outer)
- 1991-2002 Saturn SL2 (Front Driver & Passenger Side Inner & Outer)
- 1991-2002 Saturn SL1 (Front Driver & Passenger Side Inner & Outer)
- 1993-2002 Saturn SC2 (Front Driver & Passenger Side Inner & Outer)
- 1991-2002 Saturn SL (Front Driver & Passenger Side Inner & Outer)
- 1993-2002 Saturn SC1 (Front Driver & Passenger Side Inner & Outer)
- 1993-2001 Saturn SW2 (Front Driver & Passenger Side Inner & Outer)
- 1993-1999 Saturn SW1 (Front Driver & Passenger Side Inner & Outer)
- 1991-1992 Saturn SC (Front Driver & Passenger Side Inner & Outer)
It is crucial to verify fitment for your specific vehicle before installation. Refer to your vehicle's service manual for detailed specifications.
Image: Important reminder to verify vehicle fitment.
4. భద్రతా సమాచారం
Automotive repair can be dangerous. Always follow proper safety procedures to prevent injury or damage. This includes, but is not limited to:
- భద్రతా గ్లాసెస్ మరియు చేతి తొడుగులు వంటి తగిన వ్యక్తిగత రక్షణ పరికరాలు (PPE) ధరించండి.
- వాహనం కింద పనిచేసే ముందు సమతల ఉపరితలంపై ఉన్న జాక్ స్టాండ్లపై సురక్షితంగా మద్దతు ఇవ్వబడిందని నిర్ధారించుకోండి. ఎప్పుడూ జాక్పై మాత్రమే ఆధారపడకండి.
- Disconnect the battery if working near electrical components.
- Use the correct tools for the job.
- ఇన్స్టాలేషన్ ప్రక్రియలోని ఏదైనా దశ గురించి మీకు ఖచ్చితంగా తెలియకపోతే ప్రొఫెషనల్ మెకానిక్ను సంప్రదించండి.
- పిల్లలు మరియు పెంపుడు జంతువులను పని ప్రదేశం నుండి దూరంగా ఉంచండి.
5. ఇన్స్టాలేషన్ (సెటప్)
Installation of tie rod ends requires mechanical knowledge and specialized tools. If you are not confident in your ability to perform this repair, it is recommended to seek professional assistance.
సాధారణ ఇన్స్టాలేషన్ దశలు:
- వాహనాన్ని సిద్ధం చేయండి: Park the vehicle on a level surface, engage the parking brake, and block the rear wheels. Loosen the front lug nuts, then raise the front of the vehicle and support it securely with jack stands. Remove the front wheels.
- Access Tie Rods: Locate the existing inner and outer tie rod ends. You may need to remove splash shields or other components for access.
- Mark Alignment: Before removal, measure and record the exposed thread length on the outer tie rod end. This will help in setting the initial alignment for the new parts. Alternatively, count the number of turns required to remove the outer tie rod end from the inner tie rod.
- Remove Outer Tie Rod: Loosen the jam nut on the outer tie rod. Remove the cotter pin and castle nut from the outer tie rod stud. Use a tie rod puller or fork to separate the outer tie rod from the steering knuckle.
- Remove Inner Tie Rod: If replacing the inner tie rod, remove the outer tie rod from the inner tie rod. Then, use an inner tie rod removal tool to detach the inner tie rod from the steering rack.
- Install New Inner Tie Rod: Apply thread locker to the threads of the new inner tie rod and thread it into the steering rack. Torque to manufacturer specifications.
- Install New Outer Tie Rod: Thread the new jam nut onto the inner tie rod, followed by the new outer tie rod. Adjust the outer tie rod to approximately the same length as the one removed, using your earlier measurements or turn count. This is a preliminary adjustment.
- Connect to Knuckle: Insert the outer tie rod stud into the steering knuckle. Install the new castle nut and torque to specifications. Install a new cotter pin.
- Tighten Jam Nut: Once the outer tie rod is connected, tighten the jam nut against the outer tie rod end.
- తిరిగి అమర్చండి మరియు తగ్గించండి: Reinstall any removed components, mount the wheels, lower the vehicle, and torque the lug nuts.
- Professional Alignment: A professional wheel alignment is తప్పనిసరి after replacing tie rod ends to ensure proper steering geometry and tire wear.

Image: TRQ Front Inner Tie Rods.

Image: TRQ Front Outer Tie Rods.
6. ఆపరేషన్
Once properly installed and aligned, the TRQ Front Tie Rod Set will restore precise steering control and stability to your vehicle. You should experience improved handling and reduced play in the steering system. If any unusual noises, vibrations, or steering issues occur after installation, immediately inspect the components and consult a qualified mechanic.
7. నిర్వహణ
Regular inspection of your vehicle's steering and suspension components is recommended as part of routine vehicle maintenance. While these tie rod ends are designed for durability, periodic checks can help identify potential issues early.
- దృశ్య తనిఖీ: Periodically inspect the tie rod ends for signs of wear, such as torn boots, corrosion, or excessive play.
- గ్రేasing: Note that these tie rod ends may not feature grease fittings. If they do, lubricate them according to your vehicle manufacturer's recommendations using appropriate grease. If no grease fittings are present, they are designed to be maintenance-free.
- అమరిక తనిఖీలు: మీ వీల్ అలైన్మెంట్ను ఏటా తనిఖీ చేసుకోండి లేదా మీరు అసమాన టైర్ వేర్ లేదా స్టీరింగ్ సమస్యలను గమనించినట్లయితే.
8. ట్రబుల్షూటింగ్
If you experience issues after installing the TRQ Front Tie Rod Set, consider the following common troubleshooting steps:
| లక్షణం | సాధ్యమైన కారణం | పరిష్కారం |
|---|---|---|
| అసమాన టైర్ దుస్తులు | Incorrect wheel alignment | Perform a professional wheel alignment. |
| Loose steering / Play in steering wheel | Improperly torqued components; Worn ball joints or other steering components | Re-check all fasteners for correct torque. Inspect other steering components. |
| Clunking or popping noises | Loose components; Damaged tie rod end; Other worn suspension parts | Inspect all connections. Check for damage to tie rod ends or other suspension parts. |
| స్టీరింగ్ వీల్ మధ్యలో నుండి దూరంగా | Incorrect wheel alignment | Perform a professional wheel alignment. |
Always consult a certified mechanic for diagnosis and repair of complex steering and suspension issues.
9. స్పెసిఫికేషన్లు
- పార్ట్ రకం: Front Inner & Outer Tie Rod Set
- పరిమాణం: 4 Pieces (2 Inner, 2 Outer)
- మోడల్ సంఖ్య: పిఎస్ఎ 55128
- తయారీదారు: ట్రేడ్మార్క్
- ఉత్పత్తి కొలతలు: సుమారు 20.32 x 45.72 x 15.24 సెం.మీ (8 x 18 x 6 అంగుళాలు)
- వస్తువు బరువు: సుమారు 2.48 కిలోలు (5.47 పౌండ్లు)
- బాహ్య ముగింపు: మెషిన్ చేయబడింది
- OE Reference Numbers: 15221006, 21011026, 26034348
- Aftermarket Reference Numbers: ES3238RL, EV260, MES3238RL, MEV260, SUS02106, SUS07332, SUS07554
- మూలం దేశం: చైనా
10. వారంటీ
TRQ offers a lifetime warranty on these parts. For specific terms, conditions, and claim procedures, please refer to the official TRQ webసైట్ లేదా వారి కస్టమర్ సర్వీస్ను నేరుగా సంప్రదించండి. వారంటీ క్లెయిమ్ల కోసం మీ కొనుగోలు రుజువును ఉంచండి.
11. మద్దతు
For technical assistance, installation questions, or warranty inquiries, please visit the official TRQ website or contact their customer support. Always provide your product model number (PSA55128) and purchase details when seeking support.
TRQ Official Webసైట్: www.trq.com (గమనిక: ఇది ఒక ప్లేస్హోల్డర్ URL, please refer to actual product packaging or documentation for the correct webసైట్.)