
1. పరిచయం
This manual provides comprehensive instructions for the Everycom EC-801 80mm Direct Thermal Receipt Printer. It covers installation, operation, maintenance, and troubleshooting to ensure optimal performance and longevity of your device. The EC-801 is a high-speed monochrome desktop thermal printer featuring an auto-cutter and multiple connectivity options.
ముఖ్య లక్షణాలు:
- 300mm/s Ultra High-Speed Printing
- Rich Interface: Ethernet + USB
- Auto Cutter (Full / Half Cutting)
- Compatible with ESC / POS Print Instruction Mode
- Windows మరియు Linux ఆపరేటింగ్ సిస్టమ్లకు మద్దతు ఇస్తుంది
2. ప్యాకేజీ విషయాలు
క్రింద జాబితా చేయబడిన అన్ని వస్తువులు మీ ప్యాకేజీలో చేర్చబడ్డాయని దయచేసి ధృవీకరించండి:
- 1 x Everycom EC-801 80mm Thermal Receipt Printer
- 1 x Paper Guard Plate
- 1 x Paper Bering (Spindle)
- 1 x CD (for drivers and utilities)
- 1 x పవర్ అడాప్టర్
- 1 x USB కేబుల్
- 1 x 80mm Thermal Sample Roll

Image: Everycom EC-801 package contents.
3. ఉత్పత్తి ముగిసిందిview
3.1 ఫ్రంట్ ప్యానెల్

చిత్రం: ముందు భాగం view of the EC-801 printer.
- శక్తి సూచిక: Illuminates when the printer is powered on.
- లోపం సూచిక: Illuminates or flashes to indicate a printer error (e.g., paper out, print head overheat).
- PAPER Indicator: Illuminates when paper is loaded, flashes when paper is low, and turns off when paper is out.
- ఫీడ్ బటన్: Press to advance paper manually.
3.2 వెనుక ప్యానెల్

చిత్రం: వెనుక view of the EC-801 printer with ports.
- పవర్ స్విచ్: ప్రింటర్ను ఆన్ లేదా ఆఫ్ చేస్తుంది.
- పవర్ పోర్ట్: అందించిన పవర్ అడాప్టర్కు కనెక్ట్ అవుతుంది.
- USB పోర్ట్: Connects to a computer via USB cable.
- Ethernet (Net) Port: Connects to a network for LAN printing.
- క్యాష్ డ్రాయర్ పోర్ట్: Connects to a cash drawer for automatic opening.
3.3 అంతర్గత భాగాలు
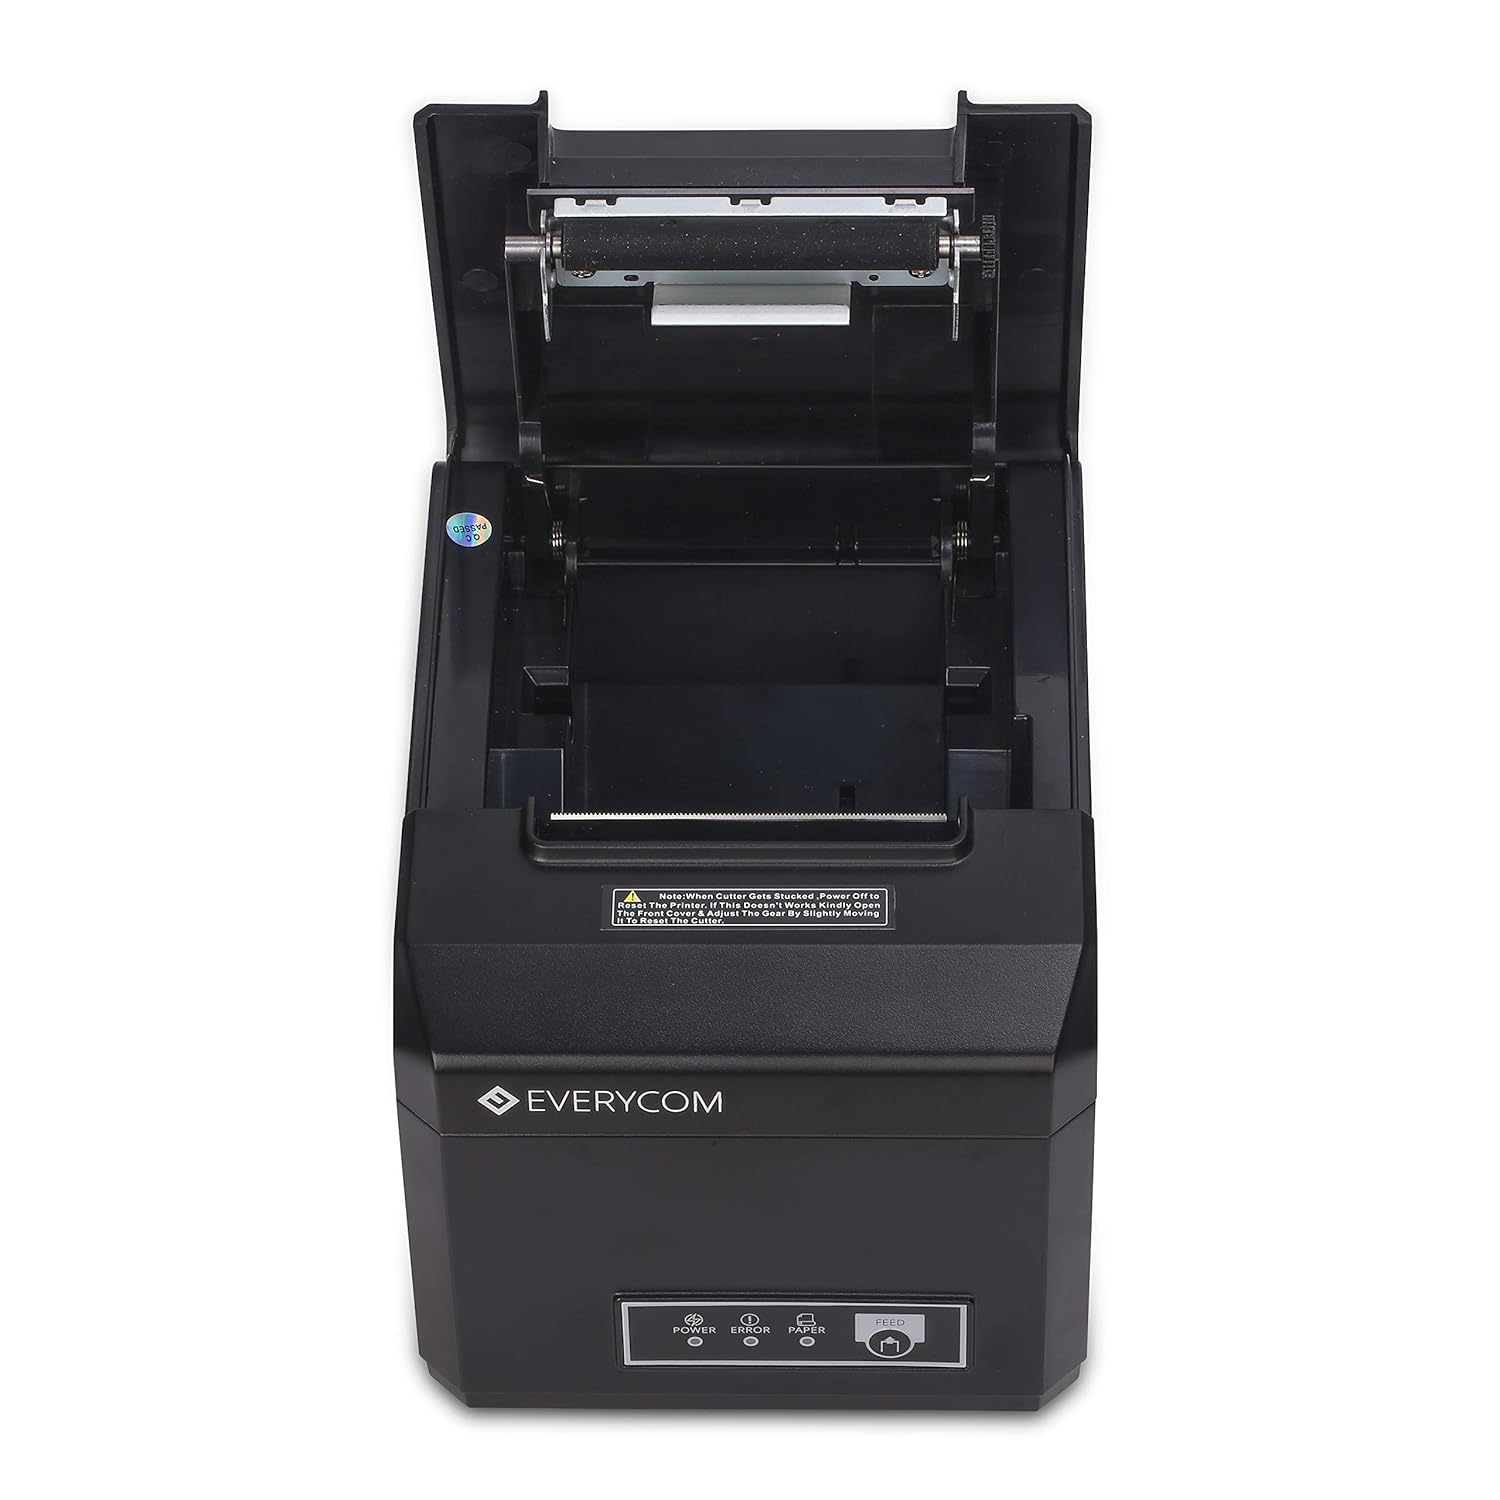
Image: EC-801 printer with paper compartment open.
- Paper Roll Compartment: Area for loading the thermal paper roll.
- ప్రింట్ హెడ్: ముద్రణకు బాధ్యత వహించే ఉష్ణ మూలకం.
- ఆటో కట్టర్: Mechanism for automatically cutting receipts.
4. సెటప్
4.1 అన్ప్యాకింగ్ మరియు ప్లేస్మెంట్
- ప్యాకేజింగ్ నుండి ప్రింటర్ మరియు అన్ని ఉపకరణాలను జాగ్రత్తగా తీసివేయండి.
- Place the printer on a stable, flat surface. Ensure adequate ventilation around the device.
4.2 కనెక్ట్ కేబుల్స్
- Connect the power adapter to the printer's power port and then plug it into a power outlet.
- USB కనెక్షన్ కోసం: USB కేబుల్ యొక్క ఒక చివరను ప్రింటర్ యొక్క USB పోర్ట్కు మరియు మరొక చివరను మీ కంప్యూటర్కు కనెక్ట్ చేయండి.
- ఈథర్నెట్ కనెక్షన్ కోసం: Connect an Ethernet cable to the printer's Ethernet port and the other end to your network router or switch.
- ఐచ్ఛికం: Connect a cash drawer cable to the cash drawer port if using an external cash drawer.
4.3 థర్మల్ పేపర్ను లోడ్ చేస్తోంది
- Open the printer's top cover by pressing the release latch (if present) or lifting the cover firmly.
- థర్మల్ పేపర్ రోల్ను కంపార్ట్మెంట్లోకి చొప్పించండి, కాగితం దిగువ నుండి ఫీడ్ అయ్యేలా మరియు ముందు అంచు నిటారుగా ఉండేలా చూసుకోండి.
- Pull a small amount of paper past the cutter blade.
- Close the top cover firmly until it clicks into place. Ensure the paper is taut and not jammed.
4.4 డ్రైవర్ ఇన్స్టాలేషన్
- Insert the provided CD into your computer's CD-ROM drive. Follow the on-screen instructions to install the printer drivers.
- If your computer does not have a CD-ROM drive, please visit the Everycom official website to download the latest drivers for your operating system (Windows or Linux).
- After installation, configure the printer settings as required by your application.
5. ఆపరేటింగ్ సూచనలు
5.1 పవర్ చేయడం ఆన్/ఆఫ్
- To power on the printer, flip the power switch on the rear panel to the 'ON' position. The POWER indicator on the front panel will illuminate.
- To power off the printer, flip the power switch to the 'OFF' position.
5.2 ప్రాథమిక ముద్రణ
- ప్రింటర్ ఆన్ చేయబడి, మీ కంప్యూటర్ లేదా నెట్వర్క్కి కనెక్ట్ చేయబడిందని నిర్ధారించుకోండి.
- Open the application from which you wish to print (e.g., POS software, text editor).
- Select the Everycom EC-801 as your printer and initiate the print command.
- The printer will automatically print the receipt and cut the paper using its auto-cutter function.

Image: EC-801 printer performing a self-test print.
5.3 Using the FEED Button
Pressing the FEED button will advance the paper by a small amount. This is useful for checking paper alignment or manually advancing paper after a print job.
5.4 సూచిక లైట్లు
- POWER (Solid Green): Printer is on and ready.
- ERROR (Solid Red): General error. Refer to troubleshooting.
- ERROR (Flashing Red): Specific error, such as print head overheating. Allow printer to cool.
- PAPER (Solid Green): Paper is loaded and sufficient.
- PAPER (Flashing Green): Paper is low. Prepare to replace the roll.
- PAPER (Off): Paper is out.
6. నిర్వహణ
6.1 ప్రింట్ హెడ్ను శుభ్రపరచడం
Regular cleaning of the print head ensures clear print quality and extends the life of your printer.
- ప్రింటర్ను ఆఫ్ చేసి, పవర్ కేబుల్ను డిస్కనెక్ట్ చేయండి.
- ప్రింట్ హెడ్ని యాక్సెస్ చేయడానికి పై కవర్ను తెరవండి.
- Using a soft, lint-free cloth lightly dampened with isopropyl alcohol, gently wipe the print head surface. Avoid touching the print head with bare hands.
- కవర్ మూసివేసి పవర్ను తిరిగి కనెక్ట్ చేసే ముందు ప్రింట్ హెడ్ పూర్తిగా ఆరనివ్వండి.
6.2 పేపర్ రోల్ను మార్చడం
When the PAPER indicator flashes or turns off, it's time to replace the paper roll. Follow the steps in Section 4.3 for loading thermal paper.
6.3 సాధారణ శుభ్రపరచడం
Wipe the exterior of the printer with a soft, dry cloth to remove dust and debris. Do not use harsh chemicals or abrasive cleaners.
7. ట్రబుల్షూటింగ్
If you encounter issues with your Everycom EC-801 printer, refer to the following common problems and solutions:
- ప్రింటర్ ఆన్ చేయడం లేదు:
Ensure the power cable is securely connected to both the printer and a working power outlet. Check the power switch position. - No print or faint print:
Verify that thermal paper is loaded correctly and that it is thermal paper (not plain paper). Clean the print head as described in Section 6.1. Ensure the paper roll is not exhausted. - పేపర్ జామ్:
Turn off the printer, open the top cover, and carefully remove any jammed paper. Ensure the paper path is clear before reloading the paper and closing the cover. Handle the paper compartment lid with care to prevent damage to hinges. - Error indicator illuminated:
This indicates a general error. Check for paper out, paper jam, or print head overheating. If the issue persists after addressing these, power cycle the printer. - Connectivity issues (USB/Ethernet):
Check that the USB or Ethernet cable is securely connected. For Ethernet, verify network settings and ensure the printer's IP address is correctly configured. Reinstall or update printer drivers if necessary. - Blurry or crooked print:
Ensure the paper roll is loaded straight and the print head is clean. Try printing a self-test page to diagnose.
8. స్పెసిఫికేషన్లు
| ప్రింటింగ్ పద్ధతి | డైరెక్ట్ థర్మల్ |
| ప్రింట్ వెడల్పు | 80మి.మీ |
| ప్రింట్ స్పీడ్ | 300mm/s |
| రిజల్యూషన్ | 203 DPI |
| ఇంటర్ఫేస్ | USB, ఈథర్నెట్ |
| ఆటో కట్టర్ | Yes (Full / Half Cutting) |
| OS అనుకూలత | Windows, Linux |
| కమాండ్ సెట్ | ESC/POS Compatible |
| ఉత్పత్తి కొలతలు (D x W x H) | 18.6 x 14.5 x 13.3 సెంటీమీటర్లు |
| వస్తువు బరువు | 1.8 కిలోలు |
| ప్రింటర్ అవుట్పుట్ | మోనోక్రోమ్ |
9. వారంటీ సమాచారం
Everycom products are covered by a manufacturer's warranty. Please refer to the warranty card included in your package or contact Everycom customer support for detailed information regarding warranty terms and conditions, including coverage period and service procedures.
10. కస్టమర్ మద్దతు
For any technical assistance, product inquiries, or support, please contact Everycom customer service:
- టోల్-ఫ్రీ నంబర్: 1800 121 4480
- పని గంటలు: Monday - Saturday, 10:00 AM - 6:30 PM (Except on Public Holidays)

Image: Everycom Customer Service Contact.