
1. పరిచయం
Thank you for choosing the Rampage SMX-R12 Hawker Gaming Mouse. This manual provides detailed instructions for setting up, operating, and maintaining your new gaming mouse. The SMX-R12 Hawker is designed for precision and comfort, featuring an advanced optical sensor, adjustable DPI settings, and multiple programmable buttons to enhance your gaming experience.
2. ఉత్పత్తి ముగిసిందిview
Familiarize yourself with the components of your Rampage SMX-R12 Hawker Gaming Mouse:
- ఎడమ క్లిక్ బటన్: ప్రామాణిక ప్రాథమిక క్లిక్ ఫంక్షన్.
- కుడి క్లిక్ బటన్: ప్రామాణిక ద్వితీయ క్లిక్ ఫంక్షన్.
- స్క్రోల్ వీల్: For scrolling and can also function as a middle click button.
- DPI సర్దుబాటు బటన్లు: Buttons to cycle through different DPI sensitivity levels.
- ముందుకు/వెనుకకు బటన్లు: Side-mounted buttons for navigation or custom functions.
- ఆప్టికల్ సెన్సార్: Located on the bottom, provides high-resolution tracking.
- ఆన్/ఆఫ్ స్విచ్: Located on the bottom, to power the mouse on or off.
- మైక్రో USB ఛార్జింగ్ పోర్ట్: Located at the front, for charging the internal battery.
- USB రిసీవర్: Small dongle for wireless connectivity, often stored in a compartment on the mouse's bottom.

మూర్తి 2.1: టాప్ view of the Rampage SMX-R12 Hawker Gaming Mouse, showing the left/right click buttons, scroll wheel, and DPI adjustment buttons.

మూర్తి 2.2: వైపు view of the Rampage SMX-R12 Hawker Gaming Mouse, highlighting the ergonomic design and side buttons.

చిత్రం 2.3: దిగువ view of the Rampage SMX-R12 Hawker Gaming Mouse, showing the optical sensor, On/Off switch, and USB receiver storage compartment.
3. సెటప్
- మౌస్ను విప్పండి: Carefully remove the mouse and its accessories from the packaging. Ensure you have the Rampage SMX-R12 Hawker mouse, the USB wireless receiver, and the micro USB charging cable.
- USB రిసీవర్ను గుర్తించండి: The small USB wireless receiver is typically stored in a compartment on the bottom of the mouse for safe keeping during transport. Remove it from its slot.
- USB రిసీవర్ని కనెక్ట్ చేయండి: Plug the USB wireless receiver into an available USB port on your computer. Your operating system should automatically detect and install the necessary drivers.
- మౌస్ను ఆన్ చేయండి: Locate the On/Off switch on the bottom of the mouse and slide it to the 'On' position. The mouse should now connect wirelessly to your computer.
- ప్రారంభ ఛార్జ్ (సిఫార్సు చేయబడింది): For optimal performance, it is recommended to fully charge the mouse before first use. Connect the micro USB charging cable to the mouse's charging port and the other end to a USB power source (e.g., computer USB port, USB wall adapter).
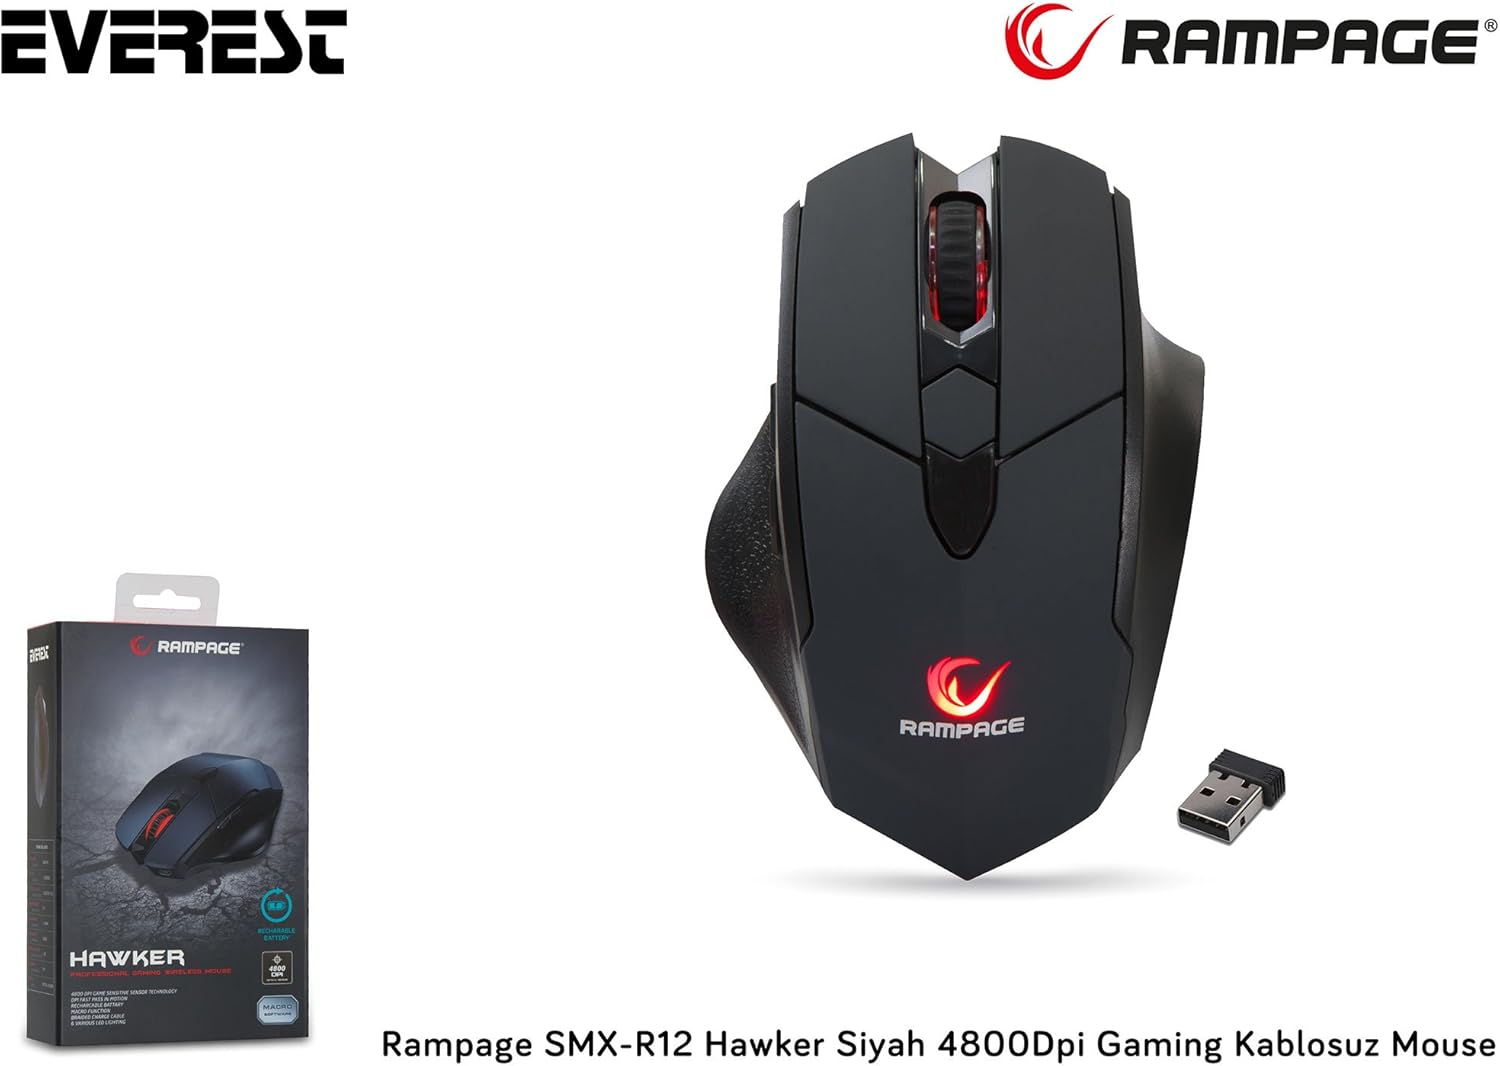
Figure 3.1: The Rampage SMX-R12 Hawker Gaming Mouse with its USB receiver and charging cable.
4. ఆపరేటింగ్ సూచనలు
Once connected, your Rampage SMX-R12 Hawker mouse is ready for use. Here are its primary functions:
- ప్రాథమిక నావిగేషన్: మీ స్క్రీన్పై కర్సర్ను నియంత్రించడానికి మౌస్ను చదునైన ఉపరితలంపైకి తరలించండి.
- క్లిక్ చేయడం: Use the left and right click buttons for primary and secondary actions.
- స్క్రోలింగ్: Rotate the scroll wheel up or down to navigate through documents and web pages. Press the scroll wheel for a middle-click function.
- సైడ్ బటన్లు: The side buttons typically function as 'Forward' and 'Backward' in web బ్రౌజర్లు మరియు file explorers. These buttons may be programmable through specific software (if available from the manufacturer) for custom in-game actions.
5. DPI Settings
ఆర్ampage SMX-R12 Hawker features an optical sensor with adjustable DPI (Dots Per Inch) settings, allowing you to change the mouse's sensitivity on the fly. Higher DPI means the cursor moves further with less physical mouse movement, ideal for fast-paced gaming. Lower DPI provides more precise control, suitable for tasks requiring accuracy.
Use the dedicated DPI adjustment buttons (usually located behind the scroll wheel) to cycle through the available DPI levels. The mouse typically has visual indicators (e.g., LED color changes) to show the current DPI setting, though specific details may vary.
The mouse supports a maximum DPI of 4800, offering a wide range of sensitivity options.
6. మౌస్ను ఛార్జ్ చేయడం
ఆర్ampage SMX-R12 Hawker Gaming Mouse is equipped with a rechargeable internal battery, eliminating the need for disposable batteries. When the battery level is low, the mouse's indicator light may flash or change color.
- కేబుల్ కనెక్ట్ చేయండి: Insert the micro USB end of the charging cable into the charging port located at the front of the mouse.
- శక్తికి కనెక్ట్ చేయండి: Plug the standard USB-A end of the charging cable into a powered USB port on your computer or a USB wall adapter.
- ఛార్జింగ్ సూచిక: The mouse will typically display an LED indicator to show that it is charging. This light may turn solid when fully charged.
- ఛార్జింగ్ సమయం: A full charge usually takes a few hours. You can continue to use the mouse while it is charging.

Figure 6.1: The micro USB charging port located at the front of the Rampage SMX-R12 Hawker Gaming Mouse.
7. నిర్వహణ
మీ మౌస్ యొక్క దీర్ఘాయువు మరియు సరైన పనితీరును నిర్ధారించడానికి, ఈ నిర్వహణ మార్గదర్శకాలను అనుసరించండి:
- శుభ్రపరచడం: మౌస్ ఉపరితలాన్ని తుడవడానికి మృదువైన, పొడి వస్త్రాన్ని ఉపయోగించండి. మొండి ధూళి కోసం, కొద్దిగా dampen గుడ్డను నీటితో తడిపివేయండి. కఠినమైన రసాయనాలు లేదా రాపిడి పదార్థాలను ఉపయోగించకుండా ఉండండి.
- సెన్సార్ క్లీనింగ్: Occasionally, dust or debris may accumulate around the optical sensor. Use a cotton swab or compressed air to gently clean the sensor area.
- బ్యాటరీ సంరక్షణ: బ్యాటరీ జీవితకాలాన్ని పొడిగించడానికి, మౌస్ను తరచుగా పూర్తిగా డిశ్చార్జ్ చేయకుండా ఉండండి. తక్కువ బ్యాటరీ సూచిక కనిపించినప్పుడు దాన్ని ఛార్జ్ చేయండి.
- నిల్వ: When not in use, especially during travel, store the USB receiver in its designated compartment on the mouse's bottom to prevent loss.
8. ట్రబుల్షూటింగ్
If you encounter issues with your Rampage SMX-R12 Hawker mouse, refer to the following common solutions:
| సమస్య | సాధ్యమైన పరిష్కారం |
|---|---|
| మౌస్ స్పందించడం లేదు |
|
| కర్సర్ అస్థిరంగా లేదా దూకుతున్నట్లుగా ఉంది |
|
| మౌస్ ఛార్జ్ కావడం లేదు |
|
| సైడ్ బటన్లు పనిచేయడం లేదు |
|
9. స్పెసిఫికేషన్లు
| ఫీచర్ | వివరాలు |
|---|---|
| బ్రాండ్ | Rampవయస్సు |
| మోడల్ | SMX-R12 Hawker |
| సెన్సార్ రకం | ఆప్టికల్ |
| DPI (అంగుళానికి చుక్కలు) | 4800 DPI వరకు |
| బటన్ల సంఖ్య | 7 (Left, Right, Scroll Click, 2 DPI, 2 Side) |
| కనెక్టివిటీ | 2.4GHz వైర్లెస్ (USB రిసీవర్ ద్వారా) |
| బ్యాటరీ రకం | Rechargeable (500mAh capacity) |
| ఛార్జింగ్ పోర్ట్ | మైక్రో USB |
| ఛార్జింగ్ కేబుల్ పొడవు | 1.7 మీటర్లు |
| కొలతలు (L x W x H) | 12.5 x 4.2 x 8.3 సెం.మీ |
| బరువు | 270 గ్రాములు |
| ఆపరేటింగ్ సిస్టమ్ అనుకూలత | Windows, macOS, ChromeOS (general compatibility) |
10. వారంటీ మరియు మద్దతు
Rampage products are designed for quality and reliability. For information regarding warranty coverage, technical support, or service, please refer to the warranty card included with your product or visit the official Rampవయస్సు webసైట్. ఏవైనా వారంటీ క్లెయిమ్ల కోసం మీ కొనుగోలు రుజువును ఉంచుకోండి.
For further assistance, please contact Rampage customer support through their official channels.