
1. పరిచయం
This manual provides detailed instructions for the installation, operation, and maintenance of your Everycom EC801B 80mm Thermal Printer. Please read this manual thoroughly before using the printer to ensure proper function and longevity of the device. The EC801B is a high-speed thermal receipt printer equipped with an auto-cutter and versatile connectivity options including USB and LAN.
2. భద్రతా సమాచారం
- DO NOT DISASSEMBLE THE PRINTER PERSONALLY. For any service-related queries, please contact Everycom support.
- The printer should be installed on a flat and solid surface to avoid vibration or impact damage.
- Ensure the power supply matches the printer's requirements to prevent electrical damage.
- Keep the printer away from water, dust, and direct sunlight.
3. ప్యాకేజీ విషయాలు
క్రింద జాబితా చేయబడిన అన్ని వస్తువులు మీ ప్యాకేజీలో చేర్చబడ్డాయని దయచేసి ధృవీకరించండి:
- 1 x Everycom EC801B Thermal Receipt Printer
- 1 x పవర్ అడాప్టర్
- 1 x USB డేటా కేబుల్
- 1 x Paper Roll (Sampలే)
- 1 x వినియోగదారు మాన్యువల్
- 1 x డ్రైవర్ సిడి

Image: Contents of the Everycom EC801B printer package, including the printer unit, power adapter, USB cable, sample paper roll, user manual, and driver CD.
4. ఉత్పత్తి ముగిసిందిview
Familiarize yourself with the various parts of your Everycom EC801B thermal printer.
4.1 ముందు మరియు పైభాగం View

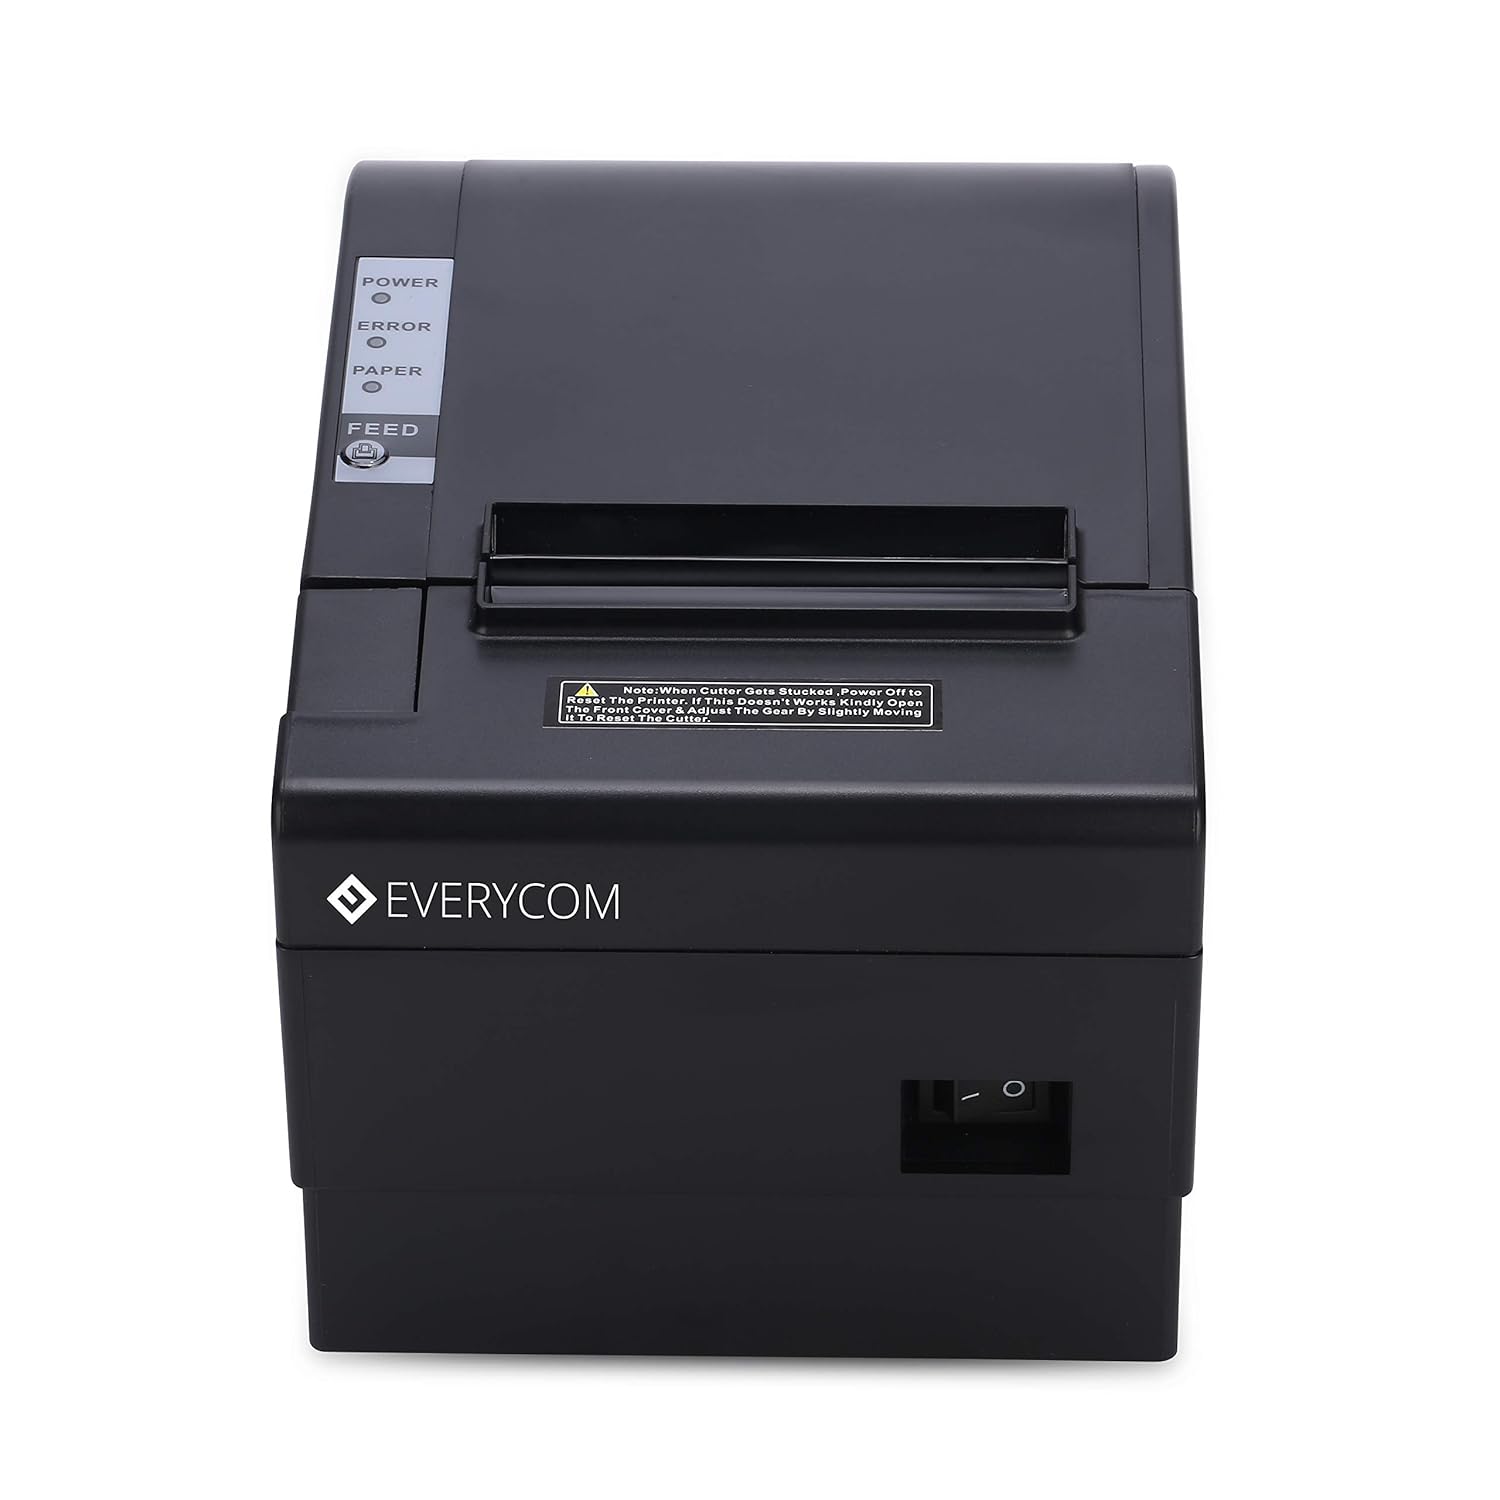
చిత్రం: ముందు భాగం view of the Everycom EC801B thermal printer, showing the paper output slot and control panel.

చిత్రం: పైన view of the Everycom EC801B thermal printer, highlighting the control panel with POWER, ERROR, PAPER indicators, and the FEED button.
4.2 నియంత్రణ ప్యానెల్
- శక్తి సూచిక: Illuminates when the printer is powered on.
- లోపం సూచిక: Flashes or illuminates to indicate an error (e.g., paper out, cover open).
- PAPER Indicator: Illuminates when paper is present, flashes when paper is low.
- ఫీడ్ బటన్: Press to advance paper. Hold to print a self-test page.
4.3 Rear Panel (Connectivity Ports)

చిత్రం: వెనుక view of the Everycom EC801B thermal printer, showing the power port, cash drawer port, Ethernet (LAN) port, and USB port.
- పవర్ పోర్ట్: పవర్ అడాప్టర్కు కనెక్ట్ చేస్తుంది.
- CASH Drawer Port: Connects to a compatible cash drawer.
- LAN (ఈథర్నెట్) పోర్ట్: Connects to a network for network printing.
- USB పోర్ట్: Connects to a computer via USB cable.
5. సెటప్
5.1 భౌతిక నియామకం
Place the printer on a stable, flat surface. Ensure there is adequate space around the printer for ventilation and easy access to ports and paper loading.
5.2 కనెక్ట్ కేబుల్స్
- పవర్ కనెక్షన్: Connect the power adapter to the printer's POWER port and then plug the adapter into a power outlet.
- Data Connection (Choose one):
- USB: Connect the USB data cable from the printer's USB port to an available USB port on your computer.
- LAN: ప్రింటర్ యొక్క LAN పోర్ట్ నుండి మీ నెట్వర్క్ రౌటర్ లేదా స్విచ్కి ఈథర్నెట్ కేబుల్ను కనెక్ట్ చేయండి.
- Cash Drawer (Optional): If using a cash drawer, connect its cable to the printer's CASH Drawer port.
5.3 పేపర్ లోడ్ అవుతోంది
- Open the printer cover by pushing the cover open lever (if present) or lifting the top cover.
- 80mm థర్మల్ పేపర్ రోల్ను కంపార్ట్మెంట్లోకి చొప్పించండి, కాగితం దిగువ నుండి ఫీడ్ అయ్యేలా చూసుకోండి మరియు ప్రింటర్ నుండి ముందు అంచు బయటకు విస్తరించి ఉండేలా చూసుకోండి.
- Close the printer cover firmly until it clicks into place. Ensure there is no slack in the paper.

చిత్రం: పైన view of the Everycom EC801B printer with the cover open, revealing the paper roll compartment.
5.4 డ్రైవర్ ఇన్స్టాలేషన్
For the printer to communicate with your computer, drivers must be installed.
- అందించిన డ్రైవర్ CDని మీ కంప్యూటర్ యొక్క CD-ROM డ్రైవ్లోకి చొప్పించండి.
- Follow the on-screen instructions to install the printer drivers. If your computer does not have a CD drive, drivers can typically be downloaded from the Everycom official webసైట్.
- After installation, configure the printer settings through your operating system's printer management tools.
6. ఆపరేటింగ్ సూచనలు
6.1 పవర్ చేయడం ఆన్/ఆఫ్
To power on the printer, ensure the power adapter is connected and press the power switch located on the side or rear of the printer. The POWER indicator light will illuminate. To power off, press the power switch again.
చిత్రం: ముందు భాగం view of the Everycom EC801B printer, showing the location of the power switch on the side.
6.2 Printing a Self-Test Page
A self-test page can confirm basic printer functionality and print quality without requiring a computer connection.
- Ensure the printer is powered off and paper is loaded.
- నొక్కండి మరియు పట్టుకోండి ఫీడ్ బటన్.
- పట్టుకొని ఉండగా ఫీడ్ బటన్ నొక్కి, ప్రింటర్ను ఆన్ చేయండి.
- విడుదల చేయండి ఫీడ్ button once the printer starts printing. A self-test page will print, showing printer information and a sample print.

Image: Everycom EC801B printer actively printing a self-test receipt with a QR code and text.
6.3 Basic Printing Operation
Once drivers are installed and the printer is connected, you can print from any application that supports printing. Select the Everycom EC801B from your list of available printers and initiate the print command.
6.4 Auto Cutter Function
The EC801B features an automatic cutter that will cut the receipt paper after each print job, or as configured in your printer settings/software.
7. నిర్వహణ
7.1 ప్రింటర్ను శుభ్రపరచడం
క్రమం తప్పకుండా శుభ్రపరచడం ముద్రణ నాణ్యతను కాపాడుకోవడానికి మరియు ప్రింటర్ జీవితకాలం పొడిగించడానికి సహాయపడుతుంది.
- ప్రింట్ హెడ్: తేలికగా కాటన్ శుభ్రముపరచు ఉపయోగించండి dampened with isopropyl alcohol to gently wipe the thermal print head. Allow it to dry completely before use.
- పేపర్ పాత్: Use a soft, dry cloth to remove any paper dust or debris from the paper path.
- బాహ్య: ఒక మృదువైన, d తో బాహ్య తుడవడంamp వస్త్రం. కఠినమైన రసాయనాలు లేదా రాపిడి క్లీనర్లను ఉపయోగించవద్దు.
7.2 పేపర్ రోల్ భర్తీ
When the PAPER indicator flashes or printing becomes faint, it's time to replace the paper roll. Follow the steps in Section 5.3 to load a new 80mm thermal paper roll.
8. ట్రబుల్షూటింగ్
మీ ప్రింటర్తో మీకు సమస్యలు ఎదురైతే, ఈ క్రింది సాధారణ సమస్యలు మరియు పరిష్కారాలను చూడండి:
| సమస్య | సాధ్యమైన కారణం | పరిష్కారం |
|---|---|---|
| ప్రింటర్ పవర్ ఆన్ చేయడం లేదు | No power, faulty adapter | Check power cable connection, ensure outlet is working, try another adapter if available. |
| No printing / Blank output | Paper loaded incorrectly, no paper, print head issue, driver issue | Reload paper correctly (thermal side facing print head), replace paper roll, clean print head, reinstall drivers. |
| ERROR indicator on/flashing | Paper out, cover open, print head overheat | Check paper, close cover firmly, allow printer to cool down. |
| పేలవమైన ముద్రణ నాణ్యత | Dirty print head, low quality paper, old paper roll | Clean print head, use high-quality thermal paper, replace old paper. |
| కంప్యూటర్ ద్వారా ప్రింటర్ గుర్తించబడలేదు. | Driver not installed, incorrect cable, port issue | Install/reinstall drivers, check USB/LAN cable connection, try a different port. |
If the problem persists after attempting these solutions, please contact Everycom customer support.
9. స్పెసిఫికేషన్లు
Key technical specifications for the Everycom EC801B Thermal Printer:
| ఫీచర్ | వివరాలు |
|---|---|
| మోడల్ | EC801B |
| ప్రింటింగ్ టెక్నాలజీ | థర్మల్ లైన్ ప్రింటింగ్ |
| ప్రింట్ స్పీడ్ | 220 mm / సెకను |
| పేపర్ వెడల్పు | 80మి.మీ |
| కనెక్టివిటీ | USB, LAN (Ethernet) |
| ఆటో కట్టర్ | అవును |
| ప్రింటర్ అవుట్పుట్ | మోనోక్రోమ్ |
| కొలతలు (LxWxH) | 18.6 x 14.5 x 13.3 సెం.మీ |
| వస్తువు బరువు | 1.2 కిలోలు |
| తయారీదారు | Everycom Electronics (Made in India) |
10. వారంటీ మరియు మద్దతు
The Everycom EC801B Thermal Printer comes with a 1 సంవత్సరాల వారంటీ కొనుగోలు తేదీ నుండి. ఈ వారంటీ సాధారణ వినియోగ పరిస్థితుల్లో తయారీ లోపాలు మరియు లోపాలను కవర్ చేస్తుంది.
For technical assistance, troubleshooting, or warranty claims, please contact Everycom Customer Support:
- టోల్-ఫ్రీ నంబర్: 1800 121 4480
- Customer Support Working Hours: Monday - Saturday, 10:00 AM - 6:30 PM (Except on Public Holidays)

Image: Everycom customer service contact details, including the toll-free number and working hours.