
1. పరిచయం
This manual provides detailed instructions for the setup, operation, maintenance, and troubleshooting of your UF-TOOLS 7-Inch LCD Digital Microscope. Please read this manual thoroughly before using the device to ensure proper functionality and to maximize its lifespan.
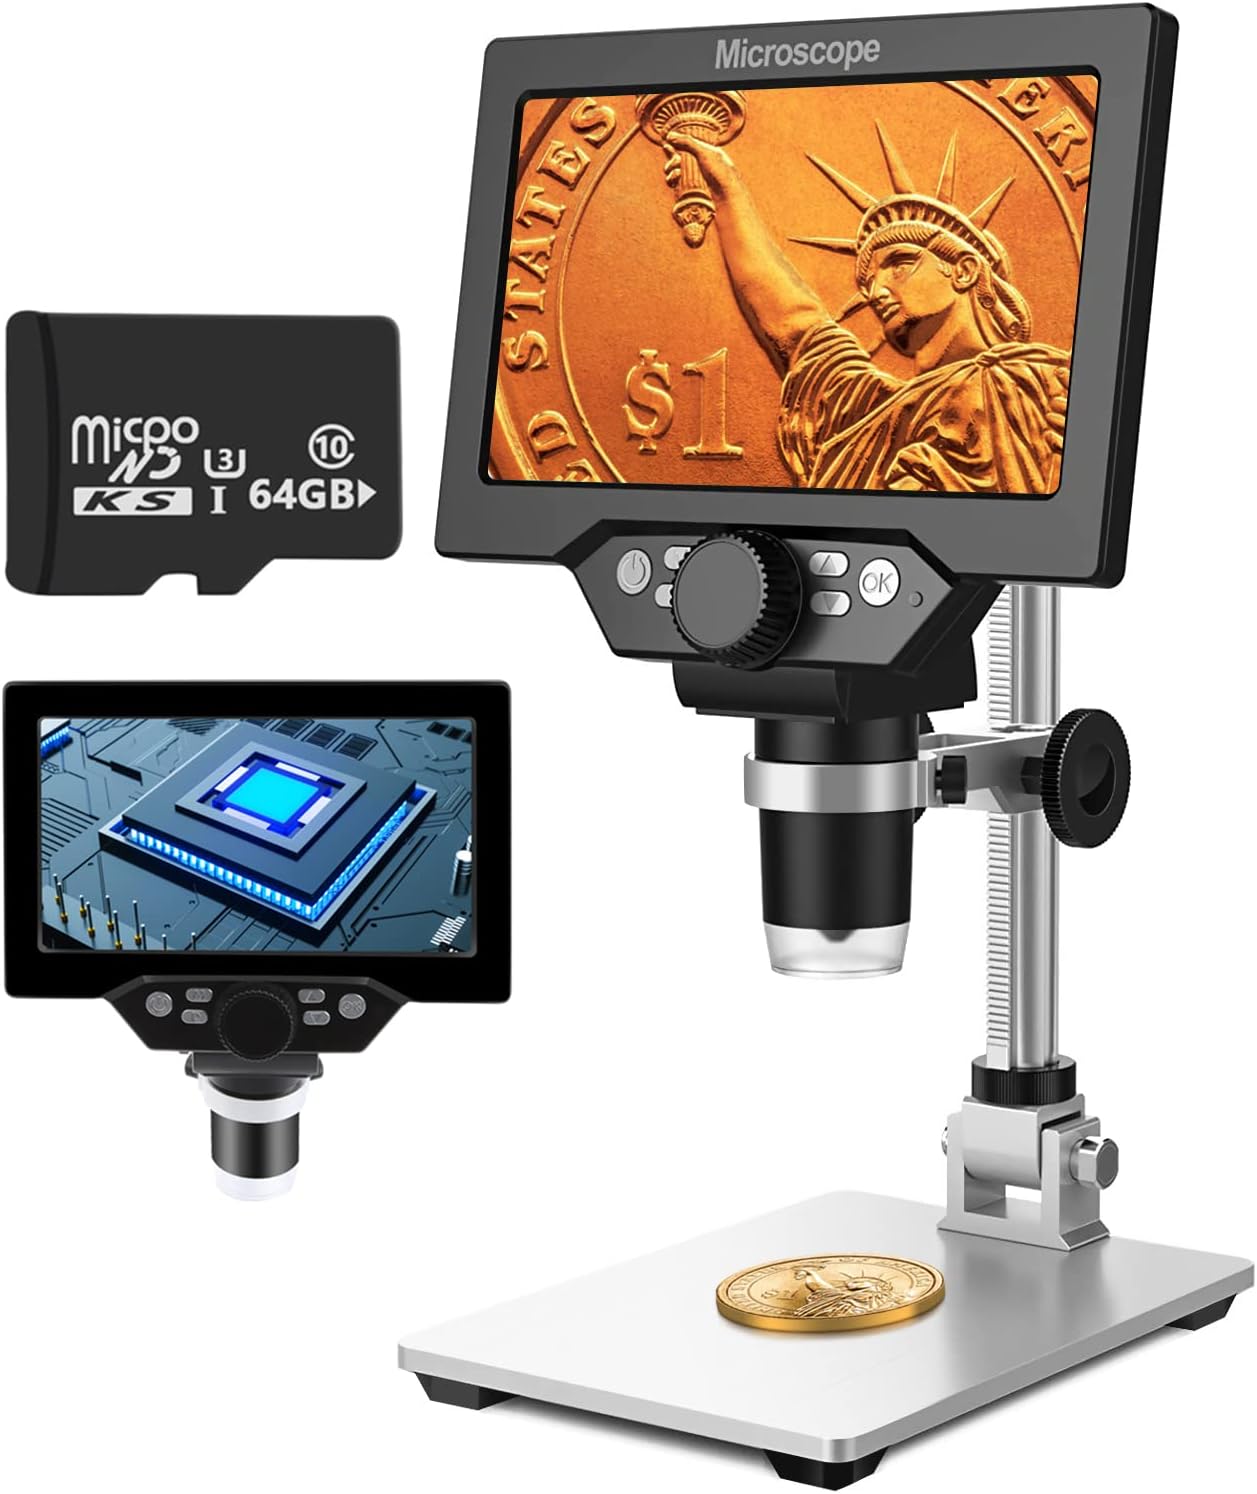
Image 1.1: UF-TOOLS 7-Inch LCD Digital Microscope with included 64GB TF card, showing the main unit and stand.
1.1 ముఖ్య లక్షణాలు
- 7-అంగుళాల LCD స్క్రీన్: Provides a clear, high-definition display for direct viewing without a computer.
- 10X-1200X Magnification: Continuous zoom capability for observing various objects.
- 12MP కెమెరా: Captures high-resolution images and 1080P video.
- 64GB TF Card: Included for direct storage of photos and videos. Supports up to 128GB.
- 8 సర్దుబాటు చేయగల LED లైట్లు: Ensures optimal illumination for detailed observation.
- Flexible Aluminum Alloy Stand: Allows for 90° angle adjustment and 2-10cm focus distance adjustment.
- అంతర్నిర్మిత 3000mAh బ్యాటరీ: Offers portability with up to 6 hours of operation on a full charge.
- PC కనెక్టివిటీ: Compatible with Windows 7/8/10 for larger display and data transfer.
2. ప్యాకేజీ విషయాలు
క్రింద జాబితా చేయబడిన అన్ని అంశాలు మీ ప్యాకేజీలో ఉన్నాయని నిర్ధారించుకోండి:
- UF-TOOLS 7-Inch LCD Digital Microscope Unit
- Adjustable Aluminum Alloy Stand
- 64GB TF కార్డ్
- USB కేబుల్
- పవర్ అడాప్టర్ (చేర్చబడితే)
- వినియోగదారు మాన్యువల్ (ఈ పత్రం)

Image 2.1: The microscope package includes a 64GB TF card for storage.
3. సెటప్ గైడ్
3.1 Assembling the Microscope
- పెట్టె నుండి అన్ని భాగాలను జాగ్రత్తగా అన్ప్యాక్ చేయండి.
- Attach the microscope unit to the adjustable aluminum alloy stand. Ensure it is securely fastened using the provided screws or locking mechanisms.
- Insert the 64GB TF card into the designated slot on the microscope unit.
- Place the assembled microscope on a stable, flat surface.

Image 3.1: Product dimensions and adjustable stand features, including 270° rotation and height adjustment.
3.2 బ్యాటరీని ఛార్జ్ చేయడం
The microscope has a built-in 3000mAh rechargeable battery. Before first use, fully charge the device.
- Connect the USB cable to the microscope's charge port and the other end to a power adapter or a computer's USB port.
- ఛార్జింగ్ ఇండికేటర్ లైట్ ఛార్జింగ్ స్థితిని చూపుతుంది.
- A full charge typically provides up to 6 hours of continuous use.

Image 3.2: The microscope features a long-lasting rechargeable battery, charged via USB.
4. ఆపరేటింగ్ సూచనలు
4.1 పరికరం ముగిసిందిview మరియు నియంత్రణలు

చిత్రం 4.1: ముగిసిందిview of the microscope's controls and ports, including charge port, MicroSD slot, light regulation, fixed knob, lifting adjusting bracket knob, and various function buttons.
- పవర్ ఆన్/ఆఫ్: పరికరాన్ని ఆన్ లేదా ఆఫ్ చేయడానికి పవర్ బటన్ను నొక్కి పట్టుకోండి.
- Video/Camera Playback: Use dedicated buttons to switch between video recording, photo capture, and playback modes.
- System Key Programming: Access menu settings for various configurations.
- Object Distance Adjustment: Adjust the distance between the lens and the object.
- పేజీ పైకి/క్రిందికి: Navigate through menus or captured media.
- Confirm Key/Camera Button: Select options or capture photos/videos.
- Light Regulation: 8 LED లైట్ల ప్రకాశాన్ని సర్దుబాటు చేయండి.
- Fixed Knob: Secures the microscope unit to the stand.
- Lifting Adjusting Bracket Knob: Adjusts the height of the microscope unit on the stand.
4.2 మాగ్నిఫికేషన్ మరియు ఫోకస్ సర్దుబాటు చేయడం
- Place the object you wish to observe on the base plate.
- Adjust the height of the microscope unit using the Lifting Adjusting Bracket Knob to get a rough focus.
- Use the focus wheel on the microscope lens to fine-tune the focus until the image on the 7-inch LCD screen is clear.
- The magnification range is 10X to 1200X. Adjust the distance between the lens and the object, along with the focus wheel, to achieve the desired magnification.

Image 4.2: The microscope features an adjustable screen, free length adjustment, and precise focus control.

Image 4.3: Digital magnification from 10X to 1200X, demonstrating the zoom capability on small objects.
4.3 LED లైట్లను ఉపయోగించడం
The microscope is equipped with 8 adjustable LED lights to illuminate your subject. Use the Light Regulation control to increase or decrease brightness as needed for optimal viewing.

Image 4.4: The 8 LED lights provide adequate illumination for observing objects in various lighting conditions.
4.4 ఫోటోలు మరియు వీడియోలను సంగ్రహించడం
With the included 64GB TF card, you can directly save images and videos.
- In photo mode, press the Confirm/Camera button to capture an image.
- In video mode, press the Confirm/Camera button to start recording, and press again to stop.
- Captured media can be reviewed using the playback function.
4.5 PC కనెక్టివిటీ
కు view observations on a larger screen or transfer files, connect the microscope to a Windows PC (Windows 7/8/10) using the provided USB cable.
- Connect the microscope to your PC via the USB cable.
- The microscope should be recognized as a storage device or a webcam, depending on the mode selected on the microscope.
- You can then access the stored images/videos or use the microscope as a live camera feed.

Image 4.5: Connect the microscope to a PC for a larger viewing experience and data management.
5. నిర్వహణ
5.1 శుభ్రపరచడం
- లెన్స్: Use a soft, lint-free cloth specifically designed for optical lenses. For stubborn smudges, a small amount of lens cleaning solution can be applied to the cloth, not directly to the lens.
- స్క్రీన్: Wipe the LCD screen gently with a microfiber cloth. Avoid harsh chemicals.
- శరీరం: Clean the microscope body and stand with a soft, dry cloth. Do not use abrasive cleaners or solvents.
5.2 నిల్వ
- మైక్రోస్కోప్ను ప్రత్యక్ష సూర్యకాంతి మరియు తీవ్రమైన ఉష్ణోగ్రతలకు దూరంగా చల్లని, పొడి ప్రదేశంలో నిల్వ చేయండి.
- ఎక్కువ కాలం నిల్వ చేస్తుంటే, దాని జీవితకాలం పొడిగించడానికి బ్యాటరీ పాక్షికంగా (సుమారు 50%) ఛార్జ్ చేయబడిందని నిర్ధారించుకోండి.
- Keep the lens covered to prevent dust accumulation.
5.3 బ్యాటరీ సంరక్షణ
- బ్యాటరీని తరచుగా పూర్తిగా డిశ్చార్జ్ చేయడాన్ని నివారించండి.
- బ్యాటరీని ఆరోగ్యంగా ఉంచడానికి, ఉపయోగంలో లేకపోయినా, క్రమం తప్పకుండా ఛార్జ్ చేయండి.
- బ్యాటరీని అధిక ఉష్ణోగ్రతలకు బహిర్గతం చేయవద్దు.
6. ట్రబుల్షూటింగ్
- శక్తి లేదు:
- Ensure the battery is charged. Connect the microscope to a power source and try again.
- పవర్ కేబుల్ కనెక్షన్ని తనిఖీ చేయండి.
- అస్పష్టమైన చిత్రం:
- Adjust the focus wheel carefully.
- Adjust the height of the microscope unit on the stand.
- Ensure the object is properly illuminated by adjusting the LED lights.
- Clean the lens if smudges or dust are present.
- Cannot Capture Photos/Videos:
- Ensure a TF card is inserted and properly formatted.
- Check if the TF card has sufficient storage space.
- Verify the device is in the correct photo or video capture mode.
- PC పరికరాన్ని గుర్తించకపోవడం:
- Ensure the USB cable is securely connected to both the microscope and the PC.
- మీ కంప్యూటర్లో వేరే USB పోర్ట్ని ప్రయత్నించండి.
- Restart both the microscope and the PC.
- Ensure your PC is running Windows 7/8/10.
7. స్పెసిఫికేషన్లు
| ఫీచర్ | వివరాలు |
|---|---|
| మోడల్ పేరు | SUGON-Digital Microscope |
| స్క్రీన్ పరిమాణం | 7 అంగుళాల LCD |
| మాగ్నిఫికేషన్ | 10X-1200X |
| కెమెరా రిజల్యూషన్ | 12MP |
| వీడియో రిజల్యూషన్ | 1080P |
| నిల్వ | 64GB TF Card (Max 128GB supported) |
| ప్రకాశం | 8 LED లైట్లు |
| బ్యాటరీ కెపాసిటీ | 3000mAh లిథియం పాలిమర్ |
| బ్యాటరీ లైఫ్ | 6 గంటల వరకు (సుమారుగా) |
| PC అనుకూలత | Windows 7/8/10 |
| మెటీరియల్ | మెటల్, ప్లాస్టిక్ |
| వస్తువు బరువు | 2.44 పౌండ్లు (1.11 కిలోలు) |
| ప్యాకేజీ కొలతలు | 9.8 x 8.19 x 3.35 అంగుళాలు |
8. వారంటీ మరియు మద్దతు
UF-TOOLS provides the following warranty and support for this product:
- తిరిగి వచ్చే కాలం: 45 days limited product return period.
- మార్పిడి విధానం: 18 months exchange for product defects.
For technical support or warranty claims, please contact UF-TOOLS customer service through the retailer where the product was purchased or visit the official UF-TOOLS webసంప్రదింపు సమాచారం కోసం సైట్.
గమనిక: వారంటీ నిబంధనలు ప్రాంతం మరియు రిటైలర్ ఆధారంగా మారవచ్చు. దయచేసి మీ కొనుగోలు రుజువును ఉంచుకోండి.