
1. పరిచయం
This manual provides detailed instructions for the installation, configuration, operation, and maintenance of your TP-Link EAP610 AX1800 Gigabit Dual-Band Wi-Fi 6 Access Point. Please read this manual thoroughly before using the device to ensure proper functionality and to avoid any potential issues.
2. ఉత్పత్తి ముగిసిందిview
The TP-Link EAP610 is a high-performance Wi-Fi 6 access point designed for demanding network environments. It offers advanced features for enhanced wireless connectivity and efficient network management.
ముఖ్య లక్షణాలు:
- అల్ట్రా-ఫాస్ట్ Wi-Fi 6 స్పీడ్లు: Delivers combined speeds of up to 1775 Mbps (574 Mbps on 2.4 GHz and 1201 Mbps on 5 GHz) for smooth streaming and fast downloads.
- అధిక సాంద్రత కనెక్టివిటీ: Supports up to 4 times more connected devices simultaneously compared to Wi-Fi 5, ideal for environments with many users.
- ఒమాడ SDNతో అనుసంధానించబడింది: Provides Zero-Touch Provisioning, Centralized Cloud Management, and Intelligent Monitoring for simplified network administration.
- సజావుగా రోమింగ్: Ensures uninterrupted video and voice calls as users move between access points.
- సౌకర్యవంతమైన శక్తి ఎంపికలు: Supports both 802.3at Power over Ethernet (PoE) and DC power for versatile installation.
3. ప్యాకేజీ విషయాలు
మీ ప్యాకేజీ కింది అంశాలను కలిగి ఉందని ధృవీకరించండి:
- 1 × EAP610 Access Point
- Mounting Kit (Ceiling/Wall Mount)
- ఇన్స్టాలేషన్ గైడ్
ఏదైనా వస్తువు తప్పిపోయినా లేదా దెబ్బతిన్నా, దయచేసి మీ విక్రేతను సంప్రదించండి.
4. హార్డ్వేర్ ఇన్స్టాలేషన్
The EAP610 can be mounted on a wall or ceiling. Ensure the chosen location provides optimal Wi-Fi coverage and is near a power source (PoE switch/injector or DC outlet).
4.1 పరికరం ముగిసిందిview
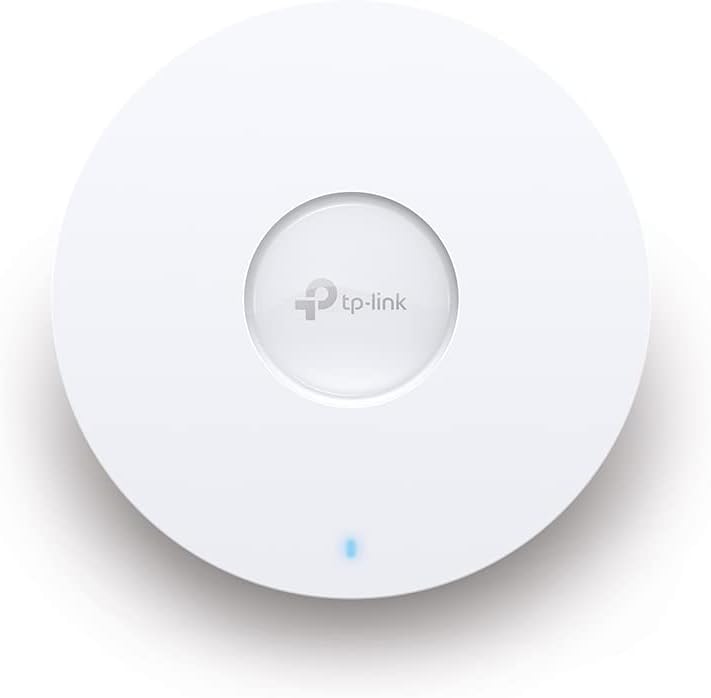
మూర్తి 1: ముందు view of the TP-Link EAP610 Access Point, showing the TP-Link logo and status LED.

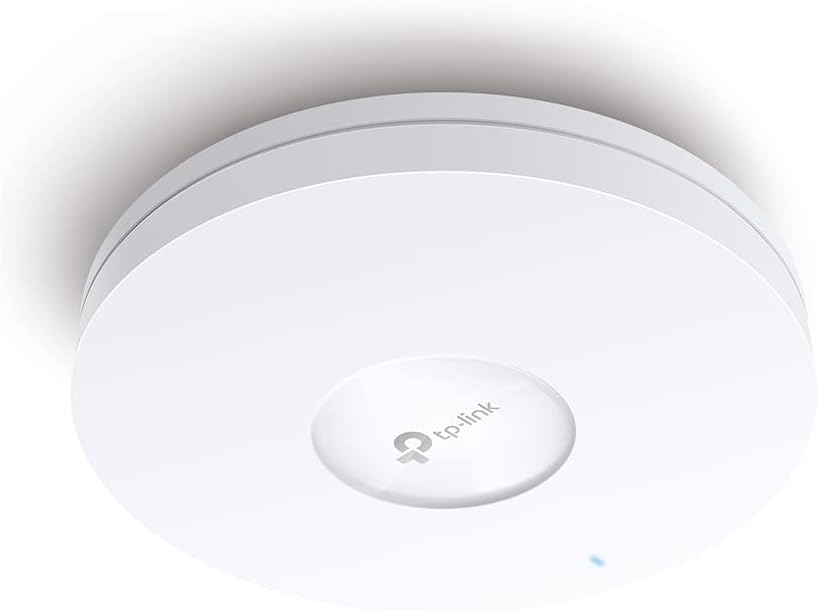
మూర్తి 2: వైపు view of the TP-Link EAP610 Access Point, illustrating its slim profile.
చిత్రం 3: దిగువ view of the TP-Link EAP610 Access Point, showing the Ethernet port and power input.
4.2 యాక్సెస్ పాయింట్ను మౌంట్ చేయడం
Use the provided mounting kit to secure the EAP610 to a wall or ceiling. Ensure the mounting surface is stable and can support the device's weight.
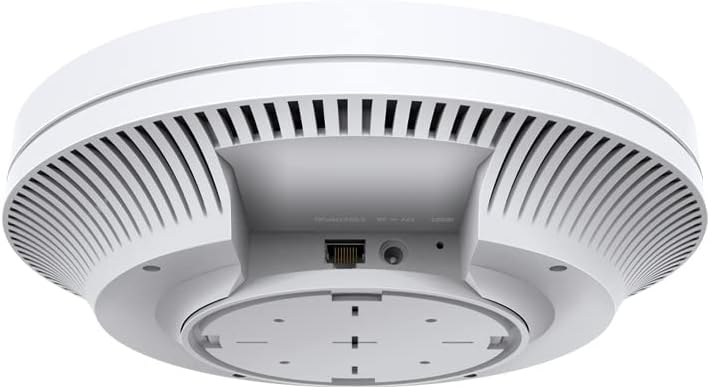
Figure 4: The EAP610 Access Point installed on a ceiling in an office environment.

Figure 5: The EAP610 Access Point installed on a wall in a commercial setting.
4.3 పరికరాన్ని శక్తివంతం చేయడం
The EAP610 supports two power methods:
- పవర్ ఓవర్ ఈథర్నెట్ (PoE): Connect an Ethernet cable from a PoE-enabled switch or PoE injector to the EAP610's Ethernet port. This provides both data and power.
- DC పవర్: Connect a 12V DC power adapter (not included) to the DC power jack on the EAP610.
Ensure the power source meets the device's requirements to prevent damage.
5. సాఫ్ట్వేర్ కాన్ఫిగరేషన్
The EAP610 can be configured and managed using the TP-Link Omada SDN platform or the Omada app.
5.1 Omada SDN Controller
For centralized management of multiple Omada devices, use the Omada SDN Controller. This allows for zero-touch provisioning, cloud access, and intelligent network monitoring.
- Download the Omada SDN Controller software from the official TP-Link webసైట్.
- Follow the on-screen instructions to install and set up the controller.
- Connect your EAP610 to the network where the Omada Controller is running. The controller will detect and allow you to adopt the EAP610.
5.2 Omada App
For convenient management via your mobile device, use the Omada app.
- Download the TP-Link Omada app from the App Store (iOS) or Google Play (Android).
- Launch the app and follow the instructions to add your EAP610.
For detailed configuration steps, refer to the official TP-Link Omada documentation available on their support webసైట్.
6. ఆపరేటింగ్ సూచనలు
Once installed and configured, the EAP610 will broadcast Wi-Fi signals for client devices to connect.
6.1 Wi-Fiకి కనెక్ట్ చేస్తోంది
- మీ వైర్లెస్ పరికరంలో (స్మార్ట్ఫోన్, ల్యాప్టాప్, టాబ్లెట్), అందుబాటులో ఉన్న Wi-Fi నెట్వర్క్ల కోసం శోధించండి.
- Select the SSID (Wi-Fi network name) configured for your EAP610.
- ప్రాంప్ట్ చేయబడితే Wi-Fi పాస్వర్డ్ను నమోదు చేయండి.
- Your device should now be connected to the EAP610's Wi-Fi network.
6.2 సజావుగా రోమింగ్
When multiple EAP610 access points are deployed and managed by an Omada Controller, client devices can seamlessly roam between them without interruption. This ensures a consistent connection for applications like video calls and voice over IP (VoIP) as you move within the coverage area.
7. నిర్వహణ
Regular maintenance helps ensure optimal performance and longevity of your EAP610 access point.
- ఫర్మ్వేర్ నవీకరణలు: కాలానుగుణంగా TP-లింక్ను తనిఖీ చేయండి website or your Omada Controller for new firmware versions. Updating firmware can improve performance, add new features, and fix security vulnerabilities.
- శుభ్రపరచడం: పరికరాన్ని శుభ్రంగా మరియు దుమ్ము లేకుండా ఉంచండి. బాహ్య భాగాన్ని తుడవడానికి మృదువైన, పొడి వస్త్రాన్ని ఉపయోగించండి. ద్రవ క్లీనర్లు లేదా ఏరోసోల్లను ఉపయోగించవద్దు.
- సరైన ప్లేస్మెంట్: Ensure the access point remains in an unobstructed location for best signal propagation. Avoid placing it near large metal objects or sources of electromagnetic interference.
- పునartప్రారంభం: If you experience network issues, a simple restart of the access point can often resolve them.
8. ట్రబుల్షూటింగ్
This section addresses common issues you might encounter with your EAP610.
8.1 శక్తి లేదు
- Ensure the Ethernet cable is securely connected to both the EAP610 and the PoE source (switch or injector).
- Verify that the PoE source is powered on and functioning correctly.
- If using a DC adapter, ensure it is properly connected and the power outlet is active.
8.2 No Wi-Fi Signal
- Check the status LED on the EAP610. Refer to the installation guide for LED indicator meanings.
- Verify that the EAP610 is properly configured via the Omada Controller or app.
- Ensure the Wi-Fi function is enabled and the SSIDs are broadcasting.
- Restart the EAP610.
8.3 నెమ్మదిగా Wi-Fi వేగం
- Check for interference from other electronic devices or neighboring Wi-Fi networks.
- Ensure your client device supports Wi-Fi 6 (802.11ax) to take full advantage of the EAP610's capabilities.
- Verify the EAP610's channel settings and adjust if necessary to avoid congestion.
- Ensure the Ethernet connection to the EAP610 is gigabit-speed.
For more advanced troubleshooting, consult the comprehensive FAQ and support resources on the TP-Link webసైట్.
9. స్పెసిఫికేషన్లు
| ఫీచర్ | వివరాలు |
|---|---|
| బ్రాండ్ | TP-లింక్ |
| మోడల్ పేరు | EAP610 |
| అంశం మోడల్ సంఖ్య | EAP610 |
| ఉత్పత్తి కొలతలు | 13.34 x 0.79 x 4.22 సెం.మీ |
| వస్తువు బరువు | 600 గ్రాములు |
| రంగు | తెలుపు |
| వైర్లెస్ రకం | 802.11ax (Wi-Fi 6) |
| ఫ్రీక్వెన్సీ బ్యాండ్ క్లాస్ | డ్యూయల్-బ్యాండ్ |
| వైర్లెస్ కమ్యూనికేషన్ స్టాండర్డ్ | 802.11ax |
| కనెక్టివిటీ టెక్నాలజీ | ఈథర్నెట్ |
| శక్తి మూలం | DC, Power over Ethernet (PoE) |
| వాల్యూమ్tage | 12 వోల్ట్లు |
| ఆపరేటింగ్ సిస్టమ్ | RouterOS (Note: This might be a generic entry, Omada SDN is the primary management platform) |
| ప్రత్యేక లక్షణాలు | RJ-45, Wireless |
| అనుకూల పరికరాలు | Wi-Fi 6 enabled devices (smartphones, laptops, etc.) |
| ఉత్పత్తి కోసం సిఫార్సు చేయబడిన ఉపయోగాలు | Company, Commercial |
| చేర్చబడిన భాగాలు | 1 × EAP610 |
| బ్యాటరీలు | Not known, requires batteries (Note: This device typically does not use batteries) |
| బ్యాటరీలు ఉన్నాయి | నం |
10. వారంటీ మరియు మద్దతు
వారంటీ సమాచారం, సాంకేతిక మద్దతు మరియు అదనపు వనరుల కోసం, దయచేసి అధికారిక TP-Link ని సందర్శించండి. webసైట్:
You can find FAQs, updated drivers and firmware, and contact information for technical assistance.