పరిచయం
This manual provides detailed instructions for the installation and maintenance of your new replacement legs for the Harman Kardon Onyx Studio 1 and 2 speakers. These legs are designed to restore stability and functionality to your speaker, ensuring it stands securely.
భద్రతా సమాచారం
- Ensure the speaker is powered off and unplugged from any power source before beginning installation.
- Handle the speaker and replacement parts with care to avoid damage.
- Keep small parts, such as screws, out of reach of children.
- ఏదైనా దశ గురించి మీకు ఖచ్చితంగా తెలియకపోతే, నిపుణుల సహాయం తీసుకోండి.
ప్యాకేజీ విషయాలు
దయచేసి మీ ప్యాకేజీలో అన్ని అంశాలు ఉన్నాయని ధృవీకరించండి:
- 1 pair of Replacement Legs (2 individual legs)
- సంస్థాపన కోసం మరలు

Image: A pair of black, conical replacement legs, designed to support the Harman Kardon Onyx Studio speaker.
సంస్థాపన
Follow these steps to install the replacement legs on your Harman Kardon Onyx Studio 1 or 2 speaker:
- Prepare the Speaker: Place your Harman Kardon Onyx Studio speaker on a soft, clean surface with the back panel facing upwards. Ensure it is stable and will not tip over during the process.
- Remove Old Legs (if applicable): If your speaker still has remnants of the old legs, carefully remove them. You may need a small screwdriver to remove any existing screws or adhesive. Clean the mounting area thoroughly.
- Position New Legs: Identify the mounting points on the back of your speaker. These are typically small circular indentations or pre-drilled holes where the original legs were attached. Align one replacement leg with its corresponding mounting point.
- కాళ్ళను సురక్షితంగా ఉంచండి: Use the provided screws to secure each replacement leg firmly to the speaker. Do not overtighten the screws, as this could damage the speaker casing or the new legs. Ensure the legs are oriented correctly to provide stable support.
- Repeat for Second Leg: Repeat steps 3 and 4 for the second replacement leg.
- పరీక్ష స్థిరత్వం: Once both legs are installed, gently place the speaker upright on a flat surface to test its stability. Ensure it stands firmly without wobbling.
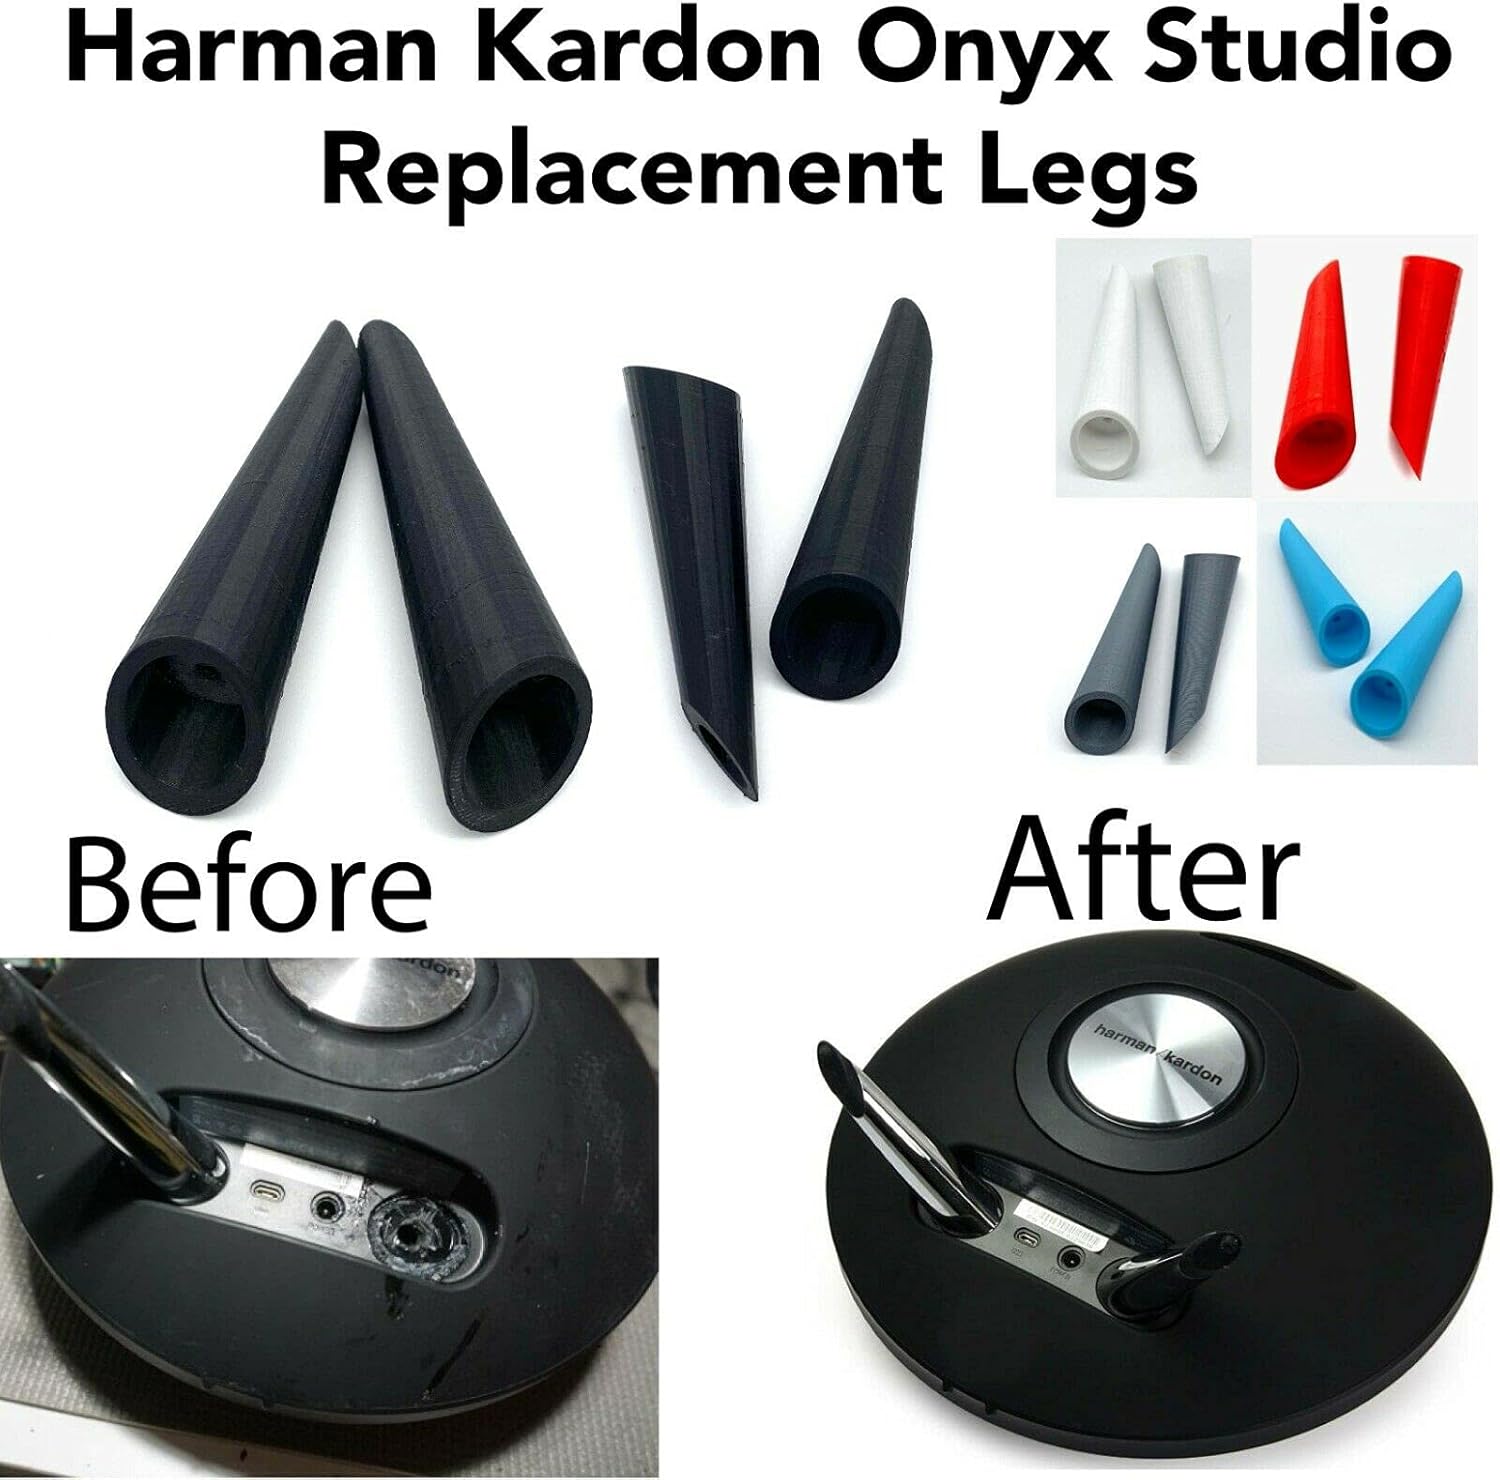
Image: A composite image showing the Harman Kardon Onyx Studio speaker with its original, damaged legs (labeled "Before") and the same speaker with the new, black replacement legs successfully installed (labeled "After").
నిర్వహణ
These replacement legs are designed for durability and require minimal maintenance:
- శుభ్రపరచడం: Wipe the legs with a soft, dry cloth to remove dust. For stubborn marks, a slightly damp వస్త్రాన్ని ఉపయోగించవచ్చు, తరువాత ఆరబెట్టవచ్చు. కఠినమైన రసాయనాలు లేదా రాపిడి క్లీనర్లను నివారించండి.
- తనిఖీ: Periodically check the screws to ensure they remain tight. If the speaker wobbles, gently tighten the screws.
- నిల్వ: If removing the legs for storage, keep them in a cool, dry place away from direct sunlight to preserve the material.
ట్రబుల్షూటింగ్
| సమస్య | సాధ్యమైన కారణం | పరిష్కారం |
|---|---|---|
| Speaker wobbles after installation. | Screws are not fully tightened or legs are not properly aligned. | Ensure screws are snug. Re-align legs if necessary and re-tighten. |
| Legs do not fit into mounting holes. | Incorrect speaker model or residual material in mounting holes. | Verify your speaker is an Onyx Studio 1 or 2. Clear any debris from the mounting holes. Do not force the legs. |
| Screws do not secure the legs. | Stripped screw holes or incorrect screw size. | Ensure you are using the provided screws. If holes are stripped, consider using a small amount of appropriate adhesive (e.g., super glue) as a last resort, but be aware this may be permanent. |
స్పెసిఫికేషన్లు
- అనుకూలత: Harman Kardon Onyx Studio 1 & 2
- మెటీరియల్: 3D Printed Biodegradable PLA Plastic
- రంగు: నలుపు
- చేర్చబడిన భాగాలు: 1 pair of legs, Screws
వారంటీ మరియు మద్దతు
For any questions regarding the installation or performance of your replacement legs, please contact the seller or manufacturer directly through the platform where the purchase was made. Please retain your proof of purchase for any warranty claims, if applicable. Specific warranty terms may vary by seller.


