
1. పరిచయం
Thank you for choosing the Motovera 3x360° 3D Green Beam Self-Leveling Laser Level. This manual provides essential information for the safe and effective operation, setup, and maintenance of your device. Please read this manual thoroughly before use and retain it for future reference.
2. భద్రతా సమాచారం
హెచ్చరిక: లేజర్ రేడియేషన్
This product is a Class II laser device. Do not stare directly into the laser beam. Avoid direct eye exposure. Use caution when operating the laser level to prevent accidental exposure to the laser beam.
- Always wear appropriate eye protection when operating the laser level.
- Do not attempt to disassemble, modify, or repair the device. This may cause serious injury and will void the warranty.
- పరికరాన్ని పిల్లలకు అందుబాటులో లేకుండా ఉంచండి.
- Ensure the work area is clear of obstructions and personnel who may be exposed to the laser beam.
- Do not operate the laser level in explosive atmospheres or near flammable materials.
3. ప్యాకేజీ విషయాలు
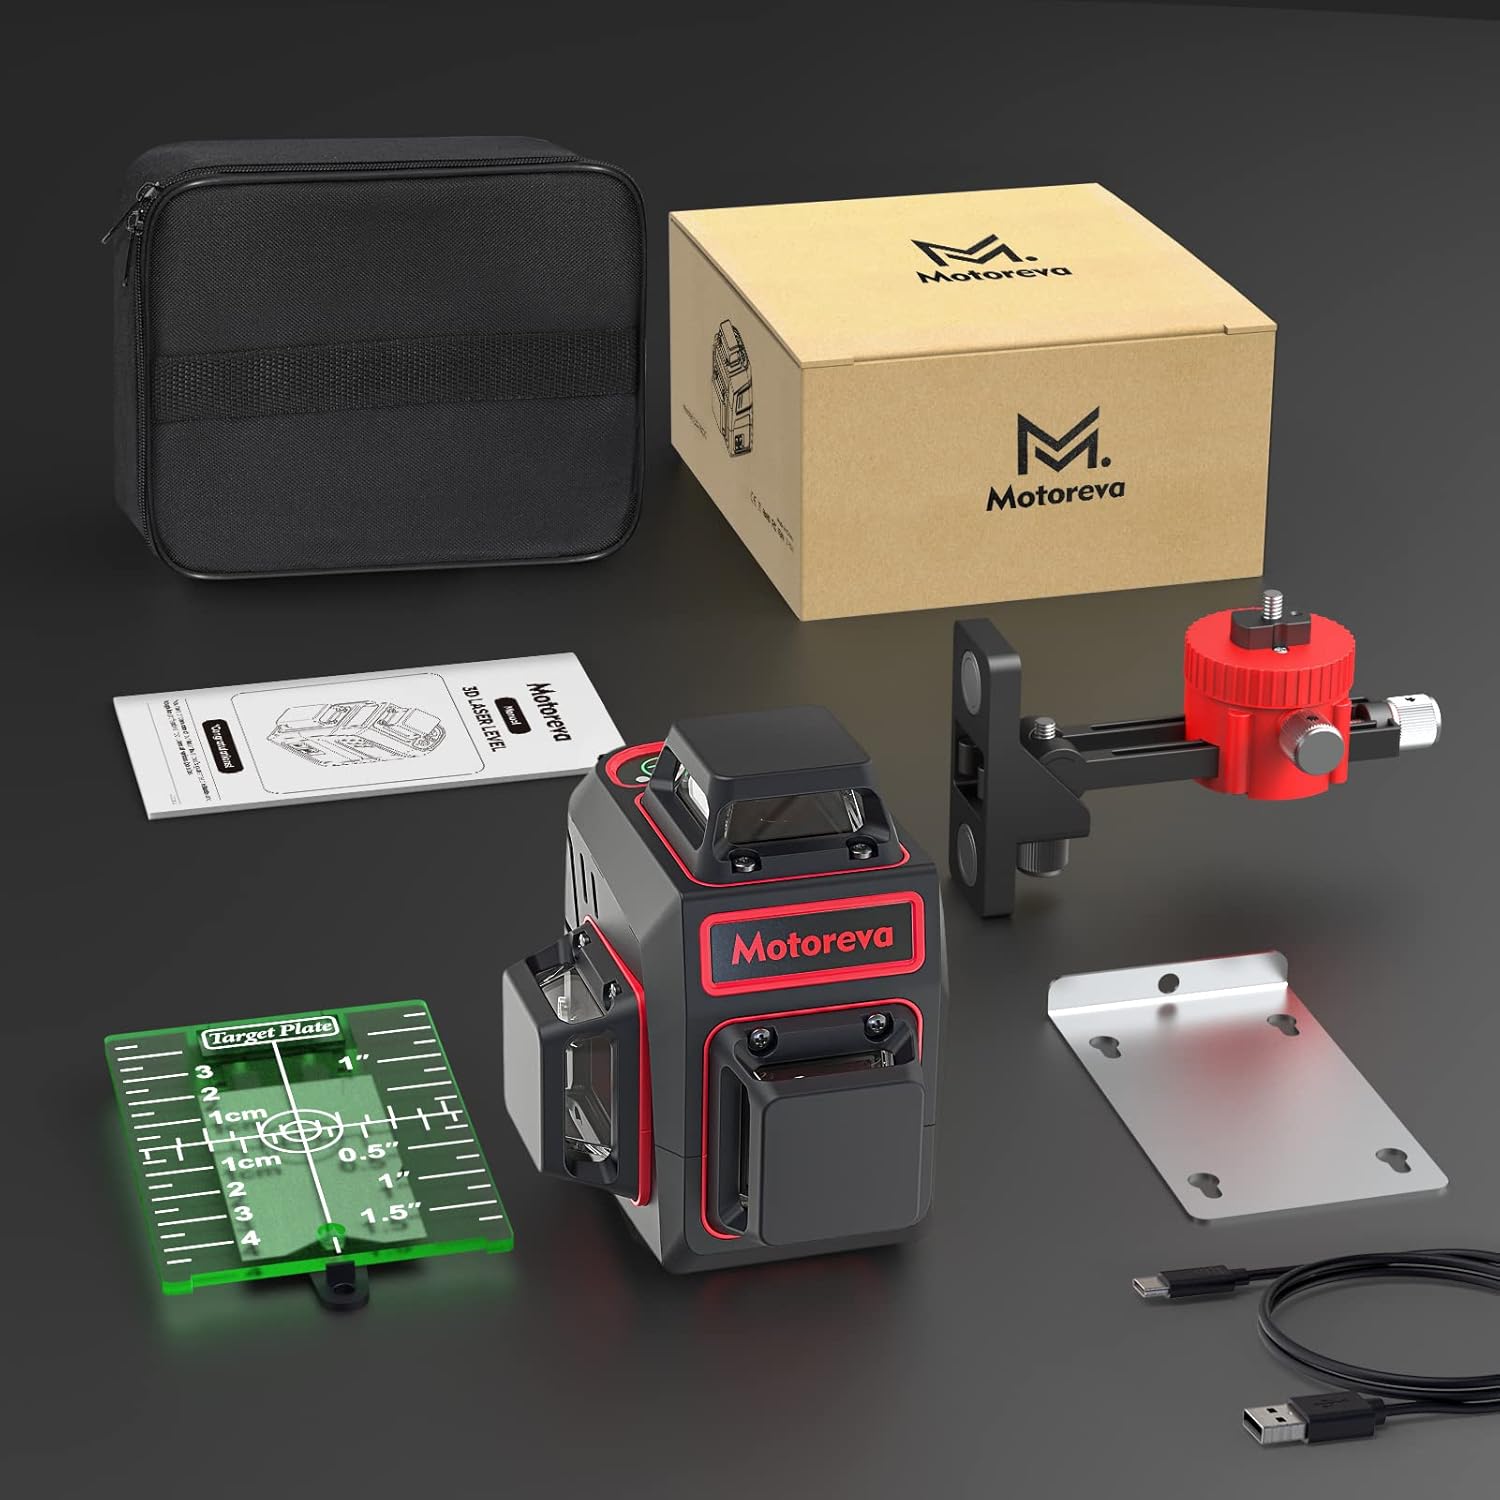
క్రింద జాబితా చేయబడిన అన్ని వస్తువులు మీ ప్యాకేజీలో చేర్చబడ్డాయని ధృవీకరించండి:
- Motovera 3D Cross Line Laser Level
- క్యారీయింగ్ కేసు
- Multi-Function Stand (Magnetic Bracket)
- లేజర్ టార్గెట్ బోర్డ్
- టైప్-సి కేబుల్
- వినియోగదారు మాన్యువల్ (ఈ పత్రం)
An image displaying all items included in the product package: the laser level unit, carrying case, multi-function stand, laser target board, Type-C cable, and user manual.
4. ఉత్పత్తి ముగిసిందిview
Familiarize yourself with the components and controls of your Motovera laser level.

A detailed diagram highlighting key components of the laser level, including the laser windows, protective cover, H/V mode button, pulse function button, lock/unlock switch, Type-C charging port, 1/4"-20 mount thread, and battery compartment.
ముఖ్య భాగాలు:
- Laser Window: ఆకుపచ్చ లేజర్ కిరణాలను ప్రసరింపజేస్తుంది.
- Laser Window Protective Cover: Shields the laser windows when not in use.
- H/V Mode Button: Cycles through horizontal and vertical line combinations.
- Pulse Function Button: Activates pulse mode for use with a laser receiver.
- లాక్/అన్లాక్ స్విచ్: Engages pendulum lock for manual mode or unlocks for self-leveling.
- టైప్-సి ఛార్జింగ్ పోర్ట్: అంతర్గత బ్యాటరీని రీఛార్జ్ చేయడానికి.
- 1/4"-20 Mount Thread: ట్రైపాడ్లు లేదా మాగ్నెటిక్ బ్రాకెట్కు అటాచ్మెంట్ కోసం.
- బ్యాటరీ కంపార్ట్మెంట్: లి-అయాన్ బ్యాటరీని ఉంచుతుంది.
- బ్యాటరీ సూచిక: Displays the current battery charge level.
5. సెటప్
5.1 ప్రారంభ ఛార్జింగ్
Before first use, fully charge the laser level. Connect the provided Type-C cable to the charging port on the device and to a suitable USB power adapter (not included). The battery indicator lights will show charging progress.

The laser level connected to a power source via its USB Type-C charging port, illustrating the charging process and the battery indicator lights.
5.2 పరికరాన్ని మౌంట్ చేయడం
The laser level can be mounted using its 1/4"-20 thread or the included magnetic bracket.
- త్రిపాద మౌంటు: Screw the laser level onto a standard tripod using the 1/4"-20 mounting thread located at the bottom of the unit.
- అయస్కాంత బ్రాకెట్: Attach the magnetic bracket to the laser level via the 1/4"-20 thread. The bracket features strong magnets for securing the device to metallic surfaces. It also allows for 360° rotation and fine adjustment of position.

The laser level mounted on its adjustable magnetic bracket, showcasing its ability to rotate 360 degrees and be securely attached to metallic surfaces for versatile positioning.
6. ఆపరేటింగ్ మోడ్లు
6.1 స్వీయ-లెవలింగ్ మోడ్
This mode is used for projecting accurate horizontal and vertical lines. The device will automatically level itself within a 4° range.
- Slide the Lock/Unlock switch to the 'Unlocked' position.
- The laser lines will activate and begin to self-level.
- If the device is tilted beyond its self-leveling range (4°), the laser lines will blink rapidly to indicate it cannot self-level. Adjust the device's position until the lines stop blinking and become steady.
A split image showing the laser level in self-leveling mode for accurate horizontal and vertical alignment, and in locked mode for projecting angled lines.
6.2 Manual/Locked Mode
This mode allows you to project laser lines at any desired angle, disabling the self-leveling function.
- Slide the Lock/Unlock switch to the 'Locked' position.
- Press the power button to turn on the laser lines. The lines will be projected at the current angle of the device.
- The laser lines may blink slowly to indicate that the device is in manual mode and not self-leveling.
6.3 లైన్ స్విచింగ్
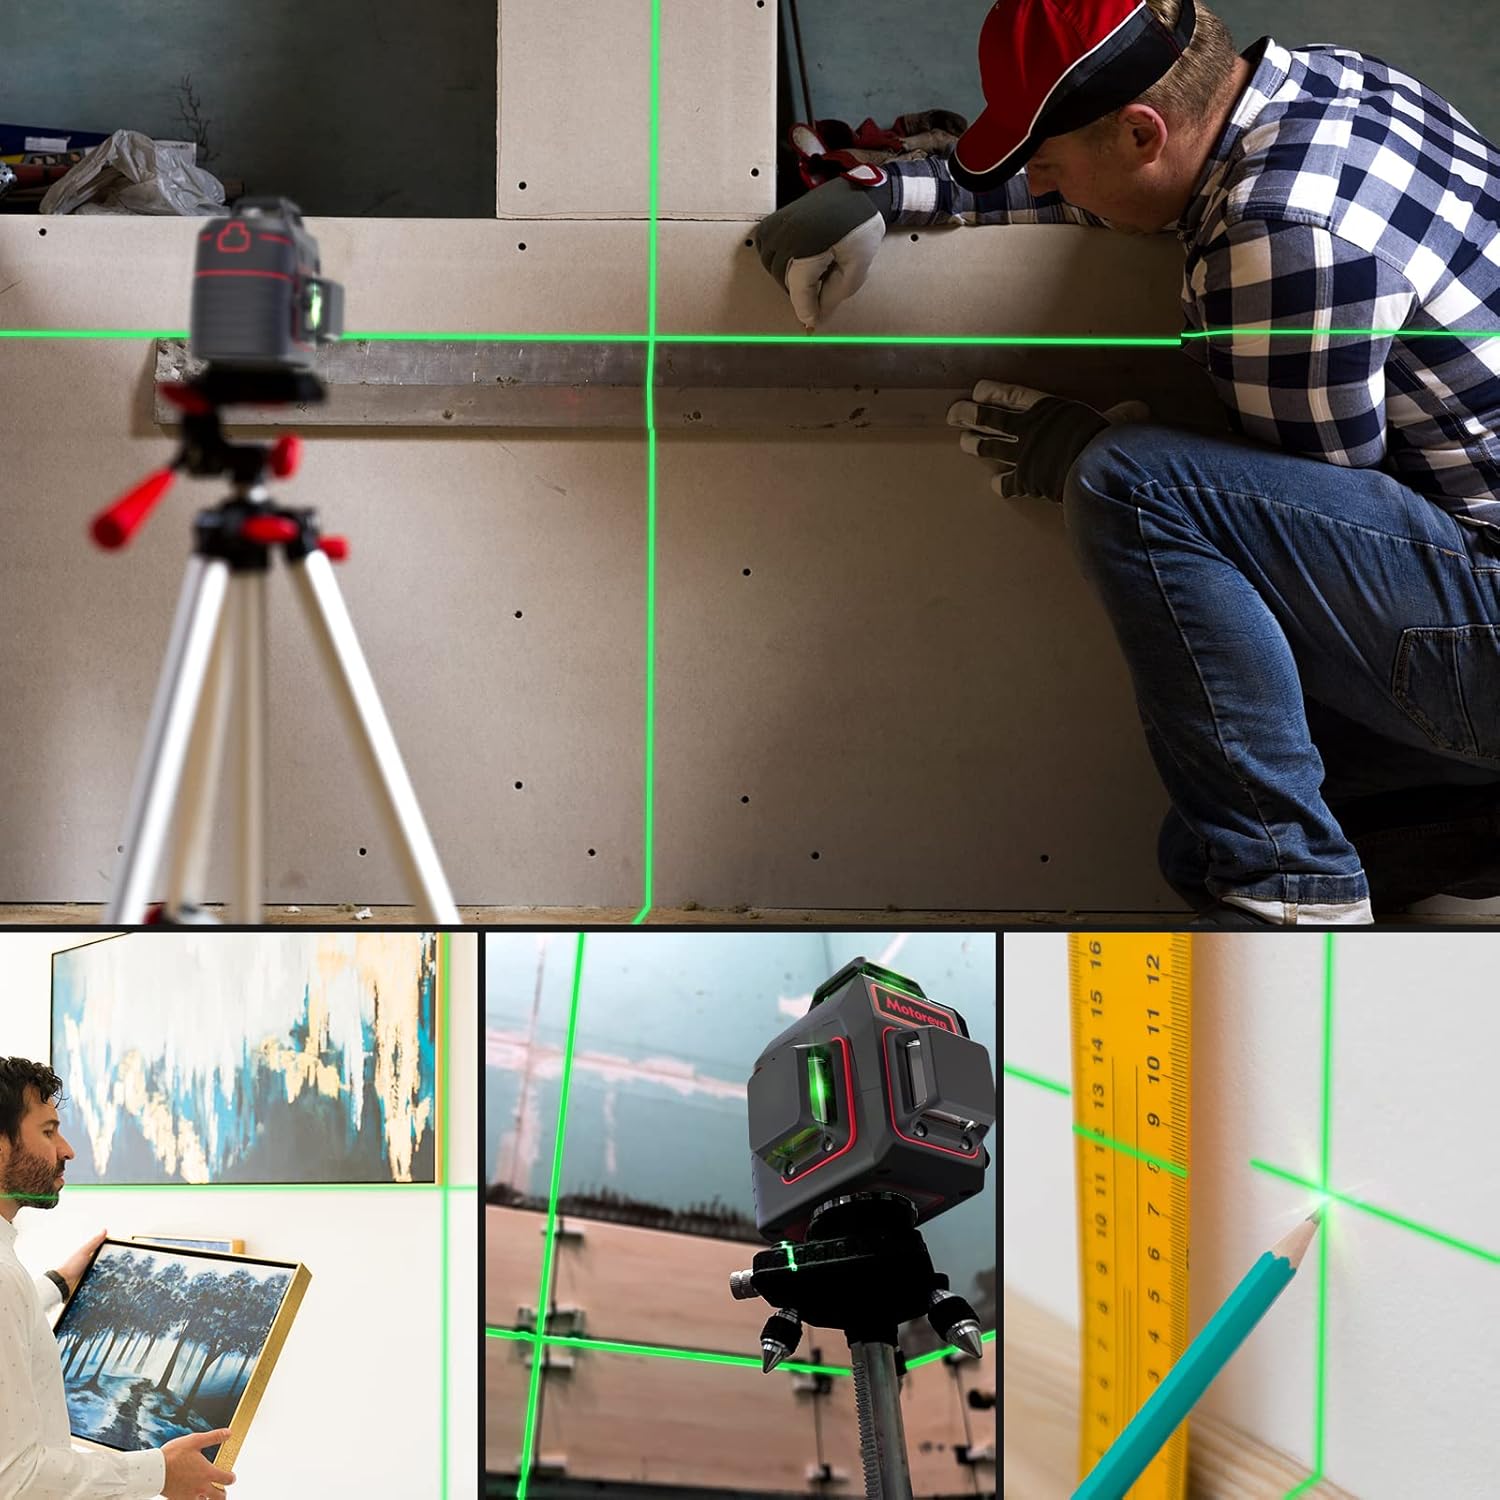
The Motovera laser level projects three 360° green beams: one horizontal and two vertical. You can cycle through different line combinations:
- Press the H/V Mode button once to activate the horizontal line.
- Press again to activate one vertical line.
- Press again to activate the second vertical line.
- Continue pressing to cycle through combinations (e.g., horizontal + one vertical, horizontal + two vertical, all three lines, etc.).

Visual representation of the laser level projecting three 360-degree green lines (one horizontal, two vertical) and demonstrating how different line combinations can be selected for various layout needs.
6.4 పల్స్ మోడ్
Pulse mode is designed for use with an optional laser receiver (not included) to extend the working range, especially in bright outdoor conditions.
- With the laser lines active, press the Pulse Function button.
- The laser lines will emit a pulsed beam, which can be detected by a compatible laser receiver up to 100 feet (approximately 30 meters) outdoors.
- Press the Pulse Function button again to exit pulse mode.
6.5 ప్రకాశం సర్దుబాటు
The laser level features two adjustable brightness settings. These settings can be cycled through by pressing the appropriate button (refer to the product overview diagram for button location) to optimize visibility for different lighting conditions and conserve battery life.
7. ఛార్జింగ్ మరియు బ్యాటరీ
The Motovera laser level is equipped with a 3.7V Li-ion battery and a Type-C charging port for convenient recharging.
- బ్యాటరీ సూచిక: The device features 4 LED lights that indicate the residual power state, allowing you to monitor battery consumption intuitively.
- ఆపరేటింగ్ సమయం: The 3600 mAh battery provides extended working hours. In normal mode, the device can operate continuously for more than 8 hours. In power-saving mode, it can work for over 16 hours.
- ఛార్జింగ్: Use the provided Type-C cable to charge the device. A full charge typically takes less than 4 hours.
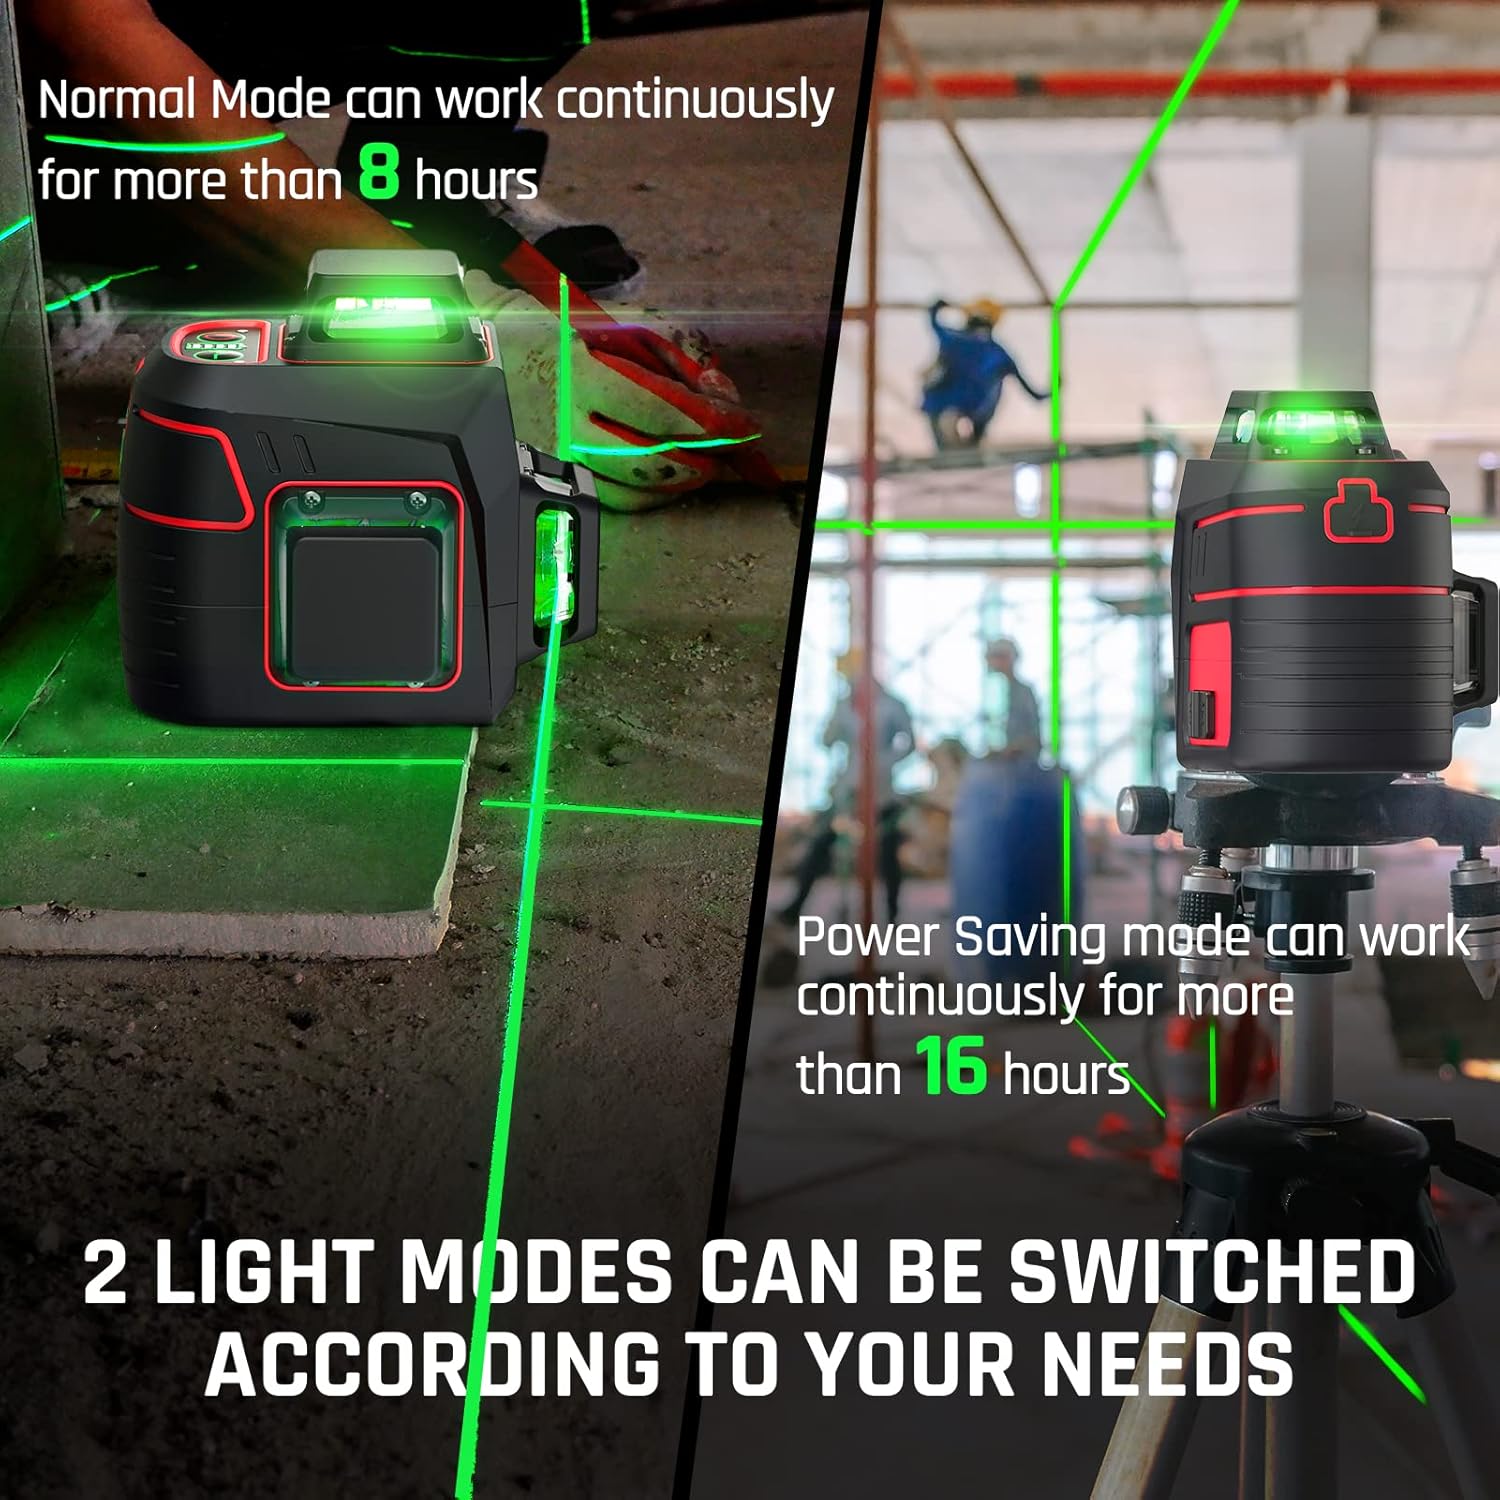
An illustration demonstrating the extended operating times of the laser level in both normal mode (up to 8 hours) and power-saving mode (up to 16 hours), emphasizing battery efficiency.
8. స్పెసిఫికేషన్లు
| ఫీచర్ | స్పెసిఫికేషన్ |
|---|---|
| బ్రాండ్ | మోటోవెరా |
| మోడల్ సంఖ్య | LL |
| లేజర్ క్లాస్ | Class II (<5mW) |
| లేజర్ రంగు | ఆకుపచ్చ |
| లేజర్ లైన్స్ | 3 x 360° (1 Horizontal, 2 Vertical) |
| ఖచ్చితత్వం | ±1.5 mm at 5 m (approximately ±1/9 inch at 16 feet) |
| స్వీయ-స్థాయి శ్రేణి | ±4° |
| పల్స్ మోడ్ పరిధి | Up to 100 feet (with optional receiver) |
| శక్తి మూలం | 3.7V Li-ion Battery (3600 mAh) |
| ఛార్జింగ్ పోర్ట్ | USB టైప్-C |
| ఆపరేటింగ్ సమయం | 8+ hours (Normal Mode), 16+ hours (Power Saving Mode) |
| IP రేటింగ్ | IP54 (ధూళి మరియు స్ప్లాష్ రెసిస్టెంట్) |
| మౌంటు థ్రెడ్ | 1/4"-20 |
| మెటీరియల్ | మెటల్, ప్లాస్టిక్ |
| ఉత్పత్తి కొలతలు | సుమారు 8.7"L x 7.8"W |
| వస్తువు బరువు | సుమారు 2.07 పౌండ్లు |
9. నిర్వహణ
- శుభ్రపరచడం: ఒక మృదువైన ఉపయోగించండి, డిamp cloth to clean the device. Do not use abrasive cleaners or solvents. Keep the laser windows clean for optimal performance.
- నిల్వ: Store the laser level in its carrying case in a dry, cool place, away from direct sunlight and extreme temperatures.
- బ్యాటరీ సంరక్షణ: దీర్ఘకాలిక నిల్వ కోసం, బ్యాటరీ ఆరోగ్యాన్ని కాపాడుకోవడానికి ప్రతి మూడు నెలలకు ఒకసారి బ్యాటరీని దాదాపు 50% వరకు ఛార్జ్ చేయండి.
- క్రమాంకనం: If you suspect the laser level is out of calibration, refer to the troubleshooting section or contact customer support. Do not attempt to recalibrate the device yourself without proper instructions.
10. ట్రబుల్షూటింగ్
If you encounter issues with your Motovera laser level, refer to the following common problems and solutions:
| సమస్య | సాధ్యమైన కారణం | పరిష్కారం |
|---|---|---|
| లేజర్ లైన్లు ఆన్ చేయవు. | Low battery, device in locked mode, or power button not pressed. | Charge the battery. Ensure the Lock/Unlock switch is in the 'Unlocked' position for self-leveling mode, or press the power button if in 'Locked' mode. |
| Laser lines are blinking rapidly in self-leveling mode. | Device is tilted beyond its self-leveling range (4°). | Place the device on a more level surface or adjust its position until the lines become steady. |
| లేజర్ లైన్లు మసకగా ఉంటాయి లేదా బయట కనిపించవు. | Bright ambient light, or not in pulse mode. | Adjust brightness settings. Activate pulse mode and use an optional laser receiver for outdoor visibility. |
| Laser lines are not accurate. | Device not properly self-leveled, or out of calibration. | Ensure the device is within its self-leveling range. If accuracy issues persist, contact customer support for calibration assistance. |
| పరికరం ఛార్జ్ చేయదు. | Faulty cable, power adapter, or charging port. | Try a different Type-C cable and power adapter. Ensure the cable is securely connected. If the issue persists, contact customer support. |
11. వారంటీ మరియు మద్దతు
Motovera products are designed for reliability and performance. For warranty information, technical support, or service inquiries, please refer to the contact details provided with your purchase or visit the official Motovera website. Please have your model number (LL) and purchase date available when contacting support.