
1. పరిచయం
This manual provides essential information for the proper installation, operation, and maintenance of your Romicta DVB-T2 H.265 HEVC Digital Terrestrial TV Receiver. Please read this manual thoroughly before using the device to ensure optimal performance and safety.

Image 1.1: Romicta DVB-T2 Receiver with included accessories, including the main unit, remote control, power adapter, IR receiver, and cables.
2. ప్యాకేజీ విషయాలు
దయచేసి అన్ని అంశాలు ప్యాకేజీలో ఉన్నాయని ధృవీకరించండి:
- Romicta DVB-T2 H.265 HEVC Digital Terrestrial TV Receiver (Model JDH003)
- Universal 2-in-1 Remote Control
- పవర్ అడాప్టర్
- IR రిసీవర్ కేబుల్
- HDMI కేబుల్
- వినియోగదారు మాన్యువల్

Image 2.1: Visual representation of the items included in the product packaging, such as the receiver, remote, power adapter, IR receiver, HDMI cable, and user manual.
3. పరికరం ముగిసిందిview
Familiarize yourself with the ports and connections on your Romicta DVB-T2 receiver.
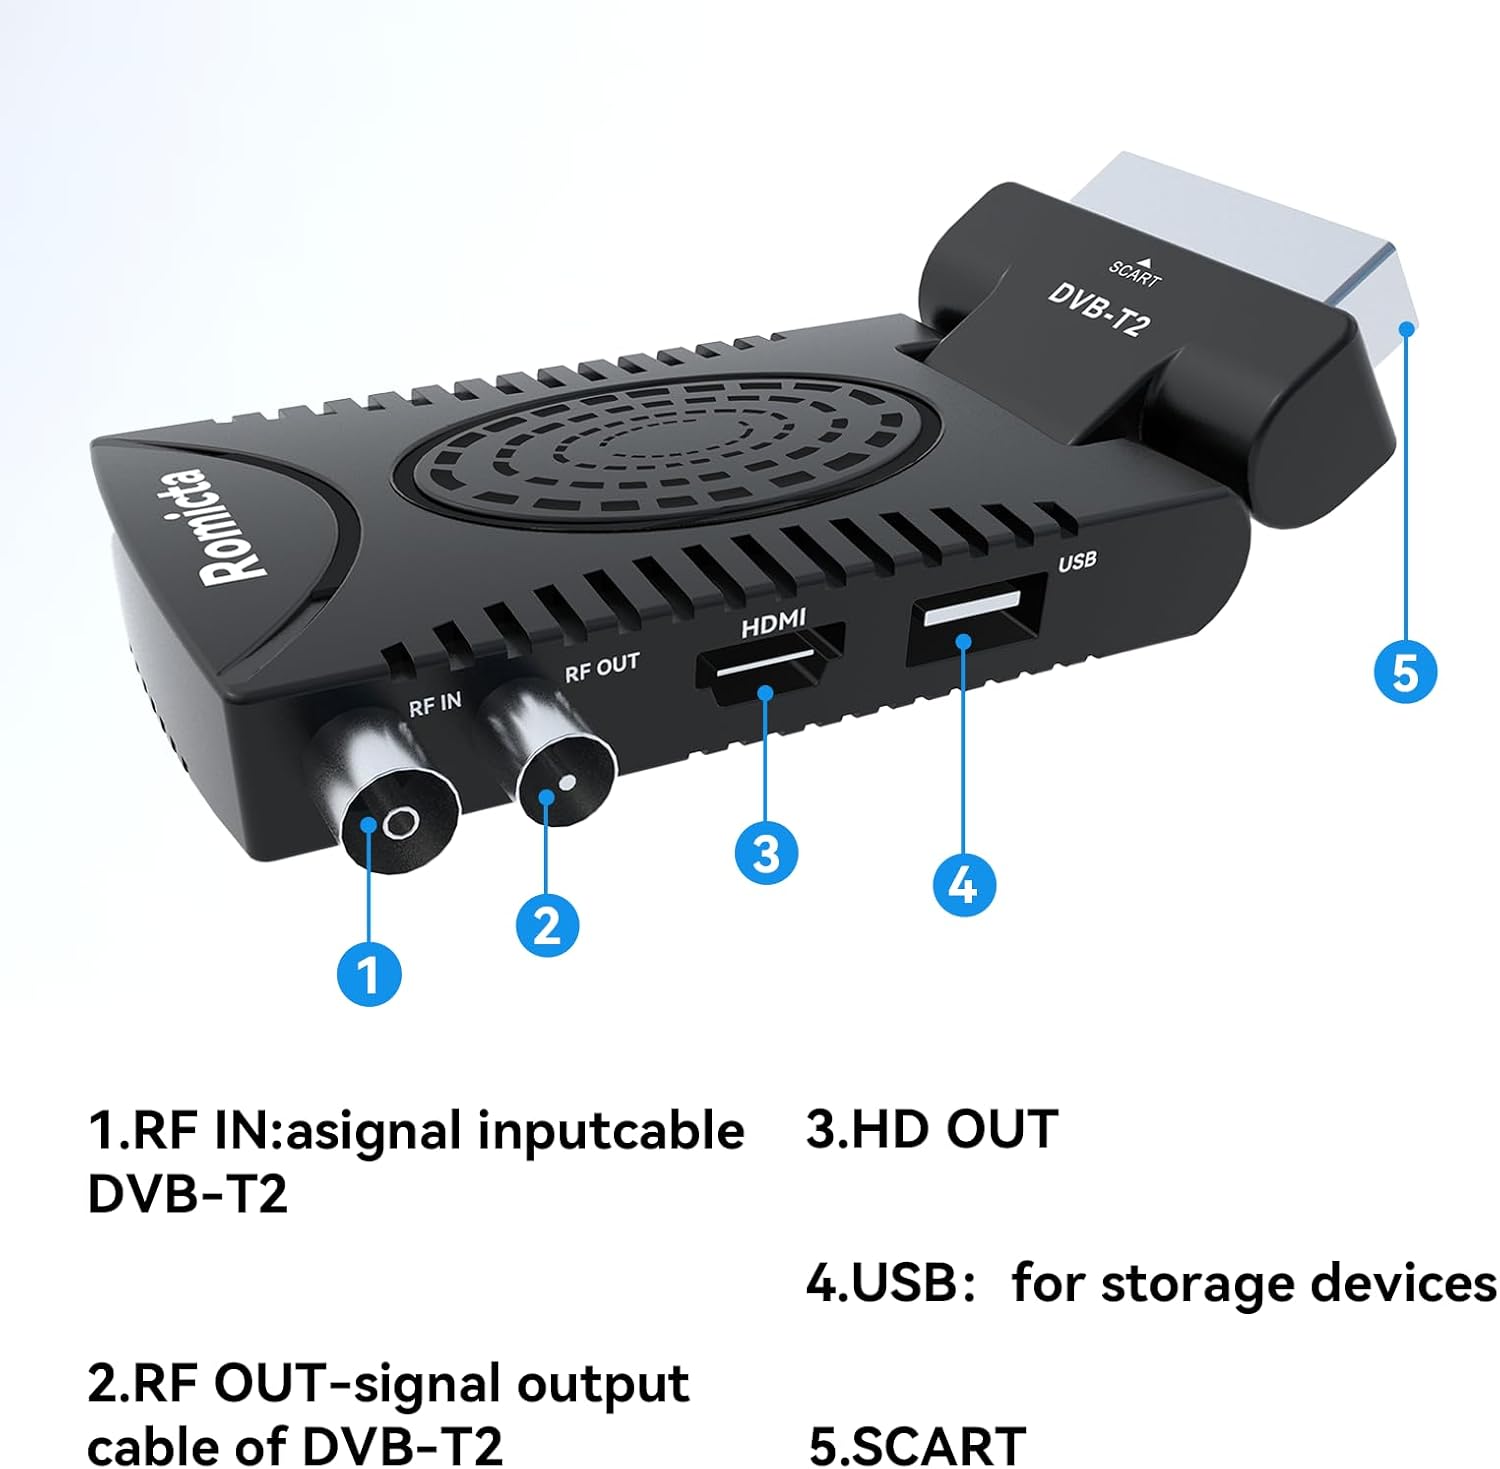
Image 3.1: Labeled diagram of the receiver's ports. 1. RF IN (Antenna signal input), 2. RF OUT (Signal output to TV), 3. HDMI (HD video/audio output), 4. USB (for storage devices), 5. SCART (analog video/audio output).
4. సెటప్ సూచనలు
Follow these steps to set up your DVB-T2 receiver:
- యాంటెన్నాను కనెక్ట్ చేయండి: మీ టెరెస్ట్రియల్ యాంటెన్నా కేబుల్ను దీనికి కనెక్ట్ చేయండి RF IN port on the receiver. Ensure the antenna provides a strong and correct digital terrestrial signal.
- టీవీకి కనెక్ట్ అవ్వండి:
- For High Definition (HD) output, connect an HDMI cable from the receiver's HDMI port to an available HDMI input on your television.
- For Standard Definition (SD) output, connect a SCART cable from the receiver's SCART port to the SCART input on your television.
- Connect IR Receiver (Optional): If the receiver is placed out of direct line-of-sight, connect the external IR receiver cable to the IR port on the receiver and position the IR sensor where it can receive signals from the remote control.
- పవర్ కనెక్ట్ చేయండి: Plug the power adapter into the receiver's power input and then into a wall outlet.
- Initial TV Configuration: Turn on your TV and select the correct HDMI or SCART input source that corresponds to the connection you made. It may be necessary to adjust your TV's settings to ensure it is configured for HD output mode.
- మొదటి సారి సంస్థాపన: Upon first power-on, the receiver will guide you through an initial setup process, including language selection and channel scanning. Follow the on-screen prompts.
- ఛానల్ స్కాన్: Select 'Auto Scan' or 'Manual Scan' to find available digital terrestrial channels. Ensure your antenna signal is optimal for a complete scan. The receiver supports up to 6000 TV/radio channels.
- రిమోట్ కంట్రోల్ సెటప్: The included 2-in-1 universal remote control can operate both the receiver and your TV. Refer to the remote control section in this manual for programming instructions.
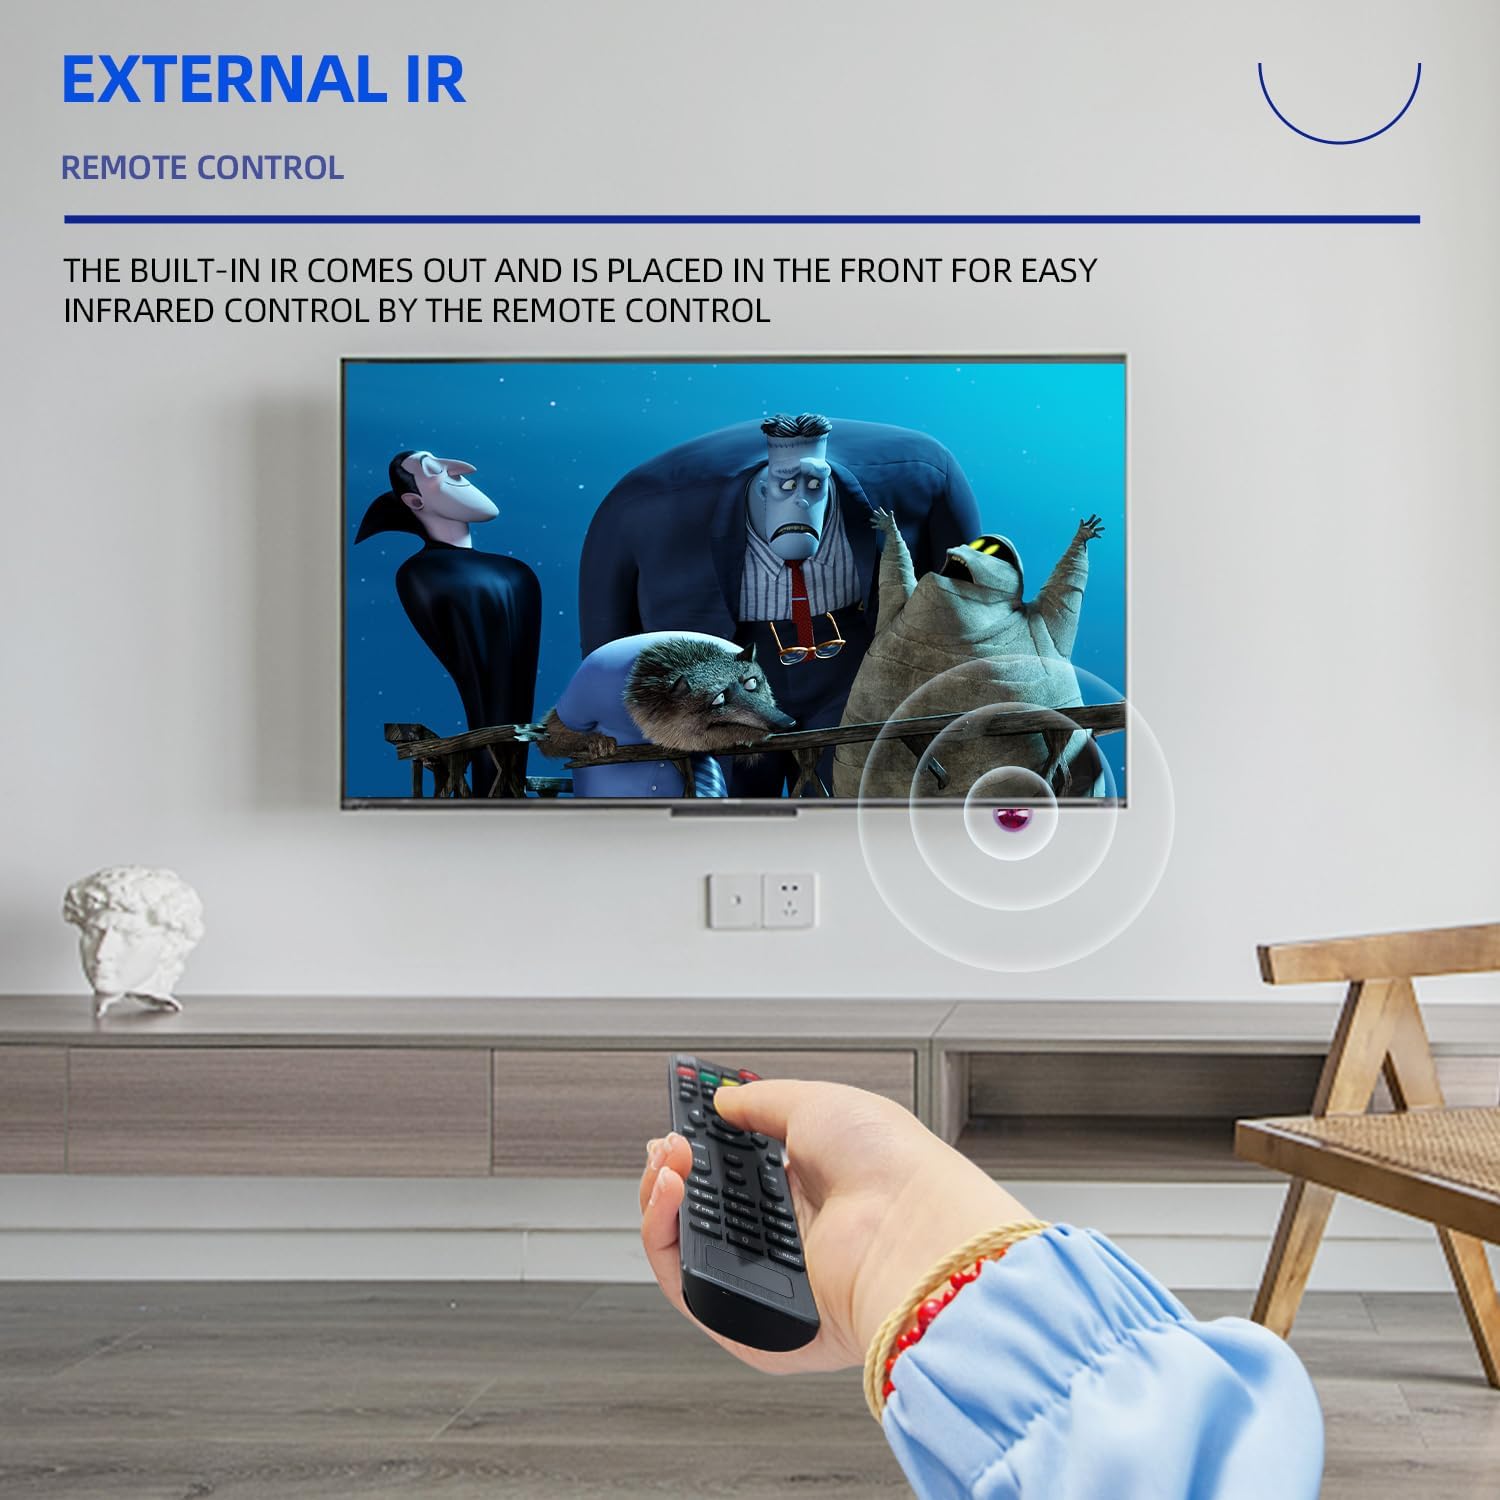
Image 4.1: Illustration of the external IR receiver being used to control the device when the main unit is not directly visible, ensuring convenient remote operation.
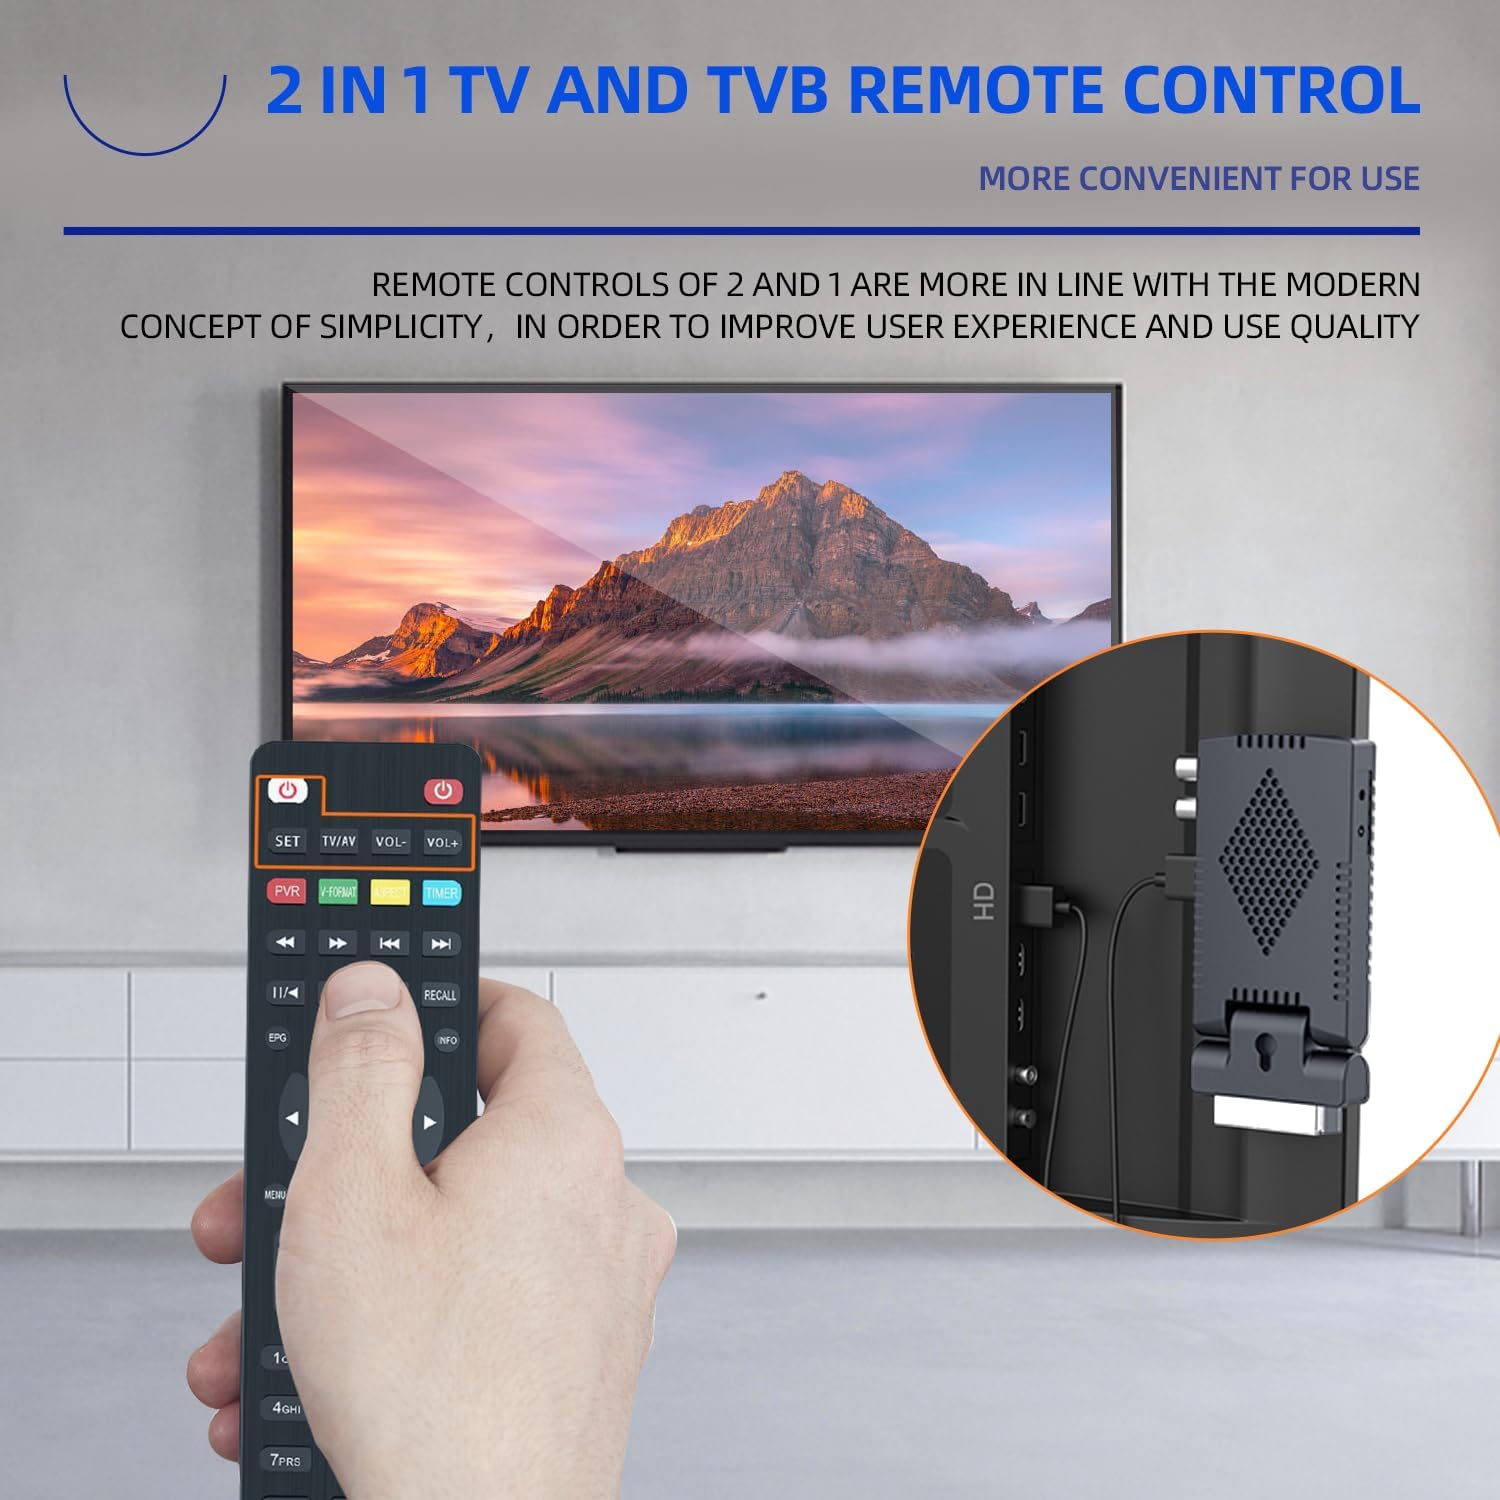
Image 4.2: The universal 2-in-1 remote control, designed to simplify control by operating both the DVB-T2 receiver and your television with a single device.
5. ఆపరేటింగ్ సూచనలు
5.1 ప్రాథమిక ఆపరేషన్
- పవర్ ఆన్/ఆఫ్: Press the power button on the remote control to turn the receiver on or off.
- ఛానెల్ ఎంపిక: Use the 'CH+' / 'CH-' buttons or enter the channel number directly using the numeric keypad.
- వాల్యూమ్ నియంత్రణ: Use the 'VOL+' / 'VOL-' buttons to adjust the volume.
- మెను నావిగేషన్: Press the 'MENU' button to access the main menu. Use arrow keys to navigate and 'OK' to confirm.
- ఎలక్ట్రానిక్ ప్రోగ్రామ్ గైడ్ (EPG): Press the 'EPG' button to view program information and schedules.
- Subtitles and Teletext: Access these features using the dedicated 'SUB-T' and 'TTX' buttons on the remote.
5.2 Media Playback (USB 2.0)
The receiver supports media playback from USB storage devices.
- Insert a USB drive (formatted in FAT32) into the USB రిసీవర్పై పోర్ట్.
- Navigate to the 'Media Player' section in the main menu.
- Select the desired media type (e.g., Music, Photo, Video) and browse your files.
- Supported formats include MP3, MP4, AVI, MKV, JPEG, and more.
5.3 PVR Recording
Record your favorite TV programs directly to a connected USB storage device (up to 4TB).
- Ensure a USB storage device is connected and properly recognized.
- While watching a program, press the 'REC' button on the remote to start immediate recording.
- To schedule a recording, access the EPG, select the desired program, and follow the on-screen instructions to set a timer.
- Recorded programs can be accessed and played back via the 'PVR' or 'Media Player' menu.
5.4 Channel Management (LCN)
The Logical Channel Numbering (LCN) function automatically organizes channels. You can also create and manage your favorite channel lists:
- Access the 'Channel Manager' or 'Edit Channel' menu.
- Use options to move, delete, or lock channels.
- Create 'Favorite' lists for quick access to preferred channels.
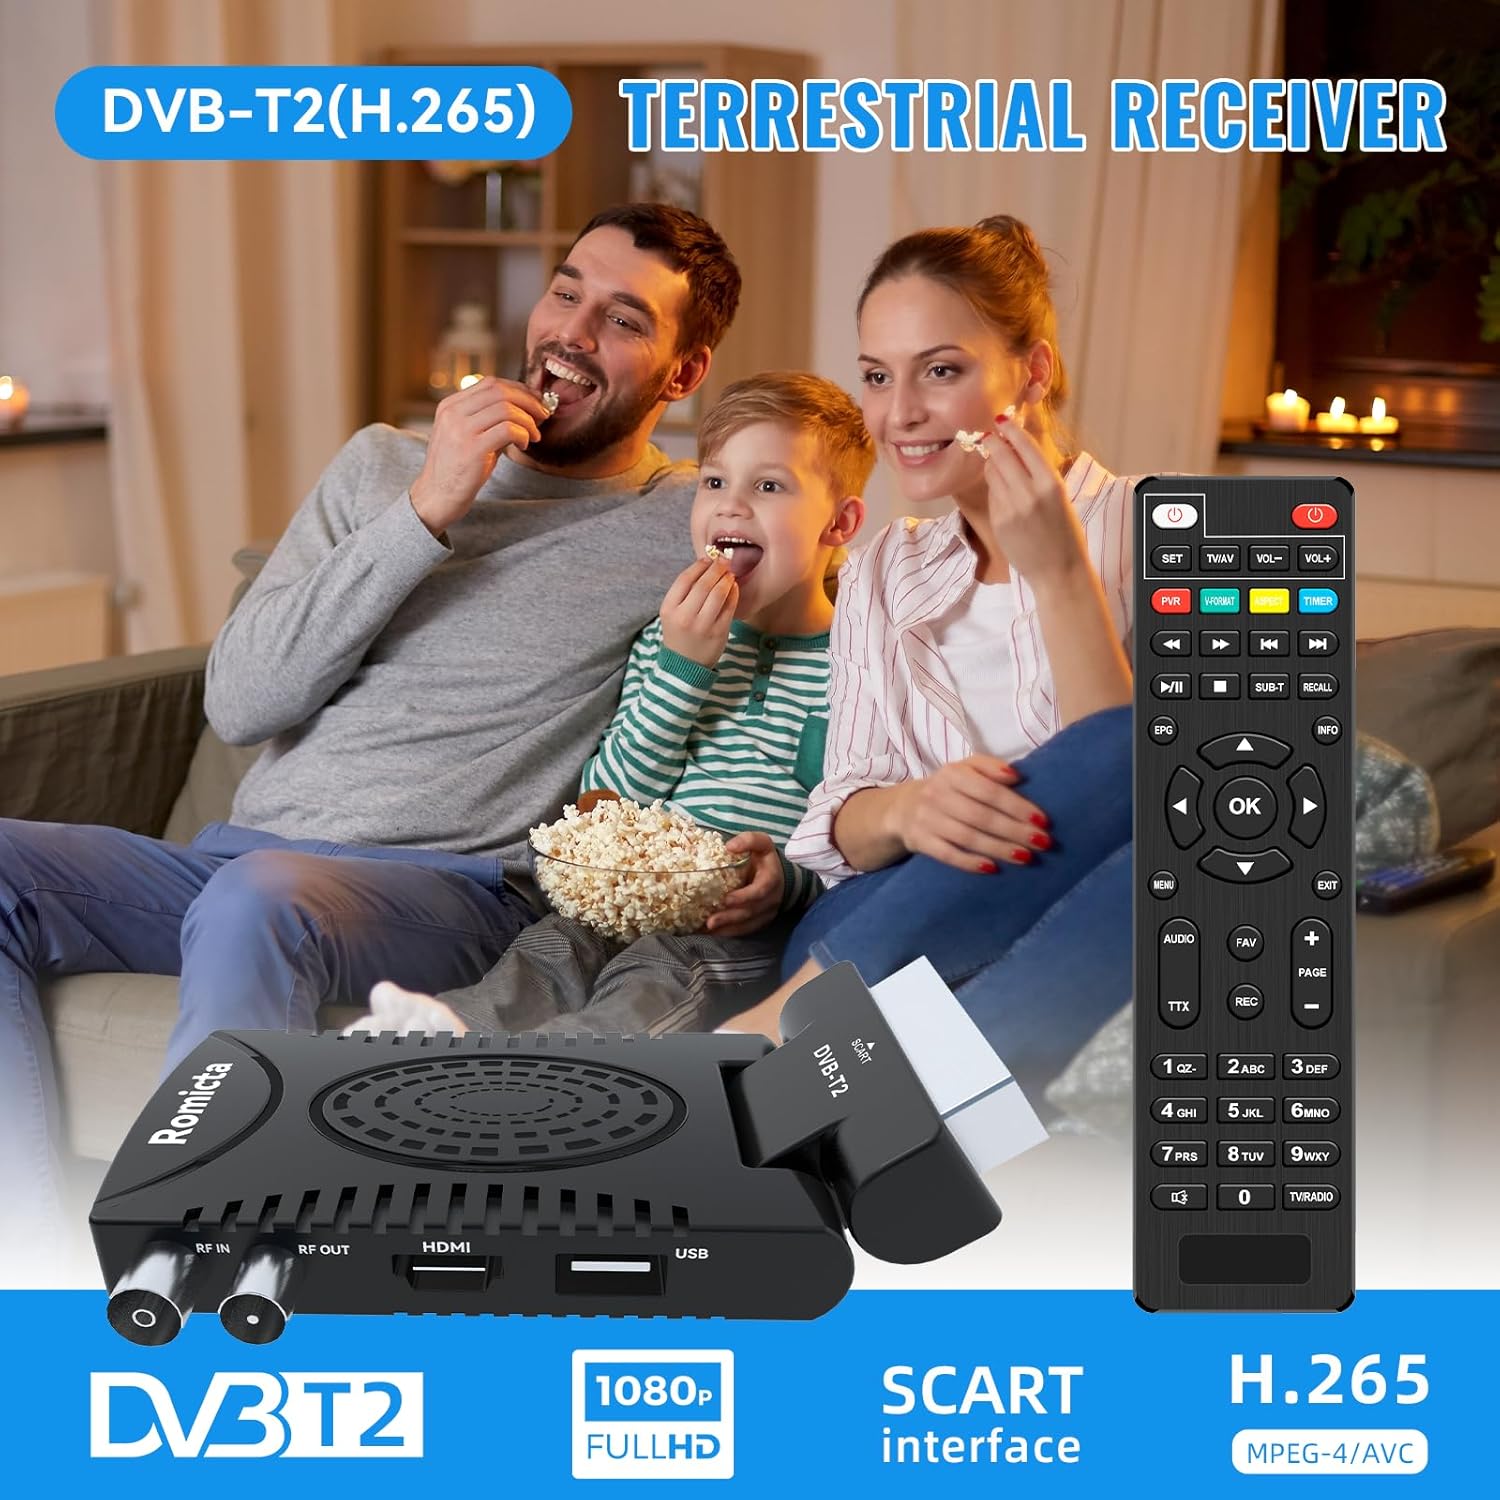
Image 5.1: A family enjoying television content, illustrating the typical use case for the Romicta DVB-T2 receiver and its remote control.
6. నిర్వహణ
To ensure the longevity and optimal performance of your receiver, follow these maintenance guidelines:
- శుభ్రపరచడం: Use a soft, dry cloth to clean the exterior of the receiver. Do not use liquid cleaners or abrasive materials.
- వెంటిలేషన్: Ensure the receiver has adequate ventilation. Do not block the ventilation openings.
- పర్యావరణం: Keep the device away from direct sunlight, heat sources, moisture, and dust.
- పవర్ ఆఫ్: పరికరాన్ని ఎక్కువ కాలం ఉపయోగించకపోతే వాల్ అవుట్లెట్ నుండి పవర్ అడాప్టర్ను డిస్కనెక్ట్ చేయండి.
7. ట్రబుల్షూటింగ్
మీ రిసీవర్తో మీకు సమస్యలు ఎదురైతే, ఈ క్రింది సాధారణ సమస్యలు మరియు పరిష్కారాలను చూడండి:
| సమస్య | సాధ్యమైన కారణం | పరిష్కారం |
|---|---|---|
| చిత్రం లేదా ధ్వని లేదు | Incorrect TV input selected; loose cable connections; no antenna signal. | Ensure TV is on the correct HDMI/SCART input. Check all cable connections. Verify antenna signal strength and connection to RF IN. |
| "సిగ్నల్ లేదు" సందేశం | Weak or no antenna signal; channels not scanned. | Check antenna connection and position. Perform a channel scan (Auto Scan). Ensure antenna provides a complete digital terrestrial signal. |
| రిమోట్ కంట్రోల్ పనిచేయడం లేదు | Batteries depleted; IR sensor blocked; incorrect remote mode. | Replace batteries. Ensure no obstructions between remote and IR sensor (or external IR receiver). Check if the remote is in the correct mode (TV or STB). |
| USB ప్లేబ్యాక్ సమస్యలు | USB drive not formatted correctly; unsupported file ఫార్మాట్. | Ensure USB drive is formatted to FAT32. Check if the media file ఫార్మాట్ రిసీవర్ ద్వారా మద్దతు ఇవ్వబడుతుంది. |
| పేలవమైన చిత్ర నాణ్యత | Weak antenna signal; TV not configured for HD output. | Adjust antenna position or consider an amplifier. Ensure your TV is set to the correct HD output mode for the connected HDMI port. |
8. స్పెసిఫికేషన్లు
Detailed technical specifications for the Romicta DVB-T2 H.265 HEVC Digital Terrestrial TV Receiver:
- మోడల్ సంఖ్య: JDH003
- బ్రాండ్: Romicta
- ట్యూనర్ రకం: DVB-T2 / DVB-C
- వీడియో డీకోడింగ్: H.265 HEVC 10-bit, Full HD 1080P
- ఆడియో అవుట్పుట్ మోడ్: Stereo, Surround (Dolby Surround support)
- సరౌండ్ సౌండ్ ఛానెల్ కాన్ఫిగరేషన్: 5.1
- కనెక్షన్లు: HDMI, USB Type A, SCART (Péritel), RF IN, RF OUT
- HDMI పోర్ట్ల సంఖ్య: 1
- ప్రత్యేక లక్షణాలు: H.265 HEVC support, PVR function, LCN (Logical Channel Numbering), Dolby Surround sound
- అనుకూల పరికరాలు: టెలివిజన్
- నియంత్రిక రకం: Remote control included (2-in-1 universal)
- USB మద్దతు: USB 2.0 (for media playback and PVR recording, FAT32 format required)
- Channel Storage Capacity: Up to 6000 TV/radio channels
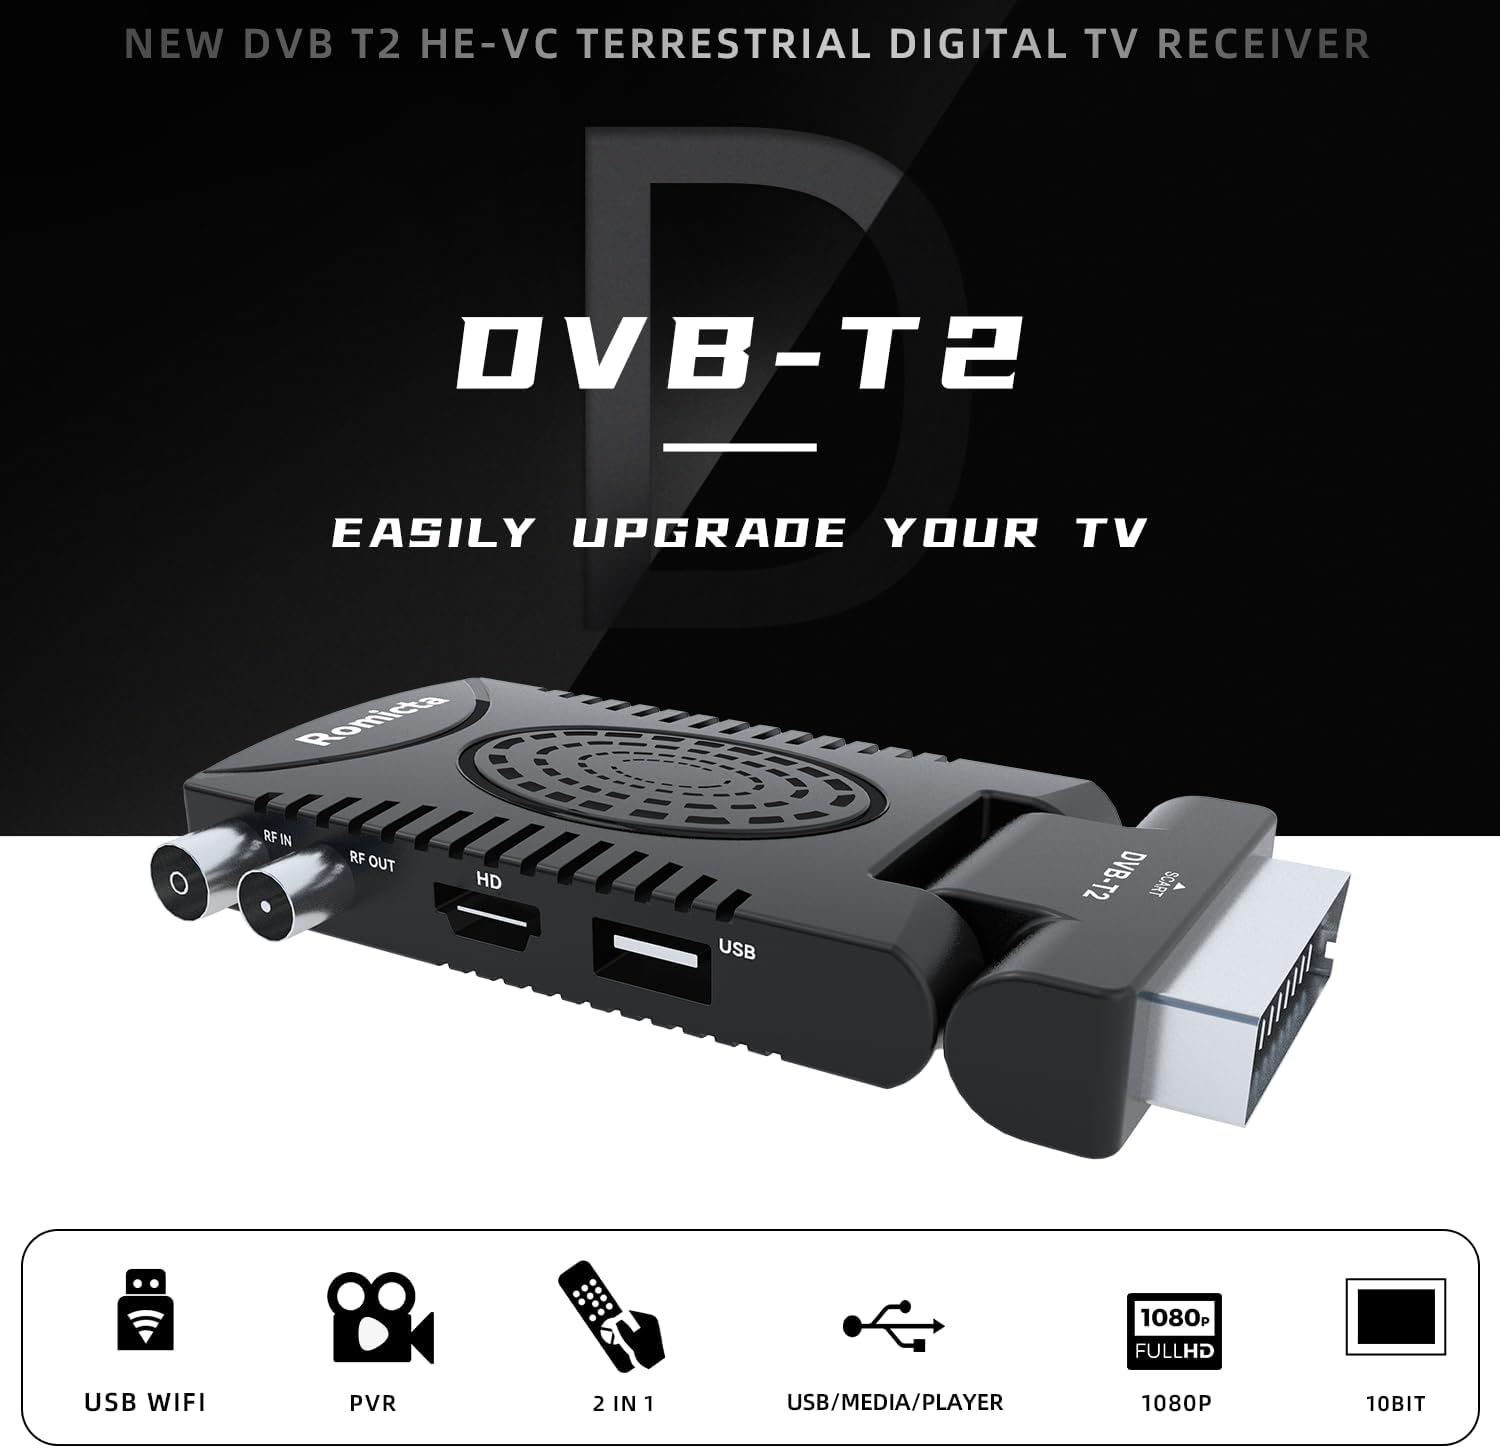
చిత్రం 8.1: ముగిసిందిview of key features including DVB-T2, USB WiFi compatibility (requires separate adapter), PVR recording, 2-in-1 remote, USB media player, 1080p Full HD, and 10-bit color depth.
9. వారంటీ మరియు మద్దతు
For warranty information, please refer to the documentation provided at the time of purchase or contact your retailer. For technical support or further assistance, please reach out to Romicta customer service through the contact information provided on the product packaging or the official Romicta webసైట్.