1. పరిచయం
This manual provides detailed instructions for the operation and maintenance of your Vormooi V71 Digital Voice Recorder. Please read this manual thoroughly before using the device to ensure proper functionality and to maximize your user experience. Keep this manual for future reference.
2. ప్యాకేజీ విషయాలు
ప్యాకేజీని తెరిచినప్పుడు, క్రింద జాబితా చేయబడిన అన్ని అంశాలు ఉన్నాయని దయచేసి ధృవీకరించండి:
- 1 x Vormooi V71 Digital Voice Recorder
- 1 x USB-C నుండి USB-C కేబుల్
- 1 x 3.5mm External Microphone
- 1 x 64GB TF మెమరీ కార్డ్
- 1 x USB-C Cable (USB-A to USB-C)
- 1 x 3.5mm Transcription Cable
- 1 x మెడ పట్టీ
- 1 x యూజర్ మాన్యువల్ (ఈ పత్రం)

Image: The Vormooi V71 Digital Voice Recorder shown with its various accessories, including the external microphone, USB-C cables, and the 64GB TF memory card, alongside a diagram illustrating the device's dimensions.
3. ఉత్పత్తి ముగిసిందిview
Familiarize yourself with the device's components and controls.

చిత్రం: వివరణాత్మక ముందు భాగం view of the Vormooi V71 Digital Voice Recorder, highlighting its 2.15-inch color screen, control buttons (MENU, PREV, NEXT, DEL/BACK, POWER/PLAY), built-in speakers, and the included external microphone.
ముఖ్య భాగాలు:
- 2.15-అంగుళాల కలర్ స్క్రీన్: Displays menus, recording status, and file సమాచారం.
- అంతర్నిర్మిత మైక్రోఫోన్లు: For standard audio capture.
- అంతర్నిర్మిత స్పీకర్: For direct playback of recordings.
- Recording Slider: Located on the side for quick record/save actions.
- USB-C పోర్ట్: ఛార్జింగ్ మరియు డేటా బదిలీ కోసం.
- 3.5mm ఆడియో జాక్: For connecting external microphone or headphones.
- TF కార్డ్ స్లాట్: జ్ఞాపకశక్తి విస్తరణ కోసం.
4. సెటప్
4.1 పరికరాన్ని ఛార్జ్ చేస్తోంది
Before first use, fully charge the device for approximately 2 hours.
- Connect the provided USB-C cable to the recorder's USB-C port.
- USB-C కేబుల్ యొక్క మరొక చివరను USB పవర్ అడాప్టర్ (చేర్చబడలేదు) లేదా కంప్యూటర్ యొక్క USB పోర్ట్కి కనెక్ట్ చేయండి.
- The screen will indicate charging status. The battery icon will show full when charging is complete.

Image: The Vormooi V71 Digital Voice Recorder displaying a full battery icon, indicating its 1100mAh battery capacity and 110 hours of continuous recording time after a 2-hour charge.
4.2 Inserting and Formatting the TF Memory Card
The device comes with 32GB internal memory and a 64GB TF card. For optimal performance, format the TF card using the device itself.
- Locate the TF card slot on the side of the recorder.
- Gently insert the 64GB TF memory card into the slot until it clicks into place.
- పరికరాన్ని ఆన్ చేయండి.
- Navigate to the 'Settings' menu on the device.
- Select 'Format Card' or a similar option.
- ఫార్మాటింగ్ ప్రక్రియను నిర్ధారించండి. Warning: Formatting will erase all data on the TF card.
Important: Do not format the voice recorder or memory cards on a computer. Always format within the device's menu for proper functionality. The device only supports exFAT format for SD cards from 8GB to 128GB.
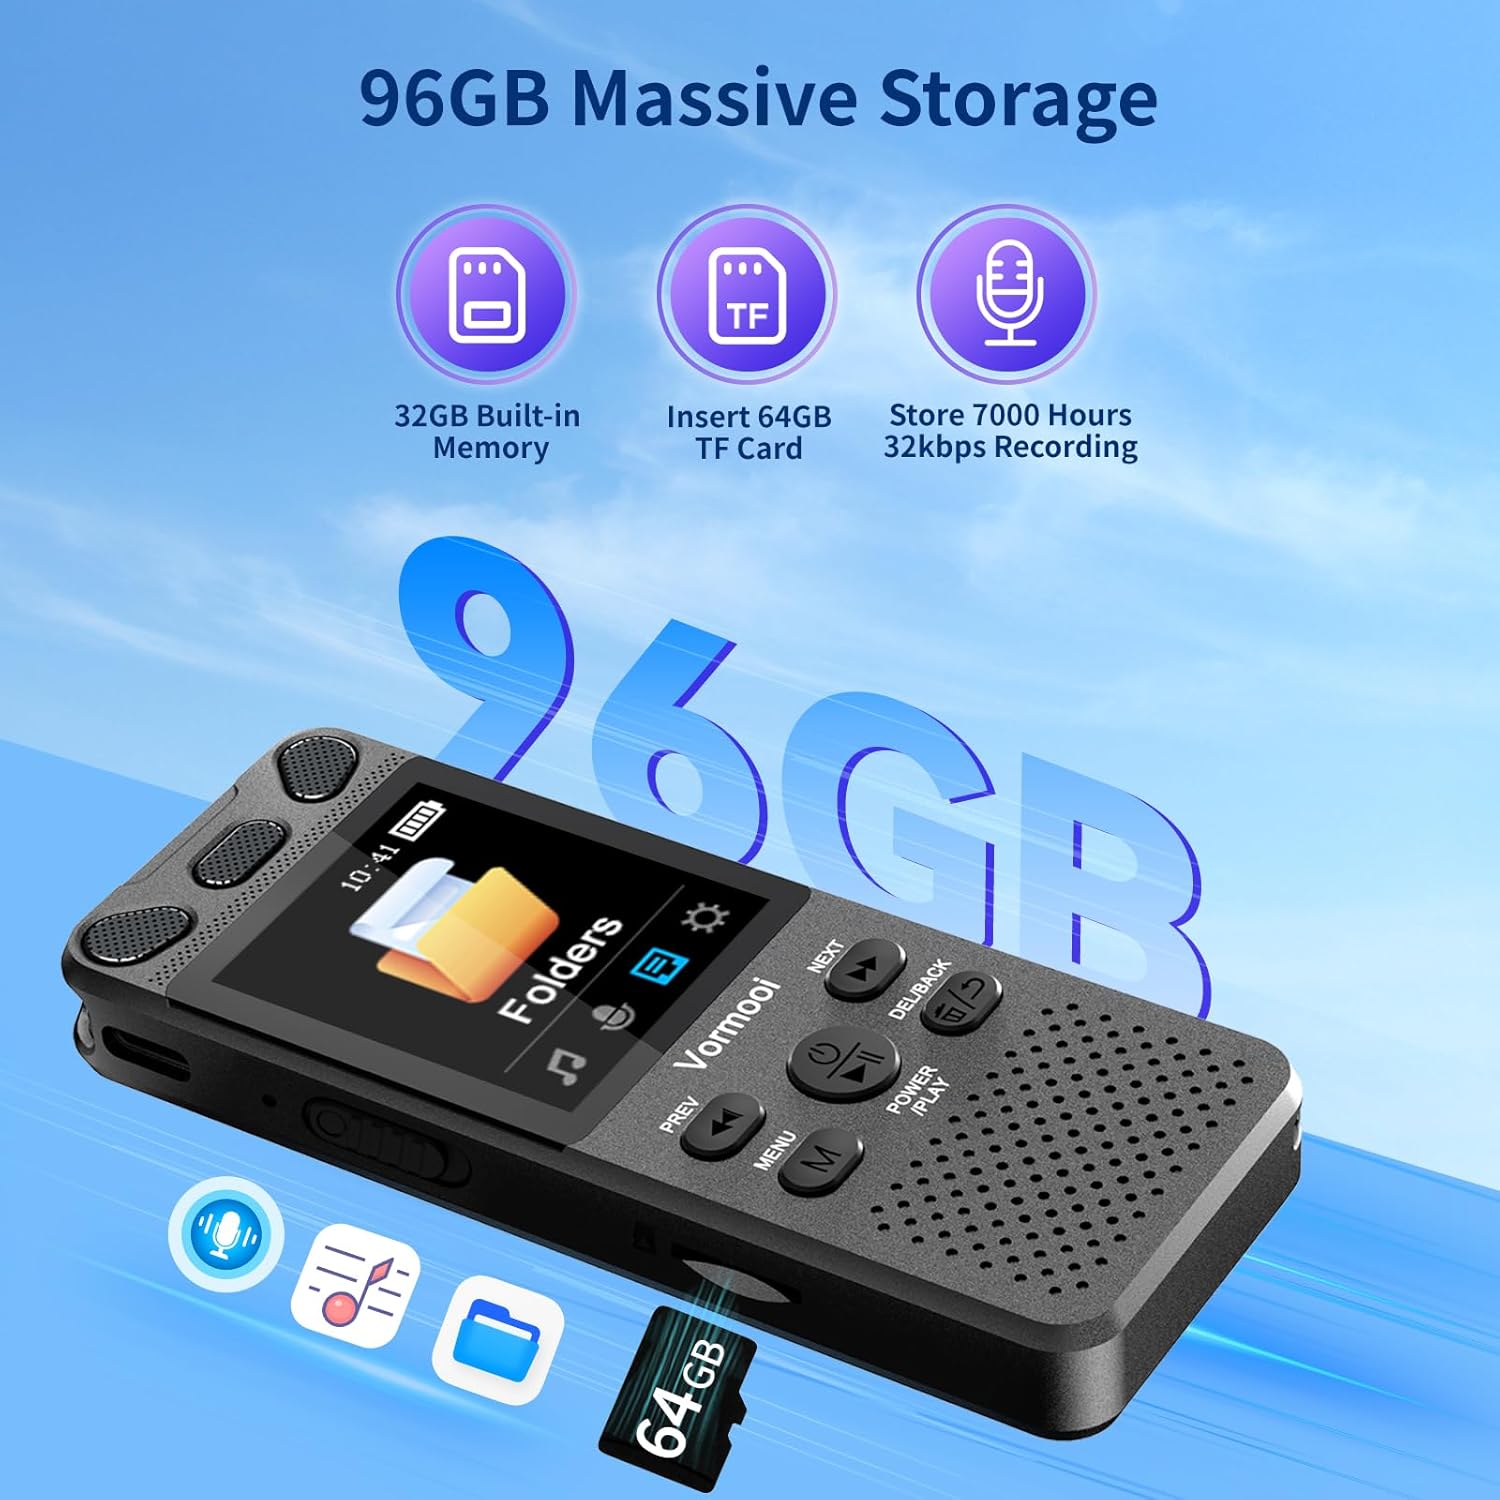
Image: The Vormooi V71 Digital Voice Recorder displaying its total 96GB storage capacity, composed of 32GB built-in memory and an inserted 64GB TF card, capable of storing up to 7000 hours of 32kbps recordings.
4.3 బాహ్య మైక్రోఫోన్ను కనెక్ట్ చేస్తోంది
The device supports an external 3.5mm 4-section microphone for enhanced recording quality.
- Locate the 3.5mm audio jack on the recorder.
- Plug the external microphone's 3.5mm connector into this jack.
- The device will automatically detect the external microphone.
5. ప్రాథమిక ఆపరేషన్
5.1 పవర్ ఆన్/ఆఫ్
- పవర్ ఆన్: Press and hold the 'POWER/PLAY' button until the screen illuminates.
- పవర్ ఆఫ్: Press and hold the 'POWER/PLAY' button until the screen turns off.
5.2 రికార్డింగ్
The V71 offers quick one-touch recording and voice-activated recording.
- వన్-టచ్ రికార్డింగ్: Slide the red button on the right side of the recorder up. Recording will start immediately, even if the device is off.
- Voice-Activated Recording (VOR): Enable VOR in the 'Settings' menu. When enabled, the recorder will automatically start recording when sound is detected and pause when silence occurs, conserving memory and battery.

Image: The Vormooi V71 Digital Voice Recorder displaying its recording interface, highlighting the 1536Kbps clear sound quality, the 2159 intelligent noise cancellation chip, and the one-touch record/save slider on the side.
5.3 Saving Recordings
To save an active recording:
- Slide the red button on the right side of the recorder క్రిందికి. The recording will be saved automatically.
5.4 ప్లేబ్యాక్
- From the main menu, navigate to 'Recordings' or 'Folders'.
- Use the 'PREV' and 'NEXT' buttons to select the desired recording.
- Press the 'POWER/PLAY' button to start playback.
5.5 వాల్యూమ్ సర్దుబాటు
During playback, use the volume buttons (usually '+' and '-') on the side of the device to adjust the speaker or headphone volume (0-32 levels).
5.6 తొలగిస్తోంది Files
- కు నావిగేట్ చేయండి file you wish to delete in the 'Recordings' or 'Folders' menu.
- Press the 'DEL/BACK' button.
- ప్రాంప్ట్ చేసినప్పుడు తొలగింపును నిర్ధారించండి.
6. అధునాతన ఫీచర్లు

Image: The Vormooi V71 Digital Voice Recorder with icons representing its advanced features: Voice Activation, Variable Speed Playback, Line-in Mic Record, Password Protection, Built-in Speaker, and A-B Repeat function.
6.1 పాస్వర్డ్ రక్షణ
Set a 6-digit password in the 'Settings' menu to protect your recordings and privacy. Only with the correct password can the device be accessed.
6.2 AB రిపీట్
During playback, press the 'MENU' button to activate A-B repeat. Select your start point (A) and end point (B) to repeatedly play a specific segment of a recording. This is useful for language learning or transcribing.
6.3 వేరియబుల్ స్పీడ్ ప్లేబ్యాక్
Adjust the playback speed of your recordings in the playback options. This feature allows you to slow down or speed up audio for easier transcription or review.
6.4 Line-in Recording
Use the provided 3.5mm transcription cable to connect the recorder to other audio sources like a mobile phone, PC, or MP3 player for direct recording.
6.5 కంప్యూటర్కు కనెక్ట్ అవుతోంది
Connect the recorder to your computer using the USB-C cable to transfer recording files. The device will appear as a removable disk drive.
7. స్పెసిఫికేషన్లు
| ఫీచర్ | స్పెసిఫికేషన్ |
|---|---|
| మోడల్ | V71 |
| మెటీరియల్ | జింక్ మిశ్రమం |
| ఉత్పత్తి కొలతలు | 10 x 3.9 x 1.26 సెం.మీ (3.94 x 1.54 x 0.5 అంగుళాలు) |
| ఉత్పత్తి బరువు | 98గ్రా (3.46oz) |
| స్క్రీన్ పరిమాణం | 2.15 అంగుళాలు |
| ప్రదర్శన రకం | 128 x 160 TFT Color Display |
| అంతర్గత మెమరీ | 32GB |
| బాహ్య మెమరీ | 64GB TF Card (included), supports 8-128GB exFAT format |
| మొత్తం నిల్వ సామర్థ్యం | 96GB |
| బ్యాటరీ కెపాసిటీ | 1100 ఎంఏహెచ్ లిథియం-అయాన్ |
| ఛార్జింగ్ సమయం | సుమారు 2 గంటలు |
| నిరంతర రికార్డింగ్ సమయం | Up to 110 hours (at 512kbps) |
| రికార్డింగ్ నాణ్యత | 32-1536Kbps PCM |
| రికార్డింగ్ ఫార్మాట్లు | MP3, WAV |
| మైక్రోఫోన్ | Built-in dual microphones, supports external 3.5mm 4-section microphone |
| ఇంటర్ఫేస్ | USB టైప్-C |
| అనుకూల పరికరాలు | MP3 Player, Personal Computer, Smartphone |
8. ట్రబుల్షూటింగ్
8.1 పరికరం ఆన్ కావడం లేదు
- Ensure the device is sufficiently charged. Connect it to a power source and charge for at least 30 minutes.
- Press and hold the 'POWER/PLAY' button for several seconds.
8.2 Cannot Record or Save Files
- Check if the memory (internal or TF card) is full. Delete unnecessary files.
- Ensure the TF card is properly inserted and formatted within the device. If not, format it via the device's settings menu.
- Verify that the recording slider is in the 'Record' position.
8.3 పేలవమైన రికార్డింగ్ నాణ్యత
- Ensure the built-in microphones are not obstructed.
- If using an external microphone, ensure it is securely connected and functioning correctly.
- Check recording settings (e.g., bitrate) and adjust if necessary.
- Reduce background noise in the recording environment.
8.4 Device Not Detected by Computer
- Ensure the USB-C cable is securely connected to both the recorder and the computer.
- మీ కంప్యూటర్లో వేరే USB పోర్ట్ని ప్రయత్నించండి.
- వేరే USB-C కేబుల్ని ప్రయత్నించండి.
- Restart both the recorder and the computer.
9. నిర్వహణ
- పరికరాన్ని పొడిగా ఉంచండి మరియు తీవ్రమైన ఉష్ణోగ్రతలకు దూరంగా ఉంచండి.
- స్క్రీన్ మరియు బాడీని మృదువైన, పొడి గుడ్డతో శుభ్రం చేయండి. కఠినమైన రసాయనాలను వాడకుండా ఉండండి.
- పరికరాన్ని వదలడం లేదా బలమైన ప్రభావాలకు గురి చేయడం మానుకోండి.
- Regularly back up important recordings to a computer to prevent data loss.
10. వారంటీ మరియు మద్దతు
The Vormooi V71 Digital Voice Recorder comes with a 2 సంవత్సరాల వారంటీ from the date of purchase. This warranty covers defects due to non-human factors.
If you encounter any issues with your device that are not resolved by the troubleshooting steps in this manual, or if the device fails due to non-human factors within the warranty period, please contact Vormooi customer support immediately. You can reach us via Amazon station letter or the after-sales email provided with your purchase documentation.
Please provide your purchase details (e.g., order number, date of purchase) when contacting support to facilitate a quicker resolution.