
1. పరిచయం
This manual provides detailed instructions for the setup, operation, and maintenance of your Vrriis WL081 Wireless HDMI Transmitter and Receiver kit. This system is designed to wirelessly extend a 1080P Full HD HDMI signal up to 1300 feet in open environments, offering features such as HDMI loop out and IR remote control support. Please read this manual thoroughly before using the product to ensure proper functionality and safety.
2. ప్యాకేజీ విషయాలు
క్రింద జాబితా చేయబడిన అన్ని అంశాలు మీ ప్యాకేజీలో చేర్చబడ్డాయని ధృవీకరించండి. ఏవైనా అంశాలు తప్పిపోయినా లేదా దెబ్బతిన్నా, దయచేసి కస్టమర్ మద్దతును సంప్రదించండి.
- 1 x Wireless HDMI Transmitter (TX)
- 1 x Wireless HDMI Receiver (RX)
- 2 x Antennas (for TX)
- 2 x Antennas (for RX)
- 2 x USB-C Power Cables
- 2 x Power Adapters (5V2A)
- 2 x IR Extension Cables
- 1 x వినియోగదారు మాన్యువల్
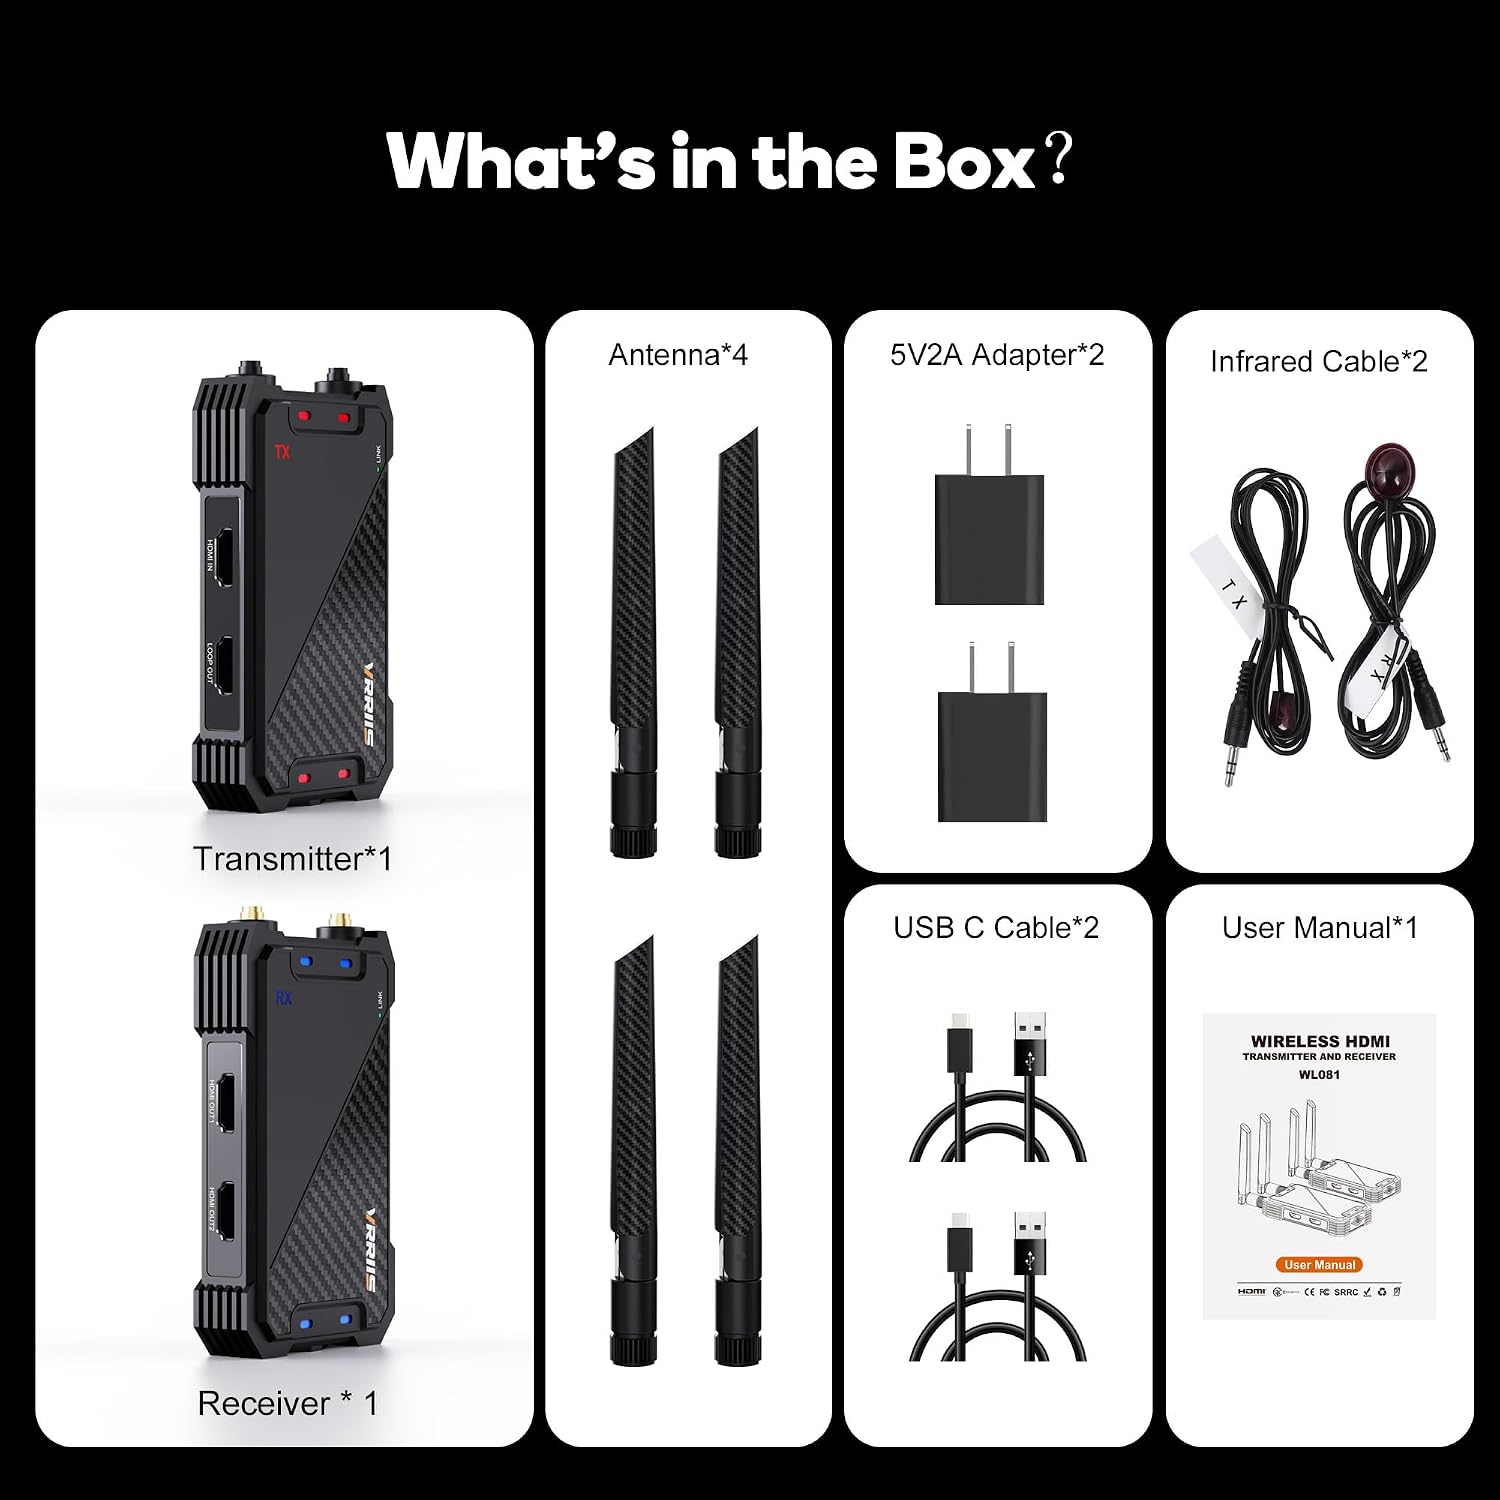
Figure 2.1: Included components in the Vrriis WL081 kit.
3. ఉత్పత్తి ముగిసిందిview
The Vrriis WL081 system consists of a Transmitter (TX) unit and a Receiver (RX) unit, each equipped with specific ports and indicators for seamless operation.
3.1 ట్రాన్స్మిటర్ (TX) యూనిట్
- HDMI IN: Connects to your HDMI source device (e.g., laptop, set-top box, camera).
- లూప్ అవుట్: Provides a local HDMI output for connecting a monitor near the source.
- IR అవుట్: Connects the IR extension cable to control the source device remotely.
- USB-C: పవర్ ఇన్పుట్ పోర్ట్.
- లింక్ సూచిక: Indicates connection status with the receiver.
- శక్తి సూచిక: శక్తి స్థితిని సూచిస్తుంది.
3.2 రిసీవర్ (RX) యూనిట్
- HDMI అవుట్: Connects to your display device (e.g., TV, projector).
- IR IN: Connects the IR extension cable to receive remote control signals.
- USB-C: పవర్ ఇన్పుట్ పోర్ట్.
- లింక్ సూచిక: Indicates connection status with the transmitter.
- శక్తి సూచిక: శక్తి స్థితిని సూచిస్తుంది.
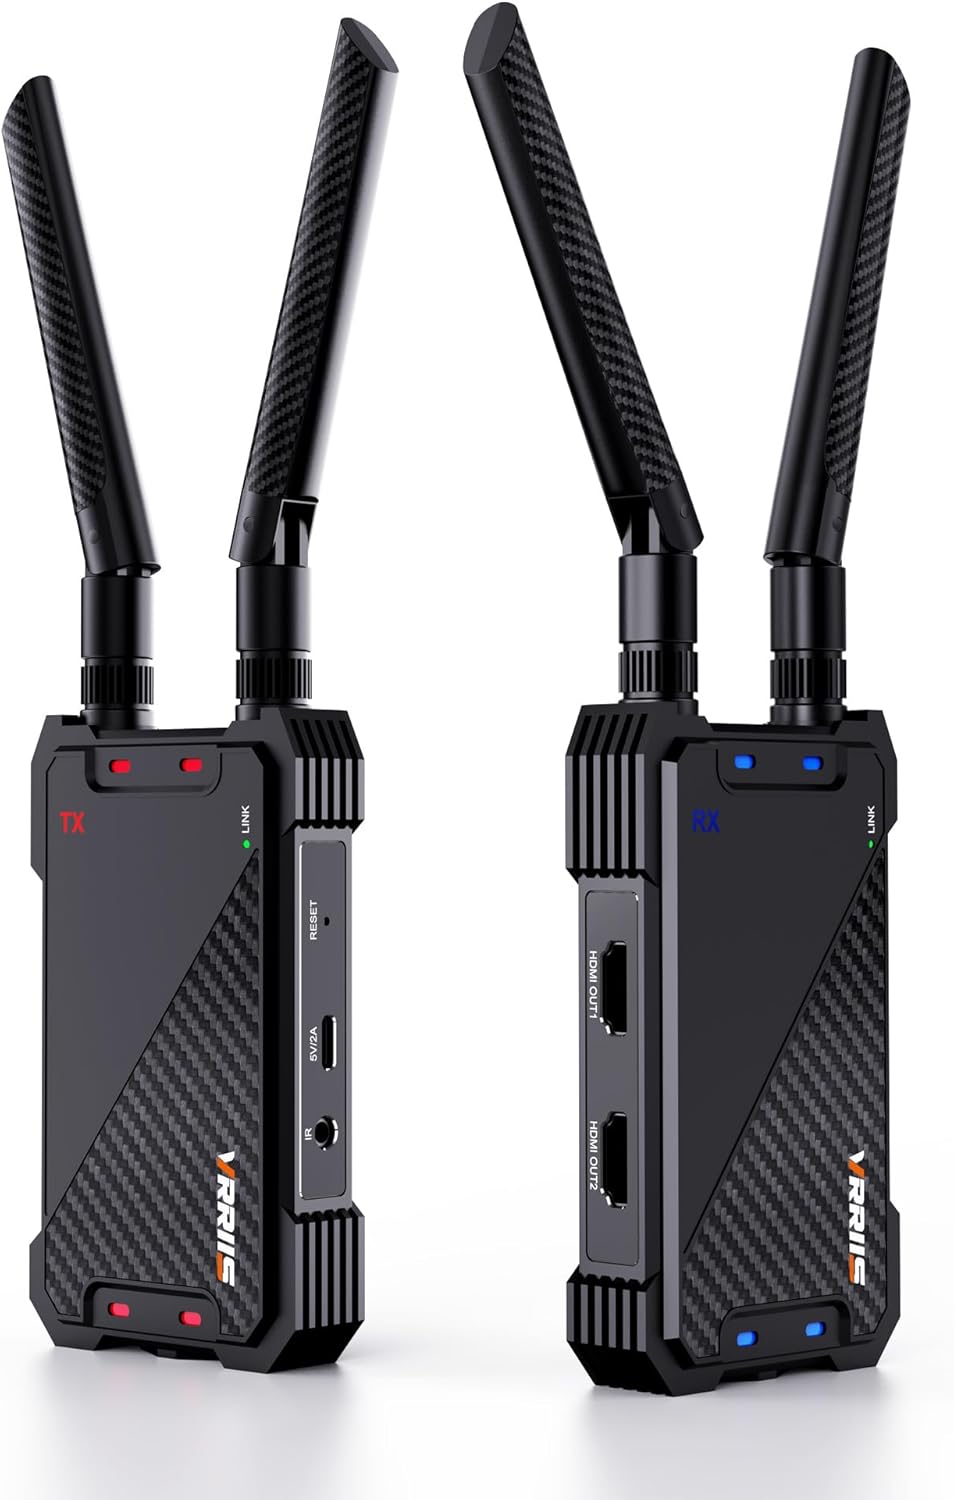
Figure 3.1: Vrriis WL081 Transmitter (left) and Receiver (right) units.
4. సెటప్ సూచనలు
Follow these steps for initial setup and pairing of your wireless HDMI system.
4.1 ప్రారంభ కనెక్షన్
- Attach the antennas to both the Transmitter (TX) and Receiver (RX) units.
- Connect your HDMI source device (e.g., laptop, set-top box) to the HDMI-IN port of the TX unit using an HDMI cable.
- Connect your display device (e.g., TV, projector) to the HDMI అవుట్ port of the RX unit using an HDMI cable.
- If desired, connect a local monitor to the లూప్ అవుట్ port of the TX unit.
- Connect the IR extension cable to the IR అవుట్ port on the TX unit and position the IR emitter near the IR sensor of your source device.
- Connect the IR extension cable to the IR IN port on the RX unit and position the IR receiver in a location where it can receive signals from your remote control.
- Connect the USB-C power cables to both the TX and RX units, then plug the power adapters into electrical outlets. The power indicators on both units should illuminate.

Figure 4.1: Connection diagram for the Vrriis WL081 system, illustrating HDMI IN, LOOP OUT, and HDMI OUT connections.

Figure 4.2: IR pass-back setup for remote control functionality.
4.2 జత చేసే సూచనలు
The transmitter and receiver units are typically pre-paired from the factory. If you need to re-pair them or add additional receivers, follow these steps:
- Ensure both the Transmitter (TX) and Receiver (RX) are powered on.
- Observe the green LINK light on both units.
- Connect the HDMI IN port on the TX unit to the HDMI OUT port on the RX unit using an HDMI cable.
- After successful pairing, both the green LINK lights on the TX and RX units will flash. If pairing fails, the lights will not flash.
- గమనిక: If pairing fails, reset both the transmitter and receiver, re-power them, then re-plug the HDMI cable and repeat the pairing steps.
- Once pairing is complete, disconnect the HDMI cable used for pairing and reconnect your source and display devices for normal use.

Figure 4.3: Pairing procedure for Transmitter and Receiver.
5. ఆపరేటింగ్ సూచనలు
5.1 ప్రాథమిక ఆపరేషన్
Once the TX and RX units are paired and connected to your source and display devices, the system will automatically transmit the HDMI signal. Ensure both units have a clear line of sight or minimal obstructions for optimal performance.
5.2 Using HDMI Loop Out
The TX unit features an HDMI LOOP OUT port. This allows you to connect a local display (e.g., a monitor) directly to the transmitter, enabling you to view the source content simultaneously at the source location without any additional latency.
5.3 IR రిమోట్ కంట్రోల్ కార్యాచరణ
The included IR extension cables enable you to control your HDMI source device from the location of the receiver. Point your remote control at the IR receiver connected to the RX unit. The signal will be transmitted wirelessly back to the TX unit, which then relays the command to your source device via the IR emitter.
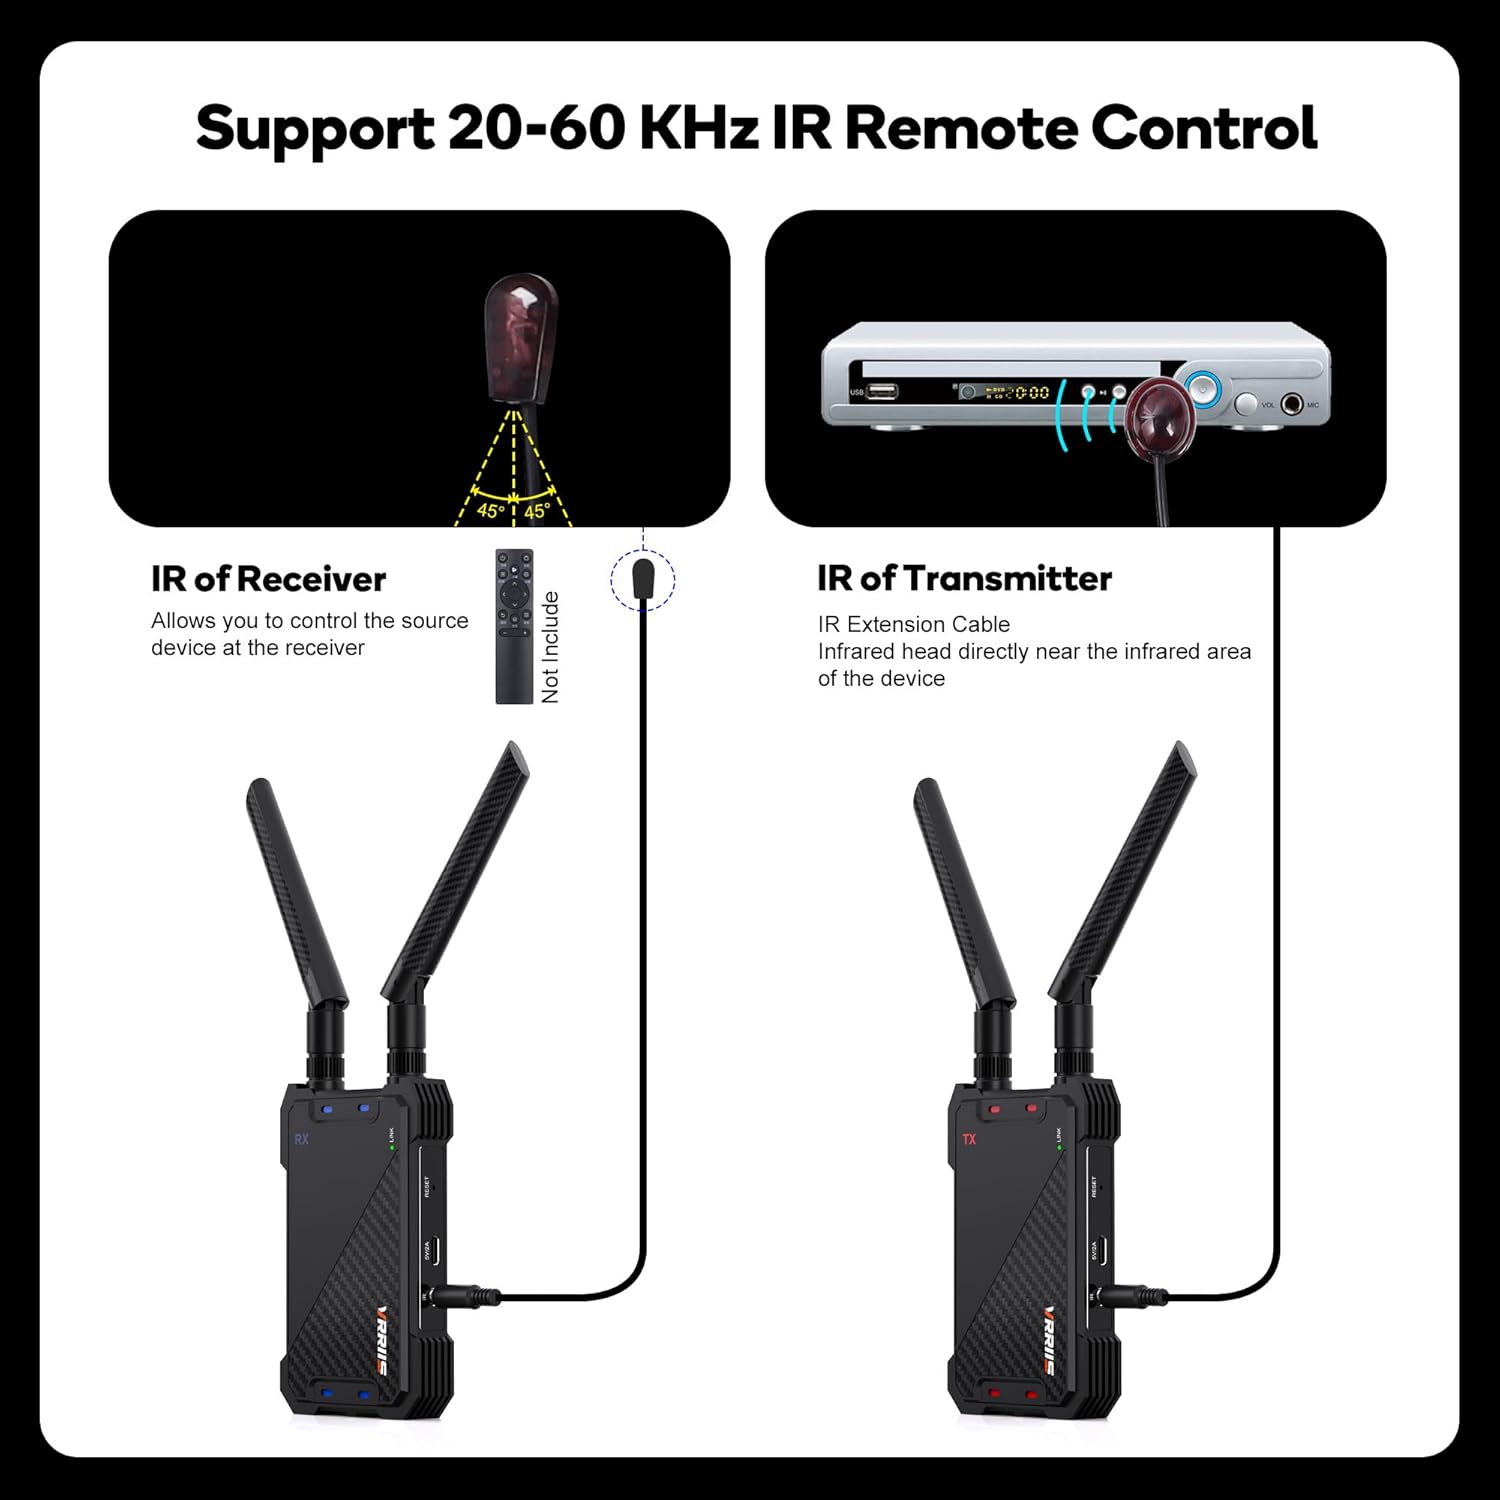
Figure 5.1: IR Remote Control setup.
5.4 Multi-Receiver Support (1 TX to 5 RXs)
The Vrriis WL081 system supports connecting one transmitter to up to five receivers simultaneously. This allows you to distribute the HDMI signal to multiple displays. Each additional receiver must be paired with the original transmitter following the pairing instructions in Section 4.2. Note that as the number of connected receivers increases, the effective wireless transmission distance may decrease.

Figure 5.2: Support for multiple receivers (up to 5 RXs) from a single transmitter.
6. నిర్వహణ
To ensure the longevity and optimal performance of your Vrriis WL081 system, follow these maintenance guidelines:
- శుభ్రపరచడం: Use a soft, dry cloth to clean the units. Avoid using liquid cleaners or abrasive materials.
- నిల్వ: ఎక్కువ కాలం ఉపయోగంలో లేనప్పుడు, యూనిట్లను ప్రత్యక్ష సూర్యకాంతి మరియు తీవ్రమైన ఉష్ణోగ్రతలకు దూరంగా చల్లని, పొడి ప్రదేశంలో నిల్వ చేయండి.
- వెంటిలేషన్: Ensure proper ventilation around the units to prevent overheating. Do not block any ventilation openings.
- శక్తి: Use only the provided power adapters. Using incompatible power sources may damage the device.
7. ట్రబుల్షూటింగ్
If you encounter issues with your Vrriis WL081 system, refer to the following troubleshooting steps:
| సమస్య | సాధ్యమైన కారణం | పరిష్కారం |
|---|---|---|
| No picture/signal on display |
|
|
| Intermittent signal/picture drops |
|
|
| IR రిమోట్ కంట్రోల్ పనిచేయడం లేదు |
|
|
| Latency/delay in video |
|
|
| Cannot transmit copyrighted content (HDCP) |
|
|
8. స్పెసిఫికేషన్లు
Technical specifications for the Vrriis WL081 Wireless HDMI Transmitter and Receiver.
- మోడల్: WL081
- బ్రాండ్: Vrriis
- రంగు: నలుపు
- ప్రసార దూరం: Up to 1300 feet (line of sight, open field)
- రిజల్యూషన్ మద్దతు: Up to 1080p @60Hz Full HD
- జాప్యం: సుమారు 0.05 సెకన్లు
- వైర్లెస్ ఫ్రీక్వెన్సీ: 2.4GHz / 5GHz Dual Band
- IR రిమోట్ కంట్రోల్: 20-60 KHz frequency support
- HDMI లూప్ అవుట్: అవును
- బహుళ-రిసీవర్ మద్దతు: 1 Transmitter to up to 5 Receivers
- HDCP మద్దతు: HDCP 1.4
- పవర్ ఇన్పుట్: USB-C, 5V2A
- అనుకూల పరికరాలు: Laptop, Projector, Set Top Box, Television, DSLR, etc.
- వస్తువు బరువు: సుమారు 1.27 పౌండ్లు (మొత్తం ప్యాకేజీ)
- ప్యాకేజీ కొలతలు: సుమారు 7.83 x 5.98 x 2.44 అంగుళాలు

Figure 8.1: Key features of the Vrriis WL081.
9. వారంటీ మరియు మద్దతు
For warranty information or technical assistance, please refer to the product packaging or contact Vrriis customer support directly. You can typically find contact details on the manufacturer's website or through your purchase platform. When contacting support, please have your product model number (WL081) and purchase details ready.