1. పరిచయం
The AdaLov CPE366 Wireless Bridge is designed to provide long-range, high-speed wireless connectivity for various outdoor applications. This manual provides detailed instructions for the installation, operation, and maintenance of your CPE366 devices, ensuring optimal performance and reliability.
1.1 ప్యాకేజీ విషయాలు
ఇన్స్టాలేషన్తో కొనసాగే ముందు, దయచేసి క్రింద జాబితా చేయబడిన అన్ని అంశాలు మీ ప్యాకేజీలో ఉన్నాయని ధృవీకరించండి:

Figure 1: Package Contents. Includes two wireless bridges, two adjustable mounting brackets, two PoE adapters, metal cable ties, network cables, and a user manual.
| అంశం | పరిమాణం |
|---|---|
| Wireless Bridge (CPE366) | 2 |
| సర్దుబాటు మౌంటు బ్రాకెట్ | 2 |
| PoE అడాప్టర్ | 2 |
| Metal Cable Ties | చేర్చబడింది |
| నెట్వర్క్ కేబుల్ | 2 |
| వినియోగదారు మాన్యువల్ | 1 |
| మరలు | 8 |
| ట్యూబ్ Clamp for Bridge | 2 |
| ట్యూబ్ Clamp for Bracket | 4 |
2. భద్రతా సమాచారం
పరికరానికి నష్టం జరగకుండా లేదా మీకు మీరే గాయం కాకుండా ఉండటానికి దయచేసి ఈ భద్రతా మార్గదర్శకాలను చదివి అనుసరించండి:
- అన్ని విద్యుత్ కనెక్షన్లకు సరైన గ్రౌండింగ్ ఉండేలా చూసుకోండి.
- పరికరాన్ని తెరవవద్దు casing; అన్ని సర్వీసింగ్లను అర్హత కలిగిన సిబ్బందికి సూచించండి.
- Install the device in a location that provides clear line of sight between units for optimal performance.
- Use only the provided PoE adapters and network cables.
- Mount the devices securely to prevent them from falling, especially in windy conditions.
3. సెటప్ మరియు ఇన్స్టాలేషన్
This section guides you through the physical installation and initial configuration of the CPE366 Wireless Bridge.
3.1 పరికరం ముగిసిందిview

Figure 2: Wireless Bridge Details. Shows the Reset Button, A-B Button, DC Power port, LAN (100Mbps) port, LAN (1000Mbps) port, Digital Tube display, and B Light indicator.
3.2 Mounting the Devices
The CPE366 comes with adjustable mounting brackets for flexible installation on walls or poles. Ensure the devices are mounted securely and have a clear line of sight to each other for optimal signal transmission.

Figure 3: Versatile Mount. The bracket features anti-slip design, a waterproof cap, and 150-degree adjustability.
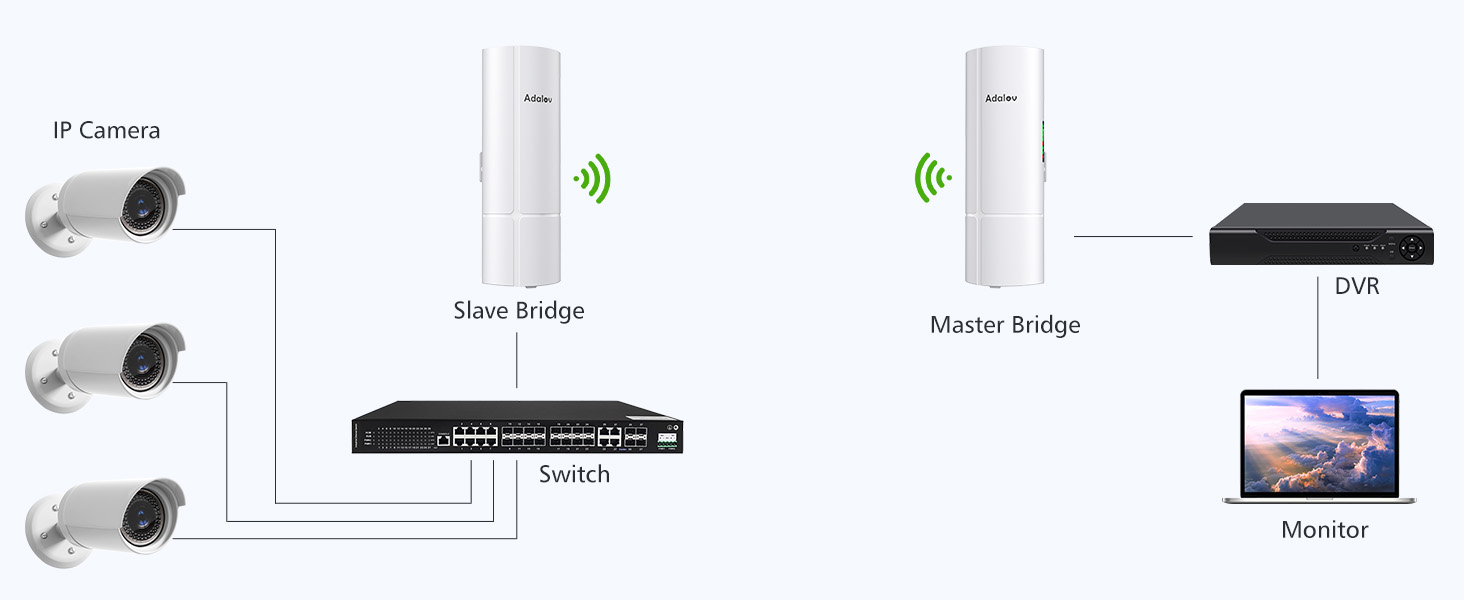
Figure 4: Bracket Mounts and Wide Application. Shows various mounting scenarios for the wireless bridge.
3.3 Wiring and Power
Connect the CPE366 devices using the provided PoE adapters and network cables. The PoE adapter supplies power and data over a single Ethernet cable.
- Connect one end of a network cable to the LAN port of the CPE366.
- Connect the other end of the network cable to the PoE port of the PoE adapter.
- Connect a second network cable from the LAN port of the PoE adapter to your router, switch, or computer.
- PoE అడాప్టర్ను పవర్ అవుట్లెట్లోకి ప్లగ్ చేయండి.
3.4 One-Key Pairing
The CPE366 supports one-key pairing for easy setup of a wireless link between two devices.

Figure 5: One-Key Pairing. Switch the slider to 'A' for the Master Bridge and 'B' for the Slave Bridge. Ensure both bridges are placed face-to-face during pairing.
3.5 కనెక్షన్ రేఖాచిత్రాలు
The CPE366 supports various network extension scenarios:
Point-to-Point (PTP) Connection

Figure 6: PTP Internet Extension. Connects a router to a remote network via Master and Slave CPE units.
Point-to-Multipoint (PTMP) Connection

Figure 7: PTP and PTMP Configurations. Illustrates connecting multiple IP cameras to a Master Bridge via Slave Bridges or a switch.
Security Camera System Integration
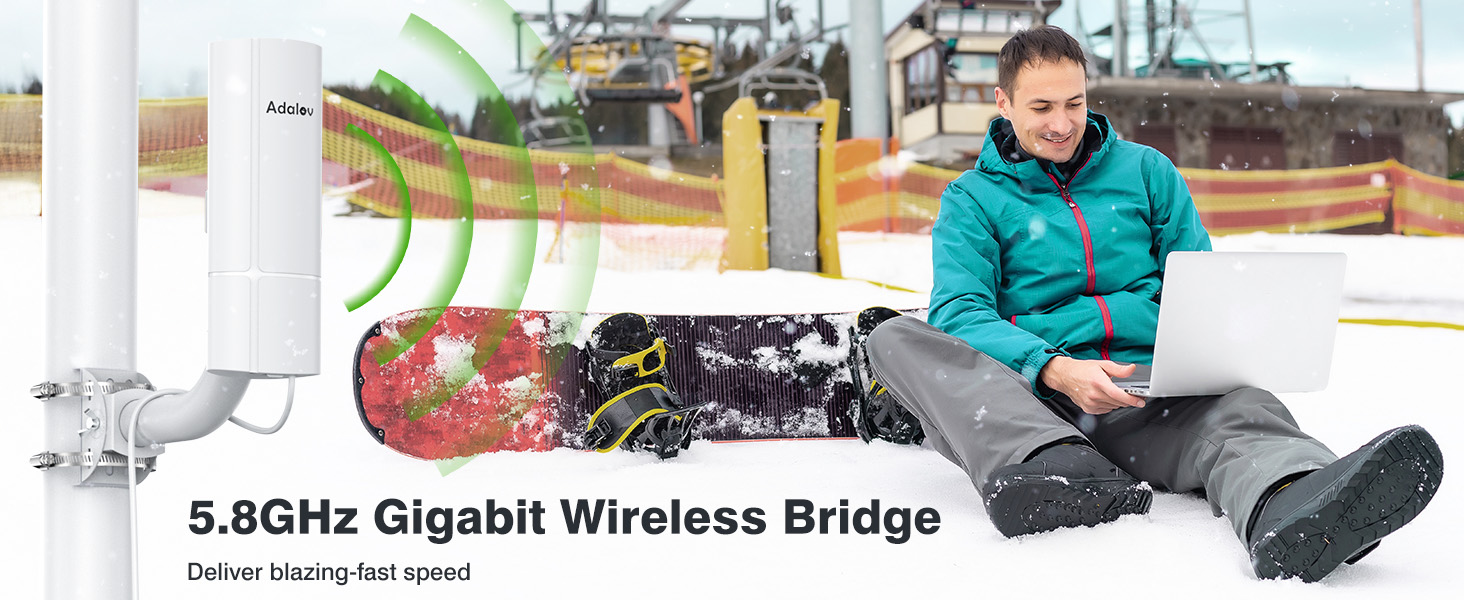
Figure 8: Security Camera Integration. Shows an IP camera connected to a Slave CPE, linking wirelessly to a Master CPE connected to an NVR/Switch.
స్టార్లింక్ ఇంటిగ్రేషన్

Figure 9: Starlink Integration. Connects a Starlink satellite dish via its Ethernet adapter to a Master Wireless Bridge, extending the network to a Slave Wireless Bridge and a remote router/computer.
4. ఆపరేటింగ్ మోడ్లు మరియు కాన్ఫిగరేషన్
The CPE366 supports multiple operating modes to suit various networking requirements.
4.1 Supported Modes
- PTP (Point-to-Point): Establishes a direct wireless link between two CPE devices.
- PTMP (Point-to-Multipoint): A master CPE communicates with multiple slave CPE devices.
- AP (యాక్సెస్ పాయింట్): Functions as a wireless access point.
- వంతెన: రెండు వైర్డు నెట్వర్క్లను వైర్లెస్గా కనెక్ట్ చేస్తుంది.
4.2 నెట్వర్క్ పనితీరు
The CPE366 operates on the 5.8GHz frequency band, offering speeds up to 900Mbps and a LAN data rate of 433Mbps. It provides a long-range transmission of up to 3 kilometers (1.9 miles) with a clear line of sight, ensuring high-speed connectivity with excellent anti-interference capabilities and low latency.
5. నిర్వహణ
The CPE366 is designed for outdoor durability and requires minimal maintenance.
5.1 వాతావరణ నిరోధకత
The device features an IP65 waterproof and dustproof rating, making it suitable for harsh outdoor conditions. It can withstand various weather elements, including rain, snow, and dust.

Figure 10: Waterproof Design. The CPE366 is built to withstand severe weather conditions.

Figure 11: IP65 Wireless Bridge. Weather resistance ready for any weather, operating from -30°C to 65°C.
5.2 శుభ్రపరచడం
పరికరాన్ని కాలానుగుణంగా తనిఖీ చేయండి, ధూళి లేదా చెత్త పేరుకుపోయిందా అని తనిఖీ చేయండి. బాహ్య భాగాన్ని మృదువైన, డి-క్లాసర్తో శుభ్రం చేయండి.amp వస్త్రం. కఠినమైన రసాయనాలు లేదా రాపిడి క్లీనర్లను ఉపయోగించవద్దు.
6. ట్రబుల్షూటింగ్
If you encounter issues with your CPE366 Wireless Bridge, refer to the following troubleshooting tips:
- శక్తి లేదు: Ensure the PoE adapter is properly connected to a power outlet and the network cable is securely plugged into the PoE port of the adapter and the CPE.
- లింక్ లేదు/సిగ్నల్ సరిగా లేదు:
- Verify that there is a clear line of sight between the two CPE devices. Obstructions like trees or buildings can significantly degrade signal quality.
- Check the alignment of the devices. Slight adjustments can improve signal strength.
- Ensure the devices are correctly configured as Master and Slave.
- Power cycle both CPE devices and the connected network equipment (router/switch).
- స్లో స్పీడ్:
- Confirm clear line of sight.
- Check for potential sources of interference in the 5.8GHz band.
- Ensure all network cables are Cat5e or higher and are in good condition.
- Network Not Accessible: Verify that the network settings (IP addresses, subnet masks) are correctly configured for your network environment.
7. స్పెసిఫికేషన్లు
Detailed technical specifications for the AdaLov CPE366 Wireless Bridge:
| ఫీచర్ | స్పెసిఫికేషన్ |
|---|---|
| మోడల్ సంఖ్య | CPE366 |
| బ్రాండ్ | AdaLov |
| కనెక్టివిటీ ప్రోటోకాల్ | Wi-Fi, ఈథర్నెట్ |
| వైర్లెస్ ఫ్రీక్వెన్సీ | 5.8GHz |
| గరిష్ట వైర్లెస్ వేగం | 900Mbps వరకు |
| LAN Data Rate | 433Mbps |
| LAN పోర్ట్లు | 100Mbps, 1000Mbps (Gigabit) |
| యాంటెన్నా | 16dBi High-Gain |
| కవరేజ్/పరిధి | Up to 3KM (1.9 miles) Line of Sight |
| జలనిరోధిత రేటింగ్ | IP65 |
| ఆపరేటింగ్ ఉష్ణోగ్రత | -30°C నుండి 65°C |
| విద్యుత్ సరఫరా | 12V DC (not included), 24V PoE (adapters included) |
| ఉత్పత్తి కొలతలు | 8.5 x 6 x 24.5 సెం.మీ |
| బరువు | 2.3 కిలోలు |
8. వారంటీ మరియు మద్దతు
For warranty information and technical support, please refer to the documentation included with your product or contact AdaLov customer service through their official channels. Keep your purchase receipt for warranty claims.