
BUXFMHT Sewing Machine 608A
BUXFMHT Mini Sewing Machine User Manual
Model: Sewing Machine 608A
1. పరిచయం
This manual provides comprehensive instructions for the safe and efficient operation, maintenance, and troubleshooting of your BUXFMHT Mini Sewing Machine. Please read this manual thoroughly before first use to ensure proper functionality and to prevent damage.
2. భద్రతా సూచనలు
యంత్రానికి గాయం లేదా నష్టం జరగకుండా ఉండటానికి ఎల్లప్పుడూ క్రింది భద్రతా జాగ్రత్తలను పాటించండి:
- Ensure the power adapter is disconnected when not in use, or when performing maintenance, cleaning, or changing accessories.
- Keep fingers away from the needle, especially during operation.
- Do not allow children to operate the machine without adult supervision.
- Use only the specified power adapter provided with the machine.
- Do not operate the machine if it is wet or if the power cord is damaged.
- ఆపరేషన్ సమయంలో యంత్రాన్ని స్థిరమైన, చదునైన ఉపరితలంపై ఉంచండి.
3. ప్యాకేజీ విషయాలు
ప్యాకేజీలో అన్ని అంశాలు ఉన్నాయని నిర్ధారించుకోండి:
- BUXFMHT Mini Sewing Machine
- ఫుట్ పెడల్
- పవర్ అడాప్టర్
- Sewing Kit (includes thread spools, spare needles, needle threader, scissors, ruler, thimble)
- ఇన్స్ట్రక్షన్ మాన్యువల్
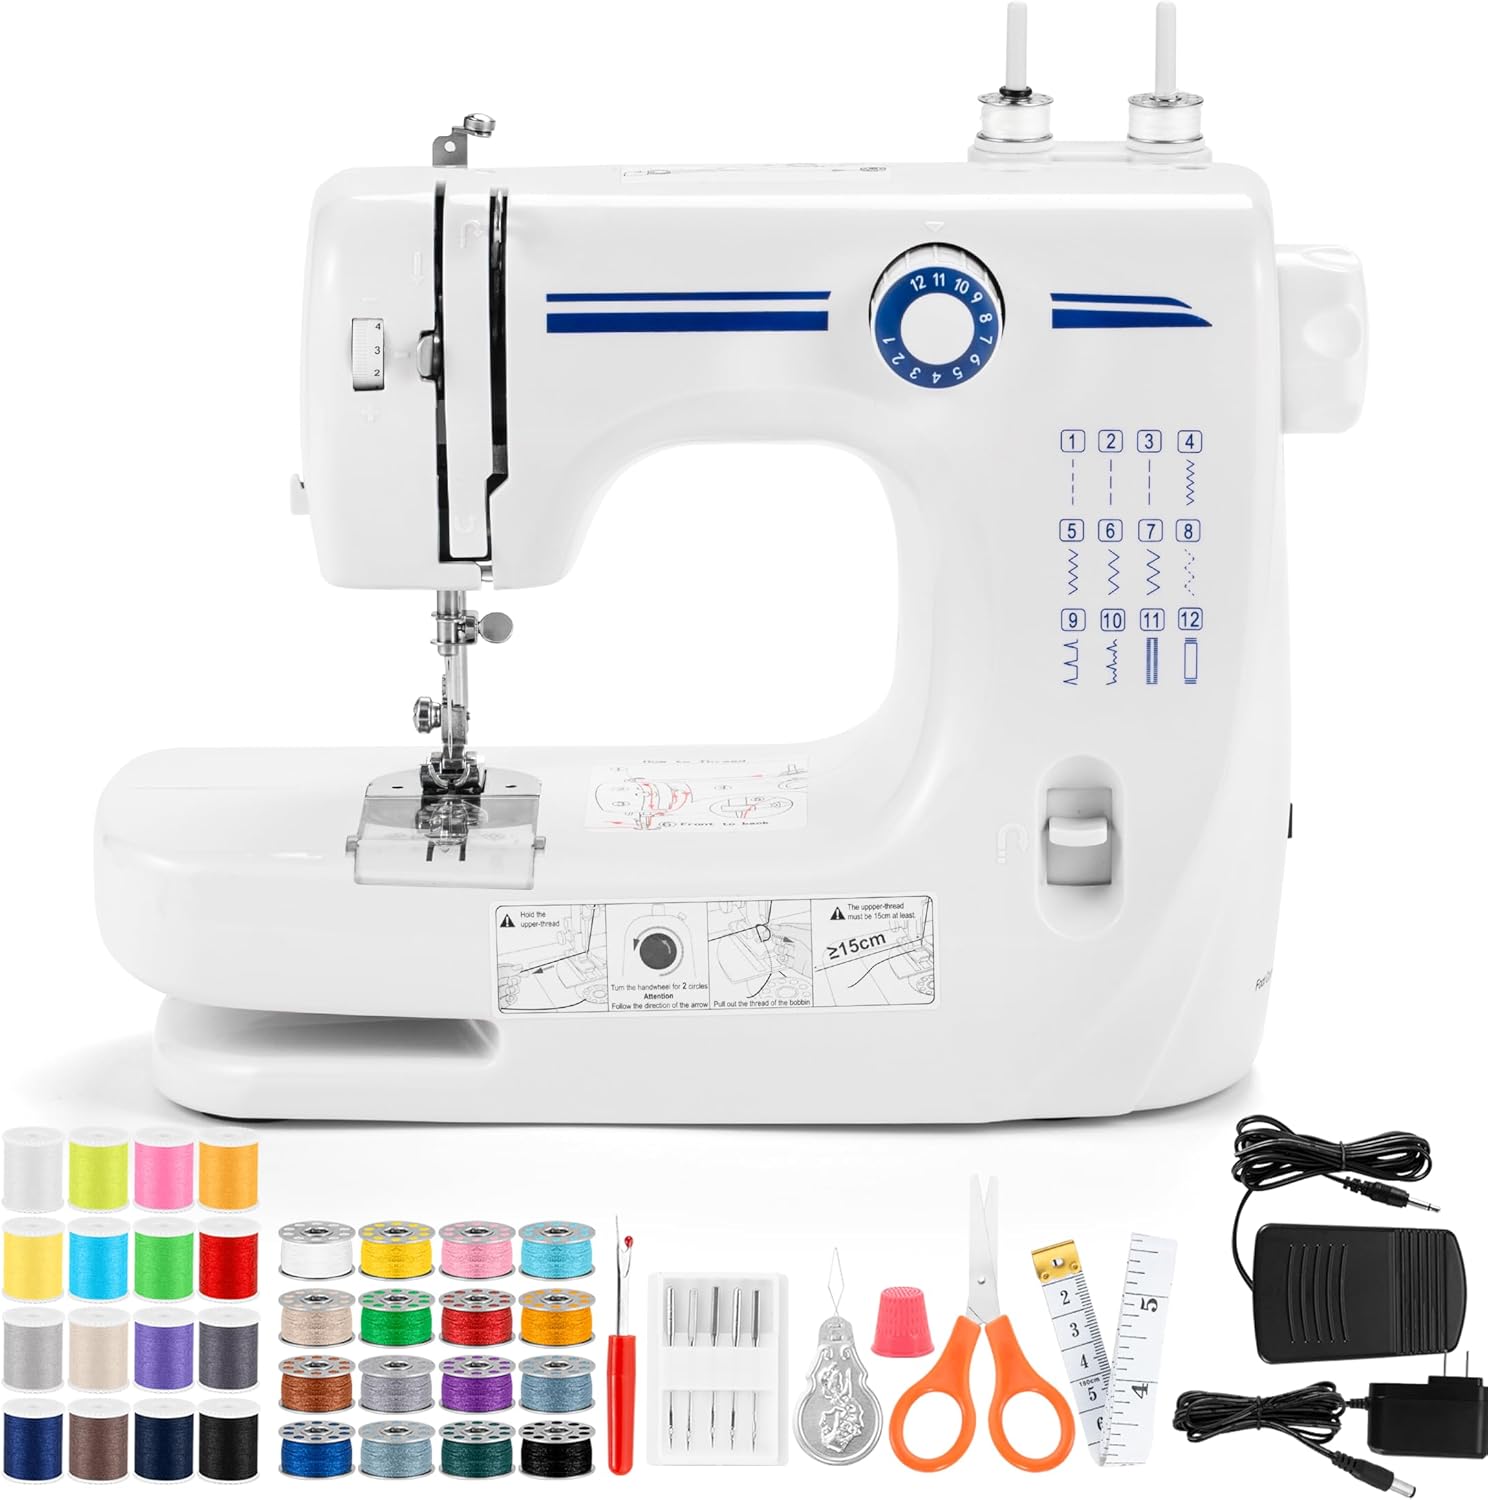
Image: The BUXFMHT Mini Sewing Machine shown with its complete set of accessories, including various colored thread spools, needles, scissors, a foot pedal, and power adapter.
4. ఉత్పత్తి ముగిసిందిview
Familiarize yourself with the main components of your sewing machine:

Image: A detailed diagram labeling key components of the sewing machine, including winding thread guides, pattern selecting dial, thread cutter, presser foot, bottom bobbin, spool pin, hand wheel, ON/OFF switch, adapter jack, and foot pedal jack.
- Winding Thread Guide: Guides the thread during bobbin winding.
- Pattern Selecting Dial: Used to choose from 12 built-in stitch patterns.
- థ్రెడ్ కట్టర్: Conveniently cuts threads after sewing.
- ప్రెస్సర్ ఫుట్: Holds the fabric firmly in place during sewing.
- Bottom Bobbin: Holds the lower thread.
- రివర్స్ కుట్టు ఫంక్షన్: Allows for reverse stitching to reinforce seams.
- Spool Pin: Holds the upper thread spool.
- హ్యాండ్ వీల్: Manually raises and lowers the needle.
- స్విచ్ ఆన్/ఆఫ్: యంత్రాన్ని ఆన్ లేదా ఆఫ్ చేస్తుంది.
- Adapter Jack: పవర్ అడాప్టర్ను కనెక్ట్ చేస్తుంది.
- Foot Pedal Jack: Connects the foot pedal for speed control.
- LED లైటింగ్: మెరుగైన దృశ్యమానత కోసం కుట్టు ప్రాంతాన్ని ప్రకాశవంతం చేస్తుంది.
5. సెటప్
5.1 పవర్ కనెక్షన్
- Insert the power adapter into the adapter jack on the back of the machine.
- Plug the other end of the adapter into a suitable power outlet.
- (Optional) Connect the foot pedal to the foot pedal jack for hands-free speed control.
5.2 యంత్రాన్ని థ్రెడ్ చేయడం
Proper threading is crucial for smooth operation and consistent stitches.
- బాబిన్ను వైండింగ్ చేయడం:
- బాబిన్ వైండర్ స్పిండిల్ పై ఖాళీ బాబిన్ ఉంచండి.
- స్పూల్ పిన్ నుండి థ్రెడ్ను బాబిన్ వైండింగ్ టెన్షన్ డిస్క్ ద్వారా గైడ్ చేయండి.
- బాబిన్ చుట్టూ దారాన్ని కొన్ని సార్లు చుట్టండి, ఆపై బాబిన్ వైండర్ స్పిండిల్ను కుడి వైపుకు నెట్టండి.
- Turn on the machine (or press the foot pedal) to wind the bobbin. Stop when the bobbin is full.
- దారాన్ని కత్తిరించి, కుదురును ఎడమ వైపుకు తిరిగి ఇవ్వండి.
- Inserting the Bottom Bobbin:
- బాబిన్ కవర్ ప్లేట్ తెరవండి.
- గాయపడిన బాబిన్ను బాబిన్ కేసులోకి చొప్పించండి, దారం సరైన దిశలో (సాధారణంగా అపసవ్య దిశలో) విప్పుతుందని నిర్ధారించుకోండి.
- Guide the thread through the tension spring and out the slot.
- బాబిన్ కవర్ ప్లేట్ను మూసివేయండి.
- Threading the Upper Thread:
- Raise the presser foot and the needle to its highest position using the hand wheel.
- Place a thread spool onto the spool pin.
- ఎగువ థ్రెడ్ గైడ్ ద్వారా థ్రెడ్ను గైడ్ చేయండి.
- Follow the numbered threading path indicated on the machine, ensuring the thread passes through the tension discs and the take-up lever.
- సూదిని ముందు నుండి వెనుకకు థ్రెడ్ చేయండి.

Image: Illustration showing the correct method of threading the needle from front to back. Incorrect threading (left) and correct threading (right) are depicted.
- బాబిన్ థ్రెడ్ను తీసుకురావడం:
- మీ ఎడమ చేతితో పై దారాన్ని తేలికగా పట్టుకోండి.
- Turn the hand wheel towards you to lower the needle, then continue turning to raise it again. The upper thread will catch the bobbin thread, forming a loop.
- Pull the loop to bring the bobbin thread up through the needle plate hole.
- Pull both upper and bobbin threads under the presser foot and towards the back of the machine, leaving about 4 inches of thread.

Image: Illustration demonstrating the importance of having at least 4 inches of both upper and bobbin threads extended before starting to sew to prevent issues.
6. ఆపరేటింగ్ సూచనలు
6.1 Selecting Stitch Patterns
The machine offers 12 built-in stitch patterns. Rotate the Pattern Selecting Dial to choose the desired stitch (1-12).

Image: A visual representation of the 12 available stitch patterns, including straight lines, blind hems, decorative stitches, and buttonhole stitches.
6.2 Adjusting Sewing Speed
The machine has two speed modes: Low (L) and High (H).
- ఉపయోగించండి బటన్ నియంత్రణ switch (L/O/H) on the machine to select the speed. 'O' is off.
- ప్రత్యామ్నాయంగా, ఫుట్ పెడల్ for variable speed control.

Image: Close-up of the sewing machine's button control for speed selection (L/O/H) and the foot pedal, illustrating the two methods of controlling sewing speed.
6.3 కుట్టుపని ప్రారంభించడం
- ఫాబ్రిక్ను ప్రెస్సర్ ఫుట్ కింద ఉంచండి.
- Lower the presser foot lever to hold the fabric firmly.
- Turn the hand wheel to lower the needle into the fabric at the starting point.
- Turn on the machine using the ON/OFF switch or press the foot pedal to begin sewing.
- Guide the fabric gently as it feeds through the machine.

Image: Illustration showing the correct position of the presser foot, pressing against the fabric, and the needle inserted into the fabric before starting to sew. Incorrect position (left) and correct position (right) are depicted.
6.4 రివర్స్ కుట్టుపని
To reinforce stitches at the beginning and end of a seam, press and hold the reverse sewing button/lever. The machine will sew backward. Release the button/lever to resume forward sewing.
6.5 Double Needle Sewing
This machine supports double needle sewing for stronger and more decorative seams. To use this feature, replace the single needle with a double needle and thread both needles according to the instructions for upper threading.

Image: A split image illustrating the two sewing modes: Double Thread Sewing (showing the bobbin area for lower thread) and Double Needles Sewing (showing the two spool pins for upper threads), highlighting the machine's versatility.
6.6 Automatic Winding Function
The machine features an improved automatic winding function for bobbins, reducing thread snagging and knotting during the winding process.

Image: A collage showing the automatic winding function, reverse sewing function, thread cutter, LED lighting, multi-layer fabrics sewing capability, and replaceable presser foot, demonstrating various features of the machine.
6.7 Cantilever Design
The cantilever design of the machine facilitates easier sewing of cylindrical items such as cuffs, collars, and pant legs, as well as children's clothing.
6.8 Fabric Compatibility
The machine is designed to handle various fabric types. Refer to the table below for guidance on fabric thickness and elasticity.

Image: A chart detailing fabric compatibility, indicating which types of fabrics (Cotton/Linen, Silk/Wool, Polyester, Elastic) are easy to sew, not smooth to sew, or difficult to sew based on their thickness (Regular, Thick, Thin, Hard, Soft).
| ఫాబ్రిక్ రకం | పత్తి/నార | పట్టు/ఉన్ని | పాలిస్టర్ | సాగే |
|---|---|---|---|---|
| రెగ్యులర్ | ✓ | ✗ ✗ ది | ✓ | △ △ △ कालिक |
| మందపాటి | ✓ | ✗ ✗ ది | ✓ | △ △ △ कालिक |
| సన్నగా | ✓ | ✗ ✗ ది | ✗ ✗ ది | ✓ |
| హార్డ్ | ✓ | ✗ ✗ ది | ✓ | △ △ △ कालिक |
| మృదువైన | ✗ ✗ ది | ✗ ✗ ది | ✗ ✗ ది | ✓ |
| పురాణం: ✓ = Easy to Sew, △ = Not Smooth to Sew, ✗ = Difficult to Sew గమనికలు: 1. Definition of fabric thickness: Thin (two layers thickness ≤ 0.35mm), Thick (two layers thickness ≥ 0.8mm), Regular (two layers thickness between 0.35mm and 0.8mm). 2. Definition of elastic cloth: If a 100mm x 30mm cloth extends to or over 108mm under 0.5KG tension force, it is defined as elastic. 3. Hard fabric examples: Jeans, fine canvas. 4. Soft fabric examples: Towel, duster. | ||||
7. నిర్వహణ
క్రమం తప్పకుండా నిర్వహణ మీ కుట్టు యంత్రం యొక్క దీర్ఘాయువు మరియు సరైన పనితీరును నిర్ధారిస్తుంది.
- శుభ్రపరచడం: Regularly clean lint and dust from the bobbin area and feed dogs using a small brush. Disconnect power before cleaning.
- నూనె వేయడం: Refer to the specific oiling points in the detailed manual if provided. Generally, a few drops of sewing machine oil are applied to moving metal parts.
- సూది భర్తీ: Replace needles frequently, especially when sewing different fabric types or if the needle becomes bent or dull. Ensure the flat side of the needle faces the back when inserting.
- నిల్వ: ఉపయోగంలో లేనప్పుడు పొడి, దుమ్ము రహిత వాతావరణంలో యంత్రాన్ని నిల్వ చేయండి.
8. ట్రబుల్షూటింగ్
ఈ విభాగం మీరు ఎదుర్కొనే సాధారణ సమస్యలను పరిష్కరిస్తుంది:
| సమస్య | సాధ్యమైన కారణం | పరిష్కారం |
|---|---|---|
| యంత్రం ప్రారంభం కాదు | Power not connected; ON/OFF switch off; Foot pedal not connected/faulty. | Check power connection; Turn ON/OFF switch to L or H; Ensure foot pedal is securely connected. |
| కుట్టిన కుట్లు | Incorrect needle insertion; Bent or dull needle; Improper threading; Incorrect needle size for fabric. | Re-insert needle correctly; Replace needle; Re-thread machine; Use appropriate needle for fabric type. |
| థ్రెడ్ బ్రేకింగ్ | Incorrect tension; Poor quality thread; Improper threading; Bent needle; Thread snagging. | Adjust tension dial; Use good quality thread; Re-thread machine carefully; Replace needle; Check for obstructions in thread path. |
| Uneven stitches / Fabric puckering | Incorrect tension; Incorrect stitch length; Fabric not fed smoothly. | Adjust tension; Select appropriate stitch length; Guide fabric gently without pulling or pushing. |
| Bobbin thread tangling | Improper bobbin winding; Incorrect bobbin insertion; Upper thread not correctly threaded. | Re-wind bobbin evenly; Re-insert bobbin correctly; Ensure upper thread is correctly threaded through all guides. |
ఈ పరిష్కారాలను ప్రయత్నించిన తర్వాత కూడా సమస్యలు కొనసాగితే, దయచేసి కస్టమర్ మద్దతును సంప్రదించండి.
9. స్పెసిఫికేషన్లు
| ఫీచర్ | వివరాలు |
|---|---|
| మోడల్ సంఖ్య | Sewing Machine 608A |
| బ్రాండ్ | BUXFMHT |
| కుట్టు నమూనాలు | 12 Built-In Patterns |
| స్పీడ్ మోడ్లు | Dual Speed (Low/High) |
| Sewing Modes | Single Needle, Double Needle |
| రివర్స్ కుట్టుపని | అవును |
| లైటింగ్ | LED లైట్ |
| Winding Function | ఆటోమేటిక్ |
| డిజైన్ ఫీచర్ | కాంటిలివర్ డిజైన్ |
| ఉత్పత్తి కొలతలు | 30 x 20 x 20 అంగుళాలు (76.2 x 50.8 x 50.8 సెం.మీ.) |
| వస్తువు బరువు | 5.5 పౌండ్లు (2.5 కిలోలు) |
| మెటీరియల్ | Thickened PP material shell, stainless steel components |
| UPC | 727370925534 |
10. వారంటీ మరియు మద్దతు
BUXFMHT provides a 12 నెలల నాణ్యత హామీ for this sewing machine. If you encounter any issues or have questions, please contact BUXFMHT customer service. They aim to respond and resolve inquiries within 24 hours.
For support, please refer to the contact information provided with your purchase or visit the official BUXFMHT store on Amazon: BUXFMHT Amazon Store.
ముఖ్యమైన గమనిక: The sewing machine package includes a fabric piece used by the manufacturer for testing threading. This is not an indication of a used product. Please read the instruction manual carefully before operating the machine for the first time to prevent damage due to improper operation.
Ask a question about this manual
Ask about setup, troubleshooting, compatibility, parts, safety, or missing instructions. Manuals+ will review the question and use this page’s manual context to help answer it.