
1. ముఖ్యమైన భద్రతా సూచనలు
ఈ పవర్ టూల్తో అందించబడిన అన్ని భద్రతా హెచ్చరికలు, సూచనలు, దృష్టాంతాలు మరియు స్పెసిఫికేషన్లను చదవండి. దిగువ జాబితా చేయబడిన అన్ని సూచనలను పాటించడంలో వైఫల్యం విద్యుత్ షాక్, అగ్ని మరియు/లేదా తీవ్రమైన గాయానికి దారితీయవచ్చు.
- పని ప్రాంత భద్రత: పని ప్రదేశాన్ని శుభ్రంగా మరియు బాగా వెలుతురు వచ్చేలా ఉంచండి. మండే ద్రవాలు, వాయువులు లేదా ధూళి వంటి పేలుడు వాతావరణాలలో విద్యుత్ ఉపకరణాలను ఆపరేట్ చేయవద్దు.
- విద్యుత్ భద్రత: పవర్ టూల్ ప్లగ్లు అవుట్లెట్కు సరిపోలాలి. ప్లగ్ను ఎప్పుడూ ఎట్టి పరిస్థితుల్లోనూ సవరించవద్దు. మట్టితో లేదా నేలతో కప్పబడిన ఉపరితలాలతో శరీర సంబంధాన్ని నివారించండి.
- వ్యక్తిగత భద్రత: Always wear eye protection, respiratory protection, and appropriate clothing. Do not overreach. Maintain proper footing and balance at all times.
- సాధన వినియోగం మరియు సంరక్షణ: పవర్ టూల్ను బలవంతంగా వాడకండి. మీ అప్లికేషన్ కోసం సరైన పవర్ టూల్ను ఉపయోగించండి. ఏవైనా సర్దుబాట్లు చేయడానికి, ఉపకరణాలను మార్చడానికి లేదా పవర్ టూల్స్ నిల్వ చేయడానికి ముందు పవర్ సోర్స్ నుండి ప్లగ్ను డిస్కనెక్ట్ చేయండి.
- Specific Sprayer Safety: Ensure proper ventilation when spraying. Do not spray flammable materials near open flames or ignition sources. Always clean the sprayer thoroughly after each use.
2. ఉత్పత్తి ముగిసిందిview మరియు ప్యాకేజీ విషయాలు
The VISLONE 300W Electric Paint Sprayer is designed for efficient application of various coatings. Familiarize yourself with its components and ensure all items are present.

చిత్రం 2.1: పైగాview of the VISLONE 300W Electric Paint Sprayer.
2.1 Package List:
- 1 x Paint Sprayer
- 2 x బ్యాటరీ (1300mAh)
- 1 x క్లీనింగ్ బ్రష్
- 1 x క్లీనింగ్ సూది
- 4 x Nozzles (Φ1.0mm, 1.8mm, 2.0mm, 2.5mm)
- 3 x రబ్బరు పట్టీ
- 1 x స్నిగ్ధత కప్
- 1 x యూజర్ మాన్యువల్ (ఈ పత్రం)
- 1 x ఛార్జర్
3. సెటప్ మరియు అసెంబ్లీ
3.1 పెయింట్ సిద్ధం చేయడం
- Ensure the paint or coating material is suitable for spray application.
- Use the provided viscosity cup to check the paint's viscosity. Thin the paint with the appropriate solvent (water for latex, mineral spirits for oil-based) until it passes through the viscosity cup within the recommended time (refer to paint manufacturer's instructions).
- Strain the thinned paint to remove any lumps or debris that could clog the nozzle.
3.2 స్ప్రేయర్ను అసెంబ్లింగ్ చేయడం
- Attach the paint container (800ml tank) to the sprayer body by screwing it securely.
- Insert a charged battery into the battery slot at the base of the handle until it clicks into place.

Figure 3.1: The 800ml capacity paint tank attached to the sprayer.
3.3 Selecting and Installing Nozzles
The sprayer includes four copper nozzles of different sizes (Φ1.0mm, 1.8mm, 2.0mm, 2.5mm) for various paint types and project requirements.
- Choose the appropriate nozzle size for your paint and desired finish. Generally, smaller nozzles are for thinner materials and finer finishes, while larger nozzles are for thicker materials and faster coverage.
- Unscrew the nozzle cap from the front of the sprayer.
- Insert the selected nozzle and ensure a gasket is properly seated.
- Screw the nozzle cap back on securely.

Figure 3.2: The four interchangeable copper nozzles (1.0mm, 1.8mm, 2.0mm, 2.5mm).
3.4 Adjusting Spray Patterns
The sprayer offers three spray patterns: horizontal, vertical, and circular. Rotate the air cap to select the desired pattern.
- క్షితిజ సమాంతర: For spraying up and down motions.
- నిలువు: For spraying side to side motions.
- సర్క్యులర్: చిన్న ప్రాంతాలు లేదా వివరణాత్మక పని కోసం.
4. ఆపరేషన్
4.1 Powering On and Testing
- Ensure the sprayer is fully assembled and the paint tank is filled.
- Point the sprayer at a test surface (e.g., cardboard) and press the trigger to start spraying.
- Adjust the flow control knob on the sprayer to achieve the desired paint output. The flow rate can be adjusted between 500-800ml/min.

Figure 4.1: Adjusting the flow control and selecting spray patterns (circular, horizontal, vertical).
4.2 స్ప్రేయింగ్ టెక్నిక్
- Maintain a consistent distance (typically 6-12 inches) from the surface being painted.
- Move the sprayer in smooth, even strokes, overlapping each pass by about 50% to ensure uniform coverage.
- పెయింట్ పేరుకుపోకుండా ఉండటానికి ప్రతి స్ట్రోక్ చివరిలో ట్రిగ్గర్ను విడుదల చేయండి.
- ఉత్తమ ఫలితాల కోసం, ఒక మందపాటి పొరకు బదులుగా అనేక సన్నని పొరలను వేయండి.
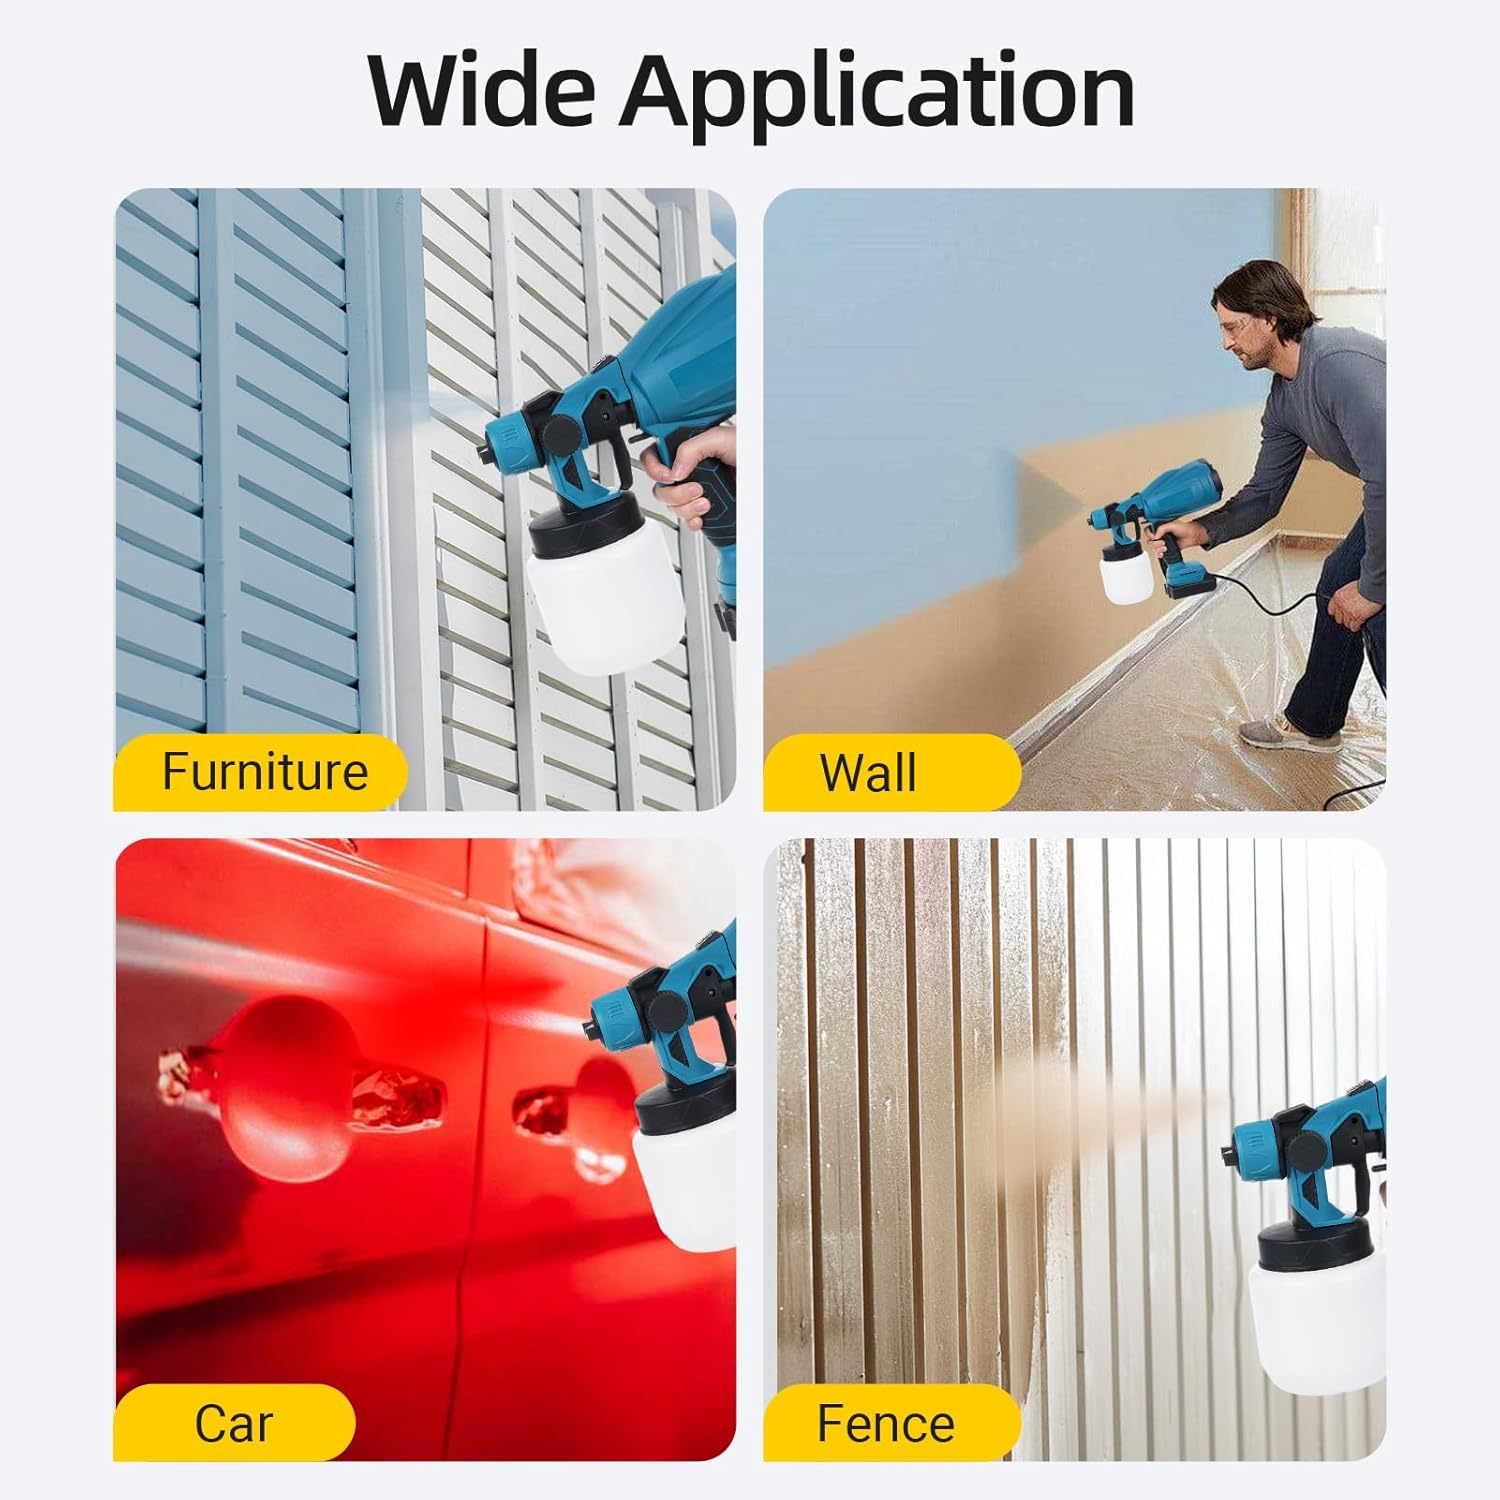
చిత్రం 4.2: ఉదాamples of the paint sprayer's application on furniture, walls, cars, and fences.
5. నిర్వహణ మరియు శుభ్రపరచడం
Proper cleaning after each use is essential to ensure the longevity and optimal performance of your paint sprayer.
5.1 శుభ్రపరచడం కోసం వేరుచేయడం
- Disconnect the battery from the sprayer.
- Unscrew the paint container and empty any remaining paint.
- Unscrew the nozzle cap and remove the nozzle and gasket.
- The front section of the sprayer can be easily detached from the motor housing for thorough cleaning.

Figure 5.1: The sprayer's design allows for easy disassembly for cleaning.
5.2 శుభ్రపరిచే విధానం
- Fill the paint container with the appropriate cleaning solution (water for water-based paints, solvent for oil-based paints).
- Reattach the container and spray the cleaning solution through the sprayer until it runs clear.
- Thoroughly clean all disassembled parts (nozzle, gasket, container, suction tube) using the provided cleaning brush and needle.
- స్ప్రేయర్ బయటి భాగాన్ని ప్రకటనతో తుడవండి.amp గుడ్డ.
- Allow all parts to dry completely before reassembly or storage.
5.3 నిల్వ
Store the clean, dry sprayer in a cool, dry place, away from direct sunlight and extreme temperatures. Ensure the battery is removed if storing for extended periods.
6. ట్రబుల్షూటింగ్
| సమస్య | సాధ్యమైన కారణం | పరిష్కారం |
|---|---|---|
| స్ప్రే లేదు లేదా బలహీనమైన స్ప్రే | Clogged nozzle; paint too thick; low paint level; air leak. | Clean nozzle; thin paint; refill tank; check all connections for tightness. |
| అసమాన స్ప్రే నమూనా | Incorrect nozzle selection; clogged air cap; inconsistent spraying distance. | Select appropriate nozzle; clean air cap; maintain consistent distance. |
| పెయింట్ డ్రిప్స్ లేదా రన్స్ | Too much paint flow; spraying too close; paint too thin. | Reduce flow rate; increase spraying distance; thicken paint slightly. |
| స్ప్రేయర్ ఆన్ కావడం లేదు | Battery not charged; battery not properly inserted. | Charge battery; ensure battery is securely inserted. |
7. స్పెసిఫికేషన్లు
| ఫీచర్ | స్పెసిఫికేషన్ |
|---|---|
| రేట్ చేయబడిన ఇన్పుట్ పవర్ | 300W |
| కంటైనర్ కెపాసిటీ | 800మి.లీ |
| నాజిల్ పరిమాణాలు | Φ1.0mm, 1.8mm, 2.0mm, 2.5mm (4 copper nozzles) |
| మోటార్ వేగం | 30000rpm / min |
| స్ప్రేయింగ్ దూరం | 200-500 సెం.మీ |
| Paint Flow | 500-800ml/నిమి |
| బ్యాటరీ | 2 x 1300mAh (included) |
| మెటీరియల్ | PP (పాలీప్రొఫైలిన్) |
| వస్తువు బరువు | 3.91 పౌండ్లు |
| ప్యాకేజీ కొలతలు | 10.43 x 7.68 x 6.89 అంగుళాలు |

Figure 7.1: Dimensions of the VISLONE 300W Electric Paint Sprayer.
8. వారంటీ మరియు మద్దతు
For warranty information or technical support, please refer to the contact details provided by your retailer or visit the official VISLONE webసైట్. కొనుగోలు రుజువుగా మీ కొనుగోలు రసీదుని ఉంచండి.
మీరు సందర్శించవచ్చు VISLONE Store on Amazon మరింత సమాచారం కోసం.