
పరిచయం
Thank you for choosing the ZEALFEEL 11x8ft Golf Enclosure Net. This product is designed to provide a realistic and safe environment for golf practice and simulation at home. Please read this manual carefully before assembly and use to ensure proper setup and operation. Keep these instructions for future reference.
భద్రతా సమాచారం
- Ensure adequate space around the enclosure for safe swinging and ball impact. Recommended 9ft ceiling clearance for full swing safety.
- Always check all connections and components for stability before each use.
- Use only appropriate golf balls (real or foam) designed for simulator use.
- Keep children and pets away from the enclosure during use.
- Do not hang or climb on the frame.
- If using outdoors, secure the net with ground stakes and sandbags to prevent movement in windy conditions.
ప్యాకేజీ విషయాలు
క్రింద జాబితా చేయబడిన అన్ని భాగాలు మీ ప్యాకేజీలో చేర్చబడ్డాయని ధృవీకరించండి:
- 1 x Golf Sim Enclosure (Frame components)
- 1 x HD Blank Sim Screen (118” x 88”)
- 2 x Side Barrier Nets
- 4 x Long Sandbags (for overall frame stability)
- 22 x Bungee Cords (for screen attachment)
- 4 x Ground Stakes (for additional anchoring)
- 1 x ఇన్స్ట్రక్షన్ మాన్యువల్

Image: All components included in the Zealfeel Golf Enclosure Net package, laid out for inspection.
సెటప్ సూచనలు
Follow these steps to assemble your golf enclosure net. It is recommended to have two people for easier assembly.
- బేస్ ఫ్రేమ్ను సమీకరించండి: Lay out all the numbered steel poles on a clean, flat surface. Connect the poles according to the diagrams provided in the included instruction manual, ensuring the spring-loaded buttons snap securely into place. The foam-padded poles are typically for the top and side sections.
- Erect the Frame: Once the base is assembled, carefully lift the side and top poles to form the full enclosure structure. Ensure all connections are firm.
- Attach the Blackout Curtains: Drape the high-density blackout curtains over the frame. Secure them using the integrated straps and buckles, ensuring they cover the top and sides of the enclosure. The Velcro side should face the front where the impact screen will be.
- Install the HD Impact Screen: Carefully hang the 118” x 88” HD impact screen inside the enclosure. Use the provided bungee cords to attach the screen to the frame grommets. Ensure the screen is taut and evenly stretched to provide a smooth projection surface.
- Attach Side Barrier Nets: Connect the side barrier nets to the outer frame using the designated hooks or straps. These nets are designed to catch stray shots and enhance safety.
- Secure the Enclosure: If using outdoors, fill the sandbags with sand and place them at the base of the frame for stability. Use the ground stakes to anchor the frame firmly into the ground.

Image: A golfer using the Zealfeel Golf Enclosure Net with a projected golf course scene, demonstrating the product in use.
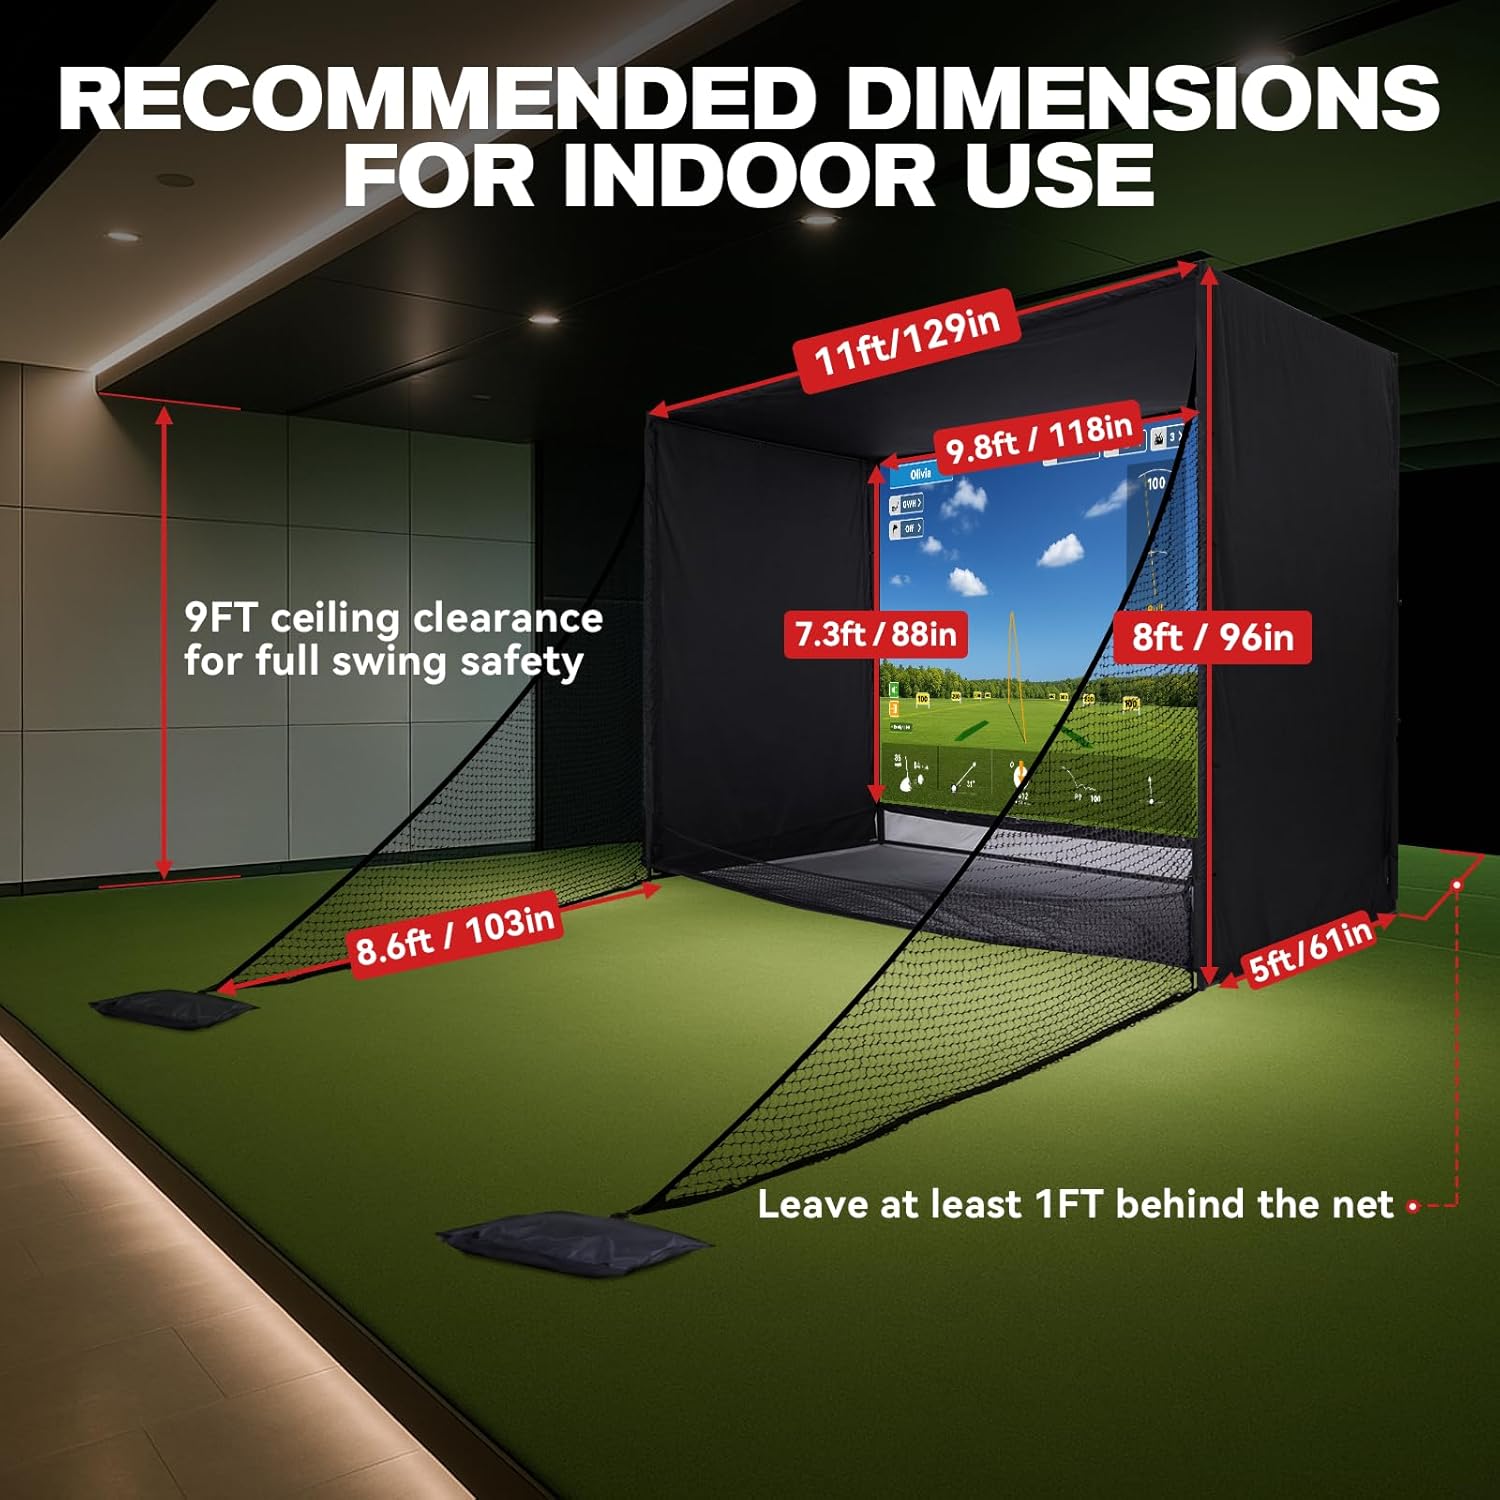
Image: A diagram illustrating the recommended indoor dimensions for setting up the golf enclosure net, including ceiling clearance and distance from the net.
Video Guide: How to setup 10x8ft Golf Simulator Enclosure Net
Video: Official setup guide from ZEALFEEL Sport US demonstrating the assembly process for the golf simulator enclosure net.
ఆపరేటింగ్ సూచనలు
The ZEALFEEL Golf Enclosure Net is designed for use with golf simulators and projectors (not included). To operate:
- Position Your Projector: Place your golf projector at an appropriate distance and angle to fill the 118” x 88” impact screen. The screen supports a 4:3 aspect ratio.
- Connect Your Simulator: Ensure your golf launch monitor and simulator software are properly set up and connected to the projector.
- Prepare Your Hitting Mat: Place your golf hitting mat (not included) in front of the screen at a comfortable and safe distance.
- Begin Play: Start your golf simulation software and begin practicing your swings. The dual-layer impact screen is designed to absorb ball impact, reduce noise, and return balls to you via the sloped bottom design.
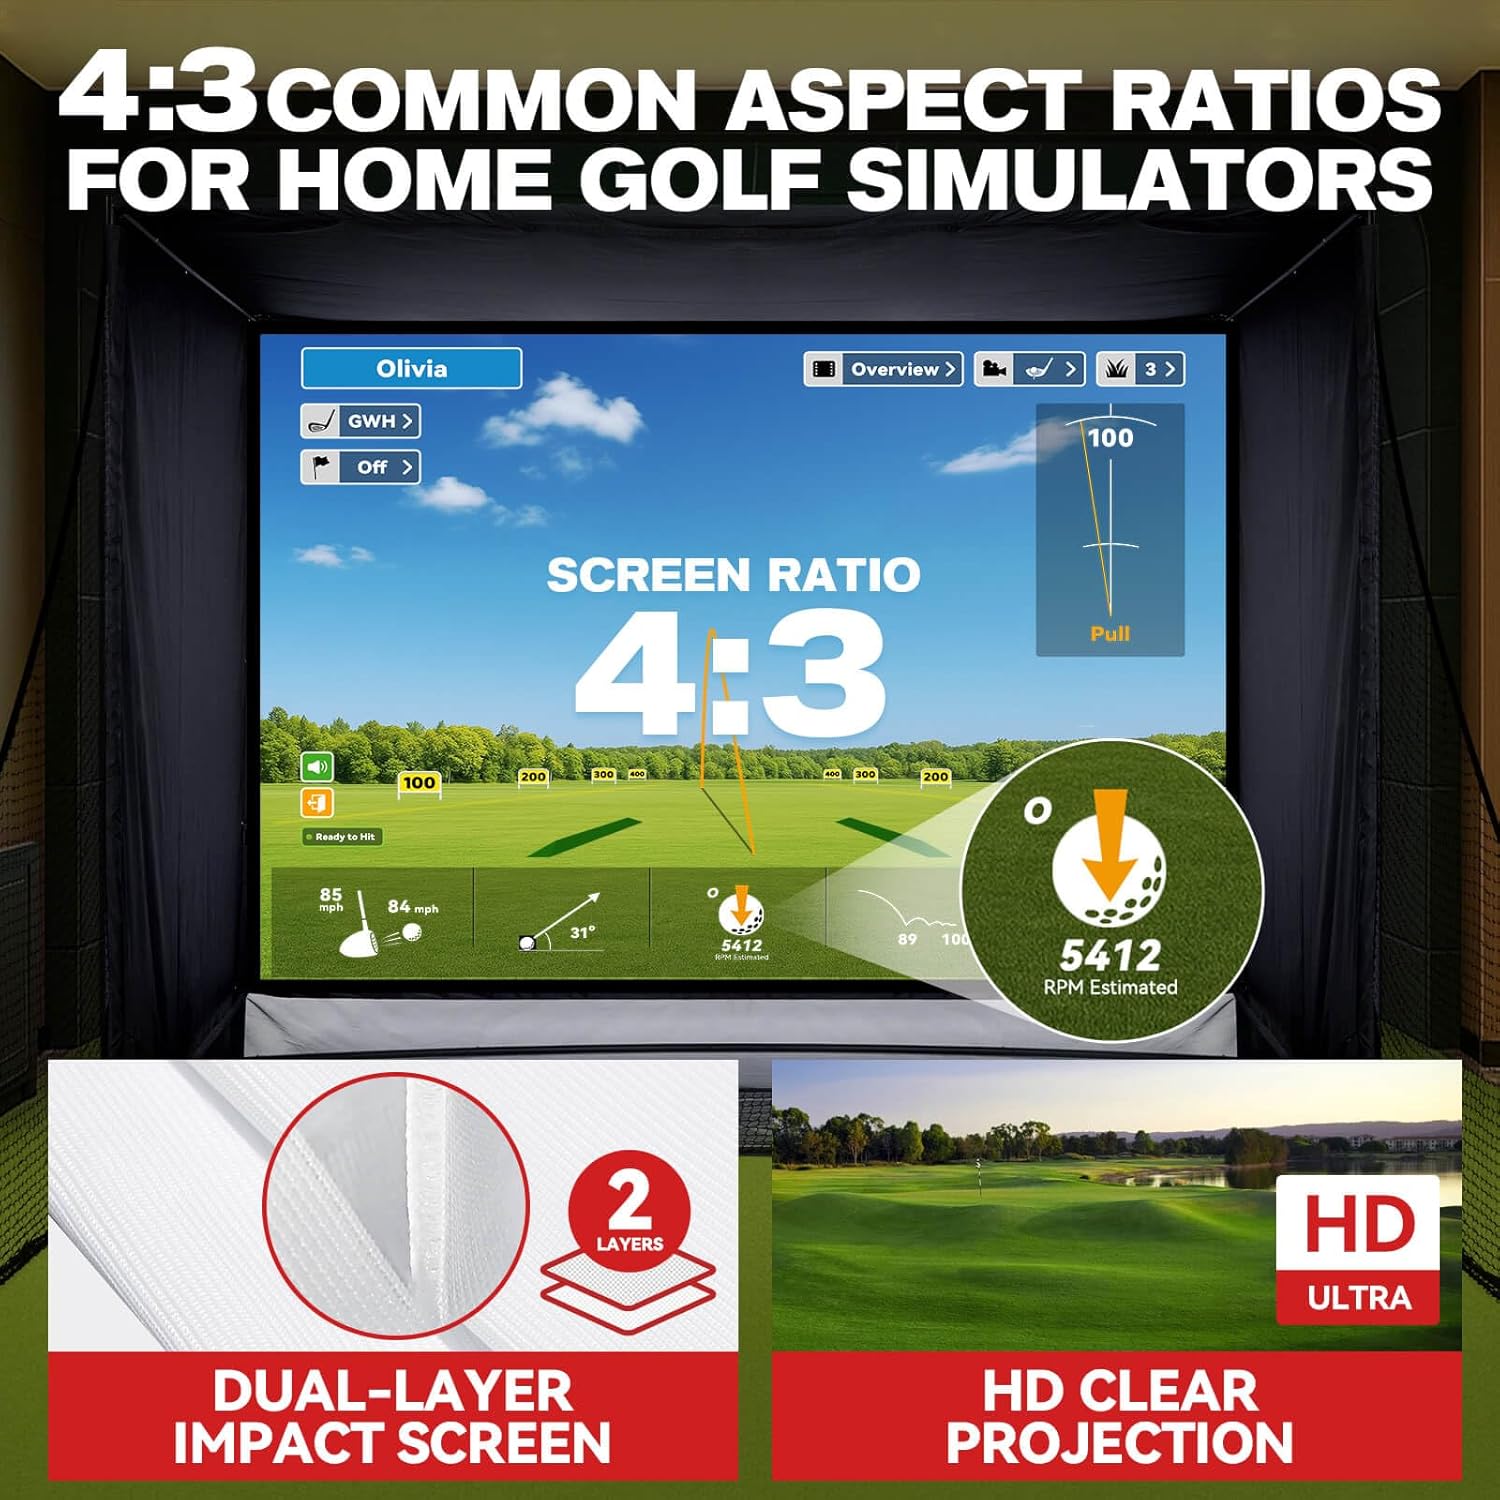
చిత్రం: వివరణాత్మక view of the 4:3 aspect ratio HD impact screen, highlighting its dual-layer design for enhanced durability and clear projection.
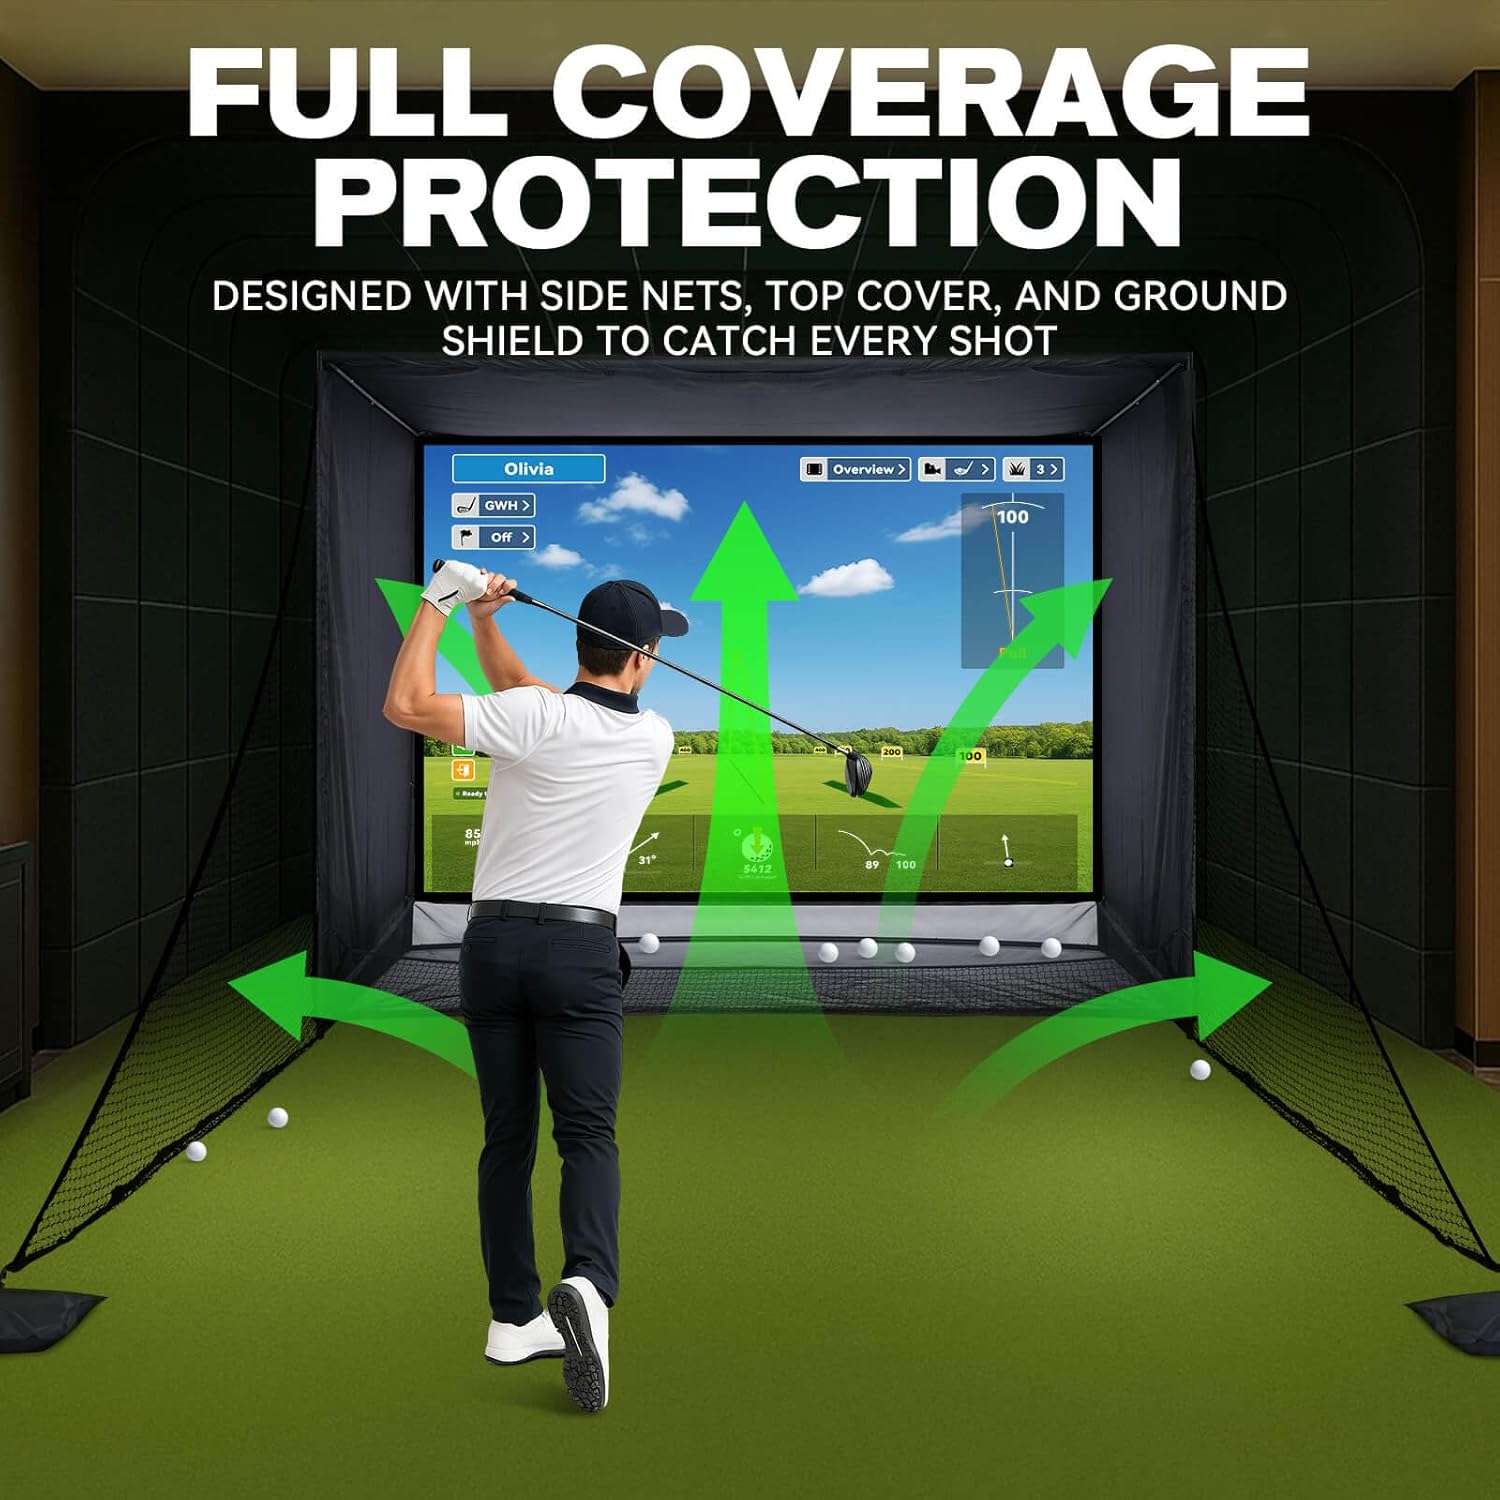
Image: A golfer inside the enclosure, with arrows demonstrating how the side nets, top cover, and ground shield provide full coverage protection against stray shots.
నిర్వహణ
- శుభ్రపరచడం: ఫ్రేమ్ మరియు ఫాబ్రిక్ భాగాలను ప్రకటనతో తుడవండిamp అవసరమైనంతవరకు వస్త్రం. కఠినమైన రసాయనాలను నివారించండి.
- స్క్రీన్ కేర్: The impact screen can be gently cleaned with a soft, damp cloth. Do not scrub vigorously.
- నిల్వ: When not in use for extended periods, disassemble the enclosure and store all components in the provided carry bag in a dry, cool place to prolong product life.
- తనిఖీ: Regularly inspect the nets, screen, and frame for any signs of wear, tear, or damage. Replace damaged parts immediately.
ట్రబుల్షూటింగ్
- వదులుగా ఉండే కనెక్షన్లు: If the frame feels unstable, recheck all pole connections to ensure the spring-loaded buttons are fully engaged.
- Screen Sagging: Adjust the bungee cords to ensure the impact screen is taut. Evenly distribute tension across all attachment points.
- తప్పిపోయిన భాగాలు: If any components are missing or damaged upon arrival, please refer to the Warranty & Support section for assistance.
- Ball Rebound Issues: Ensure the bottom net is correctly installed and sloped to facilitate automatic ball return.
స్పెసిఫికేషన్లు
- పరిమాణం: 11x8అడుగులు
- మెటీరియల్: Powder-coated Steel Frame, Anti-tear Netting, Noise-Reducing Target Cloth
- రంగు: నలుపు
- క్రీడ: గోల్ఫ్
- మోడల్ సంఖ్య: ZF16-A
- జిటిఐఎన్/యుపిసి: 199284062320

చిత్రం: పేలినది view highlighting the durable construction of the enclosure, including high-density blackout curtains, heavy-duty steel base, secure bungee cords, foam padding, and sloped bottom design.
వారంటీ & మద్దతు
This ZEALFEEL Golf Enclosure Net comes with a తయారీదారు లోపాలపై 1 సంవత్సరం వారంటీ.
If you encounter any issues, have questions, or require replacement parts, please contact ZEALFEEL customer support:
- ఇమెయిల్ మద్దతు: support@zealfeel.store
- అమెజాన్ సందేశం: Go to Your Orders > Choose your problem > Select 'Contact Seller'.