1. పరిచయం
This user manual provides detailed instructions for the proper setup, programming, operation, and maintenance of your Generic Nice Era One ON2E/ON4E/ON9E 2-Channel Remote Control Transmitter. Please read this manual thoroughly before using the device to ensure safe and efficient operation. Keep this manual for future reference.
2. ఉత్పత్తి ముగిసిందిview
The Nice Era One remote control is a compact 2-channel transmitter designed for controlling compatible devices such as garage doors. It features a simple two-button design for ease of use.
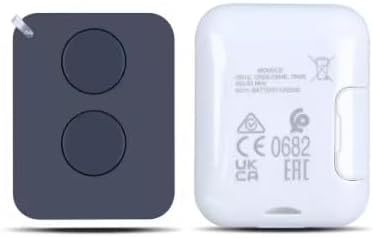
చిత్రం 1: ముందు మరియు వెనుక view of the Nice Era One remote control. The left side shows the front with two distinct circular buttons. The right side shows the back, which includes regulatory marks such as CE 0682, UK CA, and EAC, along with model information.

Image 2: The Nice Era One remote control displayed with its retail packaging and an included keychain. The remote is black with two buttons, and the packaging box indicates 'Era One Transmitter 433.92 MHz' and 'Nice' branding.
3. అనుకూలత
This remote control is compatible with the following Nice ERA systems:
- Nice ERA ONE
- Nice ERA inti
- Nice FLOR-S
- Nice Inti
- Nice One
- Nice Era Flor
ముఖ్యమైన గమనిక: This remote operates at a frequency of 433.92 MHz (USA ONLY) మరియు does not support copying old remote controls.
4. సెటప్
4.1 బ్యాటరీ ఇన్స్టాలేషన్
Your remote control comes with a battery pre-installed. If the battery needs replacement in the future, it requires 1 AAA బ్యాటరీ. బ్యాటరీని భర్తీ చేయడానికి:
- రిమోట్ కంట్రోల్ను జాగ్రత్తగా తెరవండి casing.
- పాత AAA బ్యాటరీని తీసివేయండి.
- సరైన ధ్రువణతను (+/-) నిర్ధారించుకుని, కొత్త AAA బ్యాటరీని చొప్పించండి.
- రిమోట్ కంట్రోల్ c ని మూసివేయండిasinగ్రా సురక్షితంగా.
5. Programming Instructions
Follow these steps to program your new remote control to your radio receiver or door opener:
- అభ్యాస విధానాన్ని ప్రారంభించండి: Briefly press and hold the learning button on your radio receiver or door opener. The LED indicator on the operator will turn on, indicating it is in learning mode.
- Transmit Code: While the operator's LED is on, press the desired button on your new remote control. The LED of the receiver will flash and then remain steadily lit.
- ప్రోగ్రామింగ్ను నిర్ధారించండి: Continue holding the remote button until the LED of the receiver turns off. This indicates that the remote is now successfully coded to the operator.
6. ఆపరేషన్
Once programmed, operating your Nice Era One remote control is straightforward:
- బటన్ ఫంక్షన్: Each of the two buttons on the remote control can be programmed to control a specific function or device (e.g., open/close a garage door, activate a gate).
- యాక్టివేషన్: Press the programmed button firmly for a brief moment to send the signal to the receiver.
- పరిధి: Ensure you are within the operational range of your receiver for the remote control to function correctly.
7. ట్రబుల్షూటింగ్
7.1 Deleting Codes
To delete existing codes from the receiver:
- Press and hold the learning button on the receiver.
- The LED on the receiver will turn on. Continue holding the button.
- Release the button when the LED of the receiver flashes for the మూడవసారి. All previously stored codes should now be deleted.
7.2 సాధారణ సమస్యలు మరియు పరిష్కారాలు
- రిమోట్ స్పందించడం లేదు:
- బ్యాటరీ సరిగ్గా ఇన్స్టాల్ చేయబడిందో లేదో మరియు తగినంత ఛార్జ్ ఉందో లేదో తనిఖీ చేయండి. అవసరమైతే మార్చండి.
- Ensure the remote is properly programmed to the receiver (refer to Section 5).
- Verify that the receiver is powered on and functioning correctly.
- పరిమిత పరిధి:
- రిమోట్ మరియు రిసీవర్ మధ్య ఎటువంటి అడ్డంకులు లేవని నిర్ధారించుకోండి.
- Check for sources of radio interference (e.g., other wireless devices).
- రిమోట్ కంట్రోల్లో బ్యాటరీని మార్చండి.
- తప్పు ఆపరేషన్:
- Confirm that the correct button on the remote is being pressed for the desired function.
- If multiple remotes are in use, ensure there is no signal conflict.
8. స్పెసిఫికేషన్లు
| మోడల్ సంఖ్య | ERA ONE |
| బ్రాండ్ | సాధారణమైనది |
| ఫ్రీక్వెన్సీ | 433.92 MHz (USA ONLY) |
| ఛానెల్ల సంఖ్య | 2 |
| అనుకూల పరికరాలు | Garage Door, Gate Openers (Nice ERA systems) |
| శక్తి మూలం | 1 AAA బ్యాటరీ |
| ఉత్పత్తి కొలతలు | 3.18 x 1.75 x 0.6 అంగుళాలు |
| వస్తువు బరువు | 1.76 ఔన్సులు |
| రంగు | నలుపు |
9. నిర్వహణ
మీ రిమోట్ కంట్రోల్ యొక్క దీర్ఘాయువు మరియు సరైన పనితీరును నిర్ధారించడానికి:
- శుభ్రపరచడం: రిమోట్ను మృదువైన, పొడి గుడ్డతో తుడవండి. కఠినమైన రసాయనాలు లేదా రాపిడి క్లీనర్లను ఉపయోగించకుండా ఉండండి.
- నిల్వ: రిమోట్ను చల్లని, పొడి ప్రదేశంలో, ప్రత్యక్ష సూర్యకాంతి మరియు తీవ్రమైన ఉష్ణోగ్రతలకు దూరంగా నిల్వ చేయండి.
- బ్యాటరీ: Replace the battery when the remote's performance degrades or if it stops working. Remove the battery if the remote will not be used for an extended period.
- ప్రభావాన్ని నివారించండి: అంతర్గత భాగాలను దెబ్బతీసే చుక్కలు మరియు ప్రభావాల నుండి రిమోట్ను రక్షించండి.
10. వారంటీ మరియు మద్దతు
For information regarding warranty coverage or technical support, please refer to the documentation provided at the time of purchase or contact your retailer. Keep your purchase receipt as proof of purchase.


