
1. పరిచయం
This manual provides detailed instructions for the installation, operation, and maintenance of your Evanshow Fingerprint Door Lock, Model 190NOSilver. Please read this manual thoroughly before installation and use to ensure proper function and security. This smart lock offers multiple convenient access methods, enhancing security for various indoor applications.
2. ఉత్పత్తి లక్షణాలు
- 4-in-1 Smart Lock: Offers multiple access options including fingerprint, password, IC card, and mechanical keys.
- అధిక సామర్థ్యం: Supports up to 100 unique fingerprints and 100 user-defined passwords.
- Advanced Fingerprint Sensor: Features an upgraded sensor with 0.5-second recognition speed and 360° recognition for quick and accurate access.
- సులభమైన సంస్థాపన: Designed for straightforward installation on wooden doors 1.18"-1.97" thick, without requiring complex drilling or wiring.
- మెరుగైన భద్రత: Utilizes advanced biometric technology to prevent unauthorized access, ensuring home security.
- ఆటో-లాక్ ఫంక్షన్: Customizable auto-lock feature for added convenience and peace of mind.
- Anti-Peep Password: Allows users to enter random digits before or after the actual password to prevent onlookers from guessing the code.
3. ప్యాకేజీ విషయాలు
ఇన్స్టాలేషన్ ప్రారంభించే ముందు అన్ని భాగాలు ఉన్నాయని నిర్ధారించుకోండి:
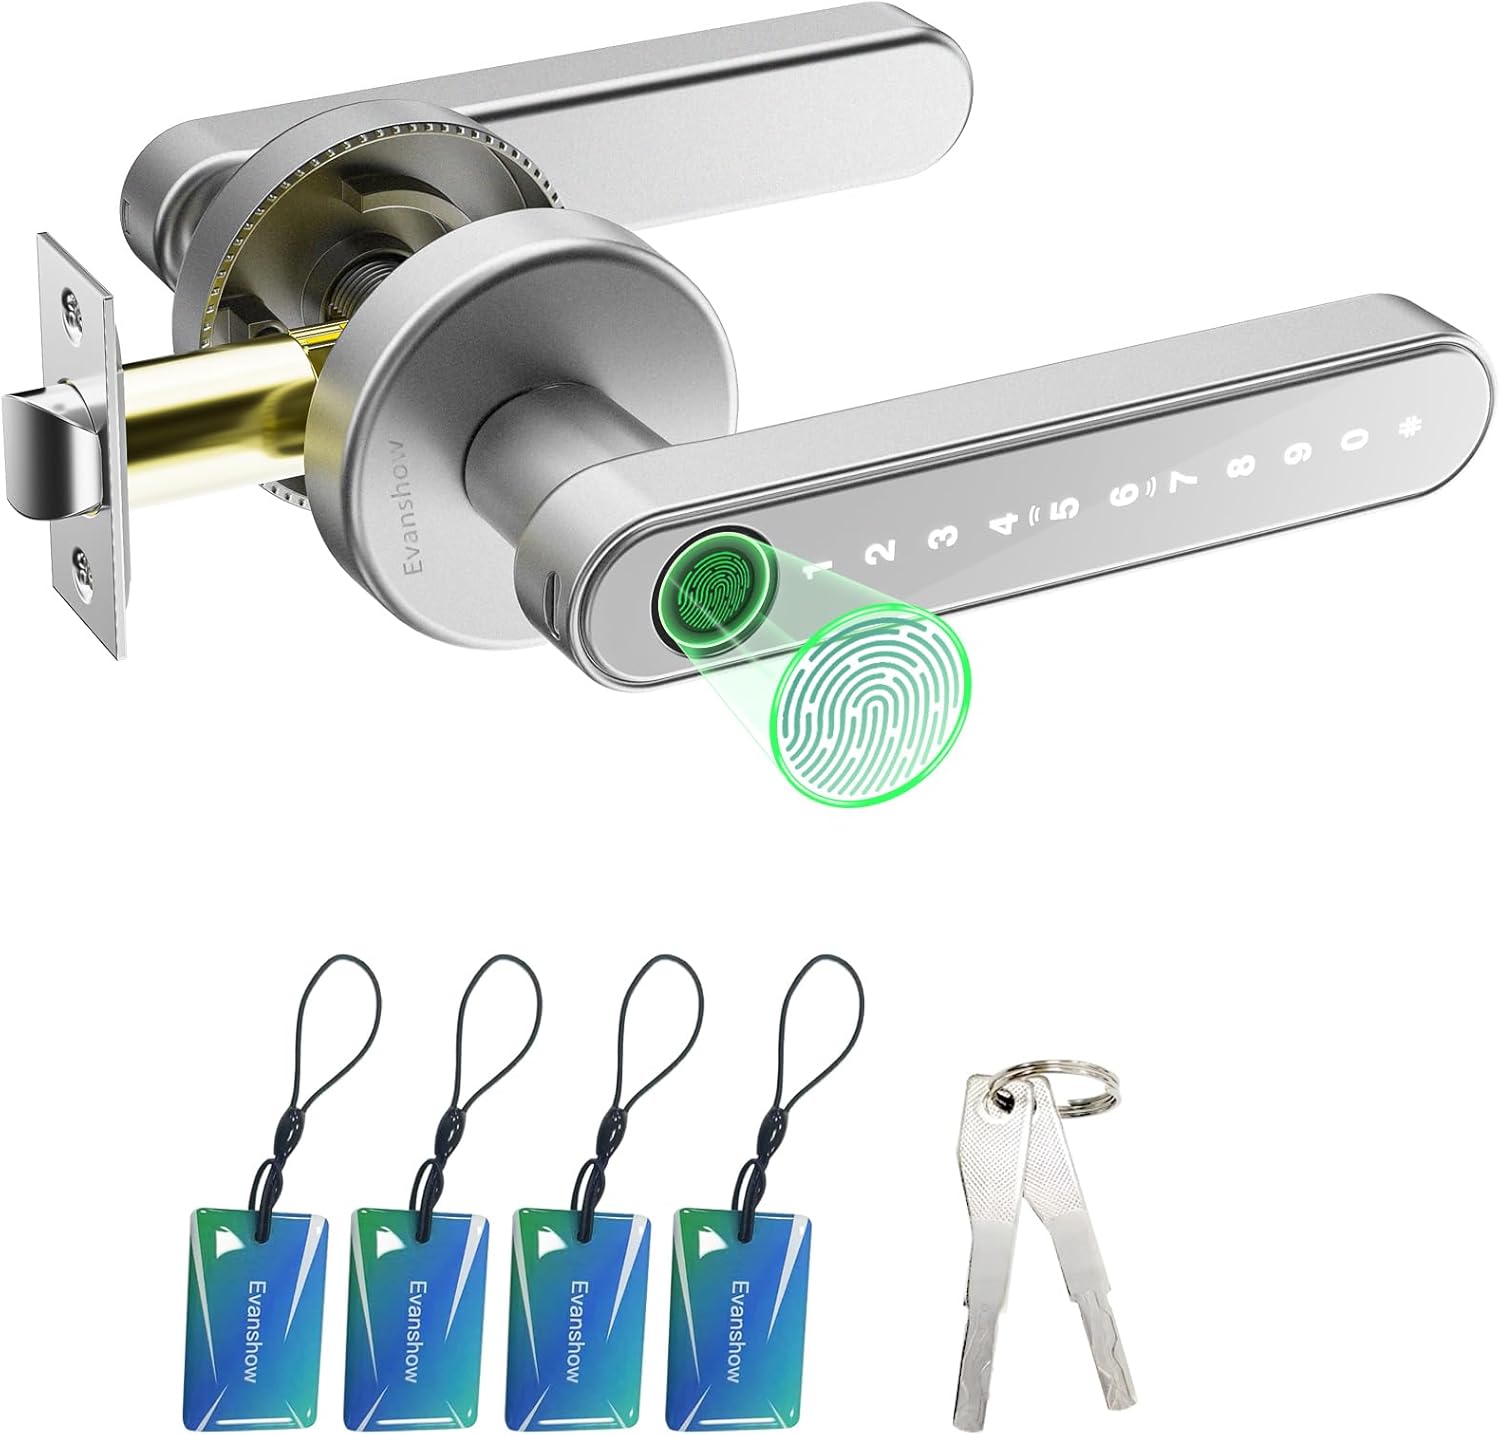
Figure 3.1: All components included in the Evanshow Fingerprint Door Lock package.
- Exterior Handle with Keypad and Fingerprint Sensor (1)
- Interior Handle (1)
- Latch Mechanism (1)
- Strike Plate (1)
- Screws and Installation Hardware (various)
- చిన్న స్క్రూడ్రైవర్ (1)
- IC కార్డులు (4)
- మెకానికల్ కీలు (2)
- USB-C ఛార్జింగ్ కేబుల్ (1)
- AAA బ్యాటరీలు (4)
- సూచనల మాన్యువల్ (ఈ పత్రం)
4. ఇన్స్టాలేషన్ గైడ్
The Evanshow Fingerprint Door Lock is designed for easy installation. A video tutorial is available to guide you through the process.
Video 4.1: Official installation guide for the Evanshow Fingerprint Door Lock.
4.1 ప్రీ-ఇన్స్టాలేషన్ తనిఖీలు
- మీ తలుపు మందం 1.18 అంగుళాలు (30mm) మరియు 1.97 అంగుళాలు (50mm) మధ్య ఉండేలా చూసుకోండి.
- Confirm the door bore hole diameter is suitable for standard door locks.
- Determine the hand orientation (left or right swing) of your door. The lock is reversible.

Figure 4.2: Door dimension requirements for installation.
4.2 దశల వారీ సంస్థాపన
- గొళ్ళెం ఇన్స్టాల్ చేయండి: Insert the latch mechanism into the edge of the door and secure it with screws. Ensure the latch bolt faces the correct direction for your door swing.
- స్ట్రైక్ ప్లేట్ను ఇన్స్టాల్ చేయండి: Attach the strike plate to the door frame, aligning it with the latch mechanism.
- Prepare Handles: Connect the wires from the exterior handle to the interior handle.
- Mount Handles: Insert the exterior handle through the door, ensuring the spindle aligns with the latch. Then, attach the interior handle, securing both sides with the provided screws.
- బ్యాటరీలను వ్యవస్థాపించండి: Open the battery compartment on the interior handle and insert 4 AAA batteries, ensuring correct polarity.
- పరీక్ష కార్యాచరణ: After installation, test all unlocking methods (fingerprint, password, IC card, mechanical key) to ensure proper operation.
5. ఆపరేటింగ్ సూచనలు
Your Evanshow Fingerprint Door Lock offers multiple ways to secure and access your space.

చిత్రం 5.1: పైగాview of the 4-in-1 smart lock access options.
5.1 అన్లాకింగ్ పద్ధతులు
- వేలిముద్ర అన్లాక్: మీ నమోదిత వేలిని వేలిముద్ర సెన్సార్పై ఉంచండి. విజయవంతంగా గుర్తించిన తర్వాత లాక్ దాదాపు 0.5 సెకన్లలో అన్లాక్ అవుతుంది.
- పాస్వర్డ్ అన్లాక్: Enter your registered passcode on the keypad. The keypad illuminates when activated.
- IC కార్డ్ అన్లాక్: Tap a registered IC card against the designated area on the exterior handle.
- మెకానికల్ కీ అన్లాక్: In case of emergency or battery depletion, use the provided mechanical keys to unlock the door. The keyhole is located at the bottom of the exterior handle.

Figure 5.2: Fingerprint unlocking in action.

Figure 5.3: Using the keypad for password entry.

Figure 5.4: Unlocking the door with an IC card.

Figure 5.5: Using a mechanical key for emergency access.
5.2 ఆటో-లాక్ ఫీచర్
The lock can be configured to automatically lock after a set period. This feature can be customized or disabled as needed.

Figure 5.6: Auto-lock functionality for enhanced security.
5.3 Anti-Peep Password
To prevent others from observing your password, you can enter random digits before or after your actual password. The lock will still recognize the correct sequence within the longer input.

Figure 5.7: Using the anti-peep password feature.
5.4 వినియోగదారులను జోడించడం/తొలగించడం
Refer to the detailed instructions in the included instruction manual for specific steps on how to enroll new fingerprints, set up new passcodes, and register or remove IC cards. This process typically involves accessing the lock's programming mode.
6. నిర్వహణ
6.1 బ్యాటరీ భర్తీ
The lock requires 4 AAA batteries. When the battery level is low, the lock will provide an audible or visual warning. Replace all four batteries simultaneously to ensure optimal performance.

Figure 6.1: Location of the battery compartment on the interior handle.
6.2 శుభ్రపరచడం
లాక్ ఉపరితలాన్ని మృదువైన, పొడి గుడ్డతో తుడవండి. ఫినిషింగ్ లేదా ఎలక్ట్రానిక్ భాగాలను దెబ్బతీసే రాపిడి క్లీనర్లు లేదా ద్రావకాలను ఉపయోగించవద్దు.
7. ట్రబుల్షూటింగ్
- లాక్ స్పందించడం లేదు: Check battery levels and replace if necessary. Ensure the wires are securely connected.
- వేలిముద్ర గుర్తించబడలేదు: Ensure your finger is clean and dry. Re-enroll your fingerprint if issues persist.
- పాస్కోడ్ పనిచేయడం లేదు: Verify the correct passcode is being entered. Try resetting the passcode.
- ఆటో-లాక్ పనిచేయడం లేదు: Check the auto-lock settings and ensure it is enabled with the desired delay.
- Mechanical key not working: కీ పూర్తిగా చొప్పించబడి సరిగ్గా తిప్పబడిందని నిర్ధారించుకోండి.
8. స్పెసిఫికేషన్లు
| ఫీచర్ | స్పెసిఫికేషన్ |
|---|---|
| మోడల్ సంఖ్య | 190NOSilver |
| మెటీరియల్ | మెటల్ |
| ఉత్పత్తి కొలతలు | 1"లీటర్లు x 2"వాట్ |
| వస్తువు బరువు | 1.2 పౌండ్లు |
| లాక్ రకం | గోప్యత |
| హ్యాండిల్ మెటీరియల్ | మెటల్ |
| చేతి ధోరణి | రివర్సబుల్ |
| ప్రత్యేక ఫీచర్ | వేలిముద్ర |
| బ్యాటరీలు అవసరం | 4 AAA బ్యాటరీలు |
| రంగు | నలుపు |
9. వారంటీ మరియు మద్దతు
For warranty information and technical support, please refer to the contact details provided on the product packaging or the official Evanshow webవారంటీ క్లెయిమ్ల కోసం కొనుగోలు రుజువుగా మీ కొనుగోలు రసీదును ఉంచండి.