
1. పరిచయం
Thank you for choosing the Audio Array AI-13 4-Channel Hybrid USB Audio Mixer. This compact mixer is designed for a variety of audio applications, including podcasting, streaming, live sessions, and home studio setups. It features 4 analog and 2 digital channels, supporting microphones, instruments, and playback devices in a streamlined interface. This manual provides detailed instructions for setup, operation, maintenance, and troubleshooting to ensure optimal performance of your device.

Image 1.1: User operating the AI-13 mixer in a studio environment.
2. ఉత్పత్తి లక్షణాలు
The Audio Array AI-13 mixer offers a range of features for versatile audio control:
- Hybrid 4-Channel Control: Combines 4 analog and 2 digital channels for flexible input management.
- Studio-Ready Inputs: Dual XLR mic inputs with switchable +48V phantom power for condenser microphones, plus Hi-Z support for guitars and instruments.
- Built-in 2-Band EQ: Each channel includes a 2-band equalizer for precise sound shaping.
- తక్కువ శబ్ద పనితీరు: Features a signal-to-noise ratio of ≥90dB for clean audio with minimal interference.
- USB Recording & Monitoring: Integrated USB return, RCA REC output, and headphone monitoring for recording and playback.
- Portable USB-C Power: Lightweight design powered via USB-C, suitable for mobile and desktop setups.
- అధిక-నాణ్యత ప్రీamps: Mic and line preamps deliver a 20Hz–20kHz frequency response and up to 100dB dynamic range.
- Powerful Headphone Output: 200mW headphone output for clear and accurate monitoring.

చిత్రం 2.1: ముగిసిందిview of the AI-13 mixer's multi-functionality.

Image 2.2: Key features of the AI-13 mixer.
3. సెటప్
Follow these steps to set up your Audio Array AI-13 mixer:
- పవర్ కనెక్షన్: Connect the mixer to a power source using the provided USB-C cable. Ensure the power source provides stable 5V power.
- Microphone/Instrument Connection:
- For microphones, connect XLR cables to the CH1 or CH2 inputs. Activate +48V phantom power if using condenser microphones.
- For instruments (e.g., guitar), connect to the Hi-Z inputs.
- అవుట్పుట్ కనెక్షన్: Connect your headphones to the PHONES jack for monitoring. Connect main outputs to your amplifier or recording device as needed.
- USB కనెక్షన్: For computer recording or playback, connect the mixer to your computer via the USB port.
4. Controls and Routing
Understanding the controls is essential for effective use of your mixer.

Image 4.1: Routing functionality overview of the AI-13 mixer.

Image 4.2: Detailed routing and control labels.
4.1 Input Section
- HI-Z Switch: Engages high impedance input for instruments like guitars.
- +48V ఫాంటమ్ పవర్: Activates phantom power for condenser microphones on XLR inputs.
- గెయిన్ నాబ్: ప్రతి ఛానెల్కు ఇన్పుట్ స్థాయిని సర్దుబాటు చేస్తుంది.
- అధిక/తక్కువ సమీకరణం: 2-band equalizer to adjust treble and bass frequencies for each channel.
- EFF (Effect Send): అంతర్నిర్మిత ఎఫెక్ట్స్ ప్రాసెసర్కు పంపబడిన సిగ్నల్ మొత్తాన్ని నియంత్రిస్తుంది.
- స్థాయి నాబ్: Adjusts the output volume for individual channels.
4.2 Output & Monitoring Section
- MAIN Volume Knob: మిక్సర్ యొక్క మొత్తం అవుట్పుట్ వాల్యూమ్ను నియంత్రిస్తుంది.
- PHONES Volume Knob: హెడ్ఫోన్ అవుట్పుట్ కోసం వాల్యూమ్ను సర్దుబాటు చేస్తుంది.
- REC అవుట్పుట్ (RCA): Provides an output for recording devices.
- USB Return: Allows audio playback from a connected computer.
4.3 USB/MP3 Player Controls

Image 4.3: USB/MP3 player controls.
- మోడ్ బటన్: Short press to switch mode (USB/Bluetooth). Long press for recording.
- ప్లే/పాజ్ బటన్: Short press to play or pause. Long press for cycle conversion.
- PREVIOUS/VOL- Button: మునుపటి పాట కోసం షార్ట్ ప్రెస్ చేయండి. వాల్యూమ్ డౌన్ కోసం లాంగ్ ప్రెస్ చేయండి.
- NEXT/VOL+ Button: తదుపరి పాట కోసం షార్ట్ ప్రెస్ చేయండి. వాల్యూమ్ అప్ కోసం లాంగ్ ప్రెస్ చేయండి.

Image 4.4: TAPE OUT and USB PC connection controls.
- TAPE OUT Jacks: Used for connecting to recording applications.
- USB PC Interface: When pressed, the device connects to MP3. Otherwise, it connects to a PC for playing computer songs and recordings.
5. కనెక్టివిటీ ఎంపికలు
The AI-13 mixer offers diverse connectivity for various audio sources and destinations.

చిత్రం 5.1: ముగిసిందిview of connectivity options.

చిత్రం 5.2: వివరణాత్మకమైనది view of input and output connections.
- ఇన్పుట్లు: XLR (for microphones), TRS (for stereo line-in), Hi-Z (for instruments), USB (for digital audio from PC/pendrive).
- అవుట్పుట్లు: Main TRS Out, RCA REC Out, Headphone Out (TRS), Amp అవుట్.
- డిజిటల్: USB-C for power and data, USB 2.0 for pendrive.
6. DSP ప్రభావాలు
The AI-13 includes built-in Digital Signal Processing (DSP) effects to enhance your audio.

Image 6.1: Built-in DSP effects section.
- రెవెర్బ్: Adds spatial depth to your sound.
- ఆలస్యం: Creates echo effects.
- Use the dedicated knobs to adjust the repeat and delay parameters of the effects.
7 శక్తి అవసరాలు
The AI-13 mixer is designed for efficient power consumption and is powered via USB-C.
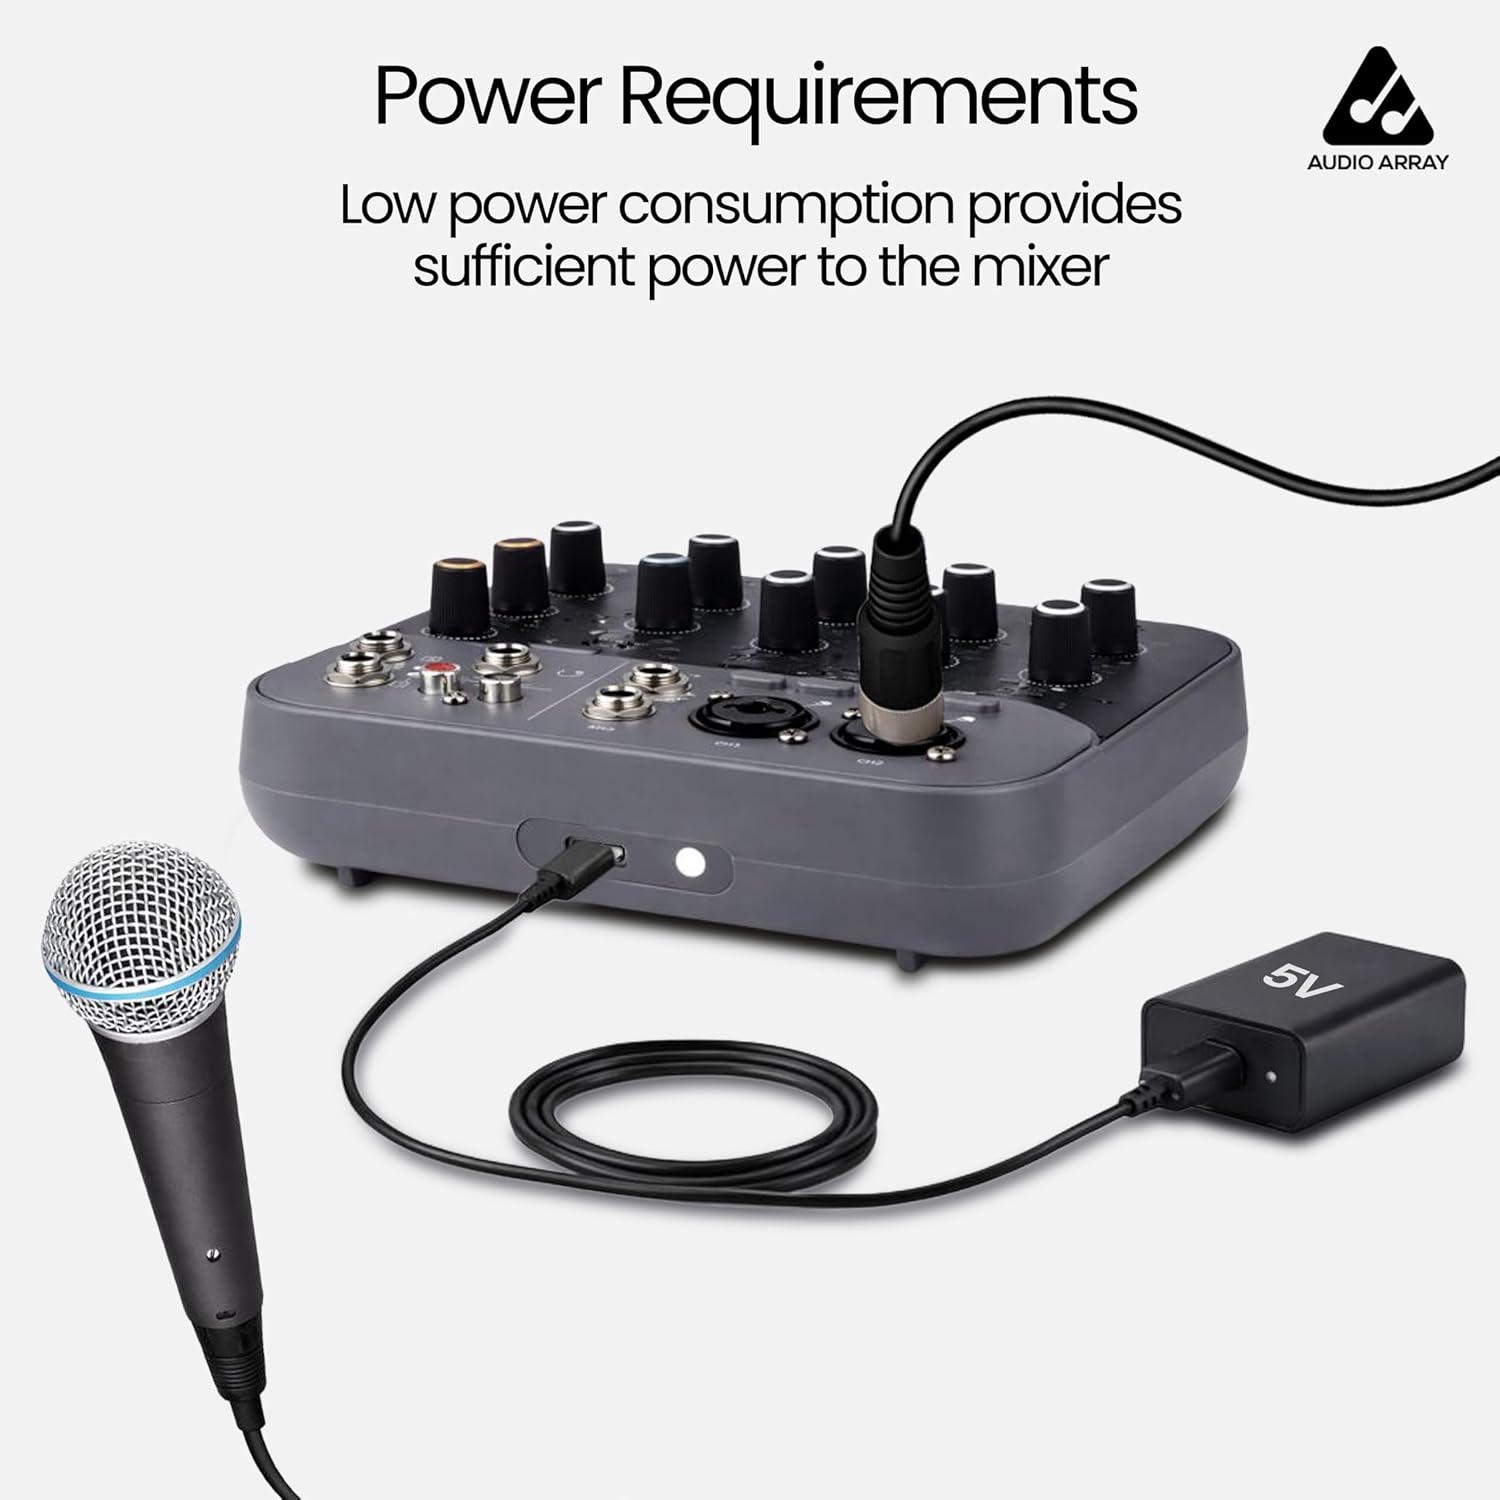
Image 7.1: Power connection via USB-C.
- శక్తి మూలం: USB Type-C (5V).
- Ensure you use a compatible 5V USB power adapter or a power bank for stable operation.
8. అనుకూల పరికరాలు
The AI-13 mixer is compatible with a wide range of audio and computing devices.

Image 8.1: Compatible devices overview.

Image 8.2: Expanded view of compatible devices in a studio setting.
- మైక్రోఫోన్లు: Dynamic and Condenser (with +48V phantom power).
- వాయిద్యాలు: Guitars, keyboards, etc.
- ప్లేబ్యాక్ పరికరాలు: MP3 players, USB pendrives, smartphones (via Bluetooth or USB).
- అవుట్పుట్ పరికరాలు: Amplifiers, powered speakers, headphones, recording interfaces.
- కంప్యూటర్లు: Laptops, desktops for USB audio interface functionality.
9. రియల్ టైమ్ మానిటరింగ్
The AI-13 allows for real-time monitoring of your audio output.

Image 9.1: Real-time monitoring setup.
Connect your headphones to the PHONES jack to monitor your mix in real-time. This allows you to hear the sound feedback and make adjustments as needed during recording or live sessions.
10. ఆపరేటింగ్ సూచనలు
General guidelines for operating your mixer:
- పవర్ ఆన్: Connect the USB-C power cable. The mixer will power on automatically.
- Adjust Input Gain: For each connected microphone or instrument, slowly increase the GAIN knob until the signal is strong but does not clip (indicated by the CLIP LED).
- Apply EQ: Use the HIGH and LOW EQ knobs to shape the tone of each channel.
- Add Effects: Turn the EFF knob on a channel to send signal to the built-in effects. Adjust the REPEAT and DELAY knobs in the master section to control the effect parameters.
- ఛానెల్ స్థాయిలను సెట్ చేయండి: Use the LEVEL knobs for each channel to balance the mix.
- మాస్టర్ వాల్యూమ్: Adjust the MAIN volume knob for the overall output level.
- హెడ్ఫోన్లతో పర్యవేక్షించండి: Use the PHONES volume knob to set your monitoring level.
- USB/Bluetooth Playback: Use the MP3 player controls to play audio from a USB drive or a Bluetooth-connected device.
11. నిర్వహణ
Proper maintenance ensures the longevity and performance of your mixer:
- శుభ్రపరచడం: Use a soft, dry cloth to clean the exterior of the mixer. Avoid liquid cleaners or abrasive materials.
- నిల్వ: మిక్సర్ను ప్రత్యక్ష సూర్యకాంతి మరియు తీవ్రమైన ఉష్ణోగ్రతలకు దూరంగా చల్లని, పొడి ప్రదేశంలో నిల్వ చేయండి.
- కేబుల్ కేర్: Handle cables carefully. Avoid bending or twisting them excessively, which can damage internal wiring.
- వెంటిలేషన్: వేడెక్కకుండా నిరోధించడానికి మిక్సర్ చుట్టూ సరైన వెంటిలేషన్ ఉండేలా చూసుకోండి.
12. ట్రబుల్షూటింగ్
If you encounter issues with your AI-13 mixer, refer to the following common problems and solutions:
| సమస్య | సాధ్యమైన కారణం | పరిష్కారం |
|---|---|---|
| శక్తి లేదు | Faulty USB-C cable or power adapter; loose connection. | Check USB-C cable and power adapter. Try a different 5V USB-C power source. Ensure connections are secure. |
| సౌండ్ అవుట్పుట్ లేదు | Volume knobs too low; incorrect input/output connections; muted channels. | Increase MAIN and PHONES volume. Verify all cables are correctly connected. Check channel LEVEL knobs. |
| మైక్రోఫోన్ పని చేయడం లేదు | Phantom power off (for condenser mics); incorrect gain; faulty mic/cable. | Activate +48V phantom power if using a condenser microphone. Increase GAIN knob. Test with a different microphone or cable. |
| వక్రీకృత ఆడియో | Input gain too high; output volume too high. | Reduce input GAIN. Lower channel LEVEL and MAIN volume. |
| USB రికార్డింగ్ పనిచేయడం లేదు | Incorrect USB PC mode; driver issues; software settings. | Ensure the USB PC button is correctly set. Check computer's sound settings and recording software. |
13. స్పెసిఫికేషన్లు
Detailed technical specifications for the Audio Array AI-13 mixer:

Image 13.1: General specifications.

Image 13.2: Detailed audio specifications.
| ఫీచర్ | వివరాలు |
|---|---|
| బ్రాండ్ | Audio Array |
| మోడల్ సంఖ్య | AI-13 |
| ఛానెల్ల సంఖ్య | 4 |
| ఉత్పత్తి కొలతలు (D x W x H) | 16D x 14W x 4H సెంటీమీటర్లు |
| వస్తువు బరువు | 680 గ్రాములు |
| కనెక్టివిటీ టెక్నాలజీ | XLR / TRS In, TRS / TS In, RCA REC Out, Main TRS Out, Headphones, USB 2.0 Pendrive, Wired Headphone, USB Type C |
| పవర్ సోర్స్ రకం | USB టైప్ C |
| ఫ్రీక్వెన్సీ రెస్పాన్స్ | 20 హెర్ట్జ్ - 20 కిలోహెర్ట్జ్ |
| అవుట్పుట్ కనెక్టర్ రకం | 1 x Main Output, 2 x TRS, 1 x Phone (TRS), REC, RCA |
| ఆడియో ఇన్పుట్ | 2 x XLR, 4 x TRS |
| శబ్దం స్థాయి | 90 డెసిబెల్స్ |
| మూలం దేశం | చైనా |
14. వారంటీ
The Audio Array AI-13 mixer comes with a manufacturer's warranty.
- వారంటీ వ్యవధి: 1 సంవత్సరం తయారీదారు వారంటీ.
- For warranty claims or service, please contact Audio Array customer support.
15. మద్దతు
For any assistance, feedback, or technical support, please contact Audio Array using the details below:

Image 15.1: Service details and contact information.

Image 15.2: Customer Support contact details.
- ఫోన్: +91 79961 35111
- WhatsApp: +91 72082 64674
- ఇమెయిల్: support@audioarray.in
- చిరునామా: Cambium Retail Private Limited, 109, Hubtown Solaris, Professor NS Phadke Rd, Andheri East, Mumbai, Maharashtra 400069, India.
You can also scan the QR codes in Image 15.1 for direct access to support channels.