
1. పరిచయం
This manual provides detailed instructions for the setup, operation, and maintenance of your Magcubic HY320Pro projector. Please read this manual thoroughly before using the product to ensure proper function and safety.
2. భద్రతా సమాచారం
Always observe the following safety precautions to prevent damage to the projector and ensure user safety:
- వెంటిలేషన్ ఓపెనింగ్లను బ్లాక్ చేయవద్దు. ప్రొజెక్టర్ చుట్టూ తగినంత గాలి ప్రవాహాన్ని నిర్ధారించుకోండి.
- అగ్ని లేదా విద్యుత్ షాక్ను నివారించడానికి ప్రొజెక్టర్ను వర్షం లేదా తేమకు బహిర్గతం చేయవద్దు.
- l ఉన్నప్పుడు ప్రొజెక్టర్ లెన్స్లోకి నేరుగా చూడటం మానుకోండిamp ఆన్లో ఉంది.
- ప్రొజెక్టర్తో సరఫరా చేయబడిన పవర్ అడాప్టర్ను మాత్రమే ఉపయోగించండి.
- ప్రొజెక్టర్ను మీరే విడదీయడానికి లేదా రిపేర్ చేయడానికి ప్రయత్నించవద్దు. అర్హత కలిగిన సేవా సిబ్బందిని సంప్రదించండి.
- ప్రొజెక్టర్ను వేడి వనరుల నుండి మరియు ప్రత్యక్ష సూర్యకాంతి నుండి దూరంగా ఉంచండి.
3. ప్యాకేజీ విషయాలు
మీ ప్యాకేజీలో అన్ని అంశాలు ఉన్నాయని ధృవీకరించండి:
- Magcubic HY320Pro Projector
- పవర్ అడాప్టర్
- రిమోట్ కంట్రోల్
- వినియోగదారు మాన్యువల్ (ఈ పత్రం)
4. ఉత్పత్తి ముగిసిందిview
Familiarize yourself with the components of your Magcubic HY320Pro projector.
4.1 ఫ్రంట్ View
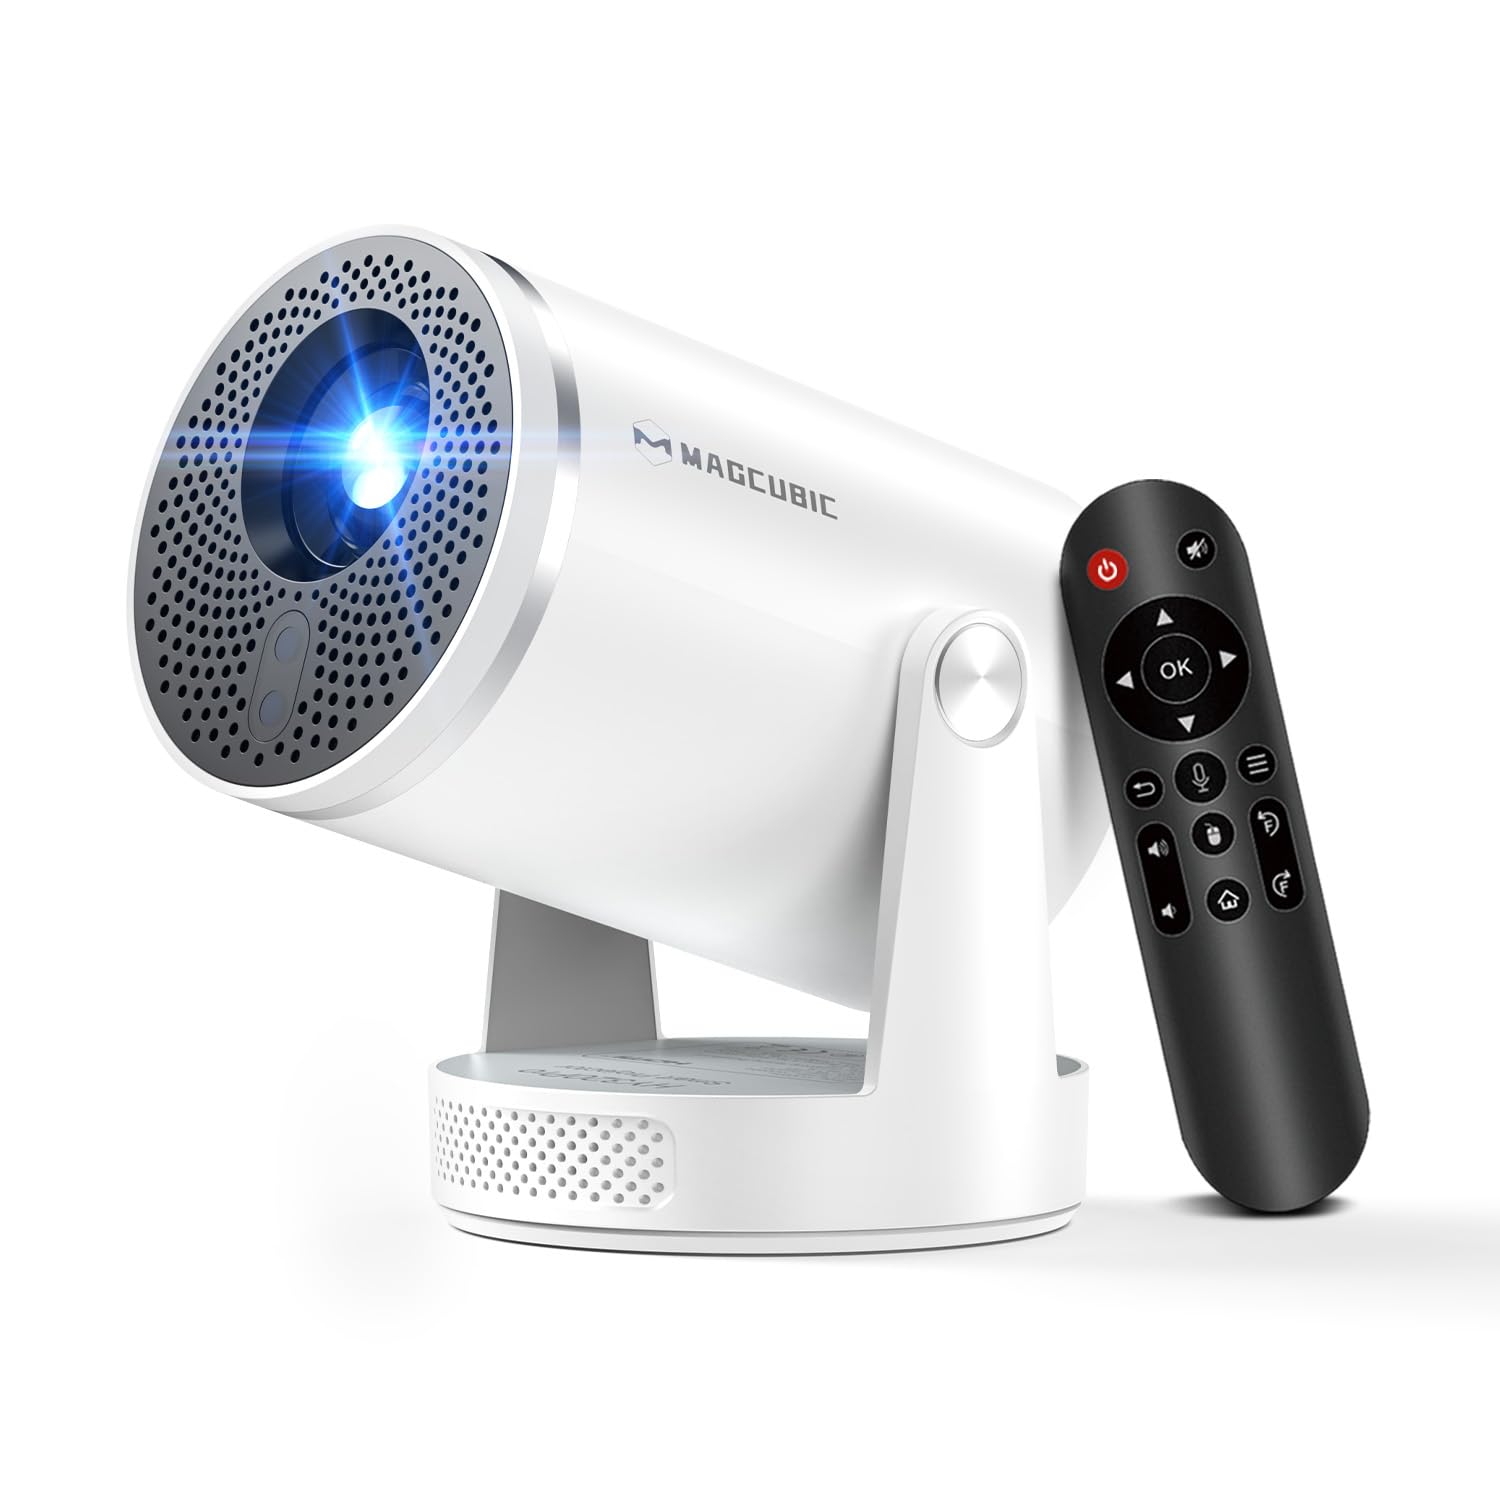
చిత్రం: ముందు భాగం view of the Magcubic HY320Pro projector, highlighting the projection lens and front ventilation grille.
4.2 వెనుక మరియు వైపు Views

చిత్రం: వెనుక మరియు పక్క view of the projector, illustrating the various input ports (HDMI, USB) and power connection.
4.3 రిమోట్ కంట్రోల్

Image: The remote control for the Magcubic HY320Pro projector, featuring navigation, volume, and power buttons, along with an Air Mouse function button.
5. సెటప్
5.1 ప్లేస్మెంట్
Position the projector on a stable, flat surface. The HY320Pro features a 180-degree rotatable projection, allowing it to project onto walls or ceilings.

Image: The projector positioned to project an image onto a ceiling, demonstrating its 180-degree rotation capability.
Refer to the projection distance table for optimal screen sizes:
| Projection Size (inches) | Projection Distance (feet) |
|---|---|
| 80" | 5.2 అడుగులు |
| 100" | 6.5 అడుగులు |
| 120" | 7.5 అడుగులు |
| 140" | 8.5 అడుగులు |
Table: Recommended projection distances for various screen sizes with the HY320Pro (0.8:1 projection ratio).
5.2 పవర్ కనెక్షన్
Connect the provided power adapter to the projector's power input and then plug it into a wall outlet.
5.3 Initial Power-On and Image Adjustment
Press the power button on the projector or remote control to turn it on. The projector features automatic focus and vertical keystone correction. The image will become clear within approximately 3 seconds.

Image: A visual representation of the projector's automatic focus and vertical keystone correction features, showing an image sharpening and aligning on a screen.
Manual horizontal keystone correction is available if needed. The zoom function allows adjustment of image size from 80% to 100%.
6. ఆపరేటింగ్ సూచనలు
6.1 బాహ్య పరికరాలను కనెక్ట్ చేయడం
ప్రొజెక్టర్ వివిధ కనెక్టివిటీ ఎంపికలకు మద్దతు ఇస్తుంది:
- HDMI: Connect gaming consoles, Blu-ray players, or other HDMI-enabled devices.
- USB: మీడియా ప్లేబ్యాక్ కోసం USB డ్రైవ్లను కనెక్ట్ చేయండి.
- బ్లూటూత్ 5.4: Pair with external headphones or speakers for enhanced audio.

Image: An illustration of various compatible devices that can be connected to the projector, such as smartphones, TV boxes, USB drives, and gaming consoles.
6.2 Wi-Fi Connection and Screen Mirroring
The projector features Wi-Fi 6 and dual-band (2.4 GHz + 5 GHz) network support for stable screen mirroring.
- Navigate to the Wi-Fi settings on the projector's main menu.
- Select your desired network and enter the password.
- For screen mirroring, select the appropriate option (e.g., AirPlay for iOS, Miracast for Android/Windows) from the projector's menu and follow the on-screen instructions to connect your device.

Image: A projector displaying content wirelessly, illustrating Wi-Fi 6 connectivity and compatibility with iOS, Windows, and Android devices for screen mirroring.
6.3 Using the Air Mouse Remote Control
The remote control includes a voice control feature and an Air Mouse function for easier navigation.
- బ్లూటూత్ని యాక్టివేట్ చేయండి: Ensure Bluetooth is enabled on the projector.
- జత చేయడం: Press and hold the left and right buttons on the remote simultaneously to establish the Bluetooth connection.
- ఎయిర్ మౌస్ ఫంక్షన్: Once paired, you can use the remote as an Air Mouse by moving it in the air to control the on-screen cursor.
- వాయిస్ నియంత్రణ: Use the voice button on the remote to search for content quickly.

Image: Step-by-step guide on how to activate and use the Air Mouse function of the remote control, including Bluetooth pairing instructions.
6.4 Android 14 System and Applications
The projector runs on Android 14, providing access to over 6,000 applications for streaming and entertainment.
- From the home screen, navigate to the "Store" or "Apps" section to browse and install applications like YouTube, Spotify, Disney+, Netflix, and more.
- Ensure a stable internet connection for optimal streaming performance.

Image: A projector screen displaying a wide array of streaming applications, demonstrating the Android 14 system's access to various entertainment platforms.
7. నిర్వహణ
Proper maintenance ensures the longevity and performance of your projector.
- లెన్స్ శుభ్రపరచడం: ఆప్టికల్ లెన్స్ల కోసం ప్రత్యేకంగా రూపొందించిన మృదువైన, మెత్తటి రహిత వస్త్రాన్ని ఉపయోగించండి. రాపిడి క్లీనర్లను ఉపయోగించవద్దు.
- బాహ్య క్లీనింగ్: ప్రొజెక్టర్ యొక్క బాహ్య భాగాన్ని మృదువైన, పొడి వస్త్రంతో తుడవండి. మొండి ధూళి కోసం, కొద్దిగా d ఉపయోగించండి.amp గుడ్డ ఆపై పూర్తిగా పొడిగా.
- వెంటిలేషన్: వేడెక్కకుండా నిరోధించడానికి వెంటిలేషన్ ఓపెనింగ్లు దుమ్ము మరియు శిధిలాల నుండి స్పష్టంగా ఉన్నాయో లేదో క్రమం తప్పకుండా తనిఖీ చేయండి.
- నిల్వ: ఎక్కువసేపు ఉపయోగంలో లేనప్పుడు, ప్రొజెక్టర్ను చల్లని, పొడి ప్రదేశంలో, దుమ్ము నుండి రక్షించబడిన ప్రదేశంలో నిల్వ చేయండి.
8. ట్రబుల్షూటింగ్
మీ ప్రొజెక్టర్తో మీకు సమస్యలు ఎదురైతే, ఈ క్రింది సాధారణ సమస్యలు మరియు పరిష్కారాలను చూడండి:
| సమస్య | సాధ్యమైన కారణం | పరిష్కారం |
|---|---|---|
| ఏ చిత్రం ప్రదర్శించబడలేదు | Power cable disconnected, input source incorrect, lens cap on. | పవర్ కనెక్షన్ను తనిఖీ చేయండి, సరైన ఇన్పుట్ సోర్స్ (HDMI/USB) ఎంచుకోండి, లెన్స్ క్యాప్ను తీసివేయండి. |
| చిత్రం అస్పష్టంగా ఉంది | Out of focus, projector not perpendicular to screen. | Allow auto-focus to complete. Adjust manual keystone correction if needed. Ensure projector is placed squarely. |
| శబ్దం లేదు | వాల్యూమ్ చాలా తక్కువగా ఉంది, బాహ్య ఆడియో పరికరం కనెక్ట్ కాలేదు, తప్పు ఆడియో అవుట్పుట్ ఎంచుకోబడింది. | Increase volume. Check Bluetooth connection for external speakers/headphones. Verify audio output settings. |
| రిమోట్ కంట్రోల్ పనిచేయడం లేదు | Batteries low/dead, remote not paired (for Air Mouse). | Replace batteries. Re-pair the remote control via Bluetooth as described in section 6.3. |
| Wi-Fi కనెక్షన్ అస్థిరంగా ఉంది | Weak signal, interference, incorrect password. | Move projector closer to router. Ensure no obstructions. Re-enter Wi-Fi password. Try 5GHz band if available. |
9. స్పెసిఫికేషన్లు
Key technical specifications for the Magcubic HY320Pro projector:
| ఫీచర్ | స్పెసిఫికేషన్ |
|---|---|
| బ్రాండ్ | మాగ్క్యూబిక్ |
| మోడల్ సంఖ్య | HY320Pro |
| స్థానిక రిజల్యూషన్ | 1920 x 1080 (1080p) |
| గరిష్ట డిస్ప్లే రిజల్యూషన్ | 4096 x 2160 (4K సపోర్ట్) |
| ప్రకాశం | 400 ANSI లుమెన్స్ |
| కాంట్రాస్ట్ రేషియో | 10000:1 |
| కనెక్టివిటీ టెక్నాలజీ | వై-ఫై 6, బ్లూటూత్ 5.4 |
| ప్రదర్శన రకం | LED |
| ఫారమ్ ఫ్యాక్టర్ | పోర్టబుల్ |
| మౌంటు రకం | గ్రౌండ్ మౌంట్ |
| సిఫార్సు చేసిన ఉపయోగాలు | Educational, Home Cinema, Office |
| ప్రత్యేక ఫీచర్ | Short Throw, Auto Focus, Auto Vertical Keystone Correction, Manual Horizontal Keystone Correction, 180° Projection |
| ఇంటిగ్రేటెడ్ స్పీకర్ | 5W |
| ఆపరేటింగ్ సిస్టమ్ | ఆండ్రాయిడ్ 14 |
| గరిష్ట ప్రొజెక్షన్ దూరం | 3.25 మీటర్లు |
| గరిష్ట చిత్ర పరిమాణం | 140 అంగుళాలు |
| Min Image Size | 40 అంగుళాలు |
| హార్డ్వేర్ ఇంటర్ఫేస్ | HDMI, USB |
| వస్తువు బరువు | 1.3 పౌండ్లు (సుమారు 0.59 కిలోలు) |
| కొలతలు (సుమారుగా) | 198.85 x 116 x 110 మిమీ |
10. వారంటీ మరియు మద్దతు
The product comes with a 1-year warranty. For technical support, warranty claims, or service inquiries, please contact your retailer or the manufacturer directly. Refer to the contact information provided with your purchase documentation.