పరిచయం
This manual provides comprehensive instructions for the setup, operation, maintenance, and troubleshooting of your RODE Videomic Pro on-camera microphone. Please read this manual thoroughly before using the product to ensure optimal performance and longevity.
The RODE Videomic Pro is a compact, lightweight shotgun microphone designed for use with camcorders, DSLR cameras, and portable audio recorders. Its integrated Rycote Lyre shock mounting system isolates the microphone capsule from external vibrations, providing clear audio capture.
ప్యాకేజీ విషయాలు
ప్యాకేజీని తెరిచినప్పుడు, దయచేసి అన్ని భాగాలు ఉన్నాయని నిర్ధారించుకోండి:
- RODE Videomic Pro Microphone
- ఫోమ్ విండ్షీల్డ్
- ఇంటిగ్రేటెడ్ రైకోట్ లైర్ షాక్ మౌంట్
- 3.5mm Stereo Mini-Jack Output Cable (attached)
- Furry Wind Cover (Dead Cat)
సెటప్
Follow these steps to set up your RODE Videomic Pro:
- బ్యాటరీని ఇన్స్టాల్ చేయండి: The Videomic Pro requires a 9V battery (not included). Open the battery compartment located on the underside of the microphone body and insert the battery, observing the correct polarity.
- మౌంటు:
The microphone features an integrated cold shoe mount. Slide the mount into your camera's hot shoe or a compatible cold shoe adapter. Tighten the locking wheel securely to prevent accidental detachment.
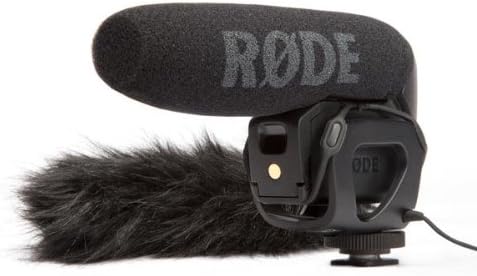
Image: The RODE Videomic Pro, a black shotgun microphone with a foam windshield, shown with an optional furry wind cover (dead cat) and its integrated shock mount. The RODE logo is visible on the foam windshield.
- కెమెరాకు కనెక్ట్ చేయండి: Plug the attached 3.5mm stereo mini-jack cable into your camera's microphone input port. Ensure the connection is firm.
- Attach Windshield: Place the foam windshield over the microphone capsule. For outdoor use or windy conditions, the included furry wind cover (dead cat) can be used over the foam windshield for superior wind noise reduction.
ఆపరేటింగ్ సూచనలు
Understanding the controls and settings will help you achieve the best audio quality.
పవర్ ఆన్/ఆఫ్
Locate the power switch on the rear of the microphone. Slide it to the 'ON' position to power on the microphone. Slide it to 'OFF' when not in use to conserve battery life.
Level Control (dB)
The Videomic Pro features a three-position level control switch on the rear:
- 0 dB: Standard gain setting, suitable for most recording situations.
- +20 dB: Boosts the output level by 20dB. Useful for cameras with noisy preamps or when recording quiet sources.
- -10 dB: Attenuates the output level by 10dB. Ideal for recording loud sound sources to prevent distortion.
హై-పాస్ ఫిల్టర్ (HPF)
A three-position high-pass filter switch is also located on the rear of the microphone:
- ఫ్లాట్: No filter applied. Captures the full frequency range.
- 75Hz: Engages a 75Hz high-pass filter. This helps to reduce low-frequency noise such as air conditioner hum or traffic rumble.
- 150Hz: Engages a 150Hz high-pass filter. This provides a stronger cut-off for more aggressive low-frequency noise reduction, useful in very noisy environments.
ముఖ్యమైన గమనిక:
Always monitor your audio using headphones connected to your camera's headphone output (if available) to ensure proper levels and prevent clipping. Adjust the microphone's level control and your camera's audio input levels accordingly.
నిర్వహణ
Proper care will extend the life of your RODE Videomic Pro:
- శుభ్రపరచడం: మైక్రోఫోన్ బాడీని శుభ్రం చేయడానికి మృదువైన, పొడి వస్త్రాన్ని ఉపయోగించండి. ద్రవ క్లీనర్లను లేదా ద్రావకాలను ఉపయోగించవద్దు.
- Windshield Care: The foam windshield can be gently hand-washed with mild soap and water if it becomes dirty. Allow it to air dry completely before reattaching.
- బ్యాటరీ భర్తీ: Replace the 9V battery when the low battery indicator light (if present) illuminates, or if you notice a decrease in audio quality. Always remove the battery if the microphone will not be used for an extended period to prevent leakage.
- నిల్వ: మైక్రోఫోన్ను ప్రత్యక్ష సూర్యకాంతి మరియు విపరీతమైన ఉష్ణోగ్రతల నుండి దూరంగా, చల్లని, పొడి ప్రదేశంలో నిల్వ చేయండి.
- షాక్ మౌంట్: The Rycote Lyre shock mount is durable, but avoid excessive force or bending to prevent damage.
ట్రబుల్షూటింగ్
If you encounter issues with your Videomic Pro, refer to the following common problems and solutions:
| సమస్య | సాధ్యమైన కారణం | పరిష్కారం |
|---|---|---|
| No audio or very low audio level. |
|
|
| Distorted or clipped audio. |
|
|
| Excessive wind noise or low-frequency rumble. |
|
|
| Vibrations or handling noise in audio. |
|
|
స్పెసిఫికేషన్లు
| ఫీచర్ | వివరాలు |
|---|---|
| మైక్రోఫోన్ ఫారమ్ ఫ్యాక్టర్ | షాట్గన్ |
| ధ్రువ నమూనా | సూపర్ కార్డియోయిడ్ |
| ఫ్రీక్వెన్సీ రేంజ్ | 20Hz - 20kHz (selected HPF @75Hz/150Hz) |
| సిగ్నల్-టు-శబ్ద నిష్పత్తి | 70 డిబి |
| శబ్దం స్థాయి | 14 డిబి |
| ఆడియో సెన్సిటివిటీ | 12 డిబి |
| ఇంపెడెన్స్ | 200 ఓం |
| కనెక్టర్ రకం | 3.5 మి.మీ జాక్ |
| శక్తి మూలం | Battery Powered (9V battery) |
| అనుకూల పరికరాలు | కెమెరా |
| వస్తువు బరువు | 4.3 ఔన్సులు (122 గ్రాములు) |
| ఉత్పత్తి కొలతలు (L x W x H) | 1.69 x 5.91 x 3.74 అంగుళాలు |
| చేర్చబడిన భాగాలు | Microphone, Foam Windshield, Integrated Rycote Lyre Shock Mount, 3.5mm Cable, Furry Wind Cover |
గమనిక: నోటీసు లేకుండా లక్షణాలు మారతాయి.
వారంటీ మరియు మద్దతు
RODE Microphones offers a comprehensive warranty for its products. For detailed warranty information, product registration, and technical support, please visit the official RODE webసైట్ లేదా వారి కస్టమర్ సేవను నేరుగా సంప్రదించండి.
ఆన్లైన్ వనరులు:
- Official RODE Webసైట్: www.rode.com
- Product Support: Refer to the support section on the RODE website for FAQs, firmware updates, and service requests.
వారంటీ క్లెయిమ్ల కోసం దయచేసి మీ కొనుగోలు రుజువును ఉంచుకోండి.


