పరిచయం
The PreSonus AudioBox Studio package provides a complete solution for computer-based recording. This manual guides you through the setup, operation, and maintenance of your AudioBox USB interface, M7 large-diaphragm condenser microphone, HD7 professional monitoring headphones, and Studio One Artist digital audio workstation software.
ఉత్పత్తి భాగాలు
Your PreSonus AudioBox Studio package includes the following components:
- AudioBox USB Interface: A 2-channel USB audio/MIDI interface for connecting microphones and instruments to your computer.
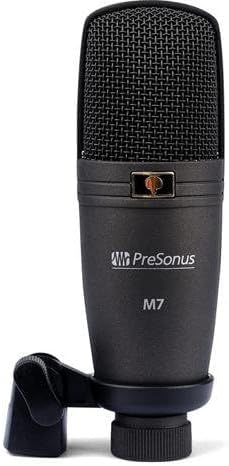
- M7 Microphone: A large-diaphragm condenser microphone for capturing vocals and instruments.
- HD7 Headphones: High-definition headphones for accurate audio monitoring.
- USB కేబుల్: For connecting the AudioBox USB to your computer.
- మైక్రోఫోన్ కేబుల్: For connecting the M7 microphone to the AudioBox USB.
- Studio One Artist Software: A digital audio workstation (DAW) for recording, editing, and mixing audio.


సెటప్
సిస్టమ్ అవసరాలు
The AudioBox Studio package is compatible with personal computers running Windows operating systems. Ensure your system meets the minimum requirements for Studio One Artist software.
హార్డ్వేర్ కనెక్షన్
- Connect AudioBox USB: Use the provided USB cable to connect the AudioBox USB interface to an available USB port on your computer. The AudioBox USB is bus-powered, meaning it draws power directly from the USB connection.
- Connect M7 Microphone: Connect the M7 microphone to one of the XLR inputs (Input 1 or Input 2) on the front of the AudioBox USB using the provided microphone cable. If using a condenser microphone like the M7, ensure 48V phantom power is enabled (see Operating Instructions).
- Connect HD7 Headphones: Plug the HD7 headphones into the 'Phones' output jack on the front of the AudioBox USB.

సాఫ్ట్వేర్ ఇన్స్టాలేషన్
- డ్రైవర్లను ఇన్స్టాల్ చేయండి: Before installing Studio One Artist, install the necessary drivers for your AudioBox USB. These can typically be found on the PreSonus website. It is recommended to download the latest drivers directly from presonus.com.
- Install Studio One Artist: Follow the instructions provided with your package to install Studio One Artist software. This usually involves downloading the software from the PreSonus website and entering a product key.
- సాఫ్ట్వేర్ యాక్టివేషన్: Activate Studio One Artist online as prompted during installation.
ఆపరేటింగ్ సూచనలు
AudioBox USB Controls
Familiarize yourself with the controls on the front panel of your AudioBox USB:
- Input 1/2 Gain Knobs: Adjust the input level for microphones or instruments connected to Input 1 and Input 2.
- క్లిప్ LED లు: Illuminate when the input signal is too high, indicating potential clipping. Reduce the gain if these light up.
- 48V బటన్: Activates phantom power for condenser microphones (like the M7). Press this button when using condenser microphones.
- Mixer Knob: Blends the direct input signal with the playback signal from your computer for zero-latency monitoring. Turn towards 'Inputs' to hear more of your live input, towards 'Playback' to hear more of your computer's audio.
- Main Knob: Controls the overall output level to your main studio monitors (if connected to the rear outputs).
- Phones Knob: Adjusts the volume level for the headphones output.
- పవర్ LED: Indicates that the AudioBox USB is receiving power and is connected.
Recording with Studio One Artist
- Launch Studio One Artist: మీ కంప్యూటర్లో సాఫ్ట్వేర్ను తెరవండి.
- Create New Song: Start a new project and configure your audio device settings to use the AudioBox USB.
- Add Audio Track: Create a new audio track for your microphone or instrument.
- రికార్డింగ్ కోసం చేయి: Select the correct input (e.g., Input 1 for M7 mic) and arm the track for recording.
- Set Input Level: Speak or play into the microphone/instrument and adjust the corresponding Input Gain knob on the AudioBox USB until the signal is strong but does not consistently light the Clip LED.
- మానిటర్ ఆడియో: Use the HD7 headphones and adjust the Phones knob and Mixer knob on the AudioBox USB to achieve a comfortable monitoring balance.
- రికార్డ్: Press the record button in Studio One Artist to begin recording.
Zero-Latency Monitoring
The AudioBox USB features a hardware mixer (controlled by the Mixer knob) that allows for zero-latency monitoring. This means you can hear your live input signal directly through your headphones without any delay, which is crucial for comfortable recording performance.
నిర్వహణ
To ensure the longevity and optimal performance of your PreSonus AudioBox Studio components:
- శుభ్రపరచడం: Use a soft, dry cloth to clean the surfaces of the AudioBox USB, M7 microphone, and HD7 headphones. Avoid using liquid cleaners or solvents.
- నిల్వ: Store components in a dry, dust-free environment when not in use.
- కేబుల్ కేర్: Avoid sharp bends or excessive pulling on cables to prevent damage.
- మైక్రోఫోన్ రక్షణ: When not in use, store the M7 microphone in its protective pouch or case to prevent dust and physical damage.
ట్రబుల్షూటింగ్
If you encounter issues with your AudioBox Studio package, consider the following common solutions:
- No Sound/Device Not Recognized:
- Ensure the AudioBox USB is securely connected to your computer via USB.
- Verify that the AudioBox USB drivers are correctly installed and updated.
- Check your computer's sound settings and Studio One Artist's audio device settings to ensure the AudioBox USB is selected as the input/output device.
- Microphone Not Working/Low Level:
- Confirm the M7 microphone is properly connected to an XLR input on the AudioBox USB.
- Ensure the 48V phantom power button is engaged for the M7 condenser microphone.
- Adjust the corresponding Input Gain knob on the AudioBox USB.
- Check that the track in Studio One Artist is armed for recording and the correct input is selected.
- Hissing/Noise in Recordings:
- అన్ని కేబుల్స్ సురక్షితంగా కనెక్ట్ అయ్యాయని మరియు దెబ్బతినకుండా చూసుకోండి.
- Reduce input gain if the Clip LED is frequently lighting up.
- Test in a different USB port on your computer.
- Minimize other electrical interference sources near your setup.
- Software Issues (Studio One Artist):
- Ensure your Studio One Artist software is updated to the latest version.
- Refer to the Studio One Artist user manual or online resources for specific software-related troubleshooting.
మరిన్ని సహాయం కోసం, దయచేసి చూడండి PreSonus Support webసైట్.
స్పెసిఫికేషన్లు
| వస్తువు బరువు | 2 పౌండ్లు |
| ఉత్పత్తి కొలతలు | 9.8 x 3.54 x 6.69 అంగుళాలు |
| అంశం మోడల్ సంఖ్య | Abox Studio |
| ఛానెల్ల సంఖ్య | 2 |
| కనెక్టివిటీ టెక్నాలజీ | USB |
| మద్దతు ఉన్న సాఫ్ట్వేర్ | స్టూడియో వన్ |
| అనుకూల పరికరాలు | వ్యక్తిగత కంప్యూటర్ |
| ఆపరేటింగ్ సిస్టమ్ | విండోస్ |
వారంటీ సమాచారం
PreSonus products are covered by a limited warranty. For detailed information regarding the warranty period, coverage, and terms and conditions for your AudioBox Studio package, please visit the official PreSonus website and navigate to the support or warranty section. Retain your proof of purchase for warranty claims.
మద్దతు
For technical support, product registration, driver downloads, and additional resources, please visit the PreSonus support page:
https://www.presonus.com/support
You can also find user forums and knowledge bases on the PreSonus website for community assistance and common queries.


