1. పరిచయం
This instruction manual provides comprehensive guidance for the safe and effective installation, operation, and maintenance of your LiftMaster 41A5434-11A Garage Door Opener Belt Assembly. This belt assembly is designed as a direct replacement for standard 7-foot high garage doors, ensuring reliable performance for compatible LiftMaster and Chamberlain belt drive models. Please read this manual thoroughly before proceeding with installation or any maintenance procedures.
2. భద్రతా సమాచారం
WARNING: Garage door openers involve high voltage electricity and powerful moving parts. Improper installation or repair can result in serious injury or death. Always exercise extreme caution.
- Always disconnect power to the garage door opener before attempting any installation, repair, or maintenance.
- Ensure the garage door is in the fully closed position before beginning work.
- కదిలే భాగాలలో చిక్కుకునే అవకాశం ఉన్న వదులుగా ఉండే దుస్తులు లేదా నగలు ధరించవద్దు.
- Keep hands and fingers clear of all moving components, especially during tensioning.
- If you are unsure about any step, consult a qualified garage door technician.
- Refer to your original garage door opener's manual for specific safety warnings and procedures.
3. అనుకూలత
The LiftMaster 41A5434-11A Belt Assembly is compatible with the following garage door opener models for standard 7-foot high garage doors:
- LiftMaster Belt Drive Models: 2500, 2580, 2280, 3500, 3580, 3280
- Chamberlain Belt Drive Models: WD822k, WD922k, WD912k
This belt is designed for a standard 7-foot high garage door, with an end-to-end belt length of 233 1/2 inches.
4. ప్యాకేజీ విషయాలు
మీ ప్యాకేజీలో ఈ క్రింది అంశాలు ఉండాలి:
- 1x LiftMaster 41A5434-11A Garage Door Opener Belt Assembly

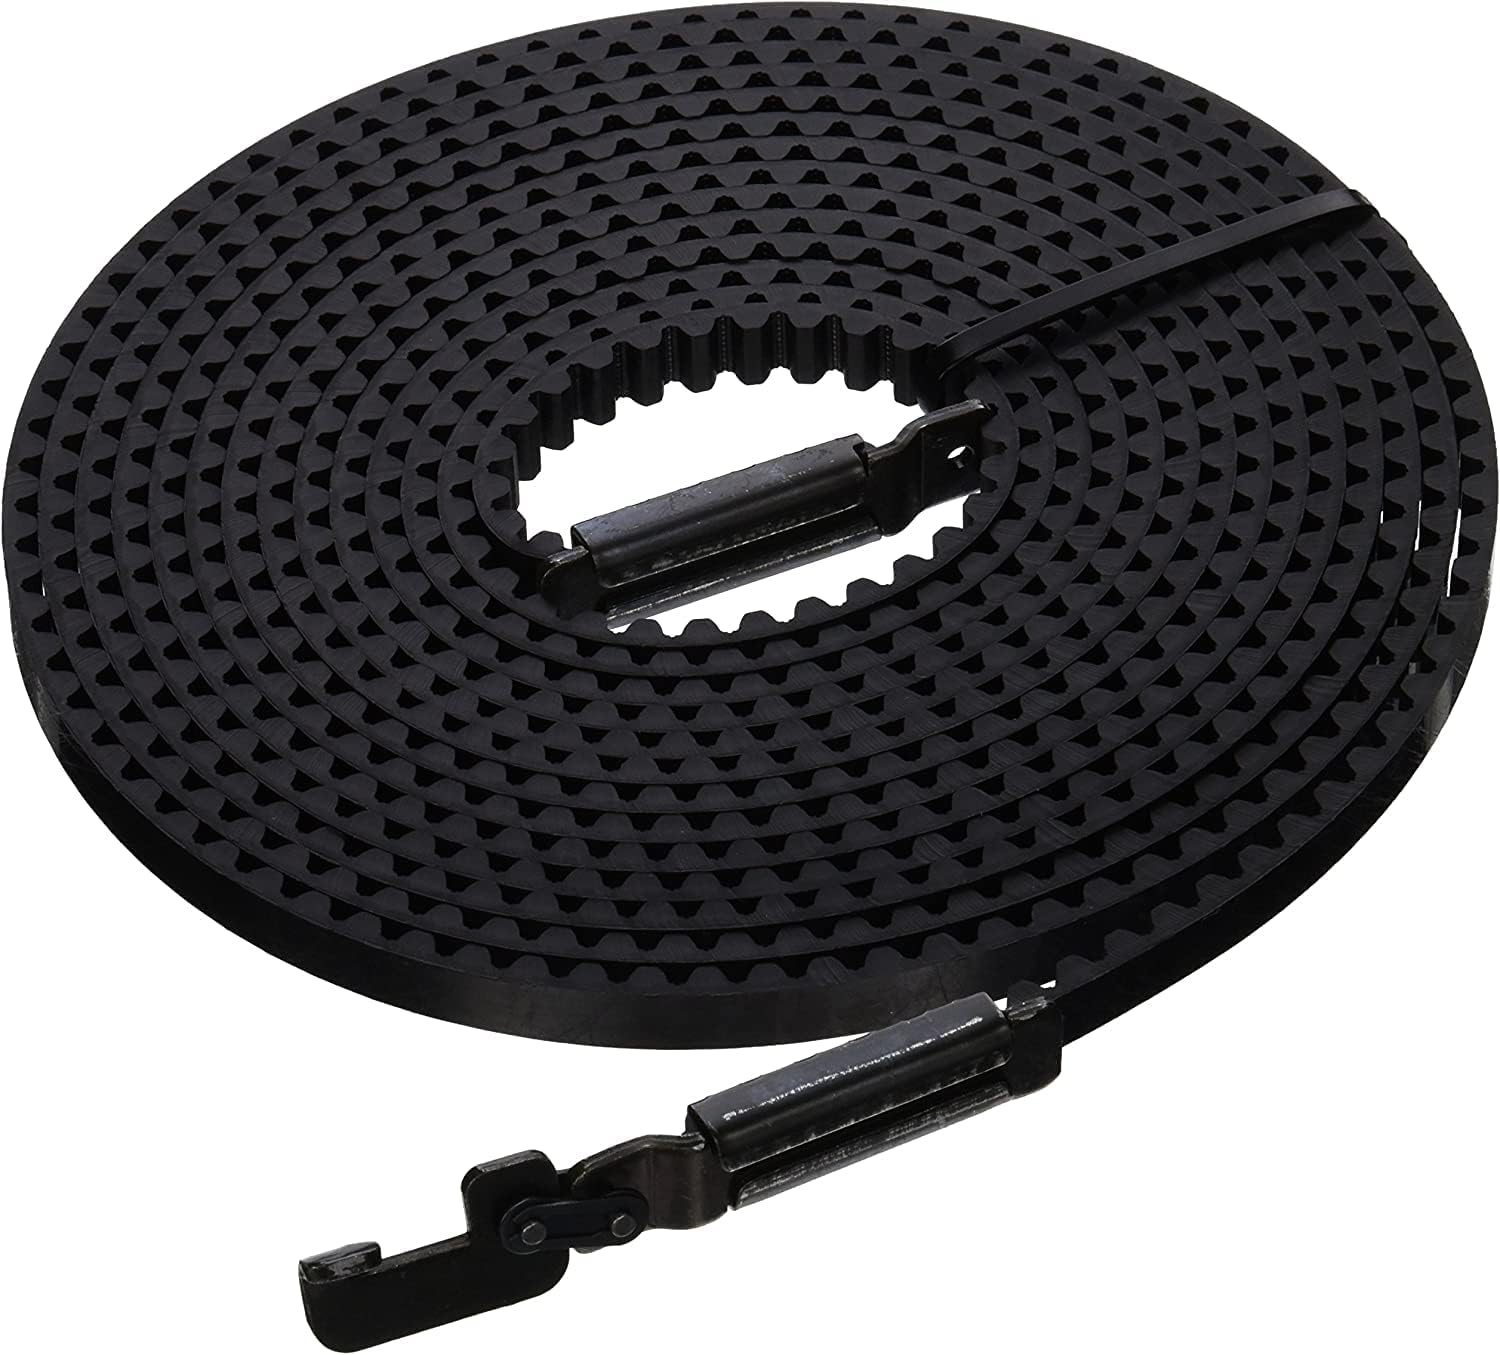
Image 1: The LiftMaster 41A5434-11A Garage Door Opener Belt Assembly, coiled for packaging, showing the belt and the attached trolley connector.
5. ఇన్స్టాలేషన్ సూచనలు
This section outlines the general steps for replacing your garage door opener belt. Specific procedures may vary slightly depending on your exact opener model. It is highly recommended to consult your original opener's manual or official LiftMaster/Chamberlain installation videos for detailed visual guidance.
- ఇన్స్టాలేషన్ కోసం సిద్ధం చేయండి:
- Ensure the garage door is fully closed.
- Disconnect all power to the garage door opener by unplugging it or turning off the circuit breaker.
- Release the emergency release handle to disengage the garage door from the opener trolley.
- పాత బెల్ట్ తొలగించండి:
- Locate the tensioning bolt or mechanism at the idler pulley end (opposite the motor unit). Loosen this mechanism to relieve tension on the old belt.
- At the motor unit, you may need to remove a pulley cover. Carefully remove the old belt from the motor's drive sprocket and the idler pulley.
- Disconnect the old belt from the trolley assembly. Note how it was attached for reassembly.
- కొత్త బెల్ట్ను ఇన్స్టాల్ చేయండి:
- Attach one end of the new 41A5434-11A belt assembly to the trolley. The new belt often comes with one end pre-attached to the trolley connector.
- Route the belt around the idler pulley at the far end of the rail.
- Route the belt around the drive sprocket on the motor unit. Ensure the teeth of the belt engage correctly with the sprocket.
- Connect the other end of the belt to the trolley, ensuring it is properly secured and aligned.

చిత్రం 2: క్లోజప్ view of the belt assembly's connector mechanism, which attaches to the garage door opener trolley.
- బెల్ట్ను టెన్షన్ చేయండి:
- Gradually tighten the tensioning bolt at the idler pulley end. The belt should be taut enough so that it does not sag below the rail, but not overly tight. Over-tightening can cause premature wear on the belt and opener components.
- A common guideline is that the belt should deflect slightly (about 1/2 inch) when pressed firmly with a finger. Refer to your opener's manual for specific tensioning recommendations.

Image 3: The belt assembly laid out, highlighting the tensioning mechanism and the overall length.
- Re-engage and Test:
- గ్యారేజ్ డోర్ ఓపెనర్కి పవర్ని మళ్లీ కనెక్ట్ చేయండి.
- Before re-engaging the door, run the opener through a full open and close cycle without the door attached. Observe the trolley's movement. Ensure it travels fully to both the open and closed positions. If the trolley stops halfway, it might be due to the opener's safety features. In this case, disconnect power, manually move the trolley to the "closed door" position (closest to the door), and then re-engage power and test again.
- Once satisfied with the trolley's movement, re-engage the garage door to the trolley.
- Perform several full open and close cycles with the door attached. Observe the door's movement and listen for any unusual noises.
- Adjust the opener's force and travel limits if necessary, following your original opener's manual.
చిత్రం 4: పూర్తి view of the LiftMaster 41A5434-11A belt assembly, showing its full length and both end connectors.
6. Operating the Garage Door Opener
Once the belt assembly is correctly installed and tensioned, the operation of your garage door opener will resume as normal. Refer to your original garage door opener manual for instructions on using remote controls, wall consoles, and other accessories.
- Ensure the safety reversal system (photo eyes) is functioning correctly after installation.
- Regularly test the safety features of your garage door opener.
7. నిర్వహణ
Proper maintenance can extend the life of your garage door opener belt assembly and ensure safe operation.
- సాధారణ తనిఖీ: Periodically inspect the belt for signs of wear, fraying, cracking, or missing teeth. Check the tension and adjust if necessary.
- పరిశుభ్రత: Keep the belt and rail free from dirt, debris, and obstructions.
- సరళత: Do not lubricate the belt itself. Refer to your opener's manual for lubrication points on other components like rollers, hinges, and springs.
- బ్యాలెన్స్: Ensure your garage door is properly balanced. A poorly balanced door puts excessive strain on the opener and belt.
8. ట్రబుల్షూటింగ్
If you encounter issues after replacing the belt, consider the following common troubleshooting steps:
| సమస్య | సాధ్యమైన కారణం | పరిష్కారం |
|---|---|---|
| Opener runs but door does not move. | Belt not engaged with trolley, or trolley is disengaged from door. | Ensure the belt is properly connected to the trolley. Re-engage the trolley to the garage door. |
| Belt appears loose or sags. | Insufficient belt tension. | Adjust the belt tensioning mechanism as described in Section 5. |
| Door reverses or stops unexpectedly. | Safety reversal system obstruction, force/travel limits incorrect, or door balance issue. | Check photo eyes for alignment or obstructions. Adjust force/travel limits. Check door balance. |
| Unusual noises from the belt. | Belt rubbing, improper tension, or worn components. | Inspect belt path for obstructions. Adjust tension. Check other opener components for wear. |
For further assistance, refer to your original garage door opener's troubleshooting guide or contact LiftMaster customer support.
9. స్పెసిఫికేషన్లు
| మోడల్ సంఖ్య | 41A5434-11A |
| బ్రాండ్ | లిఫ్ట్ మాస్టర్ / ఛాంబర్లైన్ |
| అనుకూలత | LiftMaster 2500, 2580, 2280, 3500, 3580, 3280; Chamberlain WD822k, WD922k, WD912k |
| తలుపు ఎత్తు | Standard 7-foot high garage doors |
| Belt Length (End to End) | 233 1/2 inches (approx. 593.09 cm) |
| వస్తువు బరువు | 1.06 పౌండ్లు (సుమారు 0.48 కిలోలు) |
| ఉత్పత్తి కొలతలు | 233.5 x 0.5 x 0.5 అంగుళాలు (సుమారు 593.09 x 1.27 x 1.27 సెం.మీ) |
10. వారంటీ మరియు మద్దతు
For information regarding warranty coverage for your LiftMaster 41A5434-11A Garage Door Opener Belt Assembly, please refer to the warranty documentation provided with your original garage door opener or visit the official LiftMaster website. For technical support or further assistance, please contact LiftMaster customer service directly.
LiftMaster Official Webసైట్: www.liftmaster.com


