1. పరిచయం మరియు ఉత్పత్తి ముగిసిందిview
This manual provides essential information for the proper installation, operation, and maintenance of your DB Electrical 400-48168 Alternator. This unit is designed as a direct replacement for specific Mazda vehicles, ensuring reliable performance for your vehicle's electrical system.
An alternator is a key component in a vehicle's charging system. It converts mechanical energy from the engine into electrical energy to power the vehicle's electrical components and recharge the battery.
2. భద్రతా సమాచారం
Always prioritize safety when working with automotive electrical systems. Failure to follow safety precautions can result in serious injury or damage to the vehicle.
- Disconnect the vehicle's battery before beginning any work on the electrical system to prevent accidental short circuits or electrical shocks.
- భద్రతా గ్లాసెస్ మరియు చేతి తొడుగులు సహా తగిన వ్యక్తిగత రక్షణ పరికరాలు (PPE) ధరించండి.
- Ensure the vehicle is on a stable, level surface and properly supported if lifting is required.
- Allow the engine to cool down completely before working on components in the engine bay.
- ఏదైనా దశ గురించి మీకు ఖచ్చితంగా తెలియకపోతే, అర్హత కలిగిన ఆటోమోటివ్ టెక్నీషియన్ను సంప్రదించండి.
3. సెటప్ మరియు ఇన్స్టాలేషన్
This alternator is designed as a direct replacement for the specified Mazda models. It is crucial to verify that this part fits your vehicle before proceeding with installation.
3.1 ప్రీ-ఇన్స్టాలేషన్ చెక్
- Confirm the part number and specifications match your vehicle's requirements.
- Inspect the new alternator for any visible damage from shipping.
- అవసరమైన అన్ని ఉపకరణాలు మరియు పరికరాలు అందుబాటులో ఉన్నాయని నిర్ధారించుకోండి.
3.2 సంస్థాపనా దశలు (సాధారణ మార్గదర్శకాలు)
The following are general steps for alternator replacement. Specific procedures may vary by vehicle model. Refer to your vehicle's service manual for detailed instructions.
- Disconnect the negative battery terminal, then the positive battery terminal.
- Locate the existing alternator in the engine bay.
- Loosen the serpentine belt tensioner and remove the belt from the alternator pulley.
- Disconnect all electrical connections from the old alternator (main power wire, regulator wire).
- Remove the mounting bolts securing the old alternator and carefully remove it from the vehicle.
- Position the new DB Electrical 400-48168 Alternator into place and secure it with the mounting bolts.
- Reconnect all electrical connections, ensuring they are tight and secure.
- Reinstall the serpentine belt onto the alternator pulley and tension it correctly.
- Reconnect the positive battery terminal, then the negative battery terminal.
- Start the engine and check for proper charging system operation (e.g., battery light off, voltagఇ చదవడం).
4. ఆపరేటింగ్ సూత్రాలు
The DB Electrical 400-48168 Alternator operates by converting mechanical energy from the engine's crankshaft (via the serpentine belt) into alternating current (AC) electricity. This AC current is then rectified into direct current (DC) by internal diodes, which is suitable for the vehicle's electrical system and battery charging.
అంతర్గత వాల్యూమ్tage regulator maintains a consistent output voltage, typically around 13.5 to 14.5 volts, regardless of engine speed or electrical load, protecting the battery and other electrical components from overcharging or undercharging.
5. నిర్వహణ
Alternators are generally low-maintenance components. However, regular checks of related systems can prolong its lifespan and ensure optimal performance.
- సర్పెంటైన్ బెల్ట్ తనిఖీ: Regularly check the serpentine belt for cracks, fraying, or excessive wear. Ensure it has proper tension. A loose or worn belt can lead to insufficient charging.
- బ్యాటరీ ఆరోగ్యం: A weak or failing battery can put undue strain on the alternator. Ensure your vehicle's battery is in good condition and holds a charge properly.
- విద్యుత్ కనెక్షన్లు: Periodically inspect all electrical connections to the alternator for corrosion or looseness. Clean any corrosion and ensure connections are tight.
- ఓవర్లోడింగ్ను నివారించండి: Minimize the use of excessive electrical accessories when the engine is off or at very low RPMs to reduce strain on the charging system.
6. ట్రబుల్షూటింగ్
If you experience issues with your vehicle's charging system, consider the following common troubleshooting steps. Always consult a qualified technician if you are unsure.
| లక్షణం | సాధ్యమైన కారణం | పరిష్కారం |
|---|---|---|
| బ్యాటరీ హెచ్చరిక లైట్ ఆన్ చేయబడింది | Faulty alternator, loose/worn belt, wiring issue, bad battery. | Check belt tension, inspect wiring, test battery and alternator output. |
| Dim Headlights/Interior Lights | Insufficient alternator output, weak battery. | Test charging system voltage, check battery health. |
| Battery Drains Frequently | Alternator not charging, parasitic drain, failing battery. | Test charging system, check for parasitic drains, test battery. |
| Grinding or Whining Noise | Worn alternator bearings, loose pulley. | Inspect alternator for physical damage or looseness. Replacement may be necessary. |
7. ఉత్పత్తి లక్షణాలు
The DB Electrical 400-48168 Alternator is manufactured to meet OEM specifications for reliable performance.
- యూనిట్ రకం: ఆల్టర్నేటర్
- వాల్యూమ్tage: 12V
- భ్రమణం: CW (సవ్యదిశలో)
- Ampకోపం: 110 Amps
- గడియారం: 3
- Pulley Class: S6
- రెగ్యులేటర్: IR (Internal Regulator)
- ఫ్యాన్ రకం: IF (Internal Fan)
- వస్తువు బరువు: 13.64 పౌండ్లు
- ఉత్పత్తి కొలతలు: 5.65 x 4.86 x 5 అంగుళాలు
- మూలం దేశం: చైనా
- మోడల్ సంఖ్య: 400-48168
- OEM పార్ట్ నంబర్: AMT0231
7.1 అనుకూల వాహనాలు
This alternator is compatible with the following Mazda vehicles:
- MAZDA 5: 2012-2015
- MAZDA CX-7: 2007-2012
7.2 Replaces OEM Numbers
This unit replaces the following OEM and aftermarket part numbers:
- ARROWHEAD: AMT0231
- ARROWHEAD (OEM) (OLD): A3TJ1191
- J & N: 400-48168
- LESTER: 11330
- MAZDA: L33G-18-300, L33G-18-300A, L33G-18-300R0A
- MITSUBISHI: A3TJ1191, A3TJ1191A
- REMY LIGHT DUTY: 12841
8. ఉత్పత్తి చిత్రాలు

This image shows the primary view of the DB Electrical 400-48168 Alternator, highlighting the multi-groove pulley and the main body with cooling fins. The electrical terminals and mounting brackets are also visible.

ఒక సైడ్ ప్రోfile of the alternator, emphasizing the main electrical connector and the robust casinగ్రా. ఇది view helps in identifying the correct wiring harness connection.

ఈ చిత్రం వెనుక భాగాన్ని అందిస్తుంది view of the alternator, detailing the various electrical terminals and the voltage regulator housing. Proper identification of these connections is critical for installation.
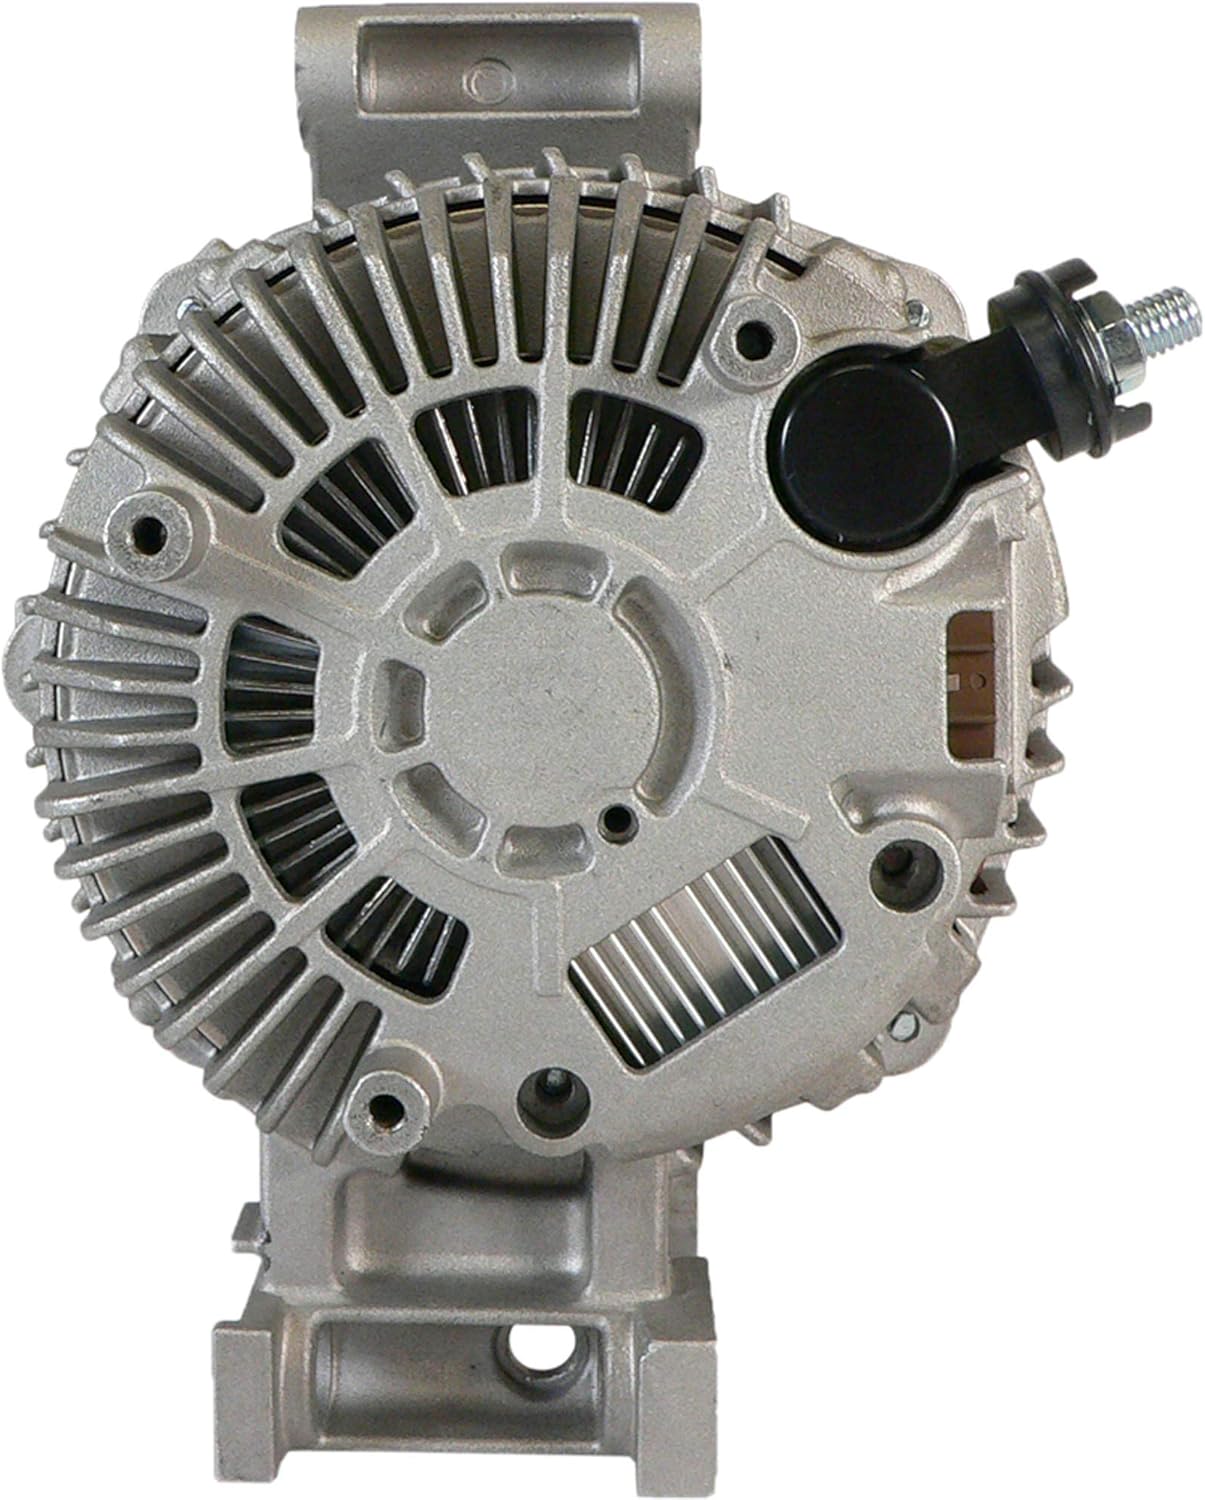
A direct back view of the alternator, showcasing the cooling fan and the rear mounting bracket. The design of the fan is optimized for efficient heat dissipation.

An angled rear perspective of the alternator, providing a clearer view of the overall structure and the relationship between the electrical components and the main housing.

Another front angled view, offering a different perspective of the pulley and the front casing, useful for confirming the correct fitment and orientation.

ఒక టాప్-డౌన్ view focusing on the pulley and the front bearing housing, illustrating the multi-rib design of the pulley for the serpentine belt.
9. వారంటీ సమాచారం
DB Electrical provides a 1 సంవత్సరాల వారంటీ on this alternator from the date of purchase. This warranty covers defects in materials and workmanship under normal use and service.
If the product does not function flawlessly within one year of your order, DB Electrical will replace it. For warranty claims or assistance, please contact the seller or manufacturer directly.
10. మద్దతు మరియు సంప్రదింపులు
For further assistance, technical support, or inquiries regarding your DB Electrical 400-48168 Alternator, please refer to the contact information provided by your retailer or visit the official DB Electrical webసైట్.
When contacting support, please have your product model number (400-48168) and purchase details readily available.


