1. పరిచయం
This manual provides essential instructions for the safe and efficient operation of your Brother DCP-T700W Color Ink Tank Wi-Fi Multifunction Printer. This device is designed for printing, scanning, and copying, featuring an integrated refillable ink tank system and wireless connectivity. Please read this manual thoroughly before using the printer and keep it for future reference.
2. భద్రతా సమాచారం
ప్రింటర్కు గాయం లేదా నష్టం జరగకుండా నిరోధించడానికి ఈ క్రింది భద్రతా జాగ్రత్తలను గమనించండి:
- ప్రింటర్ను ఎల్లప్పుడూ గ్రౌండెడ్ పవర్ అవుట్లెట్కి కనెక్ట్ చేయండి.
- Do not place the printer in areas with excessive dust, humidity, or direct sunlight.
- ప్రింటర్ను నీరు లేదా ఇతర ద్రవాలకు దూరంగా ఉంచండి.
- ప్రింటర్కు మీరే సర్వీసింగ్ చేయడానికి ప్రయత్నించవద్దు. అన్ని సర్వీసింగ్లను అర్హత కలిగిన సిబ్బందికి సూచించండి.
- Use only Brother-recommended ink and paper to ensure optimal performance and prevent damage.
3. ఉత్పత్తి ముగిసిందిview
Familiarize yourself with the main components of your Brother DCP-T700W printer.
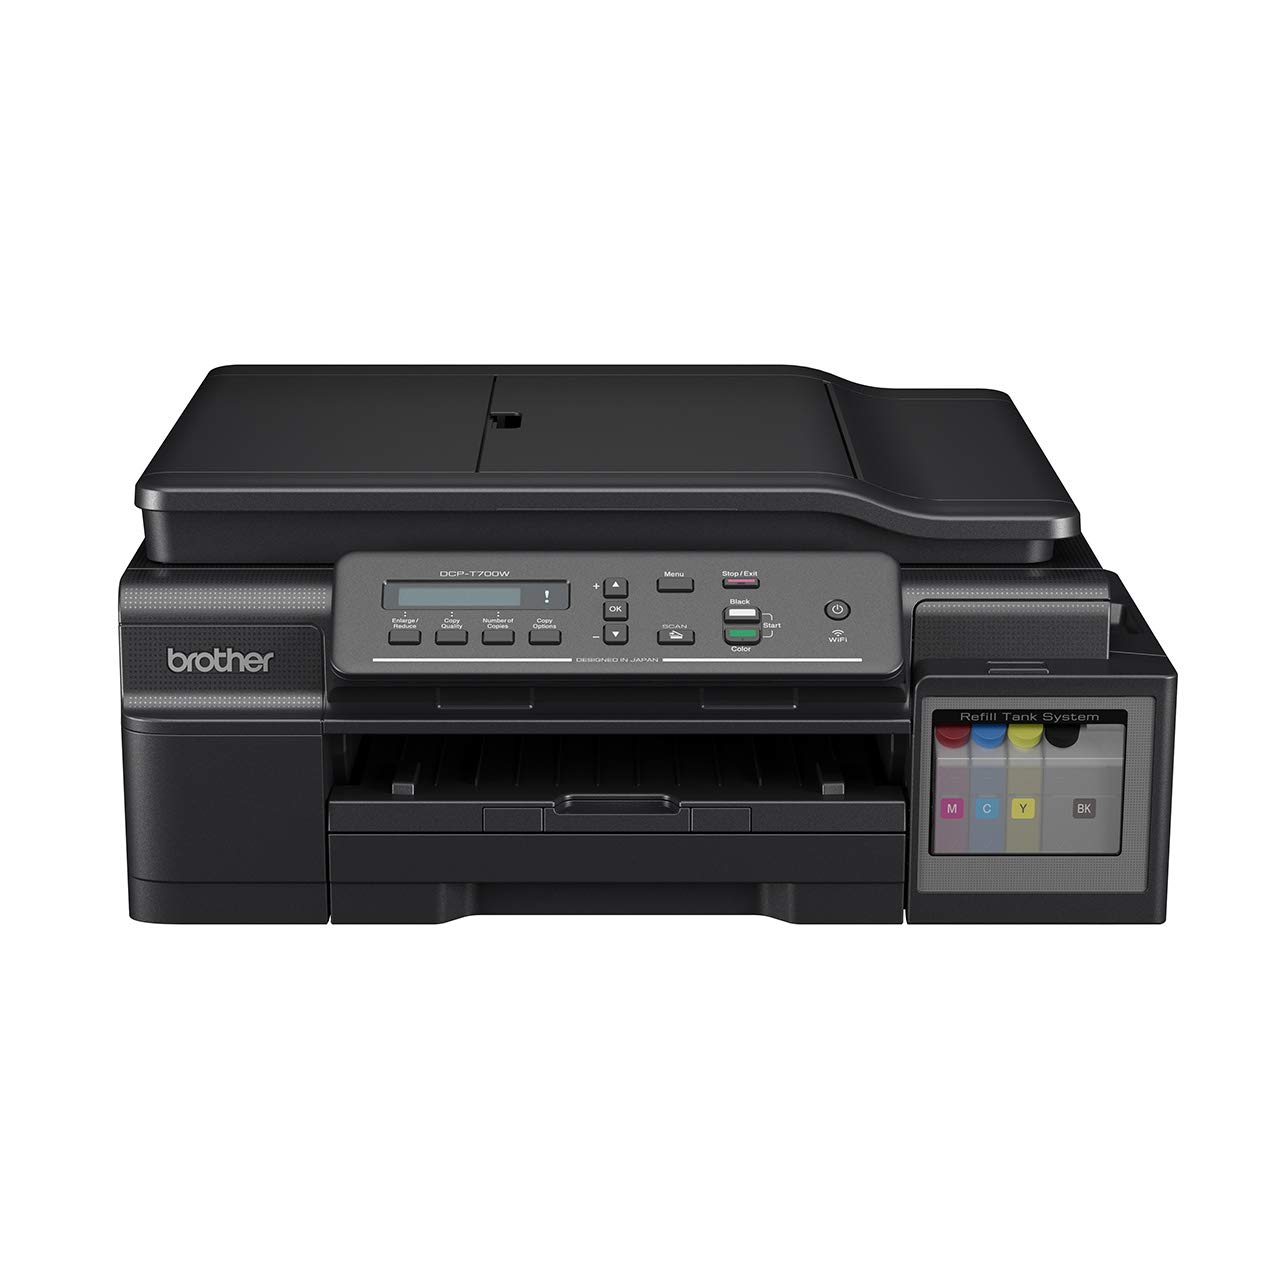
మూర్తి 3.1: ముందు view of the Brother DCP-T700W printer, showing the control panel, paper output tray, and integrated ink tank system on the right side.

మూర్తి 3.2: కోణీయ view of the Brother DCP-T700W, highlighting the Automatic Document Feeder (ADF) tray in an open position, ready for scanning or copying multiple documents.
నియంత్రణ ప్యానెల్
The control panel allows you to operate the printer's functions. It typically includes:
- LCD డిస్ప్లే: Shows status messages and menu options.
- మెను బటన్లు: Navigate through settings.
- ప్రారంభ బటన్లు: Initiate print, copy, or scan jobs (Color/Mono).
- Stop/Exit Button: Cancel operations or exit menus.
- Wi-Fi బటన్: Manage wireless network connection.
4. సెటప్
4.1 అన్ప్యాకింగ్ మరియు ప్లేస్మెంట్
- ప్రింటర్ను దాని ప్యాకేజింగ్ నుండి తీసివేసి, అన్ని రక్షణ టేపులు మరియు సామగ్రిని తీసివేయండి.
- ప్రింటర్ను తగినంత వెంటిలేషన్ ఉన్న స్థిరమైన, చదునైన ఉపరితలంపై ఉంచండి.
- Ensure there is enough space around the printer for paper loading and output.
4.2 ఇంక్ ట్యాంకులను నింపడం
The DCP-T700W features an integrated ink tank system. Follow these steps to fill the tanks:
- Open the ink tank cover located on the right side of the printer.
- సంబంధిత రంగు (నలుపు, సియాన్, మెజెంటా, పసుపు) కోసం సిరా బాటిల్ మూతను విప్పండి.
- Carefully pour the ink into the correct tank, ensuring not to overfill.
- ఇంక్ ట్యాంక్ కవర్ను సురక్షితంగా మూసివేయండి.
- Perform an initial ink charge as instructed by the printer's display or setup guide.
గమనిక: Use genuine Brother ink bottles to prevent damage and ensure print quality.
4.3 సాఫ్ట్వేర్ మరియు డ్రైవర్ ఇన్స్టాలేషన్
- Insert the installation CD-ROM into your computer's drive, or download the latest drivers and software from the official Brother support webసైట్.
- ఇన్స్టాలేషన్ను పూర్తి చేయడానికి ఆన్-స్క్రీన్ సూచనలను అనుసరించండి.
- During installation, you will be prompted to choose your connection type (USB or Wireless).
4.4 Connecting to a Network (Wi-Fi)
To connect your printer to a wireless network:
- నొక్కండి Wi-Fi నియంత్రణ ప్యానెల్లోని బటన్.
- నావిగేట్ చేయండి నెట్వర్క్ settings using the menu buttons.
- ఎంచుకోండి WLAN ఆపై సెటప్ విజార్డ్.
- The printer will search for available networks. Select your network (SSID) from the list.
- Enter your network password (network key) using the control panel buttons.
- Confirm the connection. The Wi-Fi indicator light will illuminate when connected.
Alternatively, you can use the WPS (Wi-Fi Protected Setup) method if your router supports it.
5. ఆపరేటింగ్ సూచనలు
5.1 పేపర్ లోడ్ అవుతోంది
- Open the paper tray and extend it if necessary.
- Load paper print-side down. Adjust the paper guides to fit the paper size.
- పేపర్ ట్రేని మూసివేయండి.
The printer supports various paper types and sizes, including A4. Refer to specifications for details.
5.2 పత్రాలను ముద్రించడం
- మీ కంప్యూటర్ నుండి, మీరు ప్రింట్ చేయాలనుకుంటున్న పత్రాన్ని తెరవండి.
- ఎంచుకోండి ముద్రించు అప్లికేషన్ మెను నుండి.
- Choose your Brother DCP-T700W printer.
- Adjust print settings such as paper size, orientation, color/monochrome, and duplex printing (if desired).
- క్లిక్ చేయండి ముద్రించు.
For mobile printing, use the Brother iPrint&Scan app or other compatible mobile printing services.
5.3 పత్రాలను స్కాన్ చేయడం
You can scan documents using the flatbed scanner or the Automatic Document Feeder (ADF).
Using the Flatbed Scanner:
- స్కానర్ కవర్ ఎత్తండి.
- Place the document face-down on the scanner glass, aligning it with the guide marks.
- స్కానర్ కవర్ మూసివేయండి.
- Initiate the scan from your computer using the Brother ControlCenter software or directly from the printer's control panel.
Using the Automatic Document Feeder (ADF):
- Load documents face-up into the ADF tray. Adjust the paper guides.
- Ensure documents are free of staples or clips.
- Initiate the scan from your computer or the printer's control panel.
5.4 పత్రాలను కాపీ చేయడం
- Place the document on the flatbed scanner or in the ADF.
- ప్రింటర్ నియంత్రణ ప్యానెల్లో, కాపీ చేయండి బటన్.
- Use the arrow keys to select the number of copies and adjust settings like quality or zoom.
- నొక్కండి ప్రారంభించండి (Color or Mono) button to begin copying.
6. నిర్వహణ
6.1 ఇంక్ స్థాయిలను తనిఖీ చేయడం మరియు తిరిగి నింపడం
Regularly check the ink levels in the transparent ink tanks. When a tank is low, refill it promptly to avoid print quality issues or damage to the print head. Refer to Section 4.2 for ink refilling instructions.
6.2 ప్రింటర్ను శుభ్రపరచడం
- బాహ్య: ప్రింటర్ యొక్క బాహ్య భాగాన్ని మృదువైన, మెత్తటి రహిత వస్త్రంతో తుడవండి. రాపిడి క్లీనర్లను లేదా ద్రావకాలను ఉపయోగించవద్దు.
- స్కానర్ గ్లాస్: Clean the scanner glass with a soft, dry cloth. For stubborn marks, use a small amount of glass cleaner applied to the cloth (not directly to the glass).
- ప్రింట్ హెడ్: If print quality deteriorates (e.g., streaks, missing colors), perform a print head cleaning cycle from the printer's maintenance menu or through the printer driver on your computer.
7. ట్రబుల్షూటింగ్
This section addresses common issues you might encounter. For more detailed troubleshooting, refer to the Brother support webసైట్.
7.1 ముద్రణ నాణ్యత సమస్యలు
- Streaks or Faded Prints: Check ink levels and perform a print head cleaning. Ensure you are using appropriate paper settings.
- తప్పు రంగులు: Verify that the correct ink colors are in their respective tanks. Perform a print head alignment.
- ఖాళీ పేజీలు: Check ink levels. Ensure the print head is not clogged.
7.2 పేపర్ జామ్లు
- ప్రింటర్ను ఆఫ్ చేసి, దాన్ని అన్ప్లగ్ చేయండి.
- Carefully open all covers and remove any jammed paper, pulling gently in the direction of the paper path.
- లోపల చిన్న కాగితపు ముక్కలు ఉండకుండా చూసుకోండి.
- Close all covers, plug in, and turn on the printer.
7.3 కనెక్టివిటీ సమస్యలు
- Wi-Fi డిస్కనెక్ట్: Check your router and printer's Wi-Fi status. Re-establish the connection using the setup wizard. Ensure the printer is within range of your wireless router.
- USB కనెక్షన్ గుర్తించబడలేదు: Ensure the USB cable is securely connected to both the printer and the computer. Try a different USB port or cable.
7.4 Automatic Document Feeder (ADF) Issues
- Paper Misfeeds/Jams: Ensure documents are loaded correctly, face-up, and within the paper guides. Remove any staples or clips.
- Skewed Scans: Clean the ADF rollers. Ensure documents are not wrinkled or damaged.
8. స్పెసిఫికేషన్లు
| ఫీచర్ | వివరాలు |
|---|---|
| మోడల్ | DCP-T700W |
| విధులు | ప్రింట్, స్కాన్, కాపీ |
| ప్రింటింగ్ టెక్నాలజీ | ఇంక్జెట్ |
| కనెక్టివిటీ | USB 2.0, Wi-Fi (802.11a) |
| Maximum Print Resolution (Color) | 1200 dpi |
| Maximum Print Resolution (Black & White) | 1200 dpi |
| గరిష్ట ముద్రణ వేగం (మోనోక్రోమ్) | 27 ppm |
| గరిష్ట ముద్రణ వేగం (రంగు) | 10 ppm |
| డ్యూప్లెక్స్ ప్రింటింగ్ | ఆటోమేటిక్ |
| స్కానర్ రకం | షీట్ఫెడ్ (ADF) |
| గరిష్ట మీడియా పరిమాణం | A4 |
| ఇంక్ రంగులు | నలుపు, సియాన్, మెజెంటా, పసుపు |
| అంశం కొలతలు (LxWxH) | 38 x 43.5 x 19.5 సెం.మీ |
| వస్తువు బరువు | 9.84 కిలోలు |
| విద్యుత్ వినియోగం | 700 వాట్స్ (గరిష్టంగా) |
| ప్రత్యేక ఫీచర్ | ఎనర్జీ స్టార్ సర్టిఫైడ్ |
9. వారంటీ మరియు మద్దతు
9.1 వారంటీ సమాచారం
The Brother DCP-T700W printer comes with a 1-సంవత్సరం తయారీదారు వారంటీ. This warranty covers defects in materials and workmanship under normal use. Please retain your proof of purchase for warranty claims. The warranty is applicable as per the manufacturer's terms and conditions.
9.2 కస్టమర్ మద్దతు
For technical assistance, driver downloads, FAQs, or to locate a service center, please visit the official Brother support website. You can also find contact information for customer service in your region on their webసైట్.
బ్రదర్ సపోర్ట్ Webసైట్: www.brother.com/support


