పరిచయం
The Neo 10-in-1 Hot Steam Mop Cleaner is a versatile and powerful cleaning appliance designed to effectively clean various surfaces using the power of steam. This manual provides essential information for safe operation, assembly, use, and maintenance of your steam cleaner.

Image: The Neo 10-in-1 Steam Mop in its upright configuration, ready for use on hard floors.
ముఖ్యమైన భద్రతా సమాచారం
ఈ ఉపకరణాన్ని ఉపయోగించే ముందు దయచేసి అన్ని సూచనలను జాగ్రత్తగా చదవండి. ఈ సూచనలను పాటించడంలో విఫలమైతే విద్యుత్ షాక్, అగ్ని ప్రమాదం లేదా తీవ్రమైన గాయం సంభవించవచ్చు.
- Always ensure the appliance is unplugged from the power outlet before filling with water or performing maintenance.
- Do not leave the steam cleaner unattended while it is powered on.
- పిల్లలు మరియు పెంపుడు జంతువులకు దూరంగా ఉంచండి.
- Use only clean tap water in the water tank. Do not add cleaning solutions, perfumes, or other chemicals.
- మనుషులు, జంతువులు లేదా విద్యుత్ ఉపకరణాలపై ఆవిరిని దర్శకత్వం వహించవద్దు.
- నిల్వ చేయడానికి ముందు పరికరాన్ని పూర్తిగా చల్లబరచడానికి ఎల్లప్పుడూ అనుమతించండి.
- Inspect the power cord and plug for damage before each use. Do not use if damaged.
ప్యాకేజీ విషయాలు
Carefully unpack your Neo 10-in-1 Steam Mop and ensure all items are present and undamaged. If any items are missing or damaged, contact customer support.

Image: All components of the Neo 10-in-1 Steam Mop, including the main unit, various nozzles, brushes, and cloths.
చేర్చబడిన ఉపకరణాలు:
- Main Steam Mop Unit (Upright and Handheld)
- కొలిచే కప్పు
- Window / Glass Cleaner Tool
- Round Small Brass Brush
- Grout / Slender Brush
- స్క్రాపర్ సాధనం
- Carpet / Fabric Tool
- Glider (for carpets)
- జెట్ నాజిల్
- నైలాన్ బ్రష్
- Washable Micro Fibre Cloth Pad
సెటప్
- అసెంబ్లీ: Connect the handle to the main body of the steam mop until it clicks into place. Ensure it is securely fastened.
- వాటర్ ట్యాంక్ నింపడం:
- యూనిట్ అన్ప్లగ్ చేయబడిందని నిర్ధారించుకోండి.
- వాటర్ ట్యాంక్ టోపీని తెరవండి.
- Using the provided measuring cup, fill the 450ml water tank with clean tap water. Do not overfill.
- వాటర్ ట్యాంక్ మూతను సురక్షితంగా మూసివేయండి.
- Attaching the Microfibre Cloth Pad: For floor cleaning, attach the microfibre cloth pad to the bottom of the mop head, ensuring it is securely fastened with the hook-and-loop strips.
- పవర్ కనెక్షన్: పవర్ కార్డ్ను గ్రౌన్దేడ్ ఎలక్ట్రికల్ అవుట్లెట్లోకి ప్లగ్ చేయండి.
ఆపరేటింగ్ సూచనలు
సాధారణ ఆపరేషన్:
- Once plugged in, the unit will begin to heat up. It is ready to use in approximately 30 seconds.
- The steam mop features variable steam control. Adjust the steam output according to the surface being cleaned and the level of dirt.
- The 450ml tank provides approximately 30 minutes of continuous steaming time.
Using as an Upright Steam Mop (for Floors):
This mode is ideal for cleaning sealed hard floors such as tile, laminate, and sealed hardwood. Ensure the microfibre cloth pad is attached.
- Ensure the water tank is filled and the cloth pad is attached.
- Plug in the unit and wait for it to heat up.
- Press the power button to turn on the steam.
- Move the mop slowly and steadily across the floor surface. For stubborn stains, hold the mop over the area for a few seconds to allow the steam to penetrate.
- For carpets, attach the carpet glider over the mop head with the cloth pad. Move the mop back and forth over the carpet to refresh and deodorize.
Using as a Handheld Steamer (2-in-1 Function):
The main body detaches to become a versatile handheld steamer, perfect for cleaning various surfaces and hard-to-reach areas.
- యూనిట్ను అన్ప్లగ్ చేయండి.
- Press the release button to detach the handheld unit from the main mop body.
- Select the appropriate accessory for your cleaning task and attach it securely to the handheld unit's nozzle.
- Plug in the handheld unit and wait for it to heat up.
- Direct the steam towards the surface to be cleaned. Use short bursts of steam for delicate surfaces.
Specific Handheld Attachments Usage:
- Carpet / Fabric Tool: Ideal for refreshing upholstery, curtains, and small carpeted areas. Attach the fabric tool with its cloth cover.

Image: The handheld unit with the fabric tool attached, being used to steam clean a fabric couch.
- Window / Glass Cleaner: For streak-free cleaning of windows, mirrors, and glass surfaces. Attach the window squeegee tool.

Image: The handheld unit with the window cleaning tool, used to clean window blinds.
- Grout / Slender Brush: Designed for cleaning narrow gaps, tile grout, and hard-to-reach crevices.
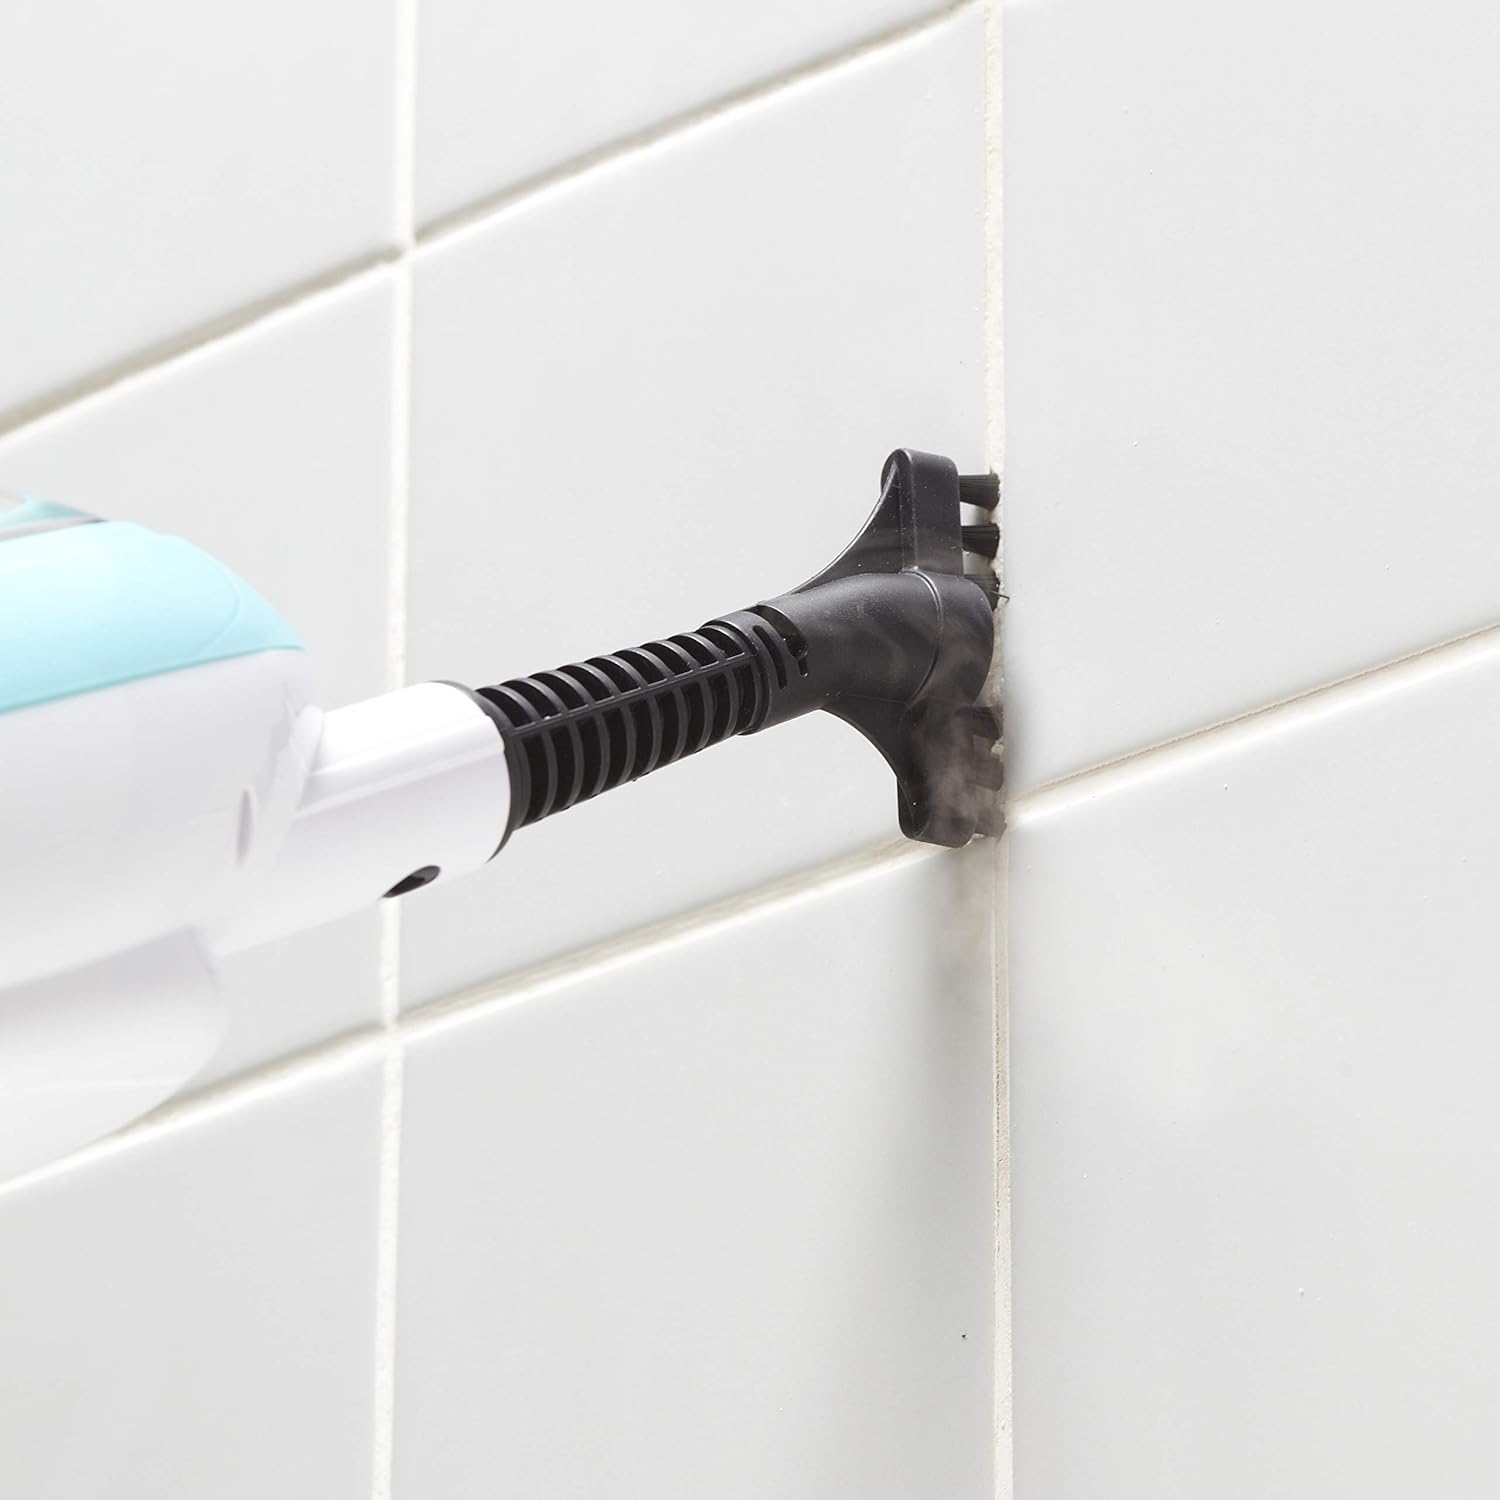
Image: The handheld unit with the grout brush attachment, effectively cleaning grout lines on a tiled wall.
- Round Small Brass Brush / Nylon Brush: For scrubbing tough dirt and grime on durable surfaces like ovens, stovetops, and BBQ grills. Use the brass brush for very stubborn stains, nylon for general scrubbing.

Image: The handheld unit with a brush attachment, cleaning the interior of a microwave oven.

Image: The handheld unit with a brush attachment, cleaning a stovetop burner.
- జెట్ నాజిల్: Provides a concentrated blast of steam for precision cleaning in tight spots or for blasting away concentrated dirt.

Image: The handheld unit with the jet nozzle attachment, cleaning around a bathroom faucet.
- Scraper Tool: For removing baked-on grime or sticky residues from hard surfaces.
నిర్వహణ
Regular maintenance ensures the longevity and optimal performance of your steam cleaner.
- వాటర్ ట్యాంక్ ఖాళీ చేయడం: After each use, unplug the unit and allow it to cool. Empty any remaining water from the tank to prevent mineral buildup.
- Cleaning Microfibre Cloth Pads: The microfibre cloth pads are washable. Remove them from the mop head and machine wash with similar colors. Do not use bleach or fabric softener. Air dry or tumble dry on low.
- శుభ్రపరిచే ఉపకరణాలు: ప్రకటనతో అన్ని ఉపకరణాలను తుడిచివేయండిamp cloth after use. Ensure they are dry before storing.
- డెస్కేలింగ్ (అవసరమైతే): If you notice reduced steam output or mineral buildup, a descaling solution designed for steam appliances can be used. Follow the descaling product's instructions carefully.
- నిల్వ: Store the steam cleaner in a cool, dry place, out of direct sunlight and away from children.
ట్రబుల్షూటింగ్
| సమస్య | సాధ్యమైన కారణం | పరిష్కారం |
|---|---|---|
| ఆవిరి ఉత్పత్తి కాలేదు. |
|
|
| Low steam output. |
|
|
| యూనిట్ నుంచి నీరు కారుతోంది. |
|
|
స్పెసిఫికేషన్లు
| ఫీచర్ | వివరాలు |
|---|---|
| మోడల్ పేరు | Neo 10 in 1 |
| మోడల్ సంఖ్య | STM-MOP |
| బ్రాండ్ | నియో |
| వాట్tage | 1500 వాట్స్ |
| ట్యాంక్ వాల్యూమ్ | 450 మిల్లీలీటర్లు |
| హీట్-అప్ సమయం | సుమారు. 30 సెకన్లు |
| Steaming Time per Tank | సుమారు. 30 నిమిషాల |
| వస్తువు బరువు | 2.3 కిలోలు (5.06 పౌండ్లు) |
| ఉత్పత్తి కొలతలు | 46.85 x 11.81 x 3.54 అంగుళాలు |
| శక్తి మూలం | కార్డెడ్ ఎలక్ట్రిక్ |
| ఫారమ్ ఫ్యాక్టర్ | హ్యాండ్హెల్డ్, నిటారుగా |
| రంగు | నీలం |
| ఉపరితల సిఫార్సు | Floor, Window |
వారంటీ మరియు మద్దతు
This product comes with a standard manufacturer's warranty. Please refer to the warranty card included in your original packaging for specific terms and conditions. For technical support, replacement parts, or warranty claims, please contact Neo customer service through their official webఉత్పత్తిని కొనుగోలు చేసిన సైట్ లేదా రిటైలర్.
వారంటీ ప్రయోజనాల కోసం కొనుగోలు రుజువుగా మీ కొనుగోలు రసీదును ఉంచండి.


