1. పరిచయం
This manual provides detailed instructions for the installation, operation, and maintenance of your Zebronics H61 Motherboard. Please read this manual thoroughly before proceeding with installation to ensure proper setup and functionality.
The Zebronics H61 Motherboard is designed to support Intel LGA 1155 socket processors (i7/i5/i3/Pentium/Celeron series) and DDR3 dual-channel memory. It features an Intel H61 chipset, providing a stable and efficient platform for your computing needs.
2. భద్రతా సమాచారం
- ఏదైనా భాగాలను ఇన్స్టాల్ చేసే లేదా తొలగించే ముందు ఎల్లప్పుడూ విద్యుత్ సరఫరాను డిస్కనెక్ట్ చేయండి.
- Handle the motherboard by its edges to avoid electrostatic discharge (ESD) damage. Use an anti-static wrist strap if available.
- మీ కంప్యూటర్ కేసు వేడెక్కకుండా నిరోధించడానికి సరైన వెంటిలేషన్ ఉండేలా చూసుకోండి.
- మదర్బోర్డును తేమ లేదా విపరీతమైన ఉష్ణోగ్రతలకు గురిచేయవద్దు.
- Refer to the component manufacturer's manuals for specific installation instructions for your CPU, RAM, and other peripherals.
3. ప్యాకేజీ విషయాలు
ప్యాకేజీలో అన్ని అంశాలు ఉన్నాయని నిర్ధారించుకోండి:
- Zebronics H61 Motherboard
- I / O షీల్డ్
- SATA Data Cable(s)
- Driver CD (for operating systems that do not automatically install drivers)
- వినియోగదారు మాన్యువల్ (ఈ పత్రం)
4. స్పెసిఫికేషన్లు
| ఫీచర్ | వివరణ |
|---|---|
| మోడల్ | H61 |
| చిప్సెట్ | ఇంటెల్ H61 ఎక్స్ప్రెస్ |
| CPU సాకెట్ | LGA 1155 |
| అనుకూల ప్రాసెసర్లు | Intel i7/i5/i3/Pentium/Celeron processors (2nd and 3rd Generation) |
| మెమరీ స్లాట్లు | 2 x DDR3 Dual-channel slots |
| మెమరీ మద్దతు | DDR3 1066/1333/1600MHz, up to 16GB |
| గ్రాఫిక్స్ ఇంటర్ఫేస్ | 1 x PCI-Express x16 slot |
| విస్తరణ స్లాట్లు | 1 x PCI ఎక్స్ప్రెస్ x1 స్లాట్ |
| నిల్వ | 4 x SATA II ports |
| LAN | Realtek 8106E 10/100 Mbps Ethernet |
| ఆడియో | 6-Channel HD Audio Codec onboard (5.1 surround sound support) |
| వెనుక I/O పోర్ట్లు | 1 x HDMI, 1 x VGA, 6 x USB 2.0, 1 x RJ45, 1 x 3-in-1 Audio Jacks (Line-in, Line-out, Mic-in), PS/2 (Keyboard/Mouse) |
| ఫారమ్ ఫ్యాక్టర్ | ATX |
| కొలతలు | 25 x 20 x 3 సెం.మీ |
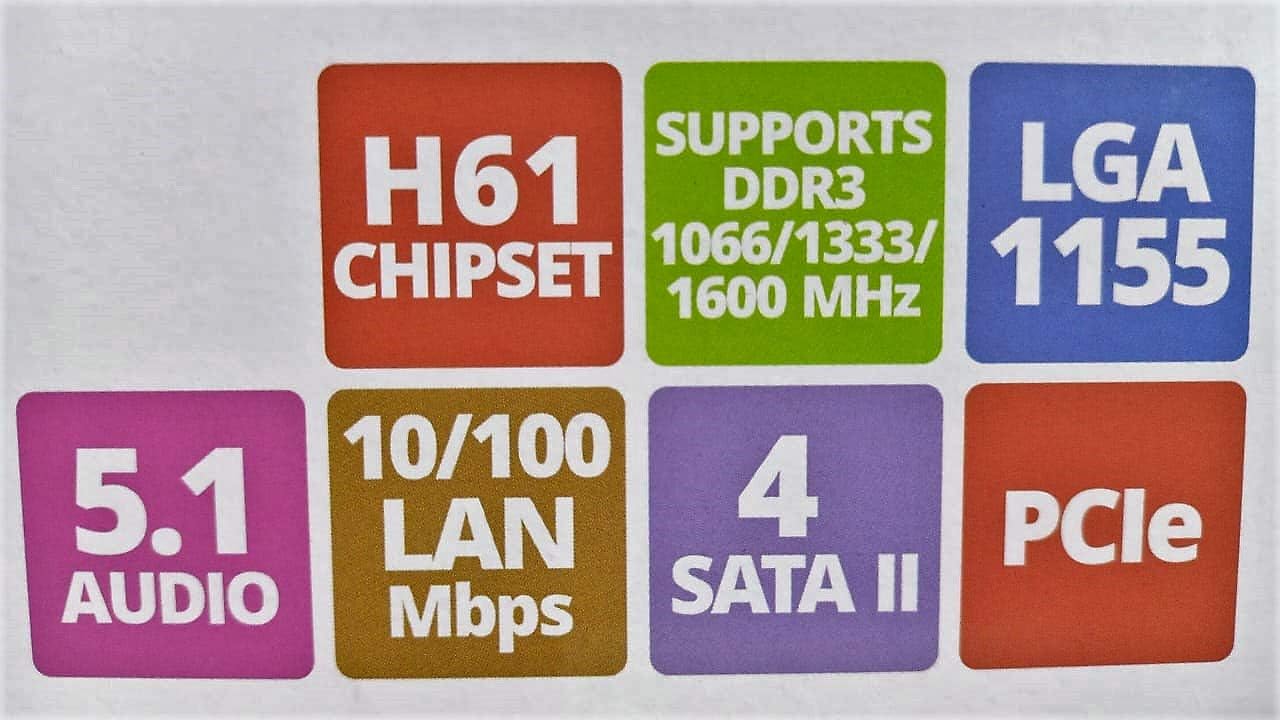
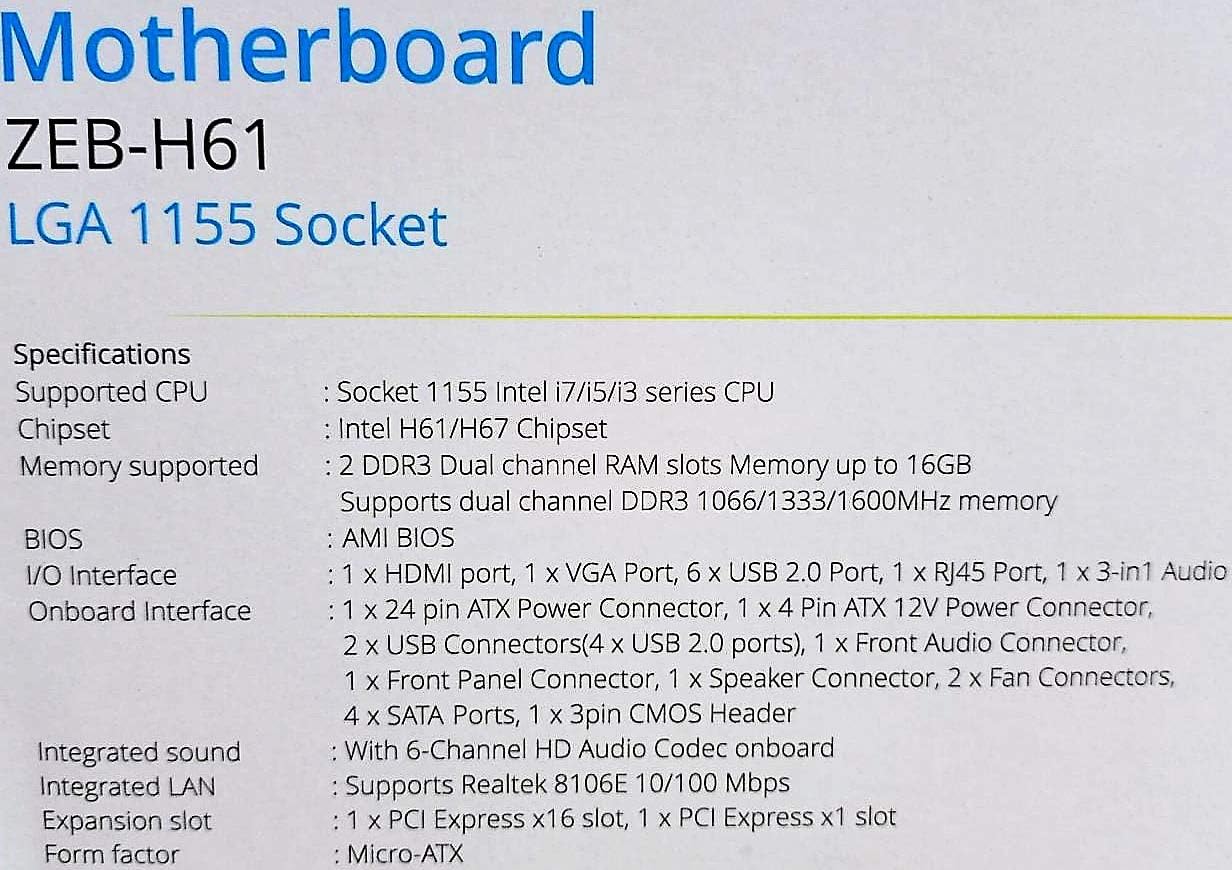
Image: Detailed specifications of the Zebronics H61 Motherboard, including chipset, CPU socket, memory support, and I/O interfaces.

Image: Visual representation of key features such as H61 Chipset, DDR3 support, LGA 1155 socket, 5.1 Audio, 10/100 LAN, 4 SATA II ports, and PCIe.
5. సెటప్ మరియు ఇన్స్టాలేషన్
5.1 మదర్బోర్డ్ లేఅవుట్

చిత్రం: పై నుండి క్రిందికి view of the Zebronics H61 Motherboard, showing the CPU socket, RAM slots, PCIe slot, and various headers.

Image: Another top-down perspective of the Zebronics H61 Motherboard, highlighting component placement.
5.2 వెనుక I/O ప్యానెల్

Image: Rear I/O panel of the Zebronics H61 Motherboard, displaying ports for PS/2 keyboard/mouse, VGA, HDMI, USB 2.0, LAN, and audio jacks.
చిత్రం: దగ్గరగా view of the rear I/O ports, detailing the VGA, HDMI, USB, LAN, and audio connections.
5.3 కాంపోనెంట్ ఇన్స్టాలేషన్ దశలు
- CPU ని ఇన్స్టాల్ చేయండి:
- CPU సాకెట్ లివర్ను తెరవండి.
- Carefully align the CPU with the socket, ensuring the golden triangle on the CPU matches the mark on the socket.
- బలవంతంగా ఒత్తిడి చేయకుండా CPU ని సాకెట్లో సున్నితంగా ఉంచండి.
- CPU ని భద్రపరచడానికి లివర్ను మూసివేయండి.
- తయారీదారు సూచనల ప్రకారం థర్మల్ పేస్ట్ వేసి, CPU కూలర్ను ఇన్స్టాల్ చేయండి.
- RAM ని ఇన్స్టాల్ చేయండి:
- DDR3 మెమరీ స్లాట్ల రెండు చివర్లలోని క్లిప్లను తెరవండి.
- మెమరీ మాడ్యూల్ను స్లాట్తో సమలేఖనం చేయండి, మాడ్యూల్లోని నాచ్ స్లాట్లోని కీకి సరిపోలుతుందని నిర్ధారించుకోండి.
- క్లిప్లు సరిగ్గా అమర్చబడే వరకు మెమరీ మాడ్యూల్ యొక్క రెండు చివర్లను గట్టిగా నొక్కండి.
- గ్రాఫిక్స్ కార్డ్ను ఇన్స్టాల్ చేయండి (ఐచ్ఛికం):
- Locate the PCI-Express x16 slot.
- మీ PC కేసు నుండి సంబంధిత విస్తరణ స్లాట్ కవర్ను తీసివేయండి.
- Align the graphics card with the slot and press down firmly until it is seated correctly.
- PC కేసుకు స్క్రూతో కార్డును భద్రపరచండి.
- నిల్వ పరికరాలను కనెక్ట్ చేయండి:
- Connect SATA data cables from the motherboard's SATA ports to your hard drives or SSDs.
- Ensure power cables from the power supply are connected to these devices.
- విద్యుత్ సరఫరాను కనెక్ట్ చేయండి:
- మీ విద్యుత్ సరఫరా నుండి మదర్బోర్డ్కు 24-పిన్ ATX పవర్ కనెక్టర్ను కనెక్ట్ చేయండి.
- Connect the 4-pin ATX 12V power connector (CPU power) to the motherboard.
- ఫ్రంట్ ప్యానెల్ హెడర్లను కనెక్ట్ చేయండి:
- Connect the power switch, reset switch, HDD LED, and power LED cables from your PC case to the corresponding pins on the motherboard's front panel header. Refer to the motherboard diagram for pin assignments.
- Connect front USB and audio headers.
6. ఆపరేటింగ్ సూచనలు
6.1 మొదటి బూట్ మరియు BIOS సెటప్
- అన్ని భాగాలను అసెంబుల్ చేసిన తర్వాత, మీ మానిటర్, కీబోర్డ్ మరియు మౌస్ను కనెక్ట్ చేయండి.
- మీ కంప్యూటర్ను ఆన్ చేయండి.
- నియమించబడిన కీని నొక్కండి (సాధారణంగా DEL or F2) repeatedly during startup to enter the BIOS/UEFI setup utility.
- BIOSలో, ఇన్స్టాల్ చేయబడిన అన్ని భాగాలు (CPU, RAM, నిల్వ) సరిగ్గా గుర్తించబడ్డాయని ధృవీకరించండి.
- Configure boot order to install your operating system from a USB drive or optical drive.
- మార్పులను సేవ్ చేసి BIOS నుండి నిష్క్రమించండి. సిస్టమ్ పునఃప్రారంభించబడుతుంది.
6.2 డ్రైవర్ ఇన్స్టాలేషన్
After installing your operating system, install the necessary drivers for optimal performance. Drivers can be found on the included driver CD or downloaded from the official Zebronics webసైట్.
- చిప్సెట్ డ్రైవర్లు
- Graphics Drivers (if using integrated graphics or a dedicated GPU)
- LAN డ్రైవర్లు
- ఆడియో డ్రైవర్లు
- USB Drivers (if applicable)
7. నిర్వహణ
- శుభ్రంగా ఉంచండి: Regularly clean dust from inside your PC case, especially from fans and heatsinks, to ensure proper airflow and prevent overheating. Use compressed air.
- BIOS నవీకరణలు: Check the Zebronics website periodically for BIOS updates. BIOS updates can improve system stability, compatibility, and performance. Follow update instructions carefully.
- డ్రైవర్ నవీకరణలు: మీ ఆపరేటింగ్ సిస్టమ్ మరియు అప్లికేషన్లతో అనుకూలత మరియు సరైన పనితీరును నిర్ధారించడానికి మీ డ్రైవర్లను నవీకరించండి.
- CMOS బ్యాటరీ: BIOS సెట్టింగ్లను నిలుపుకోవడానికి మదర్బోర్డ్ CR2032 బ్యాటరీని ఉపయోగిస్తుంది. మీ సిస్టమ్ తరచుగా సమయం లేదా BIOS సెట్టింగ్లను కోల్పోతే, బ్యాటరీని మార్చాల్సి రావచ్చు.
8. ట్రబుల్షూటింగ్
- No Power / System Does Not Boot:
- Ensure all power cables (24-pin ATX, 4-pin ATX 12V) are securely connected to the motherboard.
- Check if the power supply unit (PSU) is switched on and functioning.
- ముందు ప్యానెల్ పవర్ స్విచ్ కనెక్షన్ను ధృవీకరించండి.
- Try reseating RAM modules and the graphics card.
- మానిటర్లో డిస్ప్లే లేదు:
- Ensure the monitor is connected to the correct video output (either integrated graphics on the motherboard or dedicated graphics card).
- Check monitor power and input selection.
- Reseat the graphics card (if installed) and RAM modules.
- సిస్టమ్ అస్థిరత / క్రాష్లు:
- CPU మరియు GPU ఉష్ణోగ్రతలను తనిఖీ చేయండి. వేడెక్కడం వల్ల అస్థిరత ఏర్పడుతుంది.
- Ensure RAM modules are properly seated and compatible. Test with one RAM stick if multiple are installed.
- డ్రైవర్లు మరియు BIOSను తాజా వెర్షన్లకు నవీకరించండి.
- తప్పు RAM కోసం తనిఖీ చేయడానికి మెమరీ డయాగ్నస్టిక్ సాధనాలను అమలు చేయండి.
- CMOS Battery Issue (Loss of Time/Settings):
- If the system loses time or BIOS settings after being powered off, the CMOS battery (CR2032) may need replacement.
- To reset CMOS: Disconnect power, remove the CMOS battery, short the battery socket's positive and negative terminals for 30 seconds, then reinsert the battery.
9. వారంటీ మరియు మద్దతు
For warranty information and technical support, please refer to the official Zebronics webసైట్లో లేదా వారి కస్టమర్ సర్వీస్ విభాగాన్ని సంప్రదించండి. వారంటీ క్లెయిమ్ల కోసం కొనుగోలు రుజువుగా మీ కొనుగోలు రసీదును ఉంచండి.
Zebronics Official Webసైట్: www.zebronics.com


