పరిచయం
This manual provides detailed instructions for the safe and effective use of your Lifestance L2 Digital Wax Pot Warmer Kit. Designed for at-home hair removal, this kit includes a digital wax warmer, hard wax beads, and essential accessories for various body areas. Please read all instructions carefully before first use.
ముఖ్యమైన భద్రతా సమాచారం
To ensure safe operation and prevent injury, please adhere to the following guidelines:
- Always perform a patch test on a small area of skin 24 hours before full application to check for any adverse reactions.
- Do not apply wax to irritated, broken, sunburned, or sensitive skin. Avoid areas with moles, warts, or varicose veins.
- Ensure the wax temperature is appropriate before application. Test a small amount on your inner wrist to confirm it is warm, not hot. The recommended temperature range for skin waxing is typically lower than the maximum setting on the warmer.
- Keep the wax warmer and all accessories out of reach of children and pets.
- Do not immerse the wax warmer in water or any other liquid.
- ఉపయోగంలో లేనప్పుడు మరియు శుభ్రపరిచే ముందు పరికరాన్ని అన్ప్లగ్ చేయండి.
- Use only the provided wax beads or compatible hard wax beads designed for depilatory use.
- Avoid using the hard wax kit for nose hair removal to ensure optimal safety and effectiveness.
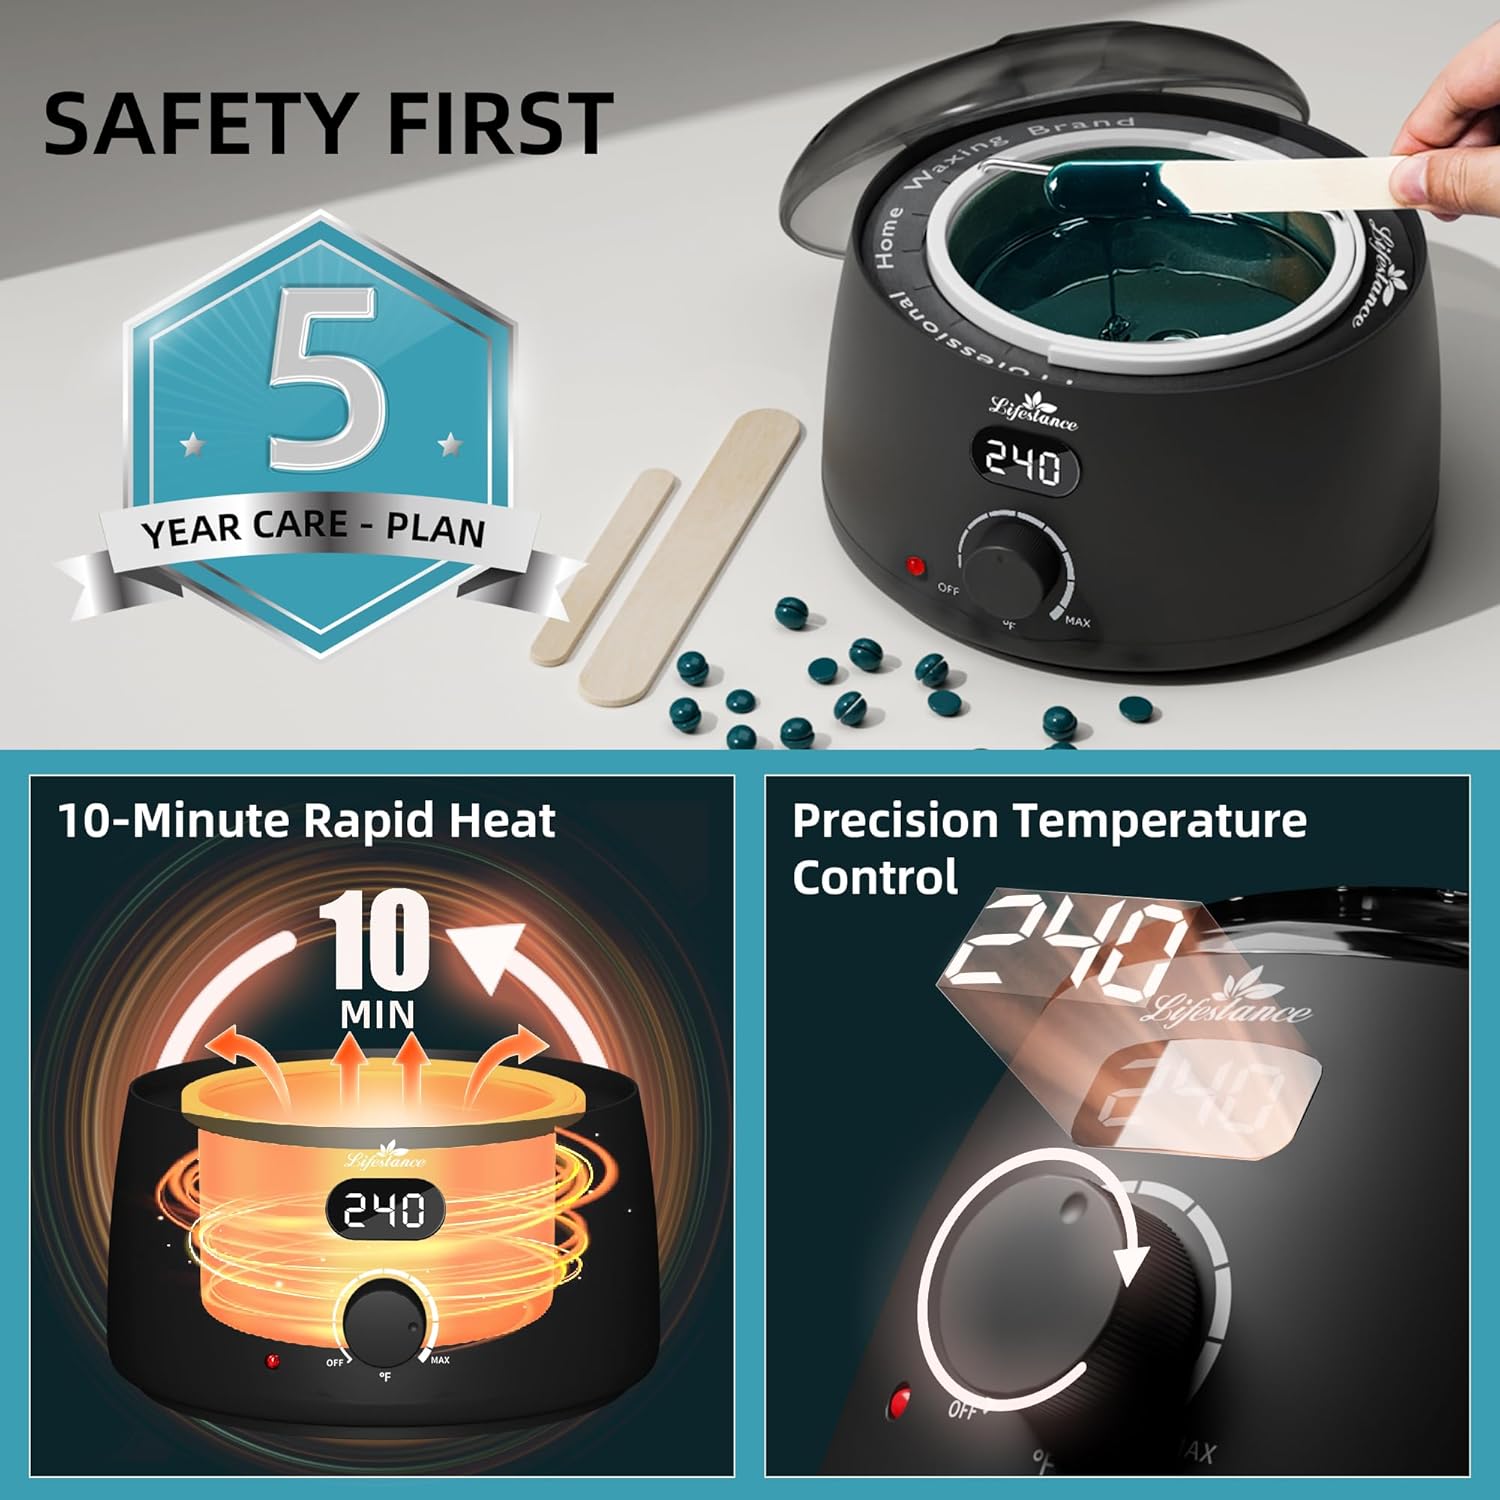
Image: Lifestance Waxing Kit highlighting safety features, including a 5-year care plan, rapid heating, and precise temperature control on the digital display.
ప్యాకేజీ విషయాలు
Your Lifestance L2 Digital Wax Pot Warmer Kit includes the following items:
- 1 x Lifestance Digital Wax Warmer (L2 Model)
- 4 x Bags of Hard Wax Beads (Jasmine, 3.5oz each)
- 1 x Pre-Wax Tea Tree Treatment Spray
- 1 x After-Wax Oil Treatment Spray
- 10 x Large Wax Applicator Sticks
- 10 x Medium Wax Applicator Sticks
- 10 x కనుబొమ్మ మైనపు గరిటెలు
- 5 x Protective Collars for Wax Pot
- 1 x వినియోగదారు మాన్యువల్

Image: A visual representation of all components included in the Lifestance Waxing Kit, such as the warmer, wax beads, pre-wax spray, after-wax oil, and applicator sticks.
సెటప్ సూచనలు
- భాగాలను అన్ప్యాక్ చేయండి: ప్యాకేజింగ్ నుండి అన్ని వస్తువులను జాగ్రత్తగా తొలగించండి.
- Place Warmer: Position the Lifestance Digital Wax Warmer on a stable, heat-resistant surface. Ensure it is away from water and flammable materials.
- Insert Protective Collar: Place one of the protective collars around the rim of the wax pot to help keep the warmer clean.
- Add Wax Beads: Pour the desired amount of Lifestance Hard Wax Beads into the removable inner pot of the warmer.
- పవర్ కనెక్ట్ చేయండి: Plug the wax warmer into a suitable electrical outlet.

Image: The Lifestance Digital Wax Machine, showcasing its precise temperature control and auto shut-off features, ready for use.
ఆపరేటింగ్ సూచనలు
1. Preparing the Wax Warmer
- ఆన్ చేయండి: Rotate the temperature control knob to your desired temperature setting. The digital display will show the current temperature.
- కరిగిన మైనపు: Allow the wax beads to melt completely. This typically takes about 10 minutes. The warmer will indicate when the target temperature is reached. The wax should have a honey-like consistency.
- ఉష్ణోగ్రత పరీక్ష: Before applying to skin, test a small amount of wax on your inner wrist to ensure it is warm and comfortable, not excessively hot. Adjust the temperature as needed.
2. చర్మ తయారీ
- శుభ్రమైన చర్మం: Ensure the skin area to be waxed is clean, dry, and free of oils or lotions.
- Apply Pre-Wax Spray: Lightly spray the Lifestance Pre-Wax Tea Tree Treatment onto the skin and allow it to dry. This helps to cleanse and prepare the skin for waxing.
3. Wax Application and Removal
- Apply Wax: Using a clean applicator stick, apply a thick, even layer of melted wax in the direction of hair growth. Ensure the wax forms a slightly thicker edge for easy gripping.
- చల్లబరచడానికి అనుమతించండి: Wait for the wax to cool and harden on the skin. This usually takes about 15-30 seconds, depending on the thickness of the application. The wax should be firm but still pliable.
- Remove Wax: Once the wax has hardened, lift the thicker edge and quickly pull the wax strip off against the direction of hair growth, keeping it parallel to the skin.
- పునరావృతం: Repeat the process on other areas as needed. Avoid waxing the same area multiple times to prevent skin irritation.

Image: A woman demonstrating the application of wax to her leg using the Lifestance Waxing Kit, illustrating the at-home hair removal process.

చిత్రం: క్లోజప్ view of wax being applied to a woman's face for eyebrow shaping, highlighting the kit's suitability for precise facial hair removal.
4. Post-Wax Care
- Soothe Skin: After waxing, apply the Lifestance After-Wax Oil Treatment to soothe the skin, reduce redness, and remove any residual wax.
- Avoid Irritants: For 24-48 hours post-waxing, avoid hot baths, saunas, tight clothing, and direct sun exposure.
నిర్వహణ మరియు శుభ్రపరచడం
- అన్ప్లగ్ చేసి చల్లబరచండి: Always unplug the wax warmer from the power outlet and allow it to cool completely before cleaning.
- లోపలి కుండను తీసివేయండి: Once cooled, carefully remove the inner wax pot.
- లోపలి కుండను శుభ్రం చేయండి: Any remaining wax in the inner pot can be reheated and poured into a disposable container for disposal, or allowed to harden and then removed. Clean the inner pot with a wax cleaner or a small amount of oil to dissolve wax residue, then wipe clean with a paper towel.
- Clean Warmer Exterior: ప్రకటనతో వార్మర్ యొక్క బాహ్య భాగాన్ని తుడవండిamp గుడ్డ. రాపిడి క్లీనర్లను ఉపయోగించవద్దు లేదా యూనిట్ను నీటిలో ముంచవద్దు.
- నిల్వ: Store the wax warmer and accessories in a cool, dry place.
ట్రబుల్షూటింగ్
| సమస్య | సాధ్యమైన కారణం | పరిష్కారం |
|---|---|---|
| Wax not melting or heating slowly. | Warmer not plugged in, low temperature setting, or insufficient time. | Ensure warmer is plugged in. Increase temperature setting. Allow sufficient time (approx. 10 minutes for initial melt). |
| Wax is too hot or causes discomfort. | ఉష్ణోగ్రత సెట్టింగ్ చాలా ఎక్కువ. | Lower the temperature setting. Always test wax on inner wrist before applying to larger areas. |
| Wax not removing hair effectively. | Wax applied too thinly, not allowed to harden sufficiently, or pulled incorrectly. | Apply a thicker layer of wax. Ensure wax is firm before removal. Pull quickly against hair growth, parallel to the skin. Ensure skin is clean and dry. |
| Skin irritation or redness after waxing. | Sensitive skin, wax too hot, or improper technique. | Perform a patch test. Ensure wax is not too hot. Apply Lifestance After-Wax Oil. Avoid waxing irritated skin. |
ఉత్పత్తి లక్షణాలు
- మోడల్ సంఖ్య: LCDWAXKIT-01
- ఉత్పత్తి కొలతలు: 7.08 x 7.08 x 7.87 అంగుళాలు
- వస్తువు బరువు: 2.82 పౌండ్లు
- తయారీదారు: జీవన స్థితి
- అంశం ఫారం: Wax (Hard Wax Beads)
- సిఫార్సు చేసిన ఉపయోగాలు: Bikini Line, Face, Legs, Arms, Underarms
- మెటీరియల్ ఫీచర్స్: Dermatologist Tested, Not Tested On Animals, Organic, Vegan
- మెటీరియల్ రకం ఉచితం: Alcohol Free, Fragrance Free, Hypoallergenic, Paraben Free, Phthalate Free
- చర్మం రకం అనుకూలత: All, Combination, Dry, Normal, Oily, Sensitive
వారంటీ మరియు మద్దతు
Your Lifestance Waxing Kit comes with a 5-year care plan, ensuring long-term reliability and consistent results. We stand by the quality of our products.
For any questions, concerns, or issues regarding your wax kit, please do not hesitate to contact Lifestance customer support. We are committed to providing a solution within 24 hours.
సంప్రదింపు సమాచారం: Please refer to the contact details provided on the product packaging or the official Lifestance webఅత్యంత తాజా మద్దతు సమాచారం కోసం సైట్.


