1. పరిచయం
This manual provides essential information for the proper use, setup, maintenance, and care of your LAZER G1 MIPS Road Bike Helmet. The LAZER G1 MIPS helmet is designed for adult cyclists, offering high performance and protection with advanced ventilation features. It incorporates the Multi-Directional Impact Protection System (MIPS) to enhance safety by redirecting energy during certain impacts.
The G1 MIPS helmet is engineered to be lightweight and features the Superlight ARS Fit System for a comfortable and secure fit. Please read this manual thoroughly before using your helmet to ensure optimal performance and safety.
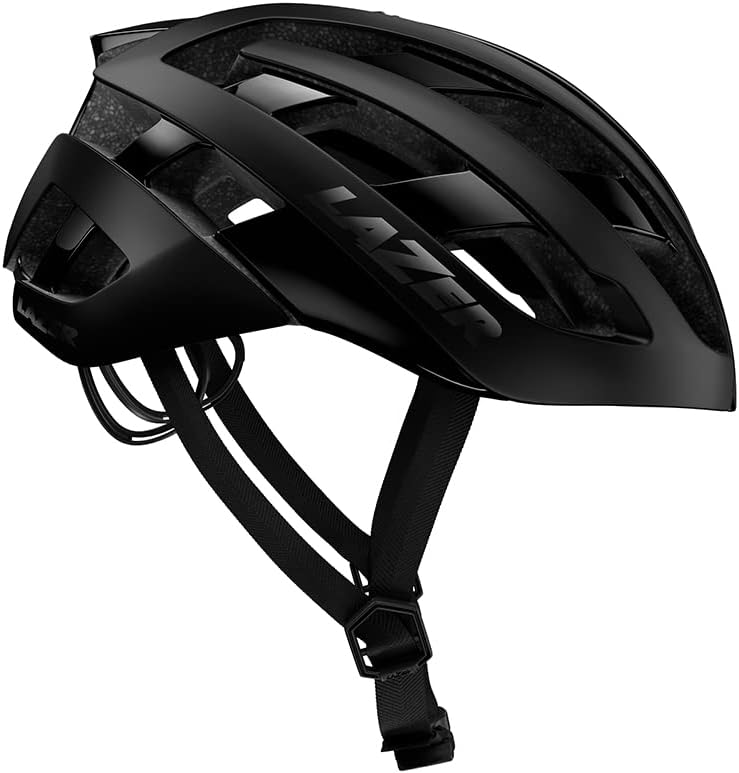
Figure 1.1: LAZER G1 MIPS Road Bike Helmet (Black, Small)
2. భద్రతా సమాచారం
Your safety is paramount. Always wear your helmet correctly and ensure it is properly fitted before every ride. This helmet is designed to reduce the risk of head injury in certain types of impacts, but it cannot protect against all possible impacts. No helmet can protect the wearer from all foreseeable impacts.
- సరైన ఫిట్: Ensure the helmet fits snugly and comfortably. It should not move freely on your head. Refer to the "Fitting Your Helmet" section for detailed instructions.
- పట్టీ సర్దుబాటు: Always secure the chin strap tightly so that the helmet cannot be pulled off your head.
- ప్రభావ రక్షణ: The MIPS system is designed to reduce rotational forces that can result from certain angled impacts. However, it does not guarantee protection against all types of impacts.
- నష్టం: Inspect your helmet for any signs of damage before each use. If the helmet has sustained an impact, even if no visible damage is present, it should be replaced immediately. The structural integrity may be compromised.
- రసాయనాలు: Do not expose the helmet to solvents, paints, or other chemicals, as these can damage the helmet's materials and compromise its protective capabilities.
- నిల్వ: హెల్మెట్ను ప్రత్యక్ష సూర్యకాంతి మరియు విపరీతమైన ఉష్ణోగ్రతల నుండి దూరంగా చల్లని, పొడి ప్రదేశంలో నిల్వ చేయండి.
3. భాగాలు మరియు పెట్టెలో ఏముంది
ప్యాకేజీని తెరిచిన తర్వాత, దయచేసి అన్ని భాగాలు ఉన్నాయని మరియు దెబ్బతినకుండా ఉన్నాయని ధృవీకరించండి.
పెట్టె విషయాలు:
- LAZER G1 MIPS Road Bike Helmet
- వినియోగదారు మాన్యువల్ (ఈ పత్రం)
- Optional comfort padding set (if included with your model)
హెల్మెట్ భాగాలు:
- ఔటర్ షెల్: Provides initial impact resistance.
- EPS Foam Liner: Absorbs impact energy.
- MIPS Layer: Internal low-friction layer designed to reduce rotational motion.
- Advanced Rollsys System (ARS) Fit System: Top-mounted dial for precise fit adjustment.
- Straps and Buckle: Secure the helmet to your head.
- ప్యాడింగ్: Internal pads for comfort and fit.
- Ventilation Channels: Designed for airflow and cooling.

Figure 3.1: Various angles of the LAZER G1 MIPS Helmet, showcasing its design and ventilation.
4. Setup and Fitting Your Helmet
Achieving a correct fit is crucial for the helmet's effectiveness.
4.1 సైజింగ్
Measure your head circumference approximately 2.5 cm (1 inch) above your eyebrows. Compare this measurement to the sizing chart below to select the appropriate helmet size. If your measurement falls between two sizes, it is generally recommended to try the smaller size first for a snugger fit.
| బ్రాండ్ సైజు | Head Circumference (CM) | Head Circumference (IN) |
|---|---|---|
| XS | 50 - 54 | 19.7 - 21.2 |
| S | 52 - 56 | 20 1/2 - 22 |
| M | 55 - 59 | 21 2/3 - 23 2/9 |
| L | 58 - 61 | 22 5/6 - 24 |
| XL | 61 - 64 | 24 - 25 1/5 |
| Unisize | 54 - 61 | 21 1/4 - 24 |
4.2. ఫిట్ని సర్దుబాటు చేయడం
- హెల్మెట్ను ఉంచండి: Place the helmet squarely on your head so that the front edge is approximately 2.5 cm (1 inch) above your eyebrows. It should sit level, not tilted back or forward.
- Adjust the ARS Fit System: The LAZER G1 MIPS features the Advanced Rollsys System (ARS). Locate the dial on the top of the helmet. Turn the dial clockwise to tighten the fit system, drawing the helmet snugly around your head. Turn counter-clockwise to loosen. Adjust until the helmet feels secure without causing uncomfortable pressure points.
- Adjust the Straps: The side straps should form a "V" shape just below your ears. Adjust the strap sliders to ensure this position.
- కట్టును భద్రపరచండి: Fasten the chin strap buckle. Tighten the strap until it is snug under your chin. You should be able to open your mouth wide, but the strap should not be loose enough to allow the helmet to shift significantly.
- ఫిట్ని తనిఖీ చేయండి: Once adjusted, try to move the helmet from side to side and front to back. It should feel snug and move your scalp slightly. If it slides easily, readjust the ARS system and straps.

Figure 4.1: Visual guide for proper helmet positioning and strap adjustment.
5. మీ హెల్మెట్ను ఆపరేట్ చేయడం
The LAZER G1 MIPS helmet is designed for straightforward use once properly fitted.
5.1 వెంటిలేషన్
The G1 MIPS helmet features 22 strategically placed vents and internal air channels to maximize airflow and keep your head cool during rides. No manual adjustment is required for the ventilation system; it operates passively.
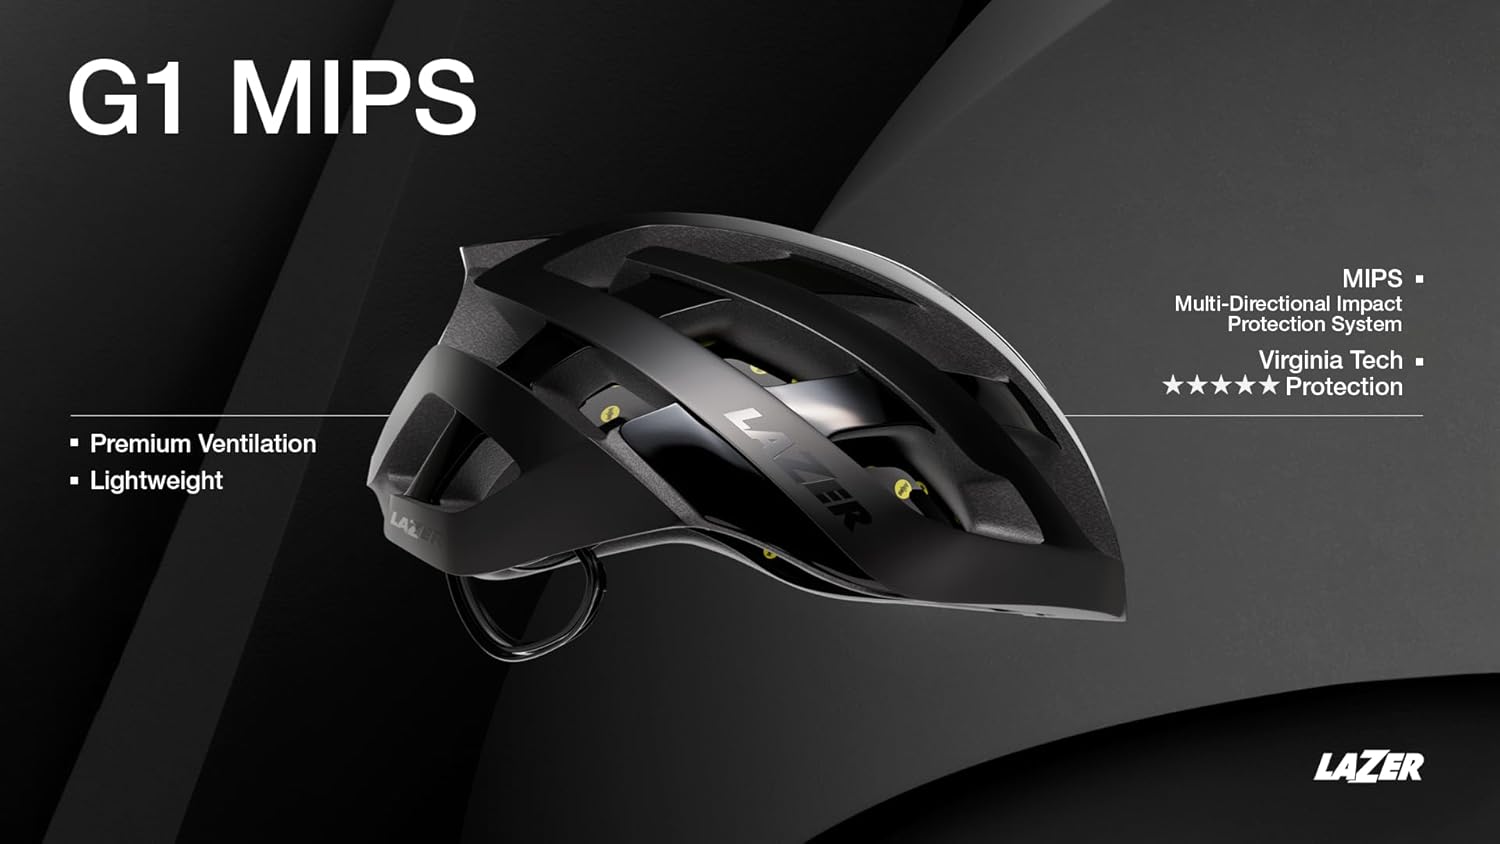
Figure 5.1: The G1 MIPS helmet's design emphasizes premium ventilation and lightweight construction.
5.2. MIPS Technology
The integrated MIPS (Multi-Directional Impact Protection System) is a low-friction layer inside the helmet designed to reduce rotational motion transferred to the brain from angled impacts. This system works automatically upon impact and requires no user interaction.
5.3. Riding with the Helmet
Always wear your helmet when cycling. Ensure the fit is secure and comfortable before beginning your ride. The lightweight design and advanced fit system are intended to provide comfort even on long rides.
Video 5.1: Short demonstration of the LAZER G1 MIPS Bike Helmet in use, highlighting its lightweight design and suitability for cycling.
6. నిర్వహణ మరియు సంరక్షణ
Proper care will extend the life of your helmet and maintain its protective qualities.
- Cleaning the Helmet: Use only mild soap and water to clean the helmet's exterior and interior padding. Do not use harsh chemicals, abrasive cleaners, or solvents, as these can damage the helmet's materials, including the shell, EPS foam, and MIPS layer.
- క్లీనింగ్ ప్యాడ్లు: The internal padding can be removed and hand-washed with mild soap and water. Allow pads to air dry completely before reinserting them into the helmet.
- నిల్వ: Store your helmet in a cool, dry place, away from direct sunlight and extreme temperatures. Avoid storing it in a car on a hot day, as excessive heat can damage the EPS foam.
- తనిఖీ: Regularly inspect the helmet for any signs of wear, cracks, dents, or other damage to the shell, straps, buckle, or fit system. If any damage is found, the helmet should be replaced.
7. ట్రబుల్షూటింగ్
ఈ విభాగం మీరు ఎదుర్కొనే సాధారణ సమస్యలను పరిష్కరిస్తుంది.
| సమస్య | సాధ్యమైన కారణం | పరిష్కారం |
|---|---|---|
| Helmet feels loose or shifts on head. | Improper adjustment of ARS system or straps. | Tighten the ARS dial (top of helmet) clockwise. Ensure chin strap is snug and side straps form a "V" below ears. Refer to Section 4.2. |
| Helmet is uncomfortable or causes pressure points. | Helmet size may be incorrect or ARS system is too tight. | Loosen the ARS dial slightly. Check if the helmet size is appropriate for your head circumference (Section 4.1). Consider using alternative padding if available. |
| Straps are twisted or difficult to adjust. | Straps may have been incorrectly threaded or stored. | Unbuckle and unthread straps completely. Re-thread them ensuring they lie flat and are not twisted. Adjust sliders as needed. |
| Visible damage to helmet after an impact. | హెల్మెట్ ఒక ప్రభావాన్ని గ్రహించింది. | వెంటనే హెల్మెట్ మార్చండి. Even minor visible damage can indicate compromised protective integrity. Do not use a damaged helmet. |
8. స్పెసిఫికేషన్లు
- మోడల్ పేరు: LAZER G1 MIPS
- మోడల్ సంఖ్య: BLU2207887932
- బ్రాండ్: లేజర్
- రంగు: Black (for this specific variant)
- పరిమాణం: Small (for this specific variant)
- వయస్సు పరిధి: పెద్దలు
- ప్రత్యేక ఫీచర్: తేలికైనది
- బాహ్య పదార్థం: పాలికార్బోనేట్ (PC)
- అంతర్గత పదార్థం: Foam (EPS)
- వస్తువు బరువు: సుమారు 8.28 ఔన్సులు (234.7 గ్రాములు)
- సిఫార్సు చేయబడిన ఉపయోగం: సైక్లింగ్
- భద్రతా ప్రమాణం: MIPS (Multi-Directional Impact Protection System) integrated.
- వెంటిలేషన్: 22 vents with internal air channels.
- Fit System: Advanced Rollsys System (ARS)
9. వారంటీ మరియు మద్దతు
9.1. వారంటీ సమాచారం
LAZER helmets typically come with a manufacturer's warranty covering defects in materials and workmanship. The specific terms and duration of your warranty may vary by region and purchase date. Please retain your proof of purchase for warranty claims.
LAZER also offers a Crash Replacement Program, providing a discount on a new replacement helmet if your helmet is damaged in a crash. For details on this program and to initiate a claim, please visit the official LAZER webసైట్ లేదా కస్టమర్ సపోర్ట్ని సంప్రదించండి.
9.2. కస్టమర్ మద్దతు
For technical assistance, warranty claims, or general inquiries, please contact LAZER customer support through their official website or the contact information provided with your product packaging. When contacting support, please have your helmet model and purchase details ready.
Official LAZER Webసైట్: www.lazer.com


