పరిచయం
This manual provides essential information for the safe and efficient operation, maintenance, and troubleshooting of your Scheppach MS225-53E gasoline lawnmower. Please read this manual thoroughly before operating the machine and keep it for future reference.

Image: The Scheppach MS225-53E gasoline lawnmower, showcasing its robust design and the included battery for electric start.
భద్రతా సూచనలు
Always prioritize safety when operating the lawnmower. Failure to follow these instructions may result in serious injury or damage to the machine.
- Read and understand all instructions before operating the lawnmower.
- Wear appropriate personal protective equipment (PPE), including eye protection, hearing protection, sturdy footwear, and long trousers.
- Keep children, pets, and bystanders away from the operating area.
- తడి గడ్డిలో లేదా వర్షంలో లాన్ మోవర్ను ఎప్పుడూ ఆపరేట్ చేయవద్దు.
- Ensure the engine is off and the spark plug cap is removed before performing any maintenance or cleaning.
- Handle fuel with extreme care. Store fuel in approved containers and refuel outdoors in a well-ventilated area.
- అధికంగా నిటారుగా ఉన్న వాలులలో లాన్మవర్ను ఆపరేట్ చేయవద్దు.
- Inspect the area for objects that could be thrown by the blade before mowing.
భాగాలు ముగిశాయిview
Familiarize yourself with the main parts of your Scheppach MS225-53E lawnmower:
- ఇంజిన్: Powerful 224 cm³ 4-stroke gasoline engine with 6 HP.
- కట్టింగ్ డెక్: Robust deck with an XXL cutting width of 53 cm.
- గ్రాస్ క్యాచర్: Large 65-liter grass catcher with a fill level indicator.
- హ్యాండిల్ బార్: Double-foldable handle for easy and space-saving storage.
- వీల్ డ్రైవ్: Switchable wheel drive for effortless mowing, especially on slopes.
- కట్టింగ్ ఎత్తు సర్దుబాటు: Central 7-fold cutting height adjustment (25 – 75 mm).
- వ్యవస్థను ప్రారంభించండి: Electric start and pull cord start options.
- సైడ్ డిశ్చార్జ్: Integrated side discharge function.
- Mulching Function: For professional mulching results.
- క్లీనింగ్ ఫంక్షన్: Integrated cleaning function with water connection.

Image: Diagram illustrating the 7-in-1 functions of the lawnmower: Mowing, Catching, Mulching, Side Discharge, Cleaning Function, Wheel Drive, Hybrid-Start.
సెటప్
1. అసెంబ్లీ
The lawnmower comes partially pre-assembled. Follow these steps for final assembly:
- హ్యాండిల్బార్ అసెంబ్లీ: Unfold the handlebar and secure it in place using the provided knobs or levers. Ensure all cables are routed correctly and not pinched.
- గ్రాస్ క్యాచర్ అసెంబ్లీ: Assemble the grass catcher according to the instructions and attach it to the rear of the lawnmower.
- Side Discharge Chute (Optional): If using the side discharge, attach the chute to the side opening of the cutting deck.
2. Initial Fluid Checks
Before the first use, ensure proper fluid levels:
- ఇంజిన్ ఆయిల్: Fill the engine with the recommended 4-stroke engine oil. Refer to the engine manual for specific oil type and capacity. Do not overfill.
- ఇంధనం: Fill the fuel tank with fresh, unleaded gasoline. Do not use E10 fuel unless specified by the manufacturer.
3. Battery Installation (for E-Start)
Insert the fully charged lithium battery into its designated compartment for the electric start function.

Image: Close-up of the electric start button, highlighting the convenience of the hybrid start system which eliminates the need for choking or priming.
Operating the Lawnmower
1. ఇంజిన్ను ప్రారంభించడం
- విద్యుత్ ప్రారంభం: Ensure the battery is charged and inserted. Press and hold the safety bar on the handlebar, then press the electric start button.
- Pull Cord Start: If the electric start is not used or the battery is low, hold the safety bar, then pull the starter cord firmly and smoothly until the engine starts.
2. కట్టింగ్ ఎత్తును సర్దుబాటు చేయడం
The cutting height can be centrally adjusted in 7 steps from 25 mm to 75 mm.
- Ensure the engine is off.
- Locate the central height adjustment lever on the side of the lawnmower.
- Pull the lever outwards and move it to the desired height setting. Release the lever to lock it in place.

Image: A hand adjusting the central cutting height lever, showing the range of 25-75 mm across 7 positions.
3. Engaging Wheel Drive
The switchable wheel drive assists in mowing, especially on uneven or sloped terrain.
- To engage the wheel drive, pull the drive lever (usually located on the handlebar) towards you.
- Release the lever to disengage the drive.
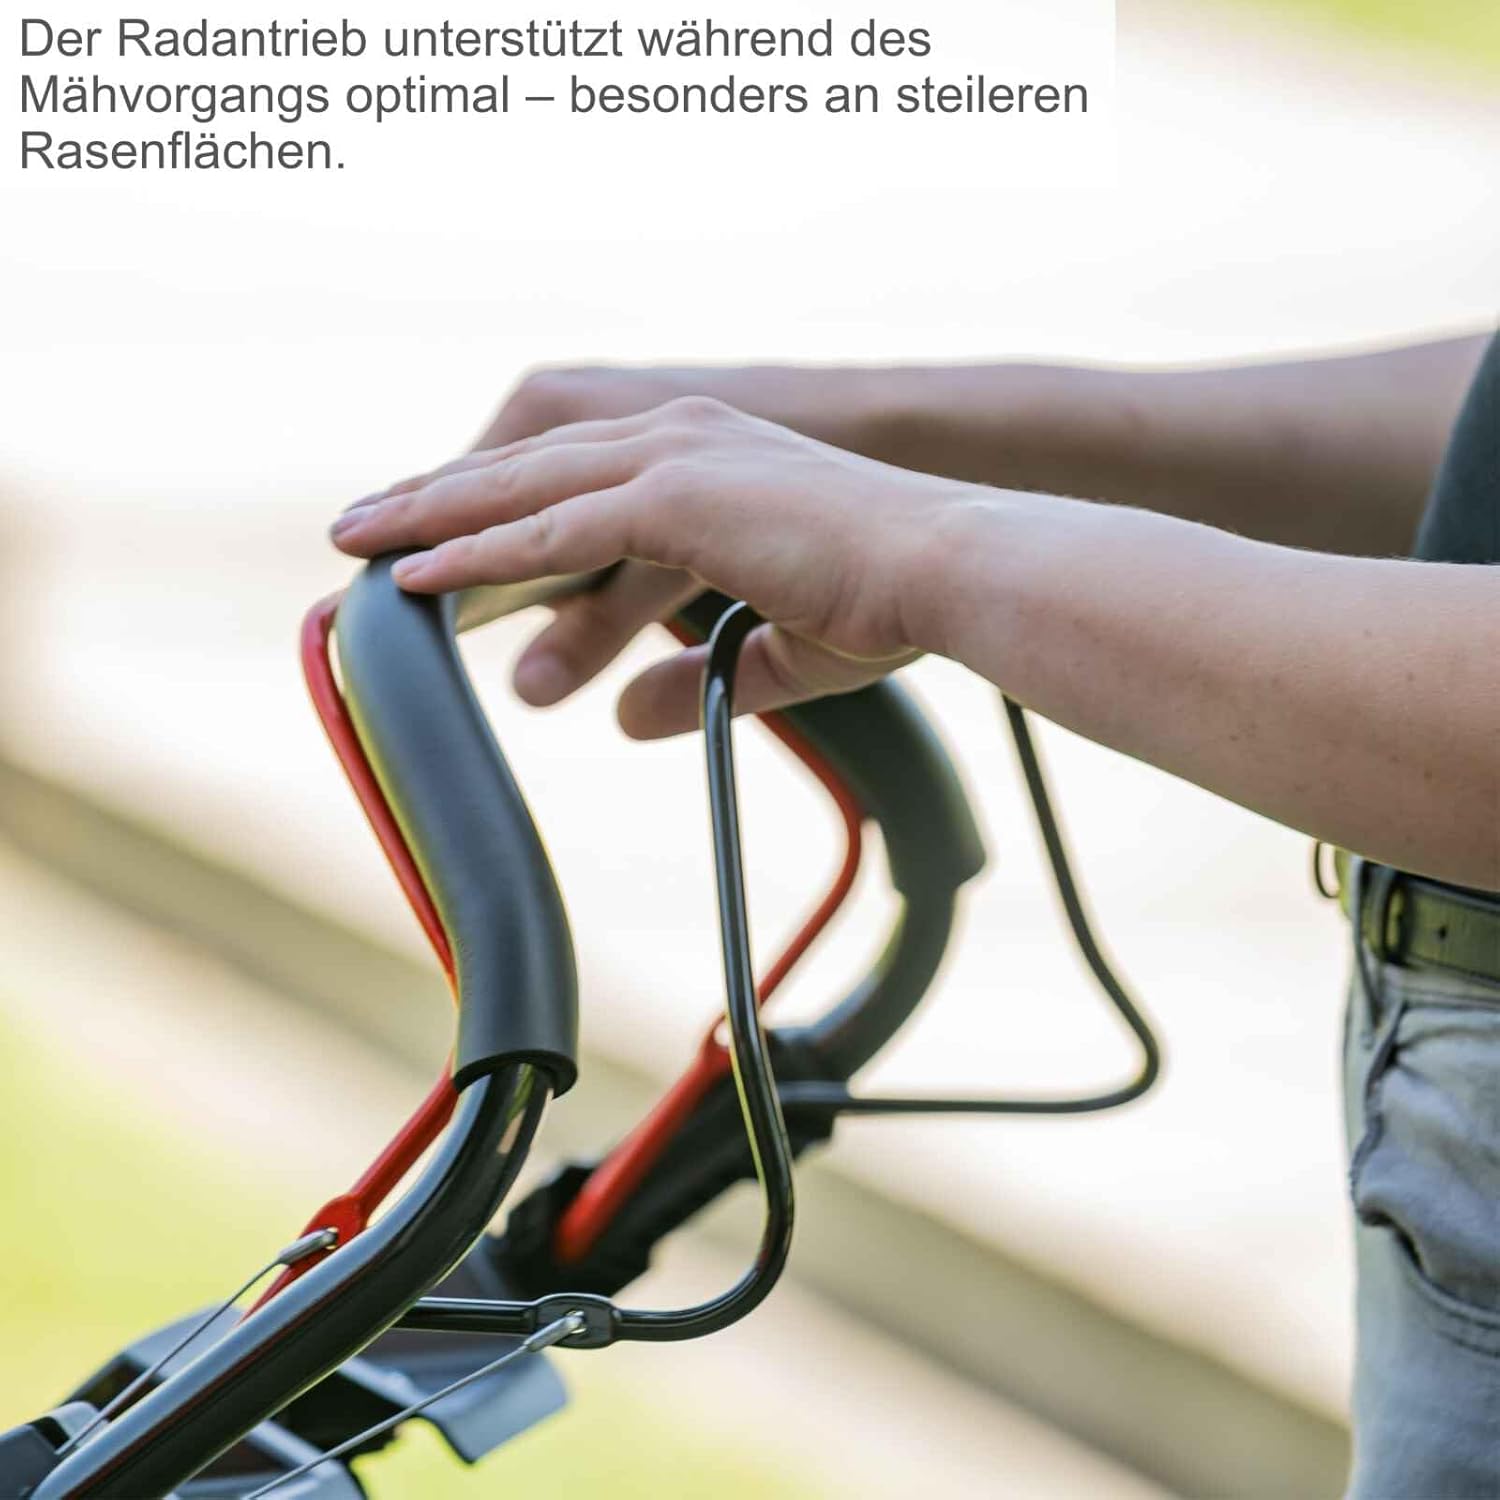
Image: Hands on the handlebar, demonstrating the engagement of the wheel drive, which provides optimal support during mowing, particularly on steeper lawns.
4. మొవింగ్ టెక్నిక్స్
- సేకరణ: Attach the grass catcher to collect clippings. Monitor the fill level indicator.
- మల్చింగ్: Install the mulching plug (if included) and remove the grass catcher. The lawnmower will finely chop and redistribute clippings back onto the lawn as natural fertilizer.
- సైడ్ డిశ్చార్జ్: Attach the side discharge chute. This is useful for very tall grass or when collecting is not desired.

Image: A hand easily attaching or detaching the side discharge chute as needed, providing flexibility for different mowing requirements.
5. ఇంజిన్ను ఆపడం
Release the safety bar on the handlebar. The engine will automatically shut off.
నిర్వహణ
క్రమం తప్పకుండా నిర్వహణ మీ లాన్ మోవర్ యొక్క దీర్ఘాయువు మరియు సరైన పనితీరును నిర్ధారిస్తుంది.
1. శుభ్రపరచడం
- సులభమైన శుభ్రపరిచే ఫంక్షన్: Connect a garden hose to the water connection point on the cutting deck. Start the engine briefly to allow the rotating blade to clean the underside of the deck.
- After using the Easy Clean function, turn off the engine and manually remove any remaining grass clippings from the deck and wheels.

Image: A garden hose connected to the Easy Clean port on the lawnmower deck, demonstrating the integrated cleaning function for quick and easy maintenance.
2. బ్లేడ్ సంరక్షణ
- బ్లేడ్ పదును మరియు దెబ్బతినడం కోసం క్రమం తప్పకుండా తనిఖీ చేయండి. మొద్దుబారిన బ్లేడ్ గడ్డిని చీల్చివేస్తుంది, ఇది అనారోగ్యకరమైన పచ్చికకు దారితీస్తుంది.
- Have the blade sharpened or replaced by a qualified service technician.
3. ఇంజిన్ నిర్వహణ
- చమురు మార్పు: Change the engine oil after the first 5 operating hours, then every 25 operating hours or annually, whichever comes first.
- ఎయిర్ ఫిల్టర్: ముఖ్యంగా దుమ్ము, ధూళి ఉన్న పరిస్థితుల్లో ఎయిర్ ఫిల్టర్ను క్రమం తప్పకుండా శుభ్రం చేయండి లేదా మార్చండి.
- స్పార్క్ ప్లగ్: స్పార్క్ ప్లగ్ను ఏటా తనిఖీ చేసి శుభ్రం చేయండి. అవసరమైతే మార్చండి.
4. నిల్వ
- Before long-term storage, drain the fuel tank or add a fuel stabilizer.
- Clean the lawnmower thoroughly.
- Store in a dry, well-ventilated area. The double-foldable handle allows for extremely space-saving storage.
ట్రబుల్షూటింగ్
| సమస్య | సాధ్యమైన కారణం | పరిష్కారం |
|---|---|---|
| ఇంజన్ స్టార్ట్ అవ్వదు. | No fuel; old fuel; spark plug issue; battery low (E-Start). | Check fuel level; use fresh fuel; clean/replace spark plug; charge/replace battery. |
| ఇంజిన్ మొరటుగా నడుస్తుంది లేదా నిలిచిపోతుంది. | Dirty air filter; stale fuel; carburetor issue. | Clean/replace air filter; drain and refill with fresh fuel; consult service center. |
| Lawnmower does not cut evenly. | Dull or damaged blade; incorrect cutting height setting. | Sharpen/replace blade; adjust cutting height. |
| విపరీతమైన కంపనం. | వంగిన లేదా అసమతుల్యమైన బ్లేడ్; వదులుగా ఉండే భాగాలు. | బ్లేడ్ దెబ్బతింటుందో లేదో తనిఖీ చేయండి, అవసరమైతే భర్తీ చేయండి; అన్ని ఫాస్టెనర్లను బిగించండి. |
స్పెసిఫికేషన్లు
- మోడల్: MS225-53E
- ఇంజిన్: 224 cm³ 4-stroke gasoline engine, 6 HP
- కట్టింగ్ వెడల్పు: 53 సెం.మీ
- కట్టింగ్ ఎత్తు సర్దుబాటు: Central, 7 positions (25 – 75 mm)
- గ్రాస్ క్యాచర్ వాల్యూమ్: 65 లీటర్లు
- వ్యవస్థను ప్రారంభించండి: Electric Start (E-Start) and Pull Cord Start
- డ్రైవ్ రకం: Switchable Wheel Drive
- విధులు: Mowing, Collecting, Mulching, Side Discharge, Cleaning Function
- ఉత్పత్తి కొలతలు: 146 x 65.1 x 115 సెం.మీ (L x W x H)
- వస్తువు బరువు: 26.6 కిలోలు
- మెటీరియల్: మిశ్రమం ఉక్కు
- రంగు: నలుపు/ఎరుపు

Image: A diagram illustrating key specifications including recommended lawn area (1800 m²), cutting height (25-75 mm) and width (530 mm), 65L grass box capacity, and the Easy Clean function.
వారంటీ మరియు మద్దతు
Scheppach products are manufactured to high-quality standards and come with a manufacturer's warranty. For warranty claims, technical support, or spare parts, please contact your authorized Scheppach dealer or visit the official Scheppach webవారంటీ ప్రయోజనాల కోసం మీ కొనుగోలు రుజువును ఉంచండి.
మరింత సమాచారం కోసం, సందర్శించండి షెప్పాచ్ బ్రాండ్ స్టోర్.


