1. పరిచయం
This manual provides detailed instructions for the installation, operation, and maintenance of your ExpertPower 20A MPPT Solar Charge Controller. This device is designed to efficiently manage power from your solar array to charge 12V or 24V battery systems, supporting various battery types including lead-acid (AGM, Gel, Flooded) and Lithium (LiFePO4).
Please read this manual thoroughly before installation and operation to ensure proper use and to prevent damage to the controller or your solar power system.
2. భద్రతా సమాచారం
- Ensure all wiring is correctly connected and securely fastened to prevent loose connections that could cause sparks or overheating.
- కంట్రోలర్ను ఇన్స్టాల్ చేసే లేదా సర్దుబాటు చేసే ముందు ఎల్లప్పుడూ సోలార్ ప్యానెల్ మరియు బ్యాటరీ పవర్ను డిస్కనెక్ట్ చేయండి.
- Install the controller in a well-ventilated area, away from flammable gases and liquids.
- కంట్రోలర్ను మీరే విడదీయవద్దు లేదా రిపేర్ చేయడానికి ప్రయత్నించవద్దు. సేవ కోసం అర్హత కలిగిన సిబ్బందిని సంప్రదించండి.
- బ్యాటరీలు మరియు విద్యుత్ వ్యవస్థలతో పనిచేసేటప్పుడు కంటి రక్షణతో సహా తగిన వ్యక్తిగత రక్షణ పరికరాలను ధరించండి.
- బ్యాటరీ వాల్యూమ్ని నిర్ధారించుకోండిtagఇ సిస్టమ్ వాల్యూమ్తో సరిపోలుతుందిtage (12V or 24V) selected by the controller.
3. ఉత్పత్తి లక్షణాలు
- MPPT టెక్నాలజీ: Maximizes solar array power generation by over 20% compared to PWM controllers through advanced tracking.
- సిస్టమ్ బహుముఖ ప్రజ్ఞ: Automatic 12V/24V system detection. Compatible with various battery chemistries including Lithium (LiFePO4), AGM, Gel, and Flooded. Offers user-defined settings, RS232 communication, and optional Bluetooth app for system control.
- Battery Management System (BMS) Compatibility: Designed to operate with or without a battery's internal BMS. Includes built-in protection features such as over-voltage, over-charge, low-voltage, deep discharge, and over-temperature compensation.
- మన్నికైన నిర్మాణం: Features an industrial-grade chassis with an IP32 rating for durability in various environmental conditions.

Image: The ExpertPower 20A MPPT Solar Charge Controller highlighting its protection features including short-circuit, overload, reverse current, and over-current protection. It also notes compatibility with AGM, Gel, Flooded, and LiFePO4 batteries, RS232 communication, and auto 12V/24V selection.
4. ఉత్పత్తి భాగాలు మరియు అంతకంటే ఎక్కువview
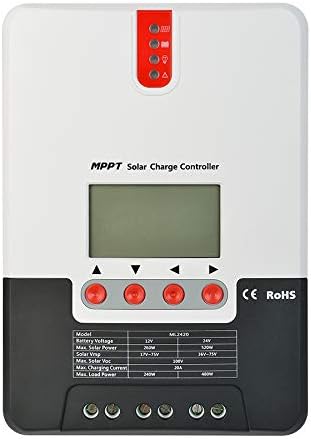
చిత్రం: ముందు భాగం view of the ExpertPower 20A MPPT Solar Charge Controller, showing the LCD display, control buttons, and LED indicators.

Image: Diagram illustrating the components of the solar charge controller, including the LCD display & buttons, LED indicators, load ports, Bluetooth port, battery ports, solar panel ports, and temperature port.
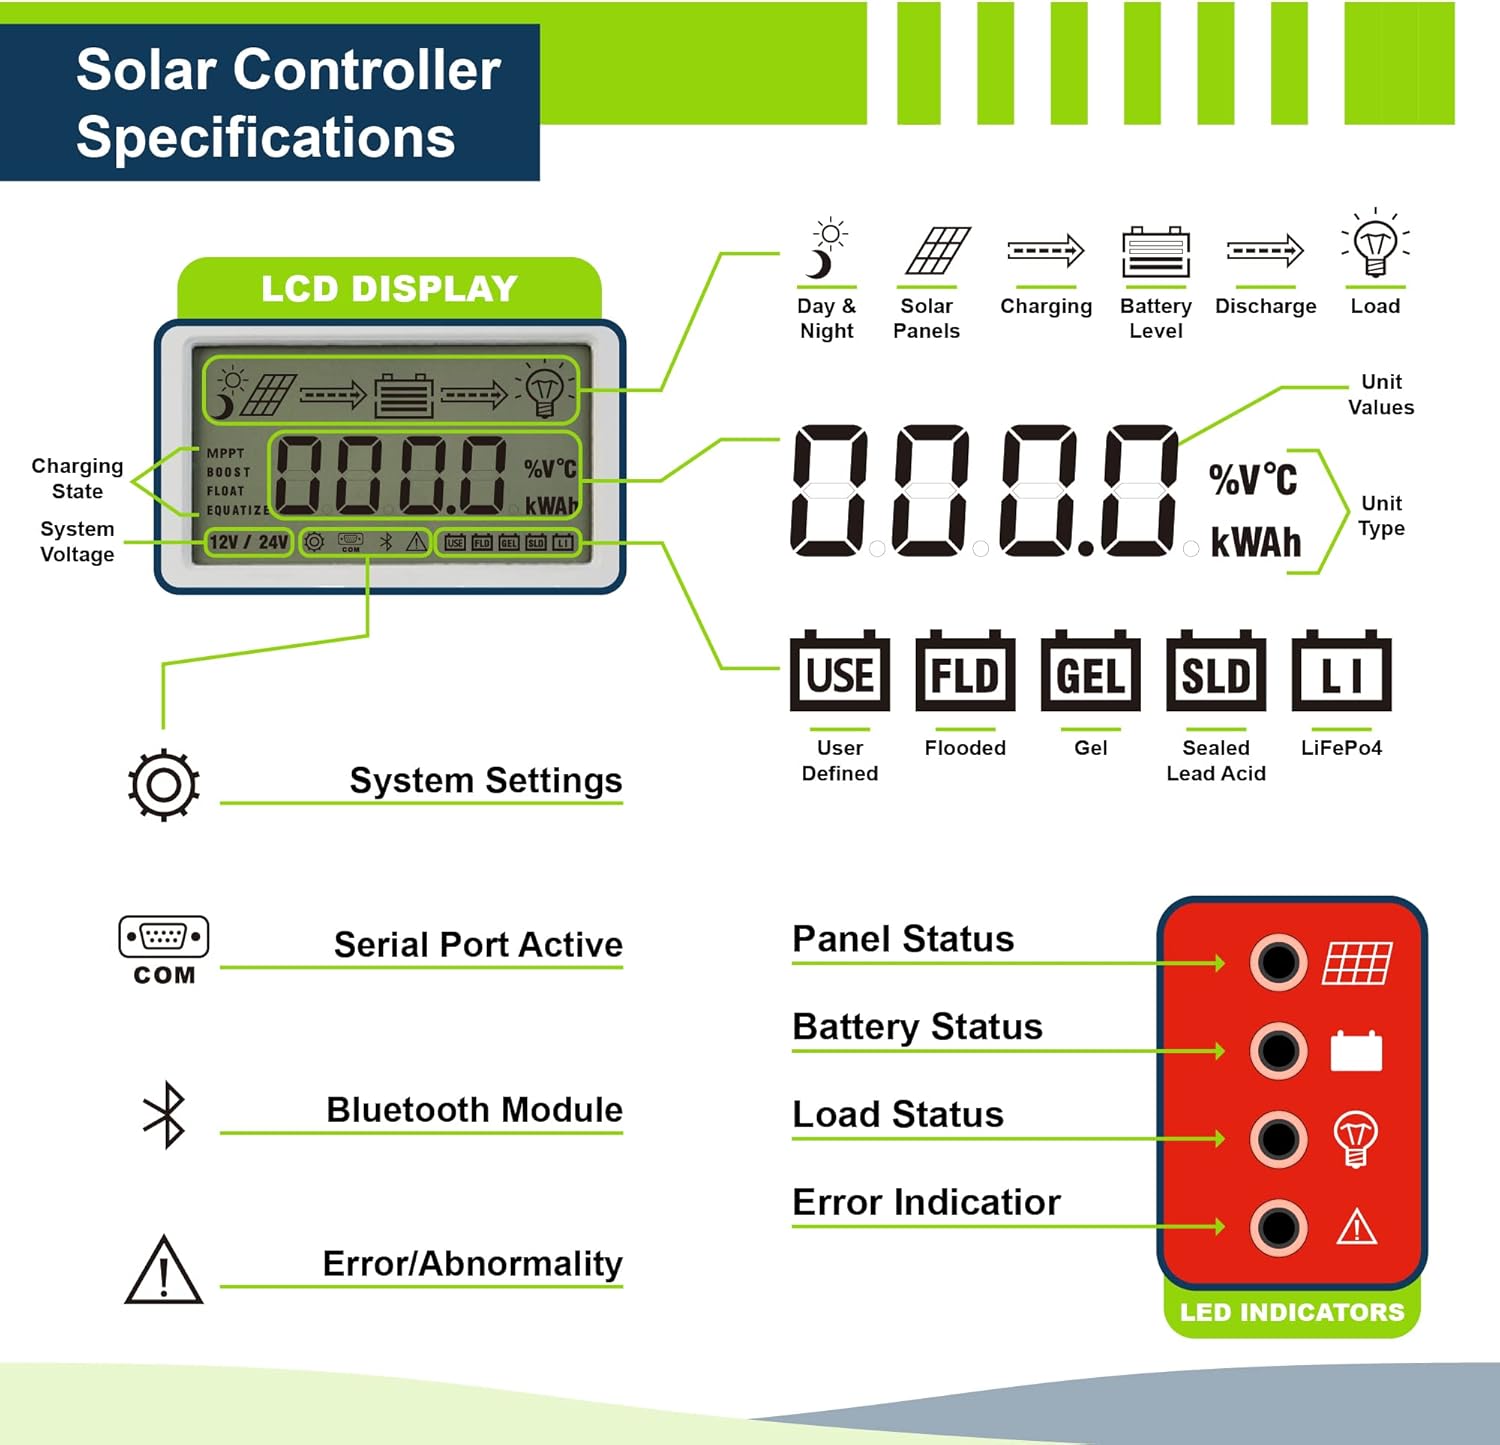
చిత్రం: వివరణాత్మకం view of the LCD display and LED indicators. The LCD shows charging state, system voltage, unit values, and unit type. The LED indicators show panel status, battery status, load status, and error indication.
5. స్పెసిఫికేషన్లు
| స్పెసిఫికేషన్ | విలువ |
|---|---|
| ఉత్పత్తి కొలతలు | 8 x 5.6 x 2.5 అంగుళాలు |
| వస్తువు బరువు | 2.4 పౌండ్లు |
| మోడల్ సంఖ్య | EPSML2420 |
| బ్రాండ్ | నిపుణుల శక్తి |
| వాల్యూమ్tage | 12V / 24V Auto-Select |
| గరిష్ట PV ఇన్పుట్ వాల్యూమ్tage | 100V |
| గరిష్ట ఛార్జింగ్ కరెంట్ | 20A |
| UPC | 840140942286 |
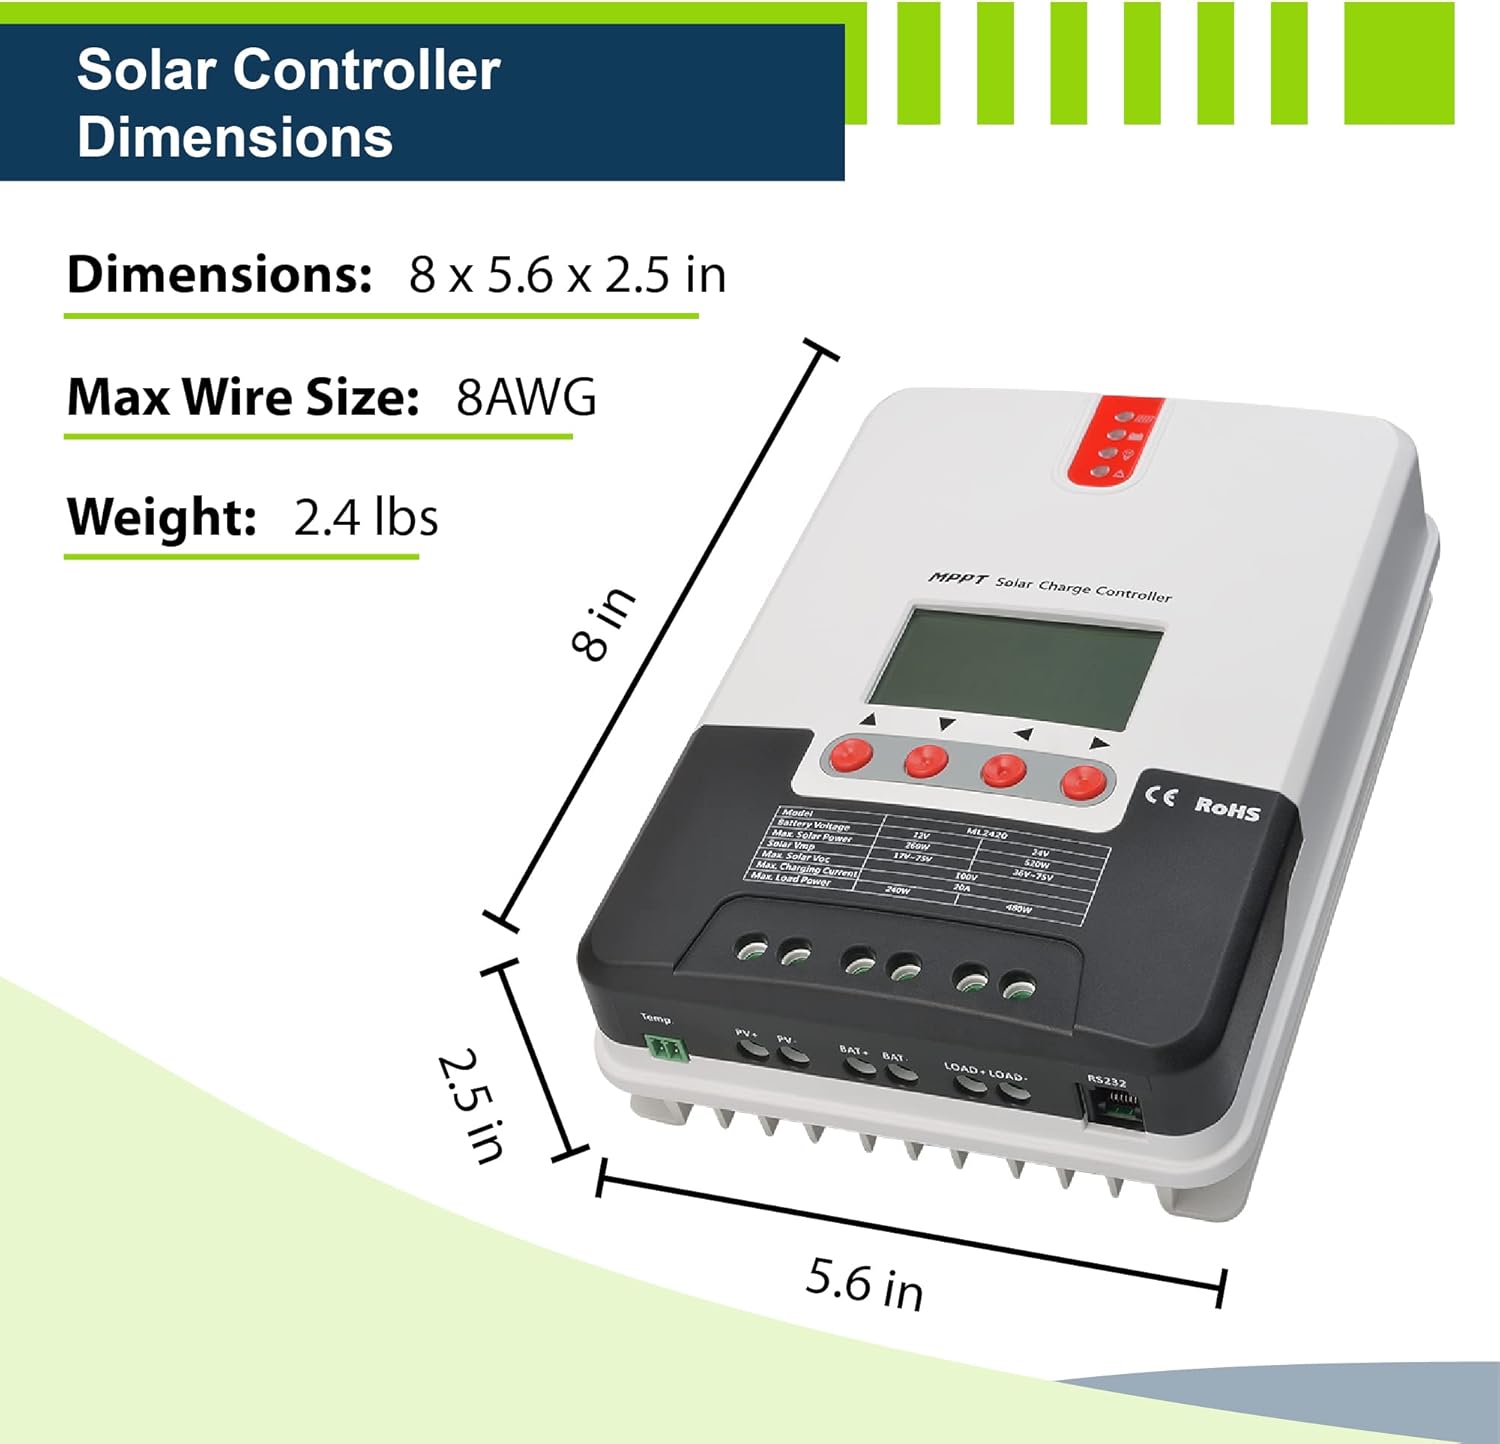
Image: Diagram showing the physical dimensions (8 x 5.6 x 2.5 inches) and weight (2.4 lbs) of the solar charge controller, along with the maximum recommended wire size (8AWG).
6. సెటప్ మరియు ఇన్స్టాలేషన్
Follow these steps for safe and correct installation of your solar charge controller:
- మౌంటు: Choose a suitable location for mounting the controller. It should be indoors, protected from direct sunlight, high temperatures, and water. Ensure adequate ventilation around the unit.
- వైర్ సైజింగ్: Use appropriate wire gauges for your solar panel, battery, and load connections to minimize power loss and ensure safety. Refer to local electrical codes.
- కనెక్షన్ ఆర్డర్:
- Connect the battery to the controller first. Ensure correct polarity (+ to + and - to -).
- Connect the solar panel to the controller. Ensure correct polarity.
- Connect the DC load to the controller (if applicable). Ensure correct polarity.
- డిస్కనెక్షన్ ఆర్డర్: When disconnecting, always reverse the connection order: disconnect the load first, then the solar panel, and finally the battery.
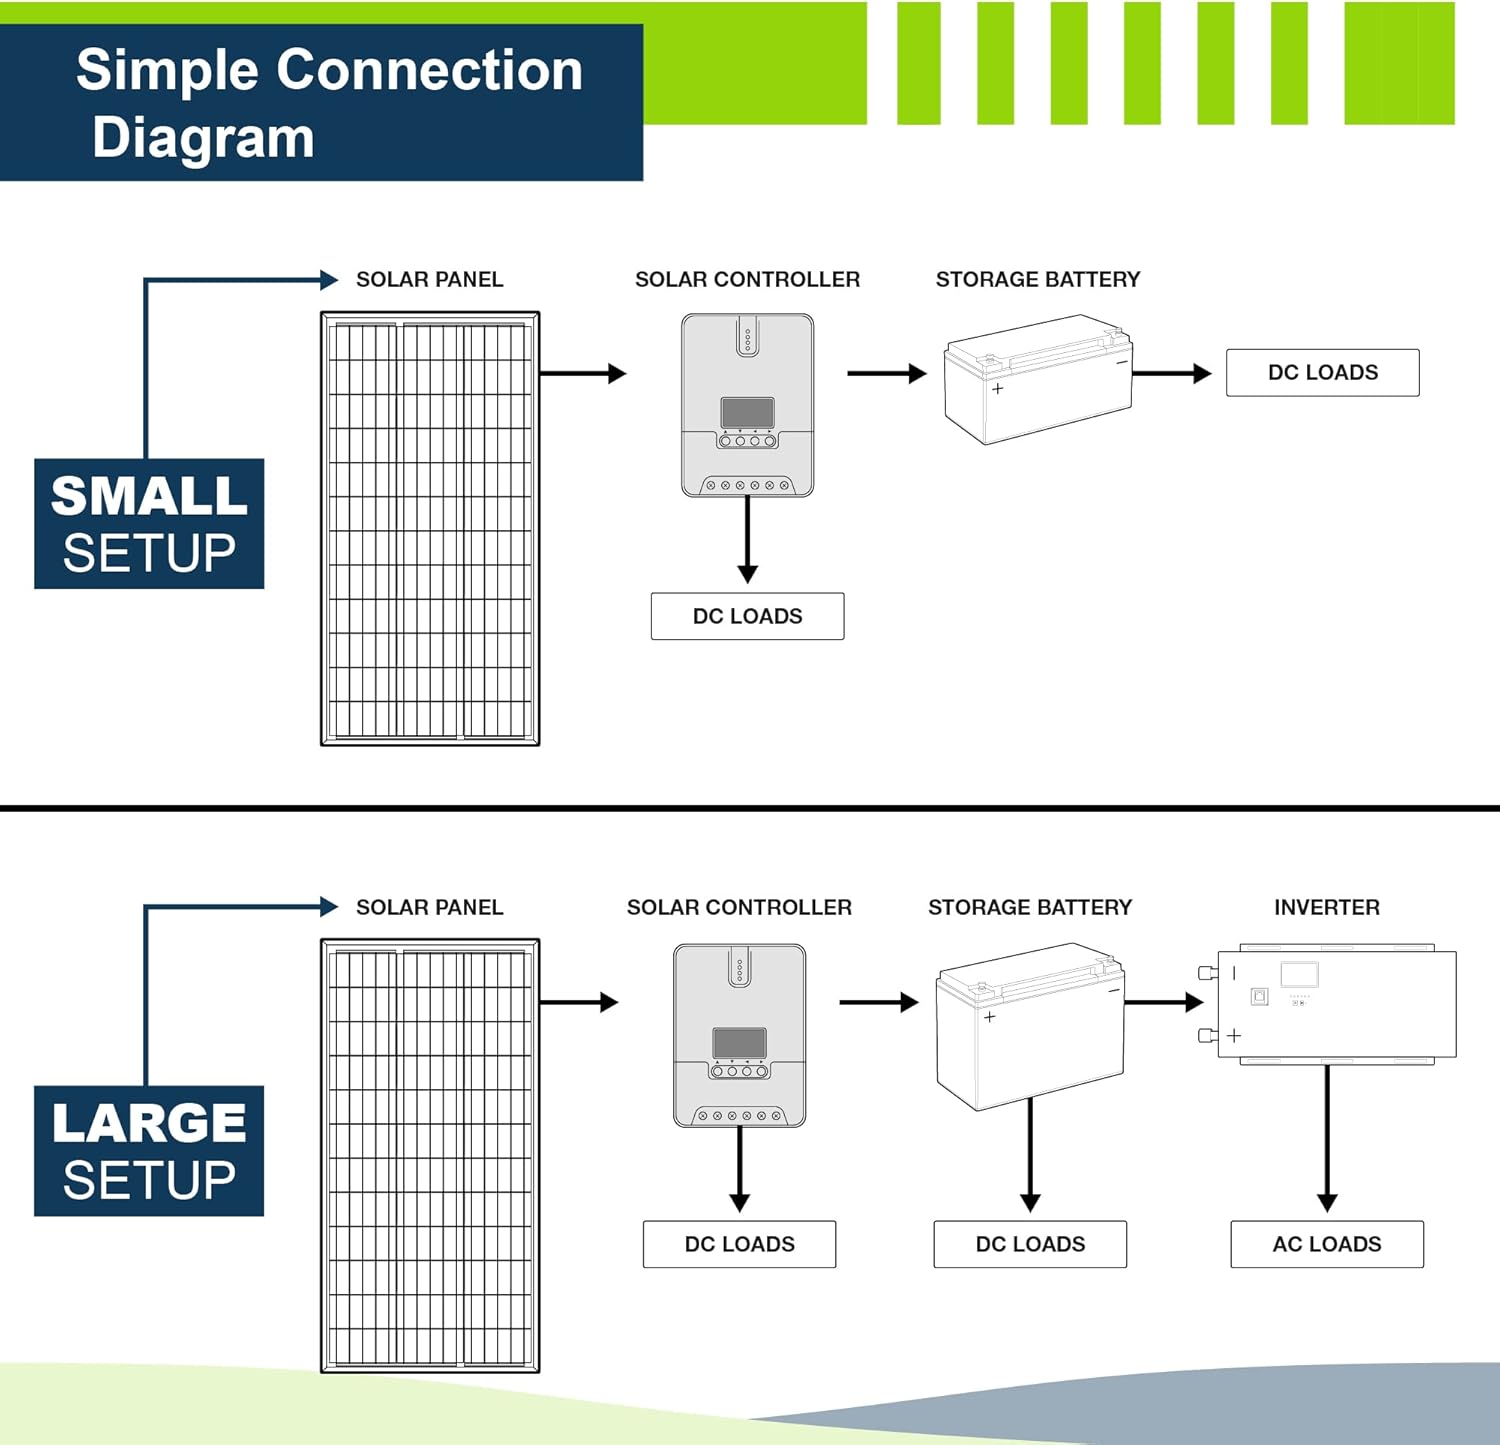
Image: Simple connection diagrams for both small and large solar setups. The small setup shows a solar panel connected to the solar controller, then to a storage battery and DC loads. The large setup includes an inverter for AC loads in addition to DC loads.
7. ఆపరేటింగ్ సూచనలు
7.1 ప్రారంభ పవర్-అప్
Once the battery is connected, the controller will power on and display system information on the LCD. It will automatically detect whether it is a 12V or 24V system.
7.2 LCD డిస్ప్లే మరియు బటన్లు
The LCD provides real-time information about your solar system. Use the control buttons (up, down, enter) to navigate through menus and adjust settings.
- ఛార్జింగ్ స్టేట్: Indicates MPPT, Boost, Float, or Equalize charging stages.
- సిస్టమ్ వాల్యూమ్tage: ప్రస్తుత బ్యాటరీ వాల్యూమ్ను ప్రదర్శిస్తుందిtage.
- Unit Values: Shows current, voltage, power, and energy readings.
- యూనిట్ రకం: Displays units like %V°C or kWh.
- బ్యాటరీ రకం ఎంపిక: Allows selection of battery chemistry (User Defined, Flooded, Gel, Sealed Lead Acid, LiFePO4).
7.3 LED సూచికలు
The LED indicators provide a quick visual status of the system:
- ప్యానెల్ స్థితి: Indicates if solar panels are connected and generating power.
- బ్యాటరీ స్థితి: Shows battery charge level and charging activity.
- లోడ్ స్థితి: Indicates if the DC load is active.
- లోపం సూచన: Lights up to signal system abnormalities or faults.
7.4 బ్యాటరీ రకం కాన్ఫిగరేషన్
It is crucial to select the correct battery type in the controller's settings to ensure proper charging and prolong battery life. Refer to your battery's specifications for recommended charging parameters. The controller supports user-defined settings for advanced customization.
8. నిర్వహణ
Regular maintenance helps ensure the longevity and optimal performance of your solar charge controller:
- శుభ్రపరచడం: దుమ్ము మరియు చెత్తను తొలగించడానికి కంట్రోలర్ యొక్క బాహ్య భాగాన్ని కాలానుగుణంగా పొడి గుడ్డతో శుభ్రం చేయండి. వెంటిలేషన్ ఓపెనింగ్లు స్పష్టంగా ఉన్నాయని నిర్ధారించుకోండి.
- కనెక్షన్లు: Annually check all wiring connections for tightness and corrosion. Loose connections can lead to power loss or overheating.
- పర్యావరణం: ఇన్స్టాలేషన్ వాతావరణం పేర్కొన్న ఉష్ణోగ్రత మరియు తేమ పరిధిలో ఉండేలా చూసుకోండి.
- ఫర్మ్వేర్: Check the ExpertPower webమీ మోడల్ కోసం అందుబాటులో ఉన్న ఏవైనా ఫర్మ్వేర్ అప్డేట్ల కోసం సైట్.
9. ట్రబుల్షూటింగ్
If you encounter issues with your solar charge controller, consider the following common troubleshooting steps:
- డిస్ప్లే/పవర్ లేదు:
- Check battery connections and ensure the battery has sufficient voltage.
- Verify polarity of battery connections.
- ఛార్జింగ్ లేదు:
- సోలార్ ప్యానెల్ కనెక్షన్లు మరియు ధ్రువణతను తనిఖీ చేయండి.
- Ensure solar panels are receiving adequate sunlight.
- సోలార్ ప్యానెల్ వాల్యూమ్ అని ధృవీకరించండిtage (Voc) is within the controller's specified range (Max PV Input 100V).
- Error Indicator Lit:
- Refer to the controller's display for specific error codes or messages.
- Check for over-voltage, over-current, or short-circuit conditions in the system.
- Ensure the battery type setting matches the connected battery.
- సరికాని వాల్యూమ్tagఇ రీడింగులు:
- అన్ని కనెక్షన్లు సురక్షితంగా మరియు తుప్పు పట్టకుండా ఉన్నాయని ధృవీకరించండి.
- Ensure the temperature sensor (if connected) is properly installed and functioning.
If problems persist after performing these checks, please contact ExpertPower customer support.
10. వారంటీ సమాచారం
ExpertPower products are designed for reliability and performance. For specific warranty terms and conditions applicable to your 20A MPPT Solar Charge Controller, please refer to the warranty card included with your product or visit the official ExpertPower webసైట్.
Typically, warranties cover defects in materials and workmanship under normal use. Damage resulting from improper installation, misuse, or unauthorized modifications is generally not covered.
11. కస్టమర్ మద్దతు
For technical assistance, product inquiries, or warranty claims, please contact ExpertPower customer support:
- ఆన్లైన్: Visit the official ExpertPower website or their Amazon store page for FAQs and contact information.
- అమెజాన్ స్టోర్: ExpertPower Amazon Store


