1. పరిచయం
Thank you for choosing the HYCHIKA Mini Electric Screwdriver 67-in-1 kit. This precision tool is designed for repairing a wide range of electronic devices and small appliances, including phones, laptops, PCs, watches, cameras, and drones. Its compact design, magnetic bits, and integrated LED lighting provide convenience and efficiency for various repair tasks.

Figure 1: The HYCHIKA Mini Electric Screwdriver and its comprehensive accessory case.
చిత్రం 2: పైగాview of all 67 components included in the precision screwdriver kit, featuring various bits, tools, and the electric screwdriver.
2. సెటప్
2.1 అన్ప్యాకింగ్ మరియు కాంపోనెంట్ గుర్తింపు
Carefully unpack all components from the storage case. Familiarize yourself with the electric screwdriver, the various precision bits, and additional tools such as the magnetizer, suction cup, pry tools, and cleaning brush.
2.2 స్క్రూడ్రైవర్ను ఛార్జ్ చేయడం
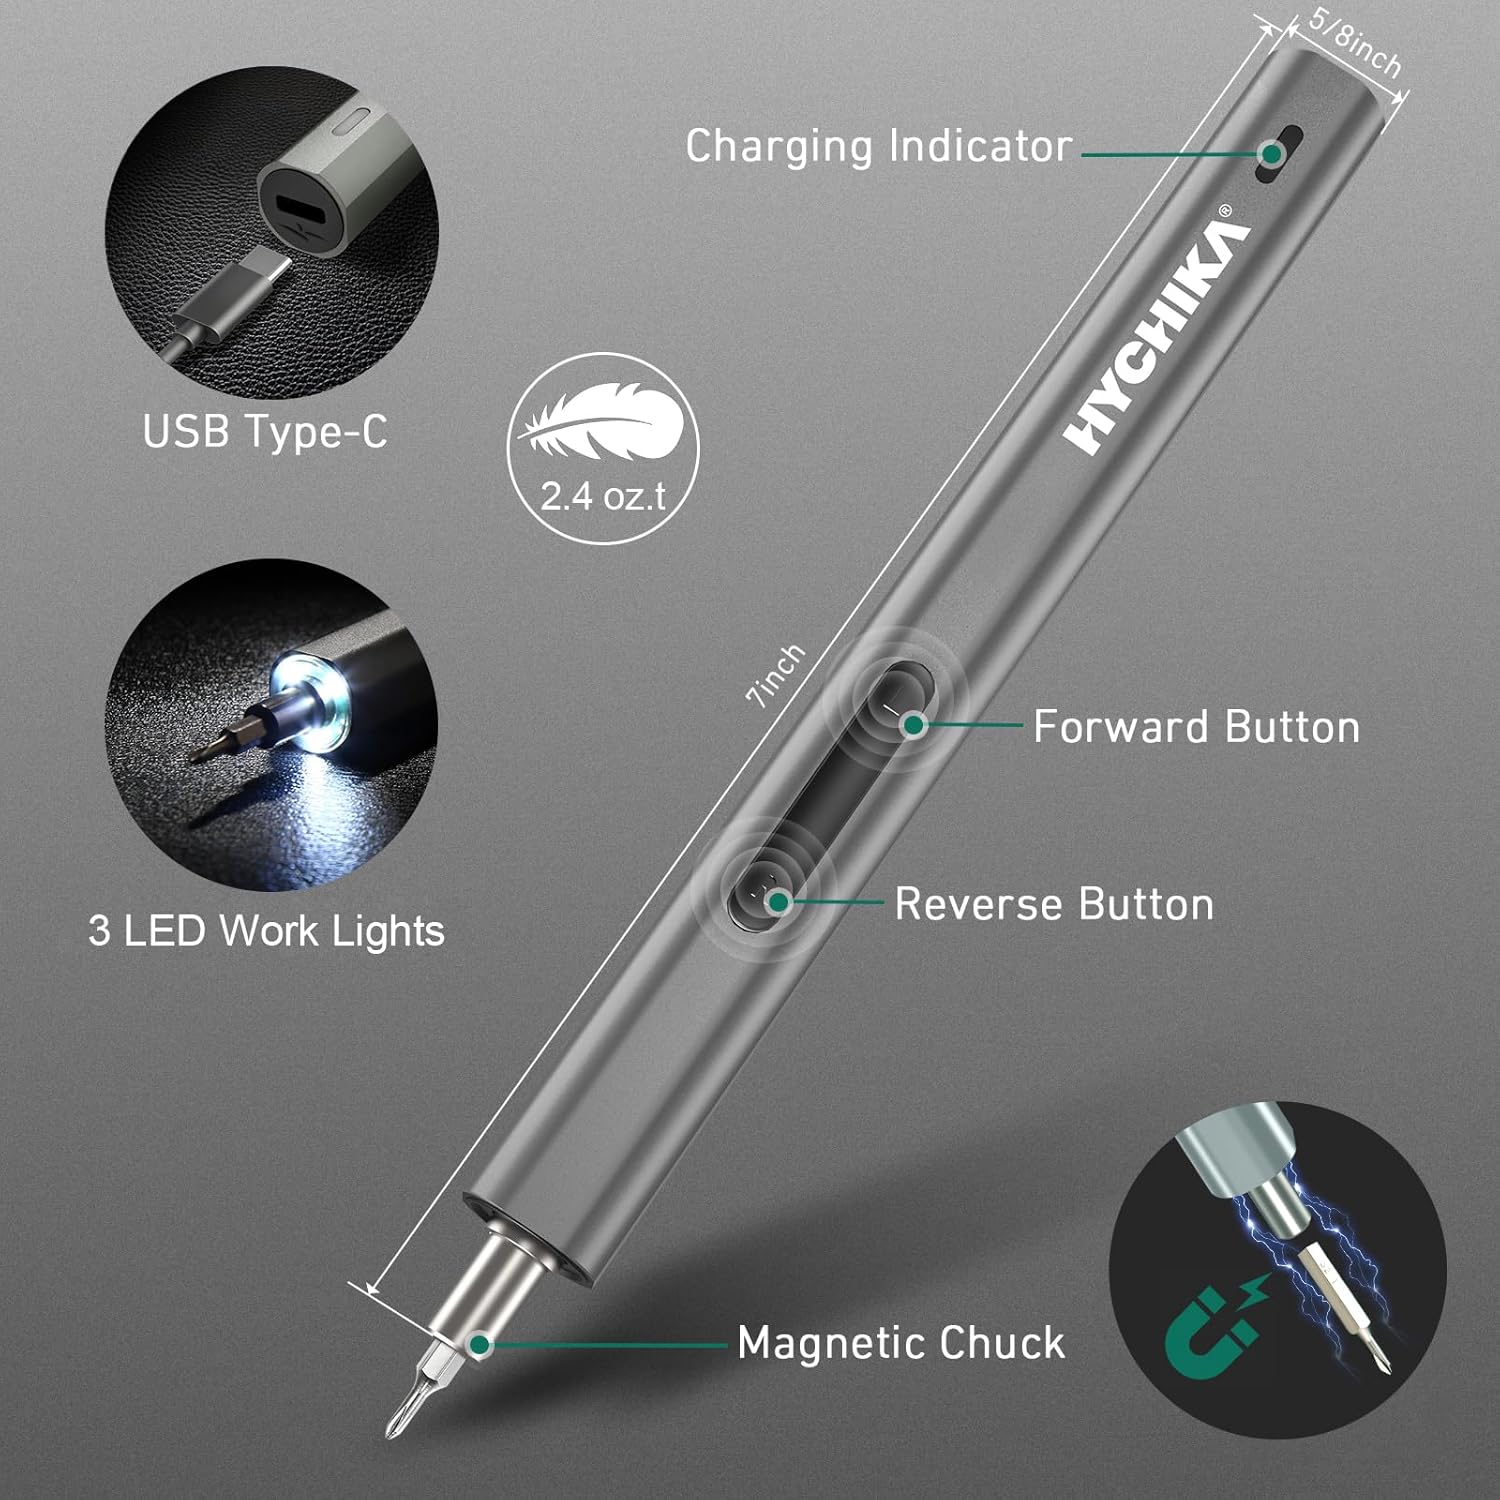
Before first use, fully charge the electric screwdriver. Connect the provided USB Type-C cable to the charging port on the screwdriver and to a suitable USB power source (e.g., computer, wall adapter). The charging indicator light will illuminate red during charging and turn green when fully charged. A full charge typically takes approximately 45 minutes and provides up to 90 minutes of continuous operation.

Figure 3: The screwdriver's USB Type-C charging port, charging indicator, forward/reverse buttons, and integrated LED work lights.

Figure 4: The USB Type-C charging port in use, indicating the charging process.
2.3 Attaching Bits
Select the appropriate bit for your task. Insert the bit firmly into the magnetic chuck of the electric screwdriver. The magnetic chuck will hold the bit securely in place. To enhance magnetism for screws, use the included magnetizer tool.
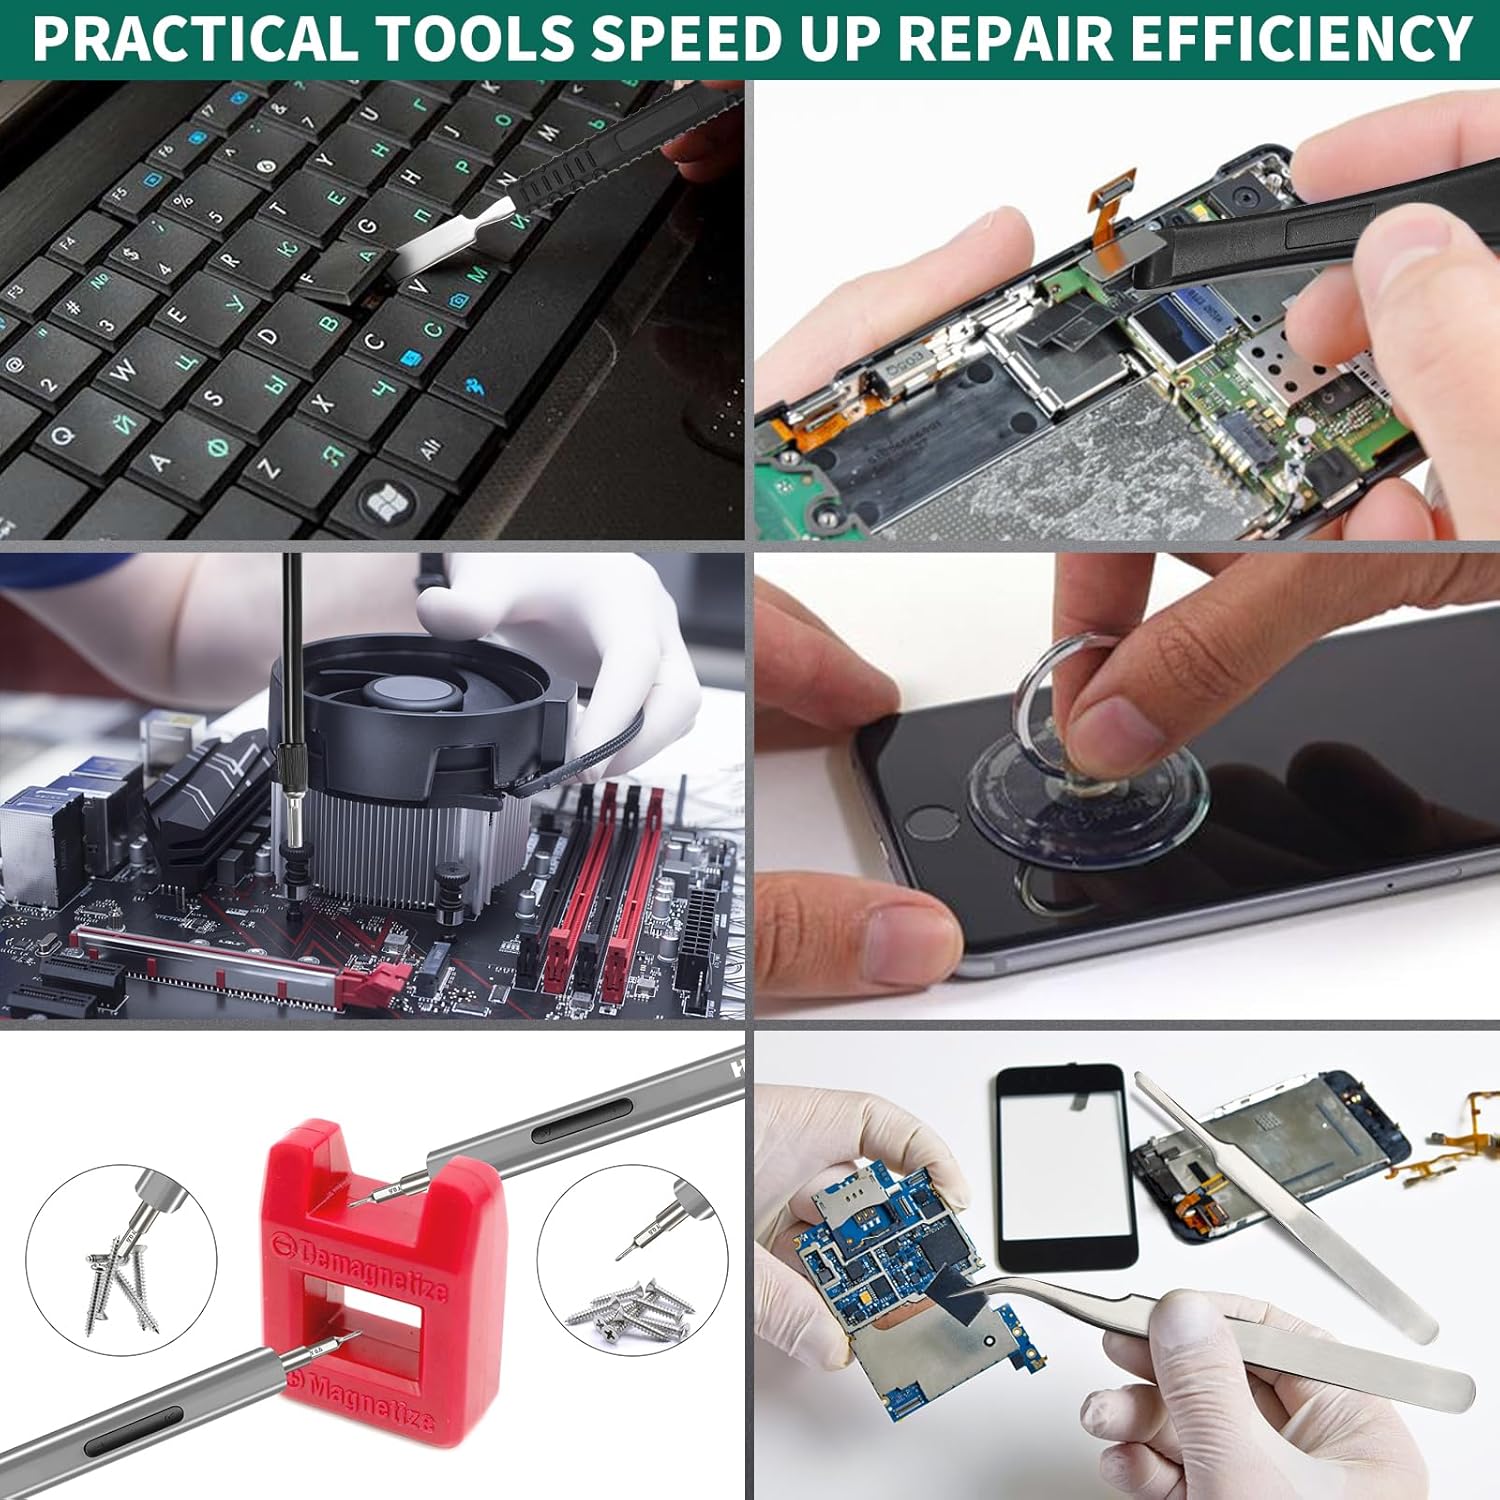
Figure 5: Illustration of the magnetic bits and the magnetizer tool, which can be used to magnetize or demagnetize screwdriver tips.
3. ఆపరేటింగ్ సూచనలు
3.1 Powering On and Direction Control
The screwdriver features dual mode operation: electric and manual. To operate in electric mode, press and hold the forward or reverse button. The forward button (usually marked 'F' or with a right-pointing arrow) tightens screws, while the reverse button (usually marked 'R' or with a left-pointing arrow) loosens them. For delicate tasks or when more torque is needed, the screwdriver can also be used manually by simply turning the handle.

Figure 6: Visual representation of the forward (tightening) and reverse (loosening) modes of the electric screwdriver.
3.2 Using the LED Work Lights
The screwdriver is equipped with 3 integrated LED lights that illuminate your work area, providing clear visibility in dimly lit spaces. These lights activate automatically when the screwdriver is in operation.

Figure 7: The 3 LED lights at the tip of the screwdriver providing illumination for precision work.
3.3 టార్క్ సెట్టింగులు
The electric screwdriver provides a precise electric torque of 0.25 N.m. For tasks requiring higher force, the manual torque can reach up to 3 N.m. Always apply appropriate torque to avoid damaging screws or components.
3.4 అప్లికేషన్ ఎక్స్ampలెస్
This kit is versatile for various precision repairs:
- Smartphones and Tablets: Opening cases, replacing screens or batteries.
- Laptops and PCs: Accessing internal components, cleaning, or upgrading.
- Watches and Eyeglasses: Tightening small screws for adjustments or repairs.
- Drones and Cameras: Disassembly for maintenance or part replacement.

Figure 8: The electric screwdriver being used for various precision repair tasks, including drone, laptop, eyeglasses, and watch maintenance.

Figure 9: Demonstrations of the kit's versatility, showing tasks like keyboard cleaning, phone screen removal with a suction cup, and working on internal PC components.
4. నిర్వహణ
4.1 శుభ్రపరచడం
Regularly clean the screwdriver and bits to ensure optimal performance. Use the included cleaning brush to remove dust and debris from the bits and the screwdriver body. For stubborn dirt, a soft, dry cloth can be used. Do not use abrasive cleaners or immerse the screwdriver in liquids.

Figure 10: The cleaning brush and other specialized tools included in the kit, useful for maintenance.
4.2 Bit Storage
After use, return all bits and accessories to their designated slots in the storage case. This prevents loss and keeps them organized for future use. The transparent cover allows for easy identification of bits.
4.3 బ్యాటరీ సంరక్షణ
To prolong battery life, avoid completely draining the battery frequently. Charge the screwdriver when the indicator shows low power. If storing for an extended period, charge the battery to approximately 50% every few months.
5. ట్రబుల్షూటింగ్
- స్క్రూడ్రైవర్ ఆన్ కావడం లేదు: Ensure the battery is charged. Connect the USB-C cable and check if the charging indicator lights up. If not, try a different cable or power source.
- Bits not holding securely: Verify that the bit is fully inserted into the magnetic chuck. If the magnetism feels weak, use the magnetizer tool to re-magnetize the bit.
- ఛార్జింగ్ సూచిక పనిచేయడం లేదు: Check the USB-C cable and power source. If the issue persists, contact customer support.
- Low electric torque: Ensure the battery is fully charged. For tasks requiring higher torque, switch to manual operation.
6. స్పెసిఫికేషన్లు
| ఫీచర్ | స్పెసిఫికేషన్ |
|---|---|
| మోడల్ సంఖ్య | HYQ2001 |
| తయారీదారు | HYCHIKA BETTER TOOLS FOR BETTER LIFE |
| కొలతలు (L x W x H) | 16.5 x 25 x 5 సెం.మీ |
| బరువు | 850 గ్రాములు |
| బ్యాటరీ రకం | లిథియం-అయాన్ |
| బ్యాటరీ కెపాసిటీ | 330 mAh |
| వాల్యూమ్tage | 3.7 వోల్ట్లు |
| గరిష్ట భ్రమణ వేగం | 180 rpm |
| ఎలక్ట్రిక్ టార్క్ | 0.25 Nm |
| మాన్యువల్ టార్క్ | 3 Nm |
| ఛార్జింగ్ పోర్ట్ | USB టైప్-C |
| ప్రత్యేక లక్షణాలు | Magnetic Tip, 3 LED Work Lights |
7. వారంటీ మరియు మద్దతు
The HYCHIKA Mini Electric Screwdriver kit comes with a 2-year availability for spare parts. For any product inquiries, technical support, or warranty claims, please refer to the contact information provided with your purchase or visit the official HYCHIKA webసైట్.