1. పరిచయం
This manual provides comprehensive instructions for the setup, operation, and maintenance of your IKIER R1 Pro 4-in-1 Laser Rotary Set. Designed for versatility and precision, this accessory enhances the capabilities of your laser engraver for cylindrical and irregularly shaped objects. Please read this manual thoroughly before use to ensure safe and optimal performance.
2. ఉత్పత్తి ముగిసిందిview
The IKIER R1 Pro is a multi-functional rotary attachment for laser engraving machines, offering both a chuck rotary and a roller rotary in a single system. It is engineered for high precision and ease of use, compatible with various laser engravers.
2.1 ముఖ్య లక్షణాలు
- అప్రయత్నంగా ఇన్స్టాలేషన్: Designed for immediate use out of the box, requiring no complex assembly or additional tools.
- సరిపోలని ఖచ్చితత్వం: Features up to 180° angle adjustment and 360° rotation engraving, driven by a precision stepping motor for 0.1 mm engraving accuracy.
- Lightning-Fast Speed: Achieves vector engraving speeds of up to 360°/0.86s. The roller distance is adjustable from 5mm to 114mm without tools, and offers four-stage roller range adjustment.
- బహుముఖ అనుకూలత: Fully compatible with all IKIER laser engraving machines and most other laser engraving machines on the market. Supports popular software like LaserGRBL/LightBurn and operating systems including Windows, MacOS, Android, and iOS.
- మన్నికైన నిర్మాణం: Built with a high-strength aluminum alloy structure for stability and longevity.
2.2 భాగాలు
The IKIER R1 Pro package includes the following main components and accessories:
- Chuck Body Assembly: The primary unit for holding objects with jaws.
- Roller Body Assembly: The unit with rollers for cylindrical objects.
- Support Column Assembly: An accessory to provide additional support and leveling for objects.
- Jaw Sets: Includes Ladder jaws, L-shaped jaws, and Hexagonal jaws for various object shapes.
- Heightened Feet: Cylindrical risers to elevate your laser engraver for accommodating larger objects with the rotary.
- కనెక్షన్ కేబుల్స్: White plug wire (for IKIER/ATOMSTACK machines) and Black plug wire (for other brand machines).
- సాధనాలు: Soft ruler, Mini level meter (bubble level), Caliper, Allen keys, and wrenches for assembly and adjustment.

చిత్రం 1: పైగాview of the IKIER R1 Pro 4-in-1 Laser Rotary Set, showing both the chuck and roller units, along with various accessories.

Figure 2: Detailed packing list illustrating all included components such as the chuck body, support column, various jaws, cables, and tools.
3. సెటప్ మరియు ఇన్స్టాలేషన్
The IKIER R1 Pro is designed for straightforward setup. Follow these steps to prepare your rotary set for use.
3.1 Elevating Your Laser Engraver (If Needed)
For engraving larger or taller objects, you may need to raise your laser engraver. Use the provided heightened feet by screwing them into the existing leg mounts of your laser engraver. These risers are designed to stack, allowing for adjustable height.
3.2 Connecting the Rotary Unit
- Identify the appropriate connection cable: use the white-tipped cable for IKIER and ATOMSTACK machines, and the black-tipped cable for most other brands.
- Connect one end of the cable to the rotary unit (either the chuck or roller). The cable port is conveniently located on the side of the unit to prevent cable damage when the unit is placed upright.
- Connect the other end of the cable to the designated rotary port on your laser engraver.
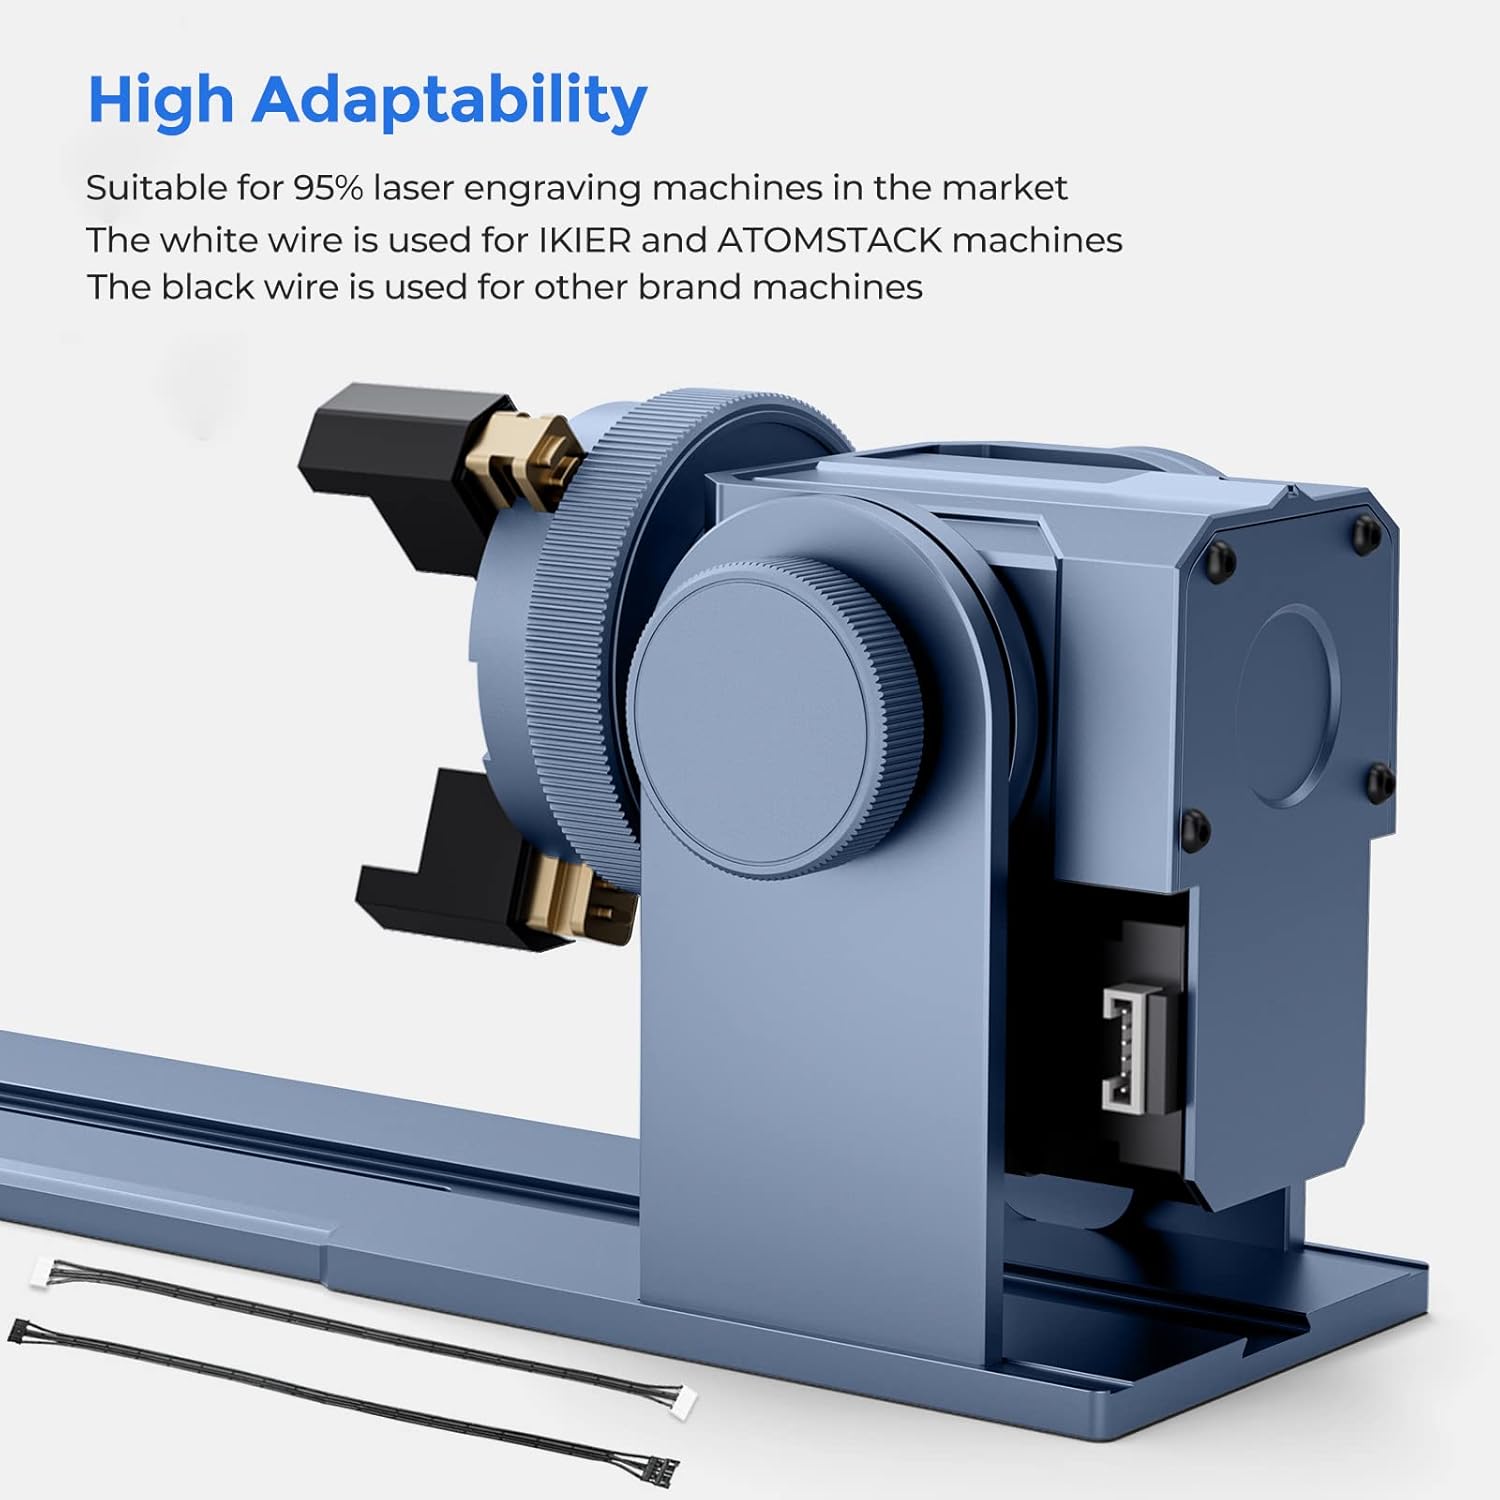
Figure 3: Illustrates the compatibility of the IKIER R1 Pro with various laser engraving machines and the use of different connection cables (white for IKIER/ATOMSTACK, black for others).
3.3 Chuck Rotary Setup
- Select the appropriate jaws (Ladder, L-shaped, or Hexagonal) based on the object you intend to engrave. The jaws are easily attached using the provided screws and Allen keys.
- Insert the object into the chuck jaws and tighten securely. Ensure the object is centered and stable.
- Adjust the angle of the chuck unit if necessary. The unit supports up to 180° angle adjustment for engraving tapered or irregularly shaped items.

Figure 4: Demonstrates the three sets of jaws (Ladder, L-shaped, Hexagonal) included with the chuck rotary for engraving diverse object shapes.

Figure 5: Shows the 180° angle adjustment feature of the chuck rotary, allowing for engraving on angled surfaces.
3.4 Roller Rotary Setup
- Place the roller unit on a stable surface.
- Adjust the distance between the rollers using the adjustment screws on the underside of the unit to fit the diameter of your cylindrical object (5mm to 114mm).
- Place the cylindrical object (e.g., tumbler, bottle) onto the rollers.
- If engraving irregularly shaped cylindrical objects (e.g., wine glasses with stems), use the support column assembly to provide stability and ensure the object remains level during rotation.
- Adjust the belt tension if necessary using the designated screw on the motor side of the roller unit to ensure smooth rotation.

Figure 6: The roller rotary unit supporting a wine glass for engraving, demonstrating its capability for various cylindrical objects.
4. ఆపరేటింగ్ సూచనలు
Once the IKIER R1 Pro is set up with your laser engraver, follow these general operating guidelines:
- సాఫ్ట్వేర్ కాన్ఫిగరేషన్: Open your preferred laser engraving software (e.g., LaserGRBL, LightBurn). Ensure the software recognizes the rotary axis. Refer to your laser engraver's software manual for specific rotary settings.
- Object Measurement: Use the provided caliper and soft ruler to accurately measure the dimensions of your object. Input these measurements into your software for precise scaling and positioning of your design.
- లెవలింగ్: Use the mini level meter to ensure your object is perfectly level on the rotary unit. This is crucial for consistent engraving results, especially on curved surfaces.
- ఫోకస్ సర్దుబాటు: Adjust the laser focus according to the object's surface. Proper focus is essential for achieving sharp and clear engravings.
- Test Engraving: Before final engraving, perform a low-power test run on a similar material or an inconspicuous area of your object to verify settings and alignment.
- Engraving Process: Start the engraving process from your software. Monitor the process closely.

Figure 7: Illustrates the high torque motor and precision of the IKIER R1 Pro, capable of 0.1mm engraving accuracy and speeds up to 6000mm/min.
5. నిర్వహణ
Regular maintenance ensures the longevity and optimal performance of your IKIER R1 Pro rotary set.
- శుభ్రపరచడం: Regularly clean the rollers, jaws, and main body of the rotary unit to remove dust, debris, and engraving residue. Use a soft, dry cloth. Avoid abrasive cleaners.
- సరళత: Periodically check moving parts for smooth operation. Apply a small amount of appropriate lubricant to gears and bearings if necessary, as recommended by the manufacturer.
- బెల్ట్ టెన్షన్: Ensure the drive belt on the roller unit maintains proper tension. Adjust using the tension screw if it becomes loose to prevent slippage and ensure accurate rotation.
- నిల్వ: When not in use, store the rotary set in a clean, dry environment, away from direct sunlight and extreme temperatures.
6. ట్రబుల్షూటింగ్
If you encounter issues with your IKIER R1 Pro, refer to the following common problems and solutions:
- Issue: Rotary unit not rotating or rotating erratically.
- Check cable connections: Ensure both ends of the connection cable are securely plugged into the rotary unit and the laser engraver.
- Verify software settings: Confirm that the rotary axis is enabled and configured correctly in your laser engraving software.
- Adjust belt tension (for roller unit): If the belt is too loose, it may slip. Tighten the tension screw on the roller unit.
- Check for obstructions: Ensure no debris is blocking the movement of the rollers or chuck jaws.
- Issue: Engraving is distorted or uneven.
- Ensure object is level: Use the mini level meter to confirm the object is perfectly horizontal on the rotary.
- Secure object: Make sure the object is firmly clamped in the chuck or stable on the rollers. Any movement during engraving will cause distortion.
- Check laser focus: Improper focus can lead to blurry or uneven engraving. Re-adjust the laser focus.
- Verify software dimensions: Double-check that the object's dimensions entered into the software match the actual measurements.
- Issue: Laser engraver not recognizing the rotary unit.
- Correct cable usage: Ensure you are using the correct cable (white-tipped for IKIER/ATOMSTACK, black-tipped for others).
- Restart software/machine: Sometimes a simple restart of the engraving software and/or the laser engraver can resolve connectivity issues.
- Consult laser engraver manual: Refer to your specific laser engraver's manual for detailed instructions on connecting and enabling rotary attachments.
If problems persist, please contact IKIER customer support for further assistance.
7. స్పెసిఫికేషన్లు
| ఫీచర్ | స్పెసిఫికేషన్ |
|---|---|
| ఉత్పత్తి కొలతలు | 2.4 x 9.9 x 6.3 అంగుళాలు |
| అంశం మోడల్ సంఖ్య | R1 ప్రో |
| వస్తువు బరువు | 8.23 పౌండ్లు |
| తయారీదారు | IKIER |
| Clamping Range (Cup) | 1-130 మి.మీ |
| Clamping Range (Ball) | 4-200 మి.మీ |
| Clamping Range (Ring) | 4-130 మి.మీ |
| Engraving Maximum Speed | 6000 mm/min (1000 mm/s) |
| చెక్కడం ఖచ్చితత్వం | 0.1 మి.మీ |
| Engraving Weight Capacity (6000 mm/min) | 1.5 కిలోల వరకు |
| Engraving Weight Capacity (1800 mm/min with suction cup holder) | 10 కిలోల వరకు |
| భ్రమణ కోణం | 0-180° |
| Roller Distance Adjustment | 5mm to 114mm (tool-free) |

మూర్తి 8: పేలింది view of the IKIER R1 Pro chuck unit and a table summarizing key specifications.
8. వారంటీ మరియు మద్దతు
IKIER stands behind its products with comprehensive customer support:
- మనీ-బ్యాక్ గ్యారెంటీ: 30-రోజుల మనీ-బ్యాక్ గ్యారెంటీ.
- వారంటీ: కొనుగోలు చేసిన తేదీ నుండి 1 సంవత్సరాల వారంటీ.
- సాంకేతిక మద్దతు: జీవితకాల సాంకేతిక మద్దతు అందుబాటులో ఉంది.
- సంప్రదించండి: Professional technical and support teams are available 24/7 to answer any questions or concerns. Refer to the product packaging or official IKIER webసంప్రదింపు వివరాల కోసం సైట్.


