పరిచయం
The AUTOPHIX F803 is a professional diagnostic tool designed for heavy-duty trucks and cars. It offers comprehensive system diagnostics, DPF regeneration functions, and standard OBD2 capabilities. This manual provides detailed instructions for its proper use and maintenance.
కీ ఫీచర్లు
- DPF Regeneration Functions: Supports OEM-level DPF functions for Cummins, Detroit, Caterpillar, and Paccar engines, including DPF regen, reset, and related information reset.
- పూర్తి సిస్టమ్ డయాగ్నస్టిక్స్: Reads and clears trouble codes, displays ECU information, and shows live data for all systems in diesel trucks (Engine, ABS, SRS, SAS, Transmission, TPMS, ESP, EPB, Suspension, etc.).
- విస్తృత వాహన అనుకూలత: Supports major truck models complying with SAE J1939/J1708/J1850/J1587/J27145 protocols, including Volvo, Mack, International, Freightliner, Peterbilt, Kenworth, Western Star, Cummins, Caterpillar, Detroit, Paccar, Isuzu, Fuso. Also supports OBD2 diagnostics for most cars, minivans, and light trucks from 1996 onwards.
- PIN Detect & Simulation Mode: Measures OBD port voltage and diagnoses connection status. Includes a simulation/demo mode for beginners.
- Enhanced Hardware: Features a 5-inch LCD display, 1GB RAM/8GB ROM, DC 10V-36V/3A power input, 2.4GHz WiFi, Quad-Core ARM Cortex-A7 CPU, and a capacitive touchscreen.
- జీవితకాల ఉచిత నవీకరణలు: Provides constant software and database updates via WiFi.
ప్యాకేజీ విషయాలు
The F803 diagnostic tool package typically includes:
- F803 ప్రధాన యూనిట్
- Diagnostic Cables (e.g., OBDII, 6-pin, 9-pin connectors)
- USB కేబుల్
- వినియోగదారు మాన్యువల్
- క్యారీయింగ్ కేసు
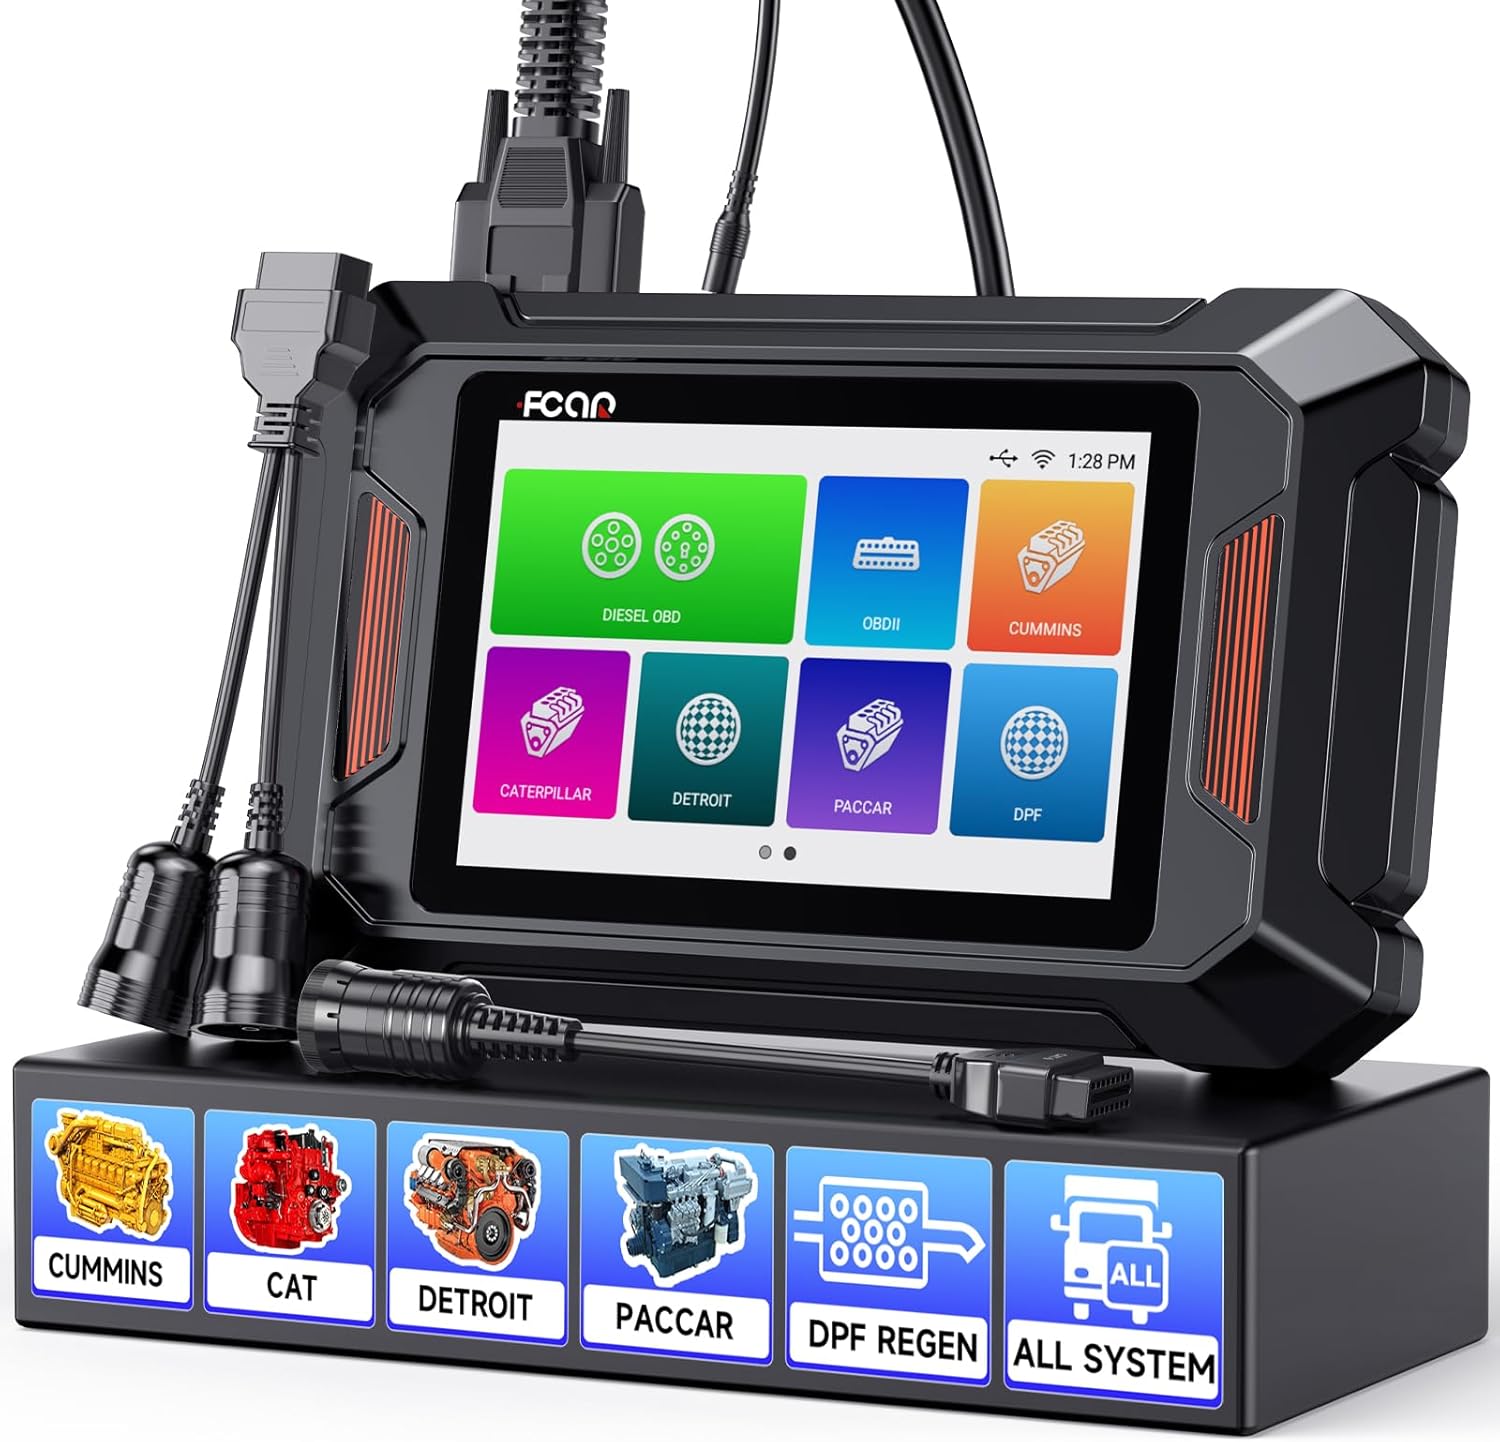
Image: The AUTOPHIX F803 diagnostic scanner with various diagnostic cables and connectors, displayed on a stand.
సెటప్
- పరికరాన్ని ఛార్జ్ చేయండి: Ensure the F803 unit is sufficiently charged before first use. Connect the device to a power source using the provided USB cable if needed.
- పవర్ ఆన్: పరికరాన్ని ఆన్ చేయడానికి పవర్ బటన్ను నొక్కి పట్టుకోండి.
- మొదటి ఏర్పాటు: Follow the on-screen prompts to select language (English or Spanish), set time zone, and connect to a Wi-Fi network for updates.
- పరికరాన్ని సక్రియం చేయండి: The device requires activation. Follow the one-click activation process as prompted on the screen.
- సాఫ్ట్వేర్ను నవీకరించండి: Connect to Wi-Fi and navigate to the update section to download and install the latest software and vehicle databases. This ensures compatibility with the newest vehicle models and features.
ఆపరేటింగ్ సూచనలు
వాహనానికి కనెక్ట్ అవుతోంది
- Locate the Diagnostic Port: For heavy-duty trucks, this is typically a 6-pin, 9-pin, or 16-pin (OBDII) connector, often found in the cab or near the dashboard. For cars, it's usually a 16-pin OBDII port under the dashboard.
- Select Appropriate Cable: Choose the correct diagnostic cable for your vehicle's port.
- స్కానర్ను కనెక్ట్ చేయండి: Plug one end of the diagnostic cable into the F803 unit and the other end into the vehicle's diagnostic port.
- ఇగ్నిషన్ ఆన్ చేయండి: వాహనం యొక్క ఇగ్నిషన్ను "ఆన్" స్థానానికి మార్చండి (ఇంజన్ ఆఫ్).
- PIN Detect (Optional): Use the "PIN Detect" function on the F803 to verify the connection status and voltage of the OBD port.
Performing Diagnostics (Heavy Duty Trucks)

Image: Diagram illustrating the F803's ability to scan various truck systems including Engine, ABS, SRS, Transmission, Suspension, and more.
- Select "Diesel OBD" or Specific Manufacturer: From the main menu, choose "Diesel OBD" for general heavy-duty diagnostics or select a specific manufacturer (e.g., Cummins, Caterpillar, Detroit, Paccar) if available for more advanced functions.
- వాహన గుర్తింపు: The scanner will attempt to automatically identify the vehicle. If unsuccessful, you may need to manually enter vehicle information.
- సిస్టమ్ స్కాన్: Select "Full System Scan" to diagnose all available electronic control units (ECUs) or choose specific systems (e.g., Engine, ABS, Transmission) for targeted diagnostics.
- కోడ్లను చదవండి/క్లియర్ చేయండి: View diagnostic trouble codes (DTCs) and their descriptions. After addressing the underlying issue, clear the codes.
- ప్రత్యక్ష డేటా: Monitor real-time sensor data in text or graphical format to observe vehicle performance and identify anomalies.
- ECU సమాచారం: Access detailed information about the vehicle's ECUs.
DPF Regeneration Functions

Image: Diagram illustrating the Diesel Particulate Filter (DPF) and Diesel Exhaust Fluid (DEF) system, showing the DPF regeneration process.
The F803 supports various DPF functions for compatible engines.
- Access DPF Menu: From the main menu or specific manufacturer menu, navigate to the DPF functions.
- ఫంక్షన్ ఎంచుకోండి: Choose the desired DPF function, such as:
- DPF పునరుత్పత్తి
- DPF రీసెట్
- DPF Related Information Reset
- DPR State Reset
- Forced DPD Regen
- Ash Service Regen
- Reset Soot Level
- ఆన్-స్క్రీన్ ప్రాంప్ట్లను అనుసరించండి: The tool will guide you through the specific steps required for each DPF function. Ensure all safety precautions are followed.
OBDII Diagnostics (Cars & Light Trucks)

Image: Illustration showing the F803 performing OBDII diagnostics on both a heavy-duty truck and a passenger car, highlighting functions like Read Codes, Erase Codes, Live Data, and I/M Readiness.
- Select "OBDII": From the main menu, choose the "OBDII" option.
- కోడ్లను చదవండి: Retrieve generic and manufacturer-specific diagnostic trouble codes.
- కోడ్లను తొలగించండి: Clear DTCs and turn off the Malfunction Indicator Lamp మరమ్మతుల తర్వాత (MIL).
- ప్రత్యక్ష డేటా స్ట్రీమ్: View real-time operational parameters of the engine.
- I/M సంసిద్ధత: Check the status of emission-related monitors.
- ఫ్రేమ్ డేటాను ఫ్రీజ్ చేయండి: View a snapshot of operating conditions when an emission-related fault occurred.
- O2 సెన్సార్ టెస్ట్: O2 సెన్సార్ పర్యవేక్షణ పరీక్ష ఫలితాలను తిరిగి పొందండి.
- ఆన్-బోర్డ్ మానిటర్ టెస్ట్: Retrieve results for emission-related powertrain components and systems.
- EVAP సిస్టమ్ పరీక్ష: Initiate a test of the evaporative emission system.
- వాహన సమాచారం: Retrieve vehicle identification number (VIN), calibration ID, and calibration verification number (CVN).
అదనపు విధులు
- స్క్రీన్షాట్: Capture screen images for documentation.
- అభిప్రాయం: Send diagnostic feedback to technical support.
- Create/Send Report: Generate diagnostic reports and send them via email.
- డేటా రీview & ప్లేబ్యాక్: Review గతంలో నమోదు చేయబడిన డయాగ్నస్టిక్ డేటా.
Wide Truck Compatibility Overview
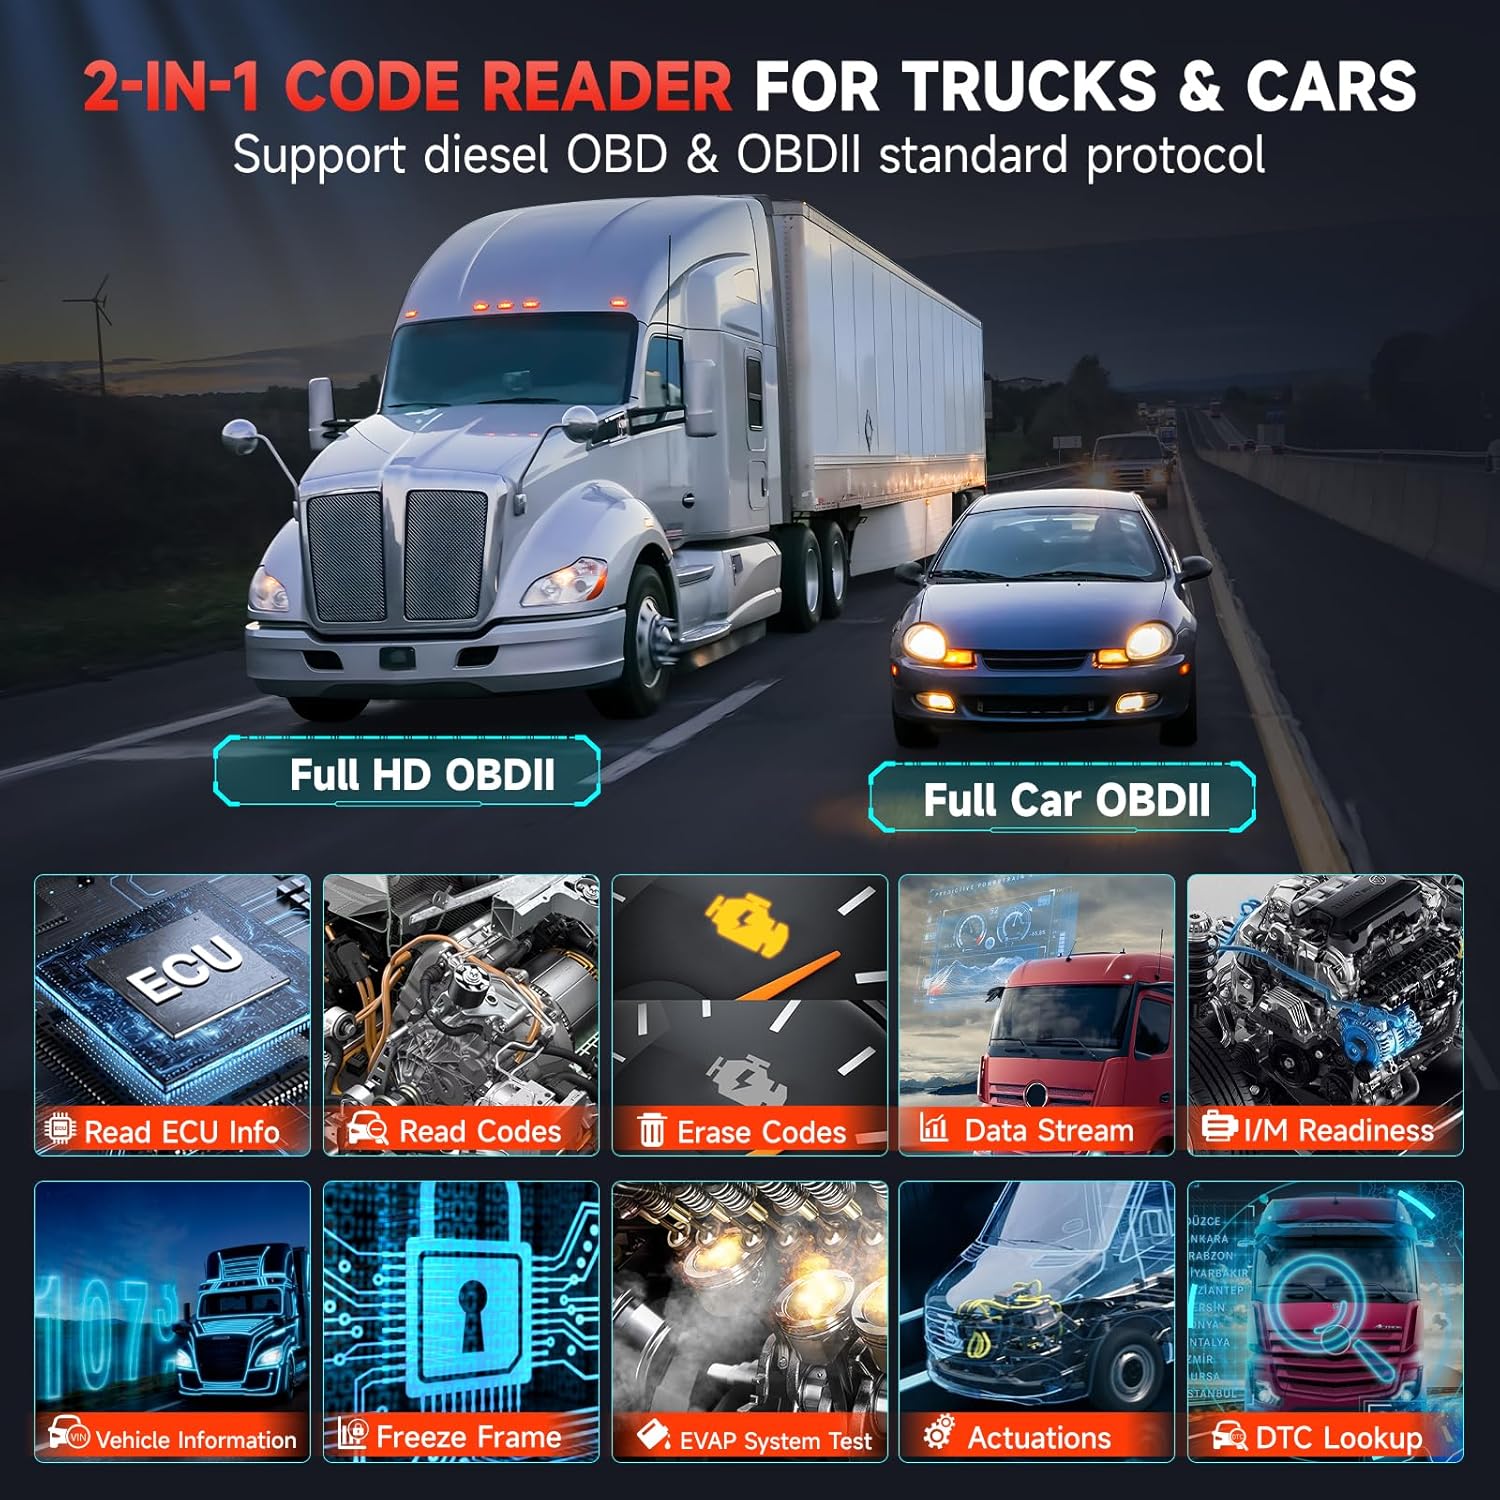
Image: Visual representation of the F803's compatibility with various truck brands including Freightliner, Peterbilt, International, Caterpillar, Volvo, and Ford Pickup.

Image: A table detailing F803 compatibility across various engine types (Cummins, Caterpillar, Paccar, Detroit) and corresponding vehicle brands and models.
నిర్వహణ
- శుభ్రముగా ఉంచు: పరికరాన్ని మృదువైన, పొడి గుడ్డతో తుడవండి. రాపిడి క్లీనర్లు లేదా ద్రావకాలను ఉపయోగించవద్దు.
- సరిగ్గా నిల్వ చేయండి: Store the F803 in its protective case in a dry, cool environment when not in use.
- సాఫ్ట్వేర్ అప్డేట్లు: Regularly update the software via Wi-Fi to ensure optimal performance and access to the latest vehicle data.
- బ్యాటరీ సంరక్షణ: Avoid fully discharging the battery frequently. Charge the device regularly, especially if stored for extended periods.
- కేబుల్ తనిఖీ: Periodically inspect diagnostic cables for any signs of damage (fraying, bent pins). Replace damaged cables immediately.
ట్రబుల్షూటింగ్
- పరికరం పవర్ ఆన్ చేయదు:
- Ensure the battery is charged. Connect to a power adapter.
- సరైన పనితీరు కోసం పవర్ బటన్ను తనిఖీ చేయండి.
- వాహనంతో కమ్యూనికేషన్ లేదు:
- Verify the ignition is in the "ON" position.
- Check if the diagnostic cable is securely connected to both the F803 and the vehicle's OBD port.
- Ensure the correct diagnostic cable is used for the vehicle.
- Use the "PIN Detect" function to check the OBD port's voltage and connection status.
- Try the scanner on another compatible vehicle to rule out a vehicle-specific issue.
- Software update failed:
- Ensure a stable Wi-Fi connection.
- Check for sufficient storage space on the device.
- Restart the device and try the update again.
- స్క్రీన్ స్పందించడం లేదు:
- పరికరం పునఃప్రారంభమయ్యే వరకు పవర్ బటన్ను నొక్కి ఉంచడం ద్వారా సాఫ్ట్ రీసెట్ను అమలు చేయండి.
- స్క్రీన్ శుభ్రంగా మరియు చెత్త లేకుండా ఉందని నిర్ధారించుకోండి.
స్పెసిఫికేషన్లు
| ఫీచర్ | వివరాలు |
|---|---|
| మోడల్ | F803 |
| ప్రదర్శించు | 5-inch LCD, Capacitive Touchscreen |
| ప్రాసెసర్ | క్వాడ్-కోర్ ARM కార్టెక్స్-A7 |
| జ్ఞాపకశక్తి | 1GB RAM / 8GB ROM |
| ఆపరేటింగ్ వాల్యూమ్tage | DC 10V-36V/3A |
| కనెక్టివిటీ | 2.4GHz Wi-Fi |
| కొలతలు | 28 x 15 x 10 సెం.మీ (సుమారుగా) |
| మద్దతు ఉన్న ప్రోటోకాల్లు | SAE J1939, SAE J1708, SAE J1850, SAE J1587, SAE J27145, OBDII |
| మద్దతు ఉన్న భాషలు | ఇంగ్లీష్, స్పానిష్ |

Image: Visual representation of the F803's enhanced hardware components, including the 5-inch LCD, 1GB RAM/8GB ROM, DC 10V-36V/3A power, 2.4GHz WiFi, Quad-Core ARM Cortex-A7 CPU, and capacitive screen.
వారంటీ మరియు మద్దతు
The AUTOPHIX F803 diagnostic tool comes with a 2-year warranty. Additionally, a 60-day free return period for refund or replacement is offered.
For technical assistance, the manufacturer provides 24/7 technical support. Users can utilize the "Feedback" function within the device to send diagnostic logs and inquiries directly to support.
Lifetime free software updates are provided via Wi-Fi to ensure the device remains current with the latest vehicle technologies and diagnostic capabilities.


