1. పరిచయం
This manual provides comprehensive instructions for the setup, operation, maintenance, and troubleshooting of your Monoprice 40-inch Ultrawide 1440P Productivity Monitor (Model 144394). Please read this manual thoroughly before using the monitor to ensure proper functionality and to prevent damage.
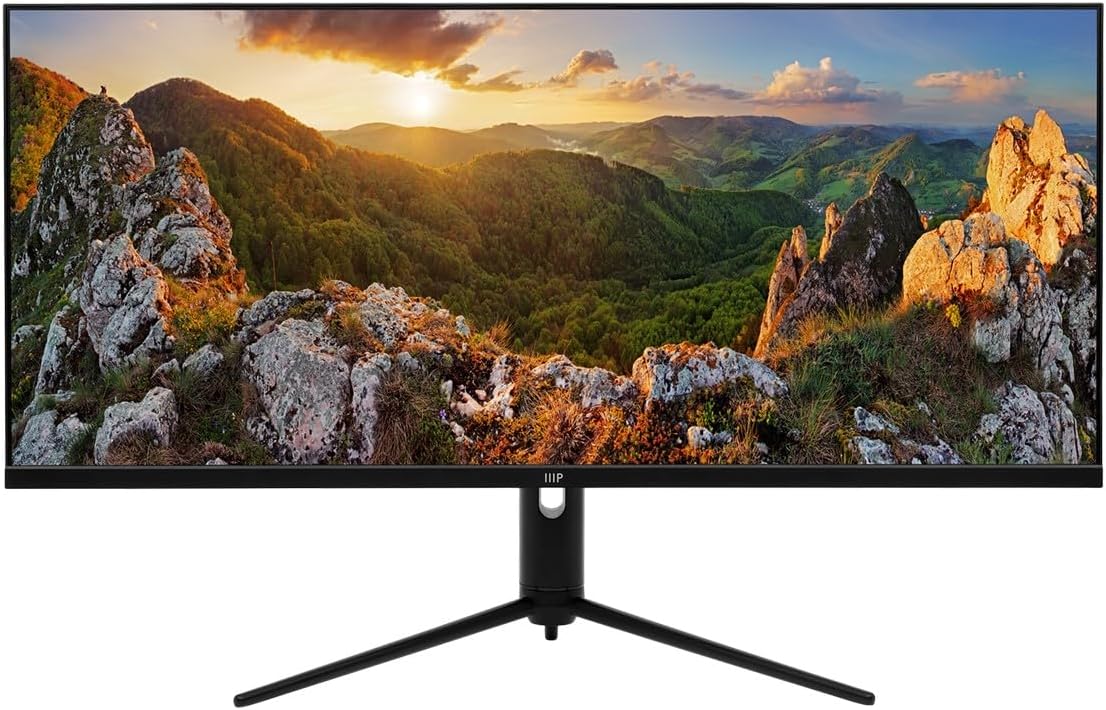
The Monoprice CrystalPro 40-inch Ultrawide Monitor is designed to enhance productivity with its expansive 3440x1440P (UWQHD) resolution and 144Hz refresh rate. Featuring an IPS panel, it delivers accurate colors and wide viewing angles, making it suitable for various professional and personal applications.
2. భద్రతా సమాచారం
Observe the following safety precautions to ensure safe operation and to extend the lifespan of your monitor:
- మానిటర్ను వర్షం, తేమ లేదా తీవ్రమైన ఉష్ణోగ్రతలకు గురి చేయవద్దు.
- ప్రత్యక్ష సూర్యకాంతిలో లేదా వేడి మూలాల దగ్గర మానిటర్ను ఉంచడం మానుకోండి.
- మానిటర్ చుట్టూ సరైన వెంటిలేషన్ ఉండేలా చూసుకోండి. వెంటిలేషన్ ఓపెనింగ్లను బ్లాక్ చేయవద్దు.
- మానిటర్తో పాటు సరఫరా చేయబడిన పవర్ అడాప్టర్ను మాత్రమే ఉపయోగించండి.
- మెరుపు తుఫానుల సమయంలో లేదా ఎక్కువ కాలం ఉపయోగించనప్పుడు అవుట్లెట్ నుండి విద్యుత్ కేబుల్ను డిస్కనెక్ట్ చేయండి.
- మానిటర్ను మీరే సర్వీసింగ్ చేయడానికి ప్రయత్నించవద్దు. అన్ని సర్వీసింగ్లను అర్హత కలిగిన సిబ్బందికి సూచించండి.
- బలమైన అయస్కాంత క్షేత్రాల నుండి మానిటర్ను దూరంగా ఉంచండి.
- Handle the screen with care. Do not press or scratch the display surface.
3. ప్యాకేజీ విషయాలు
Please verify that all items listed below are present in your package. If any items are missing or damaged, contact Monoprice customer support.
- Monoprice 40-inch Ultrawide Monitor
- మానిటర్ స్టాండ్ (బేస్ మరియు మెడ)
- పవర్ అడాప్టర్ మరియు కేబుల్
- HDMI కేబుల్
- డిస్ప్లేపోర్ట్ (DP) కేబుల్
- USB-A to USB-B Cable (for USB hub functionality)
- వినియోగదారు మాన్యువల్ (ఈ పత్రం)
- (Note: The product listing mentions "CD". Please check your package for any included software or drivers on a CD, though most modern systems download drivers online.)
4. సెటప్
4.1. స్టాండ్ అసెంబ్లింగ్
మీ మానిటర్కు స్టాండ్ను అటాచ్ చేయడానికి ఈ దశలను అనుసరించండి:
- గీతలు పడకుండా ఉండటానికి మానిటర్ ముఖాన్ని మృదువైన, శుభ్రమైన ఉపరితలంపై జాగ్రత్తగా ఉంచండి.
- మానిటర్ వెనుక భాగంలో స్టాండ్ మెడను అటాచ్ చేయండి, మౌంటు పాయింట్లను సమలేఖనం చేయండి. అందించినట్లయితే స్క్రూలతో భద్రపరచండి.
- Attach the stand base to the bottom of the stand neck. Tighten the thumb screw or screws from the bottom of the base.
- Once assembled, carefully lift the monitor and place it upright on a stable, flat surface.
4.2. కేబుల్స్ కనెక్ట్
ఏదైనా కేబుల్లను కనెక్ట్ చేసే ముందు, మానిటర్ మరియు మీ కంప్యూటర్ రెండూ పవర్ ఆఫ్ చేయబడి ఉన్నాయని నిర్ధారించుకోండి.
- పవర్ కనెక్షన్: పవర్ అడాప్టర్ను మానిటర్ పవర్ ఇన్పుట్కు కనెక్ట్ చేయండి, ఆపై పవర్ కేబుల్ను వాల్ అవుట్లెట్లోకి ప్లగ్ చేయండి.
- వీడియో కనెక్షన్:
- For optimal performance (3440x1440P at 144Hz), use the provided డిస్ప్లేపోర్ట్ (డిపి) cable to connect the monitor to your computer's graphics card.
- Alternatively, use an HDMI cable. Note that HDMI may support up to 100Hz refresh rate at 3440x1440P, depending on the HDMI version and your graphics card.
- The monitor also supports USB-C video input. Connect a compatible USB-C cable from your device to the monitor's USB-C port.
- USB హబ్ కనెక్షన్: To enable the monitor's USB-A ports, connect the provided USB-A to USB-B cable from your computer's USB port to the monitor's USB-B upstream port.
- ఆడియో అవుట్పుట్: If desired, connect external speakers or headphones to the monitor's 3.5mm audio output jack.


4.3. ప్రారంభ పవర్-ఆన్
అవసరమైన అన్ని కేబుల్లను కనెక్ట్ చేసిన తర్వాత:
- మీ కంప్యూటర్ను ఆన్ చేయండి.
- మానిటర్లోని పవర్ బటన్ను నొక్కండి. పవర్ ఇండికేటర్ లైట్ వెలుగుతూ ఉండాలి.
- మానిటర్ స్వయంచాలకంగా ఇన్పుట్ సిగ్నల్ను గుర్తించాలి. లేకపోతే, మీరు ఆన్-స్క్రీన్ డిస్ప్లే (OSD) మెనుని ఉపయోగించి ఇన్పుట్ సోర్స్ను మాన్యువల్గా ఎంచుకోవలసి ఉంటుంది.
5. మానిటర్ను నిర్వహించడం
5.1. పవర్ ఆన్/ఆఫ్
Press the power button, typically located on the bottom or back of the monitor, to turn the monitor on or off. The power indicator light will show the monitor's status.
5.2. ఆన్-స్క్రీన్ డిస్ప్లే (OSD) మెనూ
The OSD menu allows you to adjust various monitor settings. Navigation is typically done using a joystick or a series of buttons located on the back or bottom of the monitor. While the OSD interface may require some familiarity, it provides access to all display controls.
- Press the OSD button (or joystick center) to open the main menu.
- Use the navigation buttons (or joystick) to move through menu options.
- Press the select button (or joystick center) to enter a sub-menu or confirm a selection.
- Press the exit button (or move joystick left) to go back or exit the OSD.
5.3. ఇన్పుట్ ఎంపిక
To switch between connected devices (e.g., PC via DisplayPort, console via HDMI), access the OSD menu and navigate to the "Input" or "Source" section. Select the desired input.
5.4 చిత్ర సెట్టింగ్లు
Adjust display characteristics through the OSD menu:
- ప్రకాశం/కాంట్రాస్ట్: కాంతి మరియు చీకటి ప్రాంతాల మధ్య మొత్తం ప్రకాశం మరియు వ్యత్యాసాన్ని సర్దుబాటు చేయండి.
- రంగు ఉష్ణోగ్రత: Select predefined color modes (e.g., Warm, Cool, User) or adjust RGB values manually.
- చిత్ర మోడ్: Choose from various presets optimized for different content (e.g., Standard, Game, Movie, Text).
- HDR: Enable or disable HDR (High Dynamic Range) functionality. Ensure your content and graphics card support HDR for optimal results.
5.5. రిఫ్రెష్ రేట్
The monitor supports a 144Hz refresh rate. To ensure your system is utilizing this, verify the refresh rate setting in your operating system's display settings:
- విండోస్: Right-click on the desktop > Display settings > Advanced display settings > Display adapter properties for Display [X] > Monitor tab > Screen refresh rate.
- MacOS: System Settings > Displays > Refresh Rate.
గమనిక: Achieving 144Hz at 3440x1440P typically requires a DisplayPort connection. HDMI may be limited to 100Hz or lower depending on the specific HDMI version and connected device.
5.6. ఎర్గోనామిక్ సర్దుబాట్లు
మానిటర్ స్టాండ్ మీ పనితీరును ఆప్టిమైజ్ చేయడానికి ఎర్గోనామిక్ సర్దుబాట్లను అనుమతిస్తుంది viewఅనుభవం:
- వంపు: స్క్రీన్ యొక్క నిలువు కోణాన్ని (ముందుకు/వెనుకకు) సర్దుబాటు చేయండి.
- ఎత్తు సర్దుబాటు: మానిటర్ను కంటి స్థాయికి పెంచండి లేదా తగ్గించండి.
- స్వివెల్: మానిటర్ను దాని బేస్పై అడ్డంగా తిప్పండి.


6. నిర్వహణ
సరైన నిర్వహణ మీ మానిటర్ యొక్క దీర్ఘాయువు మరియు సరైన పనితీరును నిర్ధారిస్తుంది:
- స్క్రీన్ క్లీనింగ్: మెత్తటి, మెత్తటి బట్టతో స్క్రీన్ను సున్నితంగా తుడవండి. మొండి మరకల కోసం, తేలికగా dampనీటితో లేదా ప్రత్యేక స్క్రీన్ క్లీనర్తో వస్త్రాన్ని తుడవండి. క్లీనర్ను ఎప్పుడూ స్క్రీన్పై నేరుగా పిచికారీ చేయవద్దు.
- సి ని శుభ్రపరచడంasing: మానిటర్ను తుడవడానికి మృదువైన, పొడి వస్త్రాన్ని ఉపయోగించండి casing. రాపిడి క్లీనర్లు లేదా ద్రావకాలను నివారించండి.
- వెంటిలేషన్: Ensure the ventilation openings on the back of the monitor are clear of dust and obstructions.
- పవర్ ఆఫ్: Always power off and unplug the monitor before cleaning or when not in use for extended periods.
7. ట్రబుల్షూటింగ్
మీ మానిటర్తో మీకు సమస్యలు ఎదురైతే, ఈ క్రింది సాధారణ సమస్యలు మరియు పరిష్కారాలను చూడండి:
| సమస్య | సాధ్యమైన కారణం / పరిష్కారం |
|---|---|
| తెరపై చిత్రం లేదు |
|
| చిత్రం అస్పష్టంగా లేదా వక్రీకరించబడింది |
|
| No sound from monitor speakers (if applicable) or audio jack |
|
| USB ports on monitor not working |
|
| Monitor flickers or shows artifacts |
|
8. స్పెసిఫికేషన్లు
The following table outlines the technical specifications of the Monoprice 40-inch Ultrawide 1440P Productivity Monitor:
| ఫీచర్ | వివరాలు |
|---|---|
| మోడల్ సంఖ్య | 144394 |
| స్క్రీన్ పరిమాణం | 40 అంగుళాలు |
| ప్యానెల్ రకం | IPS |
| మాక్స్ రిజల్యూషన్ | 3440 x 1440 (UWQHD) |
| రిఫ్రెష్ రేట్ | 144Hz |
| కారక నిష్పత్తి | 21:9 |
| HDR మద్దతు | HDR600 |
| రంగు స్వరసప్తకం | NTSC 105%, DCI-P3 95%, sRGB 99%, Adobe RGB 89% |
| కనెక్టివిటీ | 2x HDMI, 1x DisplayPort, 1x USB-C, 1x Audio Out, 1x USB-B (Upstream) |
| USB పోర్ట్లు | 1x USB 2.0 (Downstream, requires USB-B upstream connection to PC) |
| స్క్రీన్ ఉపరితలం | నిగనిగలాడే |
| బరువు | 31.9 పౌండ్లు (స్టాండ్ తో) |
| రంగు | నలుపు |
9. వారంటీ మరియు మద్దతు
For warranty information, technical support, or service inquiries, please refer to the warranty card included with your product or visit the official Monoprice webవారంటీ క్లెయిమ్ల కోసం కొనుగోలు రుజువుగా మీ కొనుగోలు రసీదును ఉంచండి.
మోనోప్రైస్ కస్టమర్ సపోర్ట్: www.monoprice.com/support ద్వారా మరిన్ని


