1. పరిచయం
Welcome to the user manual for your Natec FURY SHOBO SH4F RGB MIDI TOWER PC Case. This guide provides essential information for the proper assembly, installation, operation, and maintenance of your new computer chassis. Please read this manual thoroughly before beginning installation to ensure optimal performance and longevity of your components.
2. భద్రతా మార్గదర్శకాలు
- Always disconnect the power supply from the wall outlet before installing or removing any components inside the PC case.
- Handle components with care to avoid damage from electrostatic discharge (ESD). Consider using an anti-static wrist strap.
- Keep small parts, such as screws, away from children.
- Ensure proper ventilation around the PC case to prevent overheating.
- Do not expose the case to extreme temperatures, humidity, or direct sunlight.
- Avoid placing heavy objects on top of the case.
3. ప్యాకేజీ విషయాలు
దయచేసి మీ ప్యాకేజీలో అన్ని అంశాలు ఉన్నాయని ధృవీకరించండి:
- Natec FURY SHOBO SH4F RGB MIDI TOWER PC Case
- Accessory box (containing screws, cable ties, and other small parts)
- వినియోగదారు మాన్యువల్ (ఈ పత్రం)
4. ఉత్పత్తి ముగిసిందిview
The Natec FURY SHOBO SH4F is a MIDI TOWER PC case designed for gaming and general-purpose computing, offering ample space for components and efficient cooling. It features a modern design with RGB lighting.
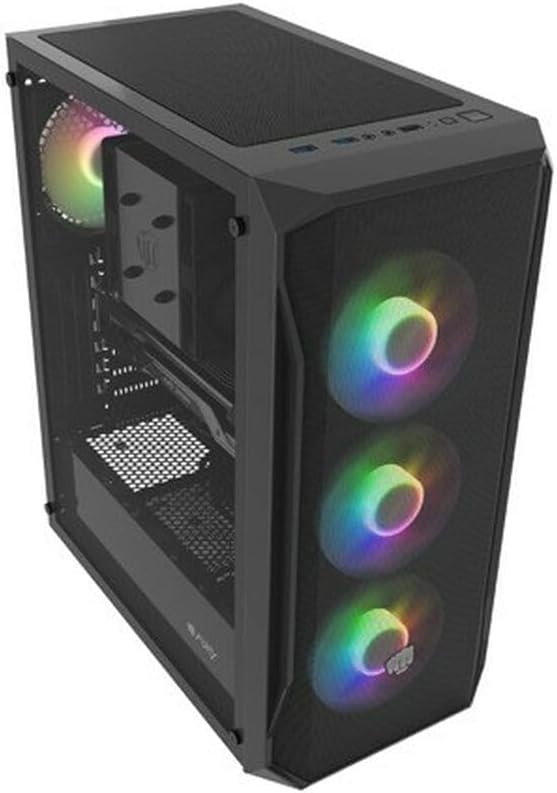
చిత్రం 4.1: కోణీయ view of the Natec FURY SHOBO SH4F RGB MIDI TOWER PC Case, showcasing its black metal and tempered glass construction. The front panel features a mesh design with three illuminated RGB fans, and a single RGB fan is visible at the rear exhaust. The top panel includes I/O ports and a mesh filter.
4.1 ఫ్రంట్ I/O ప్యానెల్
- పవర్ బటన్
- రీసెట్ బటన్
- USB 2.0 పోర్ట్ (x1)
- ఆడియో జాక్లు (హెడ్ఫోన్/మైక్రోఫోన్)
- RGB Control Button (if applicable)
4.2 Internal Layout
The case supports Micro ATX and Mini ATX motherboards and features a bottom-mounted power supply bay. It includes dedicated areas for storage drives and efficient cable management.
5. సెటప్ మరియు కాంపోనెంట్ ఇన్స్టాలేషన్
Follow these steps to install your PC components into the FURY SHOBO SH4F case.
5.1 కేసును సిద్ధం చేయడం
- కేసును చదునైన, స్థిరమైన ఉపరితలంపై ఉంచండి.
- Remove the side panels. Typically, the tempered glass side panel is secured with thumbscrews.
5.2 మదర్బోర్డ్ సంస్థాపన
- కేసు వెనుక ఓపెనింగ్లో I/O షీల్డ్ను (మీ మదర్బోర్డులో ముందే ఇన్స్టాల్ చేయకపోతే) ఇన్స్టాల్ చేయండి.
- Ensure the motherboard standoffs are correctly aligned for your Micro ATX or Mini ATX motherboard. Adjust or install additional standoffs if necessary.
- Carefully place the motherboard onto the standoffs, aligning the screw holes.
- Secure the motherboard with the provided screws. Do not overtighten.
5.3 విద్యుత్ సరఫరా సంస్థాపన
- Locate the power supply bay at the bottom rear of the case.
- Slide your power supply unit (PSU) into the bay from the rear of the case, ensuring the fan faces downwards (if the case has a bottom vent) or upwards.
- కేసు వెనుక నుండి స్క్రూలతో PSU ని భద్రపరచండి.
5.4 స్టోరేజ్ డ్రైవ్ ఇన్స్టాలేషన్
Refer to your case's specific drive bay design for 2.5" SSDs and 3.5" HDDs. Typically, these involve trays or direct screw mounting.
5.5 ఎక్స్పాన్షన్ కార్డ్ ఇన్స్టాలేషన్ (ఉదా. గ్రాఫిక్స్ కార్డ్)
- Remove the necessary PCI-E slot covers from the rear of the case.
- Insert your expansion card into the corresponding PCI-E slot on the motherboard.
- Secure the card with a screw or the case's retention mechanism.
5.6 కేబుల్ నిర్వహణ
Utilize the cutouts and tie-down points behind the motherboard tray to route and secure cables. This improves airflow and aesthetics.
5.7 Connecting RGB Fans
The pre-installed RGB fans typically connect to a central RGB controller or directly to your motherboard's RGB headers. Consult your motherboard manual for specific RGB header locations and software control. Ensure all fan power cables are connected to appropriate fan headers on the motherboard or a fan hub.
6. మీ PC కేసును ఆపరేట్ చేయడం
6.1 పవర్ చేయడం ఆన్/ఆఫ్
After all components are installed and cables connected, plug your power supply into a wall outlet. Press the power button on the front I/O panel to turn on your system. To turn off, use the operating system's shutdown function or press and hold the power button for several seconds.
6.2 RGB లైటింగ్ నియంత్రణ
If your case features an RGB control button on the front I/O panel, press it to cycle through various lighting modes and colors. For advanced customization, use your motherboard's RGB software (e.g., ASUS Aura Sync, MSI Mystic Light, Gigabyte RGB Fusion) if the fans are connected to compatible headers.
7. నిర్వహణ
Regular maintenance helps ensure optimal performance and extends the lifespan of your PC components.
7.1 డస్ట్ ఫిల్టర్ క్లీనింగ్
The FURY SHOBO SH4F case includes dust filters (e.g., on the top and bottom). Periodically remove and clean these filters by rinsing them with water and allowing them to dry completely before re-installing. This prevents dust buildup and maintains airflow.
7.2 బాహ్య క్లీనింగ్
కేస్ బాహ్య భాగాన్ని మృదువైన, d వస్త్రంతో తుడవండి.amp cloth. Avoid abrasive cleaners or solvents that could damage the finish or tempered glass.
8. ట్రబుల్షూటింగ్
మీరు సమస్యలను ఎదుర్కొంటే, ఈ క్రింది సాధారణ ట్రబుల్షూటింగ్ దశలను చూడండి:
- శక్తి లేదు: Ensure the power supply is properly connected to the wall outlet and the motherboard. Check all internal power cables (24-pin ATX, 8-pin CPU, GPU power). Verify the power button cable is correctly connected to the motherboard's front panel header.
- తిరుగుతున్న ఫ్యాన్లు: Check if fan power cables are securely connected to the motherboard or fan hub. Ensure the power supply is functioning.
- RGB లైటింగ్ పని చేయడం లేదు: Verify RGB cables are correctly connected to the RGB controller or motherboard header. If using a button, try cycling through modes. If using software, ensure it's installed and configured correctly.
- వేడెక్కడం: Ensure all fans are spinning correctly and oriented for proper airflow (intake/exhaust). Clean dust filters and internal components. Verify CPU cooler and GPU cooler are properly installed.
9. స్పెసిఫికేషన్లు
| బ్రాండ్ | Natec |
| సిరీస్ | SH4F ద్వారా మరిన్ని |
| మోడల్ సంఖ్య | NFO-2154 |
| కేసు రకం | మిడి టవర్ |
| మదర్బోర్డు అనుకూలత | Micro ATX, Mini ATX |
| రంగు | నలుపు |
| మెటీరియల్ | మెటల్ |
| ఉత్పత్తి కొలతలు (LxWxH) | 19.69 x 16.93 x 9.84 అంగుళాలు (50 x 43 x 25 సెం.మీ.) |
| వస్తువు బరువు | 9.46 పౌండ్లు (4.3 కిలోగ్రాములు) |
| విద్యుత్ సరఫరా మౌంటు రకం | దిగువ మౌంట్ |
| శీతలీకరణ పద్ధతి | గాలి |
| USB 2.0 పోర్ట్ల సంఖ్య | 1 |
10. వారంటీ మరియు మద్దతు
Natec products are manufactured to high-quality standards. For information regarding warranty terms and conditions, please refer to the warranty card included with your product or visit the official Natec website. If you encounter any issues not covered in this manual or require further assistance, please contact Natec customer support through their official channels.
తయారీదారు: Natec


