
1. ఉత్పత్తి ముగిసిందిview
The ID-COOLING FROZN A410 DK is an all-black single tower CPU air cooler designed for efficient heat dissipation. It features two 120mm FDB fans in a push-pull configuration and four direct contact heat pipes to effectively manage CPU temperatures. With a total height of 152mm, it offers broad compatibility with various chassis models and ensures non-interference with RAM and PCIe slots. The cooler supports a wide range of Intel and AMD sockets, including the latest LGA1700/1851 and AM4/AM5 platforms, providing a hassle-free installation experience.
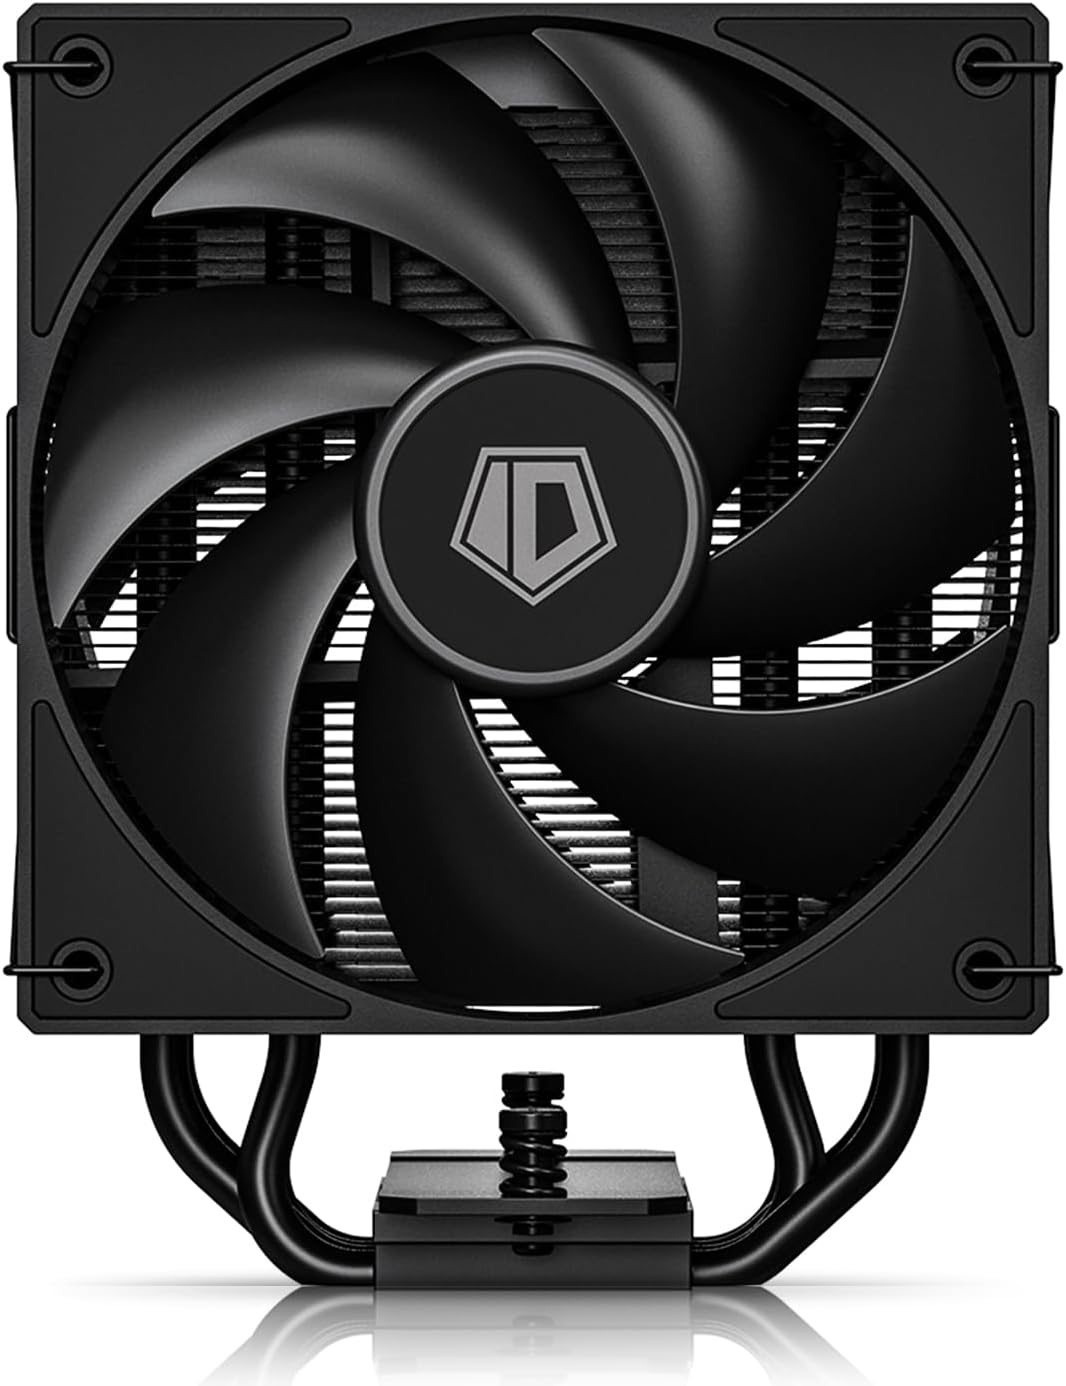
మూర్తి 1: ప్రధాన view of the ID-COOLING FROZN A410 DK CPU Cooler.
2 కీ ఫీచర్లు
- మెరుగైన ఉష్ణ వెదజల్లడం: Single tower design with 4 heat pipes and two 120mm FDB fans in a push-pull configuration for excellent CPU cooling.
- కాంపాక్ట్ ఎత్తు: 152mm total height ensures compatibility with a wide range of PC chassis.
- RAM అనుకూలత: Designed to avoid interference with memory modules and PCIe slots.
- Direct Contact Heat Pipes: Four Ø6mm direct contact heat pipes with exclusive technology for effective heat transfer.
- PWM Fans: Dual 120mm PWM fans offer automatic speed control and ultra-quiet operation (Max. Air Flow: 78.25CFM; Noise Level: 29.85dB(A) Max.).
- Hassle-free Installation: Compatible with Intel LGA1700/1851/1200/1150/1151/1155/1156 and AMD AM4/AM5 sockets.
- సౌందర్య అప్పీల్: All-black layout blends seamlessly into most computer cases.
3. పెట్టెలో ఏముంది
The ID-COOLING FROZN A410 DK CPU Cooler package includes:
- హీట్సింక్
- 2x 120mm Cooling Fans
- Mounting Hardware (for Intel and AMD sockets)
- థర్మల్ గ్రీజు
- 1-to-2 4-pin PWM Fan Splitter

Figure 2: Included components for the FROZN A410 DK CPU Cooler.
4. ఇన్స్టాలేషన్ గైడ్
Follow these steps for proper installation of your ID-COOLING FROZN A410 DK CPU Cooler. Refer to the video guides for visual assistance.
4.1. Intel LGA1700/1851/1200/115X Installation
- బ్యాక్ప్లేట్ సిద్ధం చేయండి: Adjust the Intel backplate screws to the corresponding positions (pull outward for LGA1851/1700, pull inward for LGA1200/115X). Place the backplate through the back of the motherboard.
- స్టాండ్ఆఫ్లు మరియు బ్రాకెట్లను ఇన్స్టాల్ చేయండి: Install the rubber Intel standoffs and Intel bracket in sequence. Secure the bracket with screws.
- థర్మల్ గ్రీజును వర్తించండి: Clean the CPU surface. Peel off the protective sticker from the copper plate of the heatsink. Apply a thin, even layer of thermal grease to the CPU surface.
- మౌంట్ హీట్సింక్: Carefully place the heatsink onto the CPU, aligning it with the mounting holes. Secure it by tightening the two screws on each side.
- ఫ్యాన్లను అటాచ్ చేయండి: Use the provided fan clips to secure both 120mm fans to the heatsink tower in a push-pull configuration. Ensure the airflow direction is correct (typically, one fan pushes air into the heatsink, and the other pulls it through).
- అభిమానులను కనెక్ట్ చేయండి: Connect the two fan cables to the 1-to-2 4-pin splitter. Then, connect the splitter to the CPU_FAN header on your motherboard.
4.2. AMD AM4/AM5 ఇన్స్టాలేషన్
- స్టాక్ బ్రాకెట్లను తీసివేయండి: Remove the original AMD plastic retention frame from the motherboard, but keep the stock backplate.
- స్టాండ్ఆఫ్లు మరియు బ్రాకెట్లను ఇన్స్టాల్ చేయండి: Install the red AMD standoffs and the universal AMD bracket. Secure them with screws.
- థర్మల్ గ్రీజును వర్తించండి: Clean the CPU surface. Peel off the protective sticker from the copper plate of the heatsink. Apply a thin, even layer of thermal grease to the CPU surface.
- మౌంట్ హీట్సింక్: Carefully place the heatsink onto the CPU, aligning it with the mounting holes. Secure it by tightening the two screws on each side.
- ఫ్యాన్లను అటాచ్ చేయండి: Use the provided fan clips to secure both 120mm fans to the heatsink tower in a push-pull configuration. Ensure the airflow direction is correct.
- అభిమానులను కనెక్ట్ చేయండి: Connect the two fan cables to the 1-to-2 4-pin splitter. Then, connect the splitter to the CPU_FAN header on your motherboard.
Installation Video Guide (Intel & AMD)
Video 1: Official installation guide for the FROZN A410 DK CPU Cooler, demonstrating steps for both Intel and AMD platforms.
ఉత్పత్తి ముగిసిందిview and Installation Tips
వీడియో 2: ఒక సంక్షిప్త వివరణview of the FROZN A410 DK, highlighting key features and providing additional installation tips.
5. ఆపరేటింగ్ సూచనలు
Once installed, the FROZN A410 DK CPU Cooler operates automatically via the motherboard's PWM fan control. Ensure your motherboard BIOS settings are configured for optimal fan curves to balance cooling performance and noise levels.
- BIOS/UEFI సెట్టింగ్లు: Access your motherboard's BIOS/UEFI to customize fan speed curves. You can set fan speeds to increase with CPU temperature for better cooling under load or decrease for quieter operation at idle.
- ఉష్ణోగ్రత పర్యవేక్షణ: Use system monitoring software (e.g., HWMonitor, CPU-Z) to keep track of your CPU temperatures to ensure it stays within safe operating limits.
- వాయు ప్రవాహ ఆప్టిమైజేషన్: Ensure good airflow within your PC case by properly arranging other case fans to complement the push-pull configuration of the CPU cooler.
6. నిర్వహణ
క్రమం తప్పకుండా నిర్వహణ మీ CPU కూలర్ యొక్క దీర్ఘాయువు మరియు సరైన పనితీరును నిర్ధారించడంలో సహాయపడుతుంది.
- దుమ్ము శుభ్రపరచడం: Periodically clean dust from the heatsink fins and fan blades using compressed air or a soft brush. Ensure the fans are not spinning during cleaning.
- థర్మల్ పేస్ట్: Reapply thermal paste if you remove the heatsink for any reason. Old thermal paste can dry out and reduce cooling efficiency.
- ఫ్యాన్ తనిఖీ: సురక్షిత కనెక్షన్ల కోసం ఫ్యాన్ కేబుల్లను తనిఖీ చేయండి మరియు ఫ్యాన్ బ్లేడ్లు అడ్డంకులు లేకుండా ఉన్నాయని నిర్ధారించుకోండి.
7. ట్రబుల్షూటింగ్
మీ CPU కూలర్తో మీకు సమస్యలు ఎదురైతే, ఈ క్రింది వాటిని పరిగణించండి:
- అధిక CPU ఉష్ణోగ్రతలు:
- Check if the heatsink is securely mounted and making proper contact with the CPU.
- థర్మల్ పేస్ట్ సరిగ్గా అప్లై చేయబడిందని మరియు అది ఎండిపోలేదని ధృవీకరించండి.
- Ensure fans are spinning and not obstructed.
- Check BIOS/UEFI fan settings to ensure an aggressive enough fan curve.
- అధిక ఫ్యాన్ శబ్దం:
- Check for dust buildup on fans and heatsink.
- Ensure fan cables are not hitting fan blades.
- Adjust BIOS/UEFI fan settings to a quieter fan curve if temperatures allow.
- తిరుగుతున్న ఫ్యాన్లు:
- Verify that the fan splitter is correctly connected to both fans and the CPU_FAN header on the motherboard.
- Check motherboard BIOS/UEFI settings to ensure fan control is enabled.
8. స్పెసిఫికేషన్లు
| ఫీచర్ | స్పెసిఫికేషన్ |
|---|---|
| ఉత్పత్తి కొలతలు | 4.72"L x 3.85"W x 5.98"H (120mm L x 98mm W x 152mm H) |
| బ్రాండ్ | ID-శీతలీకరణ |
| పవర్ కనెక్టర్ రకం | X- పిన్ PWM |
| వాట్tage (TDP) | 230 వాట్స్ |
| శీతలీకరణ పద్ధతి | గాలి |
| అనుకూల పరికరాలు | Desktop CPUs (Intel LGA1700/1851/1200/1150/1151/1155/1156, AMD AM4/AM5) |
| శబ్దం స్థాయి | 29.85 dB(A) Max |
| గరిష్ట భ్రమణ వేగం | 2000 RPM |
| గాలి ప్రవాహ సామర్థ్యం | 78.25 CFM |
| వస్తువు బరువు | 2.61 పౌండ్లు |
9. వారంటీ మరియు మద్దతు
For warranty information and technical support, please refer to the official ID-COOLING webసైట్ లేదా వారి కస్టమర్ సర్వీస్ను నేరుగా సంప్రదించండి. వారంటీ క్లెయిమ్ల కోసం మీ కొనుగోలు రసీదును ఉంచండి.