పరిచయం
Welcome to the user manual for your UMIDIGI G9 Tab 11-inch Android 14 Tablet. This guide provides essential information on setting up, operating, maintaining, and troubleshooting your device to ensure optimal performance and user experience. Please read this manual thoroughly before using your tablet.
1. ప్రారంభించడం: సెటప్
1.1. పెట్టెలో ఏముంది
Upon unboxing your UMIDIGI G9 Tab, please verify that all the following items are included:
- UMIDIGI G9 Tab Tablet
- TPU Tri-Fold Stand Protective Cover
- ప్రొటెక్టివ్ ఫిల్మ్ (ముందుగా అప్లైడ్ చేయబడింది)
- Passive Capacitive Stylus
- టైప్-సి కేబుల్
- పవర్ అడాప్టర్
- SIM ట్రే ఎజెక్టర్
- త్వరిత ప్రారంభ గైడ్

Image: UMIDIGI G9 Tab tablet shown with its stylus, protective case, and charging cable.
1.2. ప్రారంభ ఛార్జింగ్
Before first use, it is recommended to fully charge your tablet.
- టైప్-సి కేబుల్ను టాబ్లెట్ ఛార్జింగ్ పోర్ట్కు కనెక్ట్ చేయండి.
- Connect the other end of the cable to the provided power adapter.
- పవర్ అడాప్టర్ను వాల్ అవుట్లెట్లోకి ప్లగ్ చేయండి.
- The charging indicator will appear on the screen. Allow the tablet to charge completely.
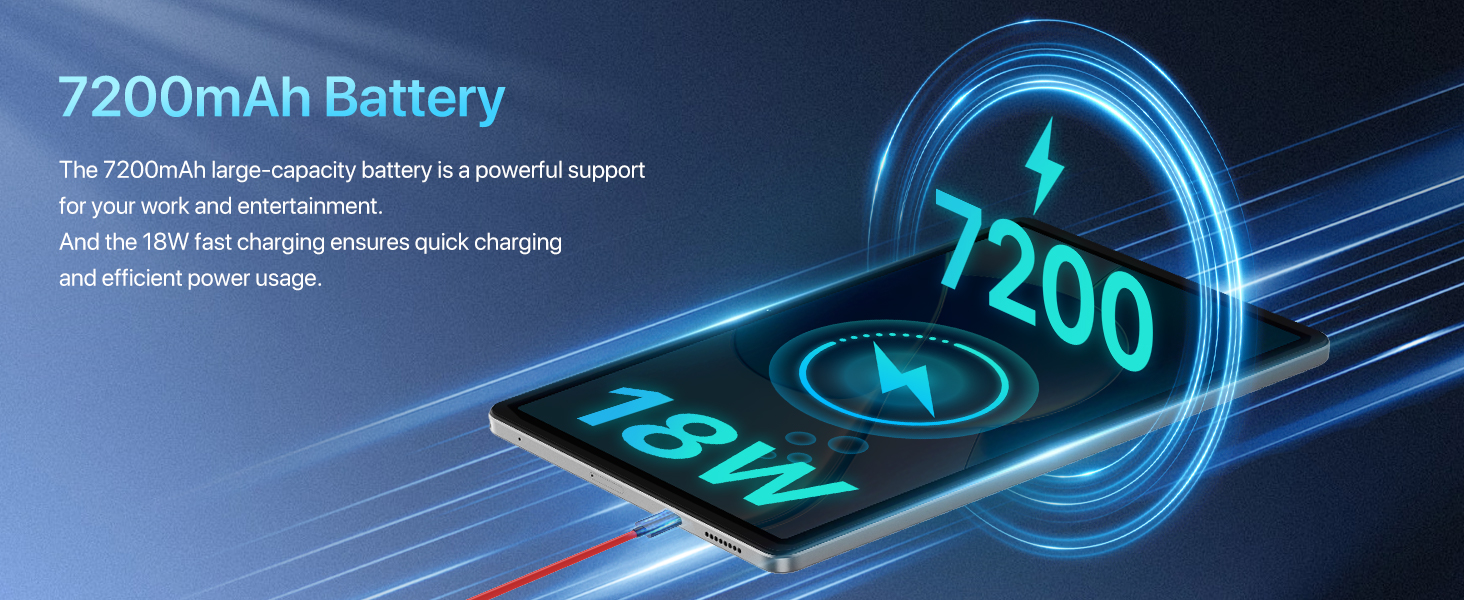
Image: The UMIDIGI G9 Tab connected to its charger, illustrating the 18W fast charging capability.
1.3. పవర్ ఆన్/ఆఫ్
- పవర్ ఆన్ చేయడానికి: Press and hold the Power button located on the side of the tablet until the UMIDIGI logo appears.
- పవర్ ఆఫ్ చేయడానికి: పవర్ బటన్ను నొక్కి పట్టుకోండి, ఆపై స్క్రీన్పై కనిపించే ఎంపికల నుండి "పవర్ ఆఫ్" ఎంచుకోండి.
1.4. SIM కార్డ్ మరియు TF కార్డ్ ఇన్స్టాలేషన్
Your UMIDIGI G9 Tab supports dual Nano SIM cards or one Nano SIM card and one TF (microSD) card for expanded storage.
- టాబ్లెట్ వైపున SIM కార్డ్ ట్రేని గుర్తించండి.
- ట్రే పక్కన ఉన్న చిన్న రంధ్రంలోకి సిమ్ ట్రే ఎజెక్టర్ సాధనాన్ని చొప్పించి, ట్రే బయటకు వచ్చే వరకు సున్నితంగా నొక్కండి.
- సిమ్ ట్రేని జాగ్రత్తగా బయటకు తీయండి.
- Place your Nano SIM card(s) and/or TF card into the designated slots on the tray. Ensure the gold contacts are facing down and the cards are correctly oriented.
- ట్రే సరైన స్థానంలోకి వచ్చే వరకు దాన్ని తిరిగి టాబ్లెట్లోకి సున్నితంగా నెట్టండి.
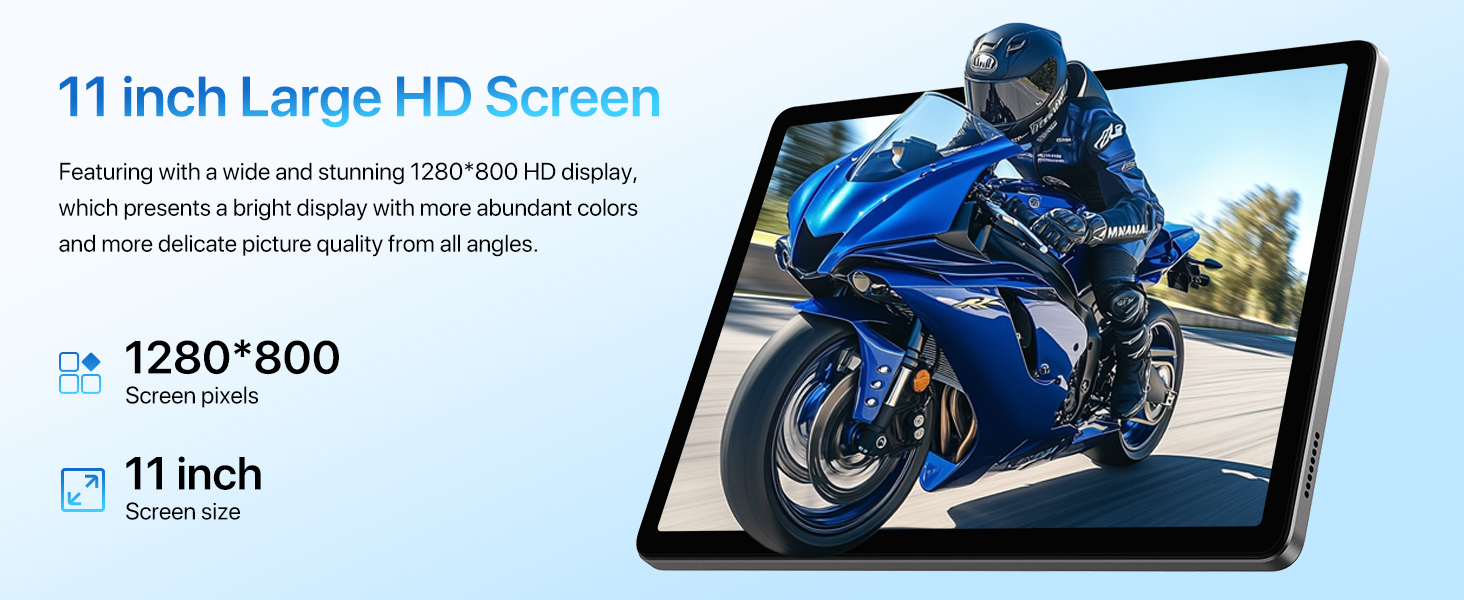
Image: Diagram showing how to insert dual Nano SIM cards or a Nano SIM and a TF card into the tablet's tray.
2. మీ టాబ్లెట్ను ఆపరేట్ చేయడం
2.1. ఆండ్రాయిడ్ 14 ఆపరేటింగ్ సిస్టమ్
Your UMIDIGI G9 Tab runs on Android 14, offering an intuitive and secure user experience.
- నావిగేషన్: Use gestures or the traditional navigation bar (Back, Home, Recents) to move between apps and screens.
- నోటిఫికేషన్లు: నోటిఫికేషన్లు మరియు త్వరిత సెట్టింగ్లను యాక్సెస్ చేయడానికి స్క్రీన్ పై నుండి క్రిందికి స్వైప్ చేయండి.
- యాప్ డ్రాయర్: స్క్రీన్ దిగువ నుండి పైకి స్వైప్ చేయండి view అన్ని ఇన్స్టాల్ చేసిన అప్లికేషన్లు.
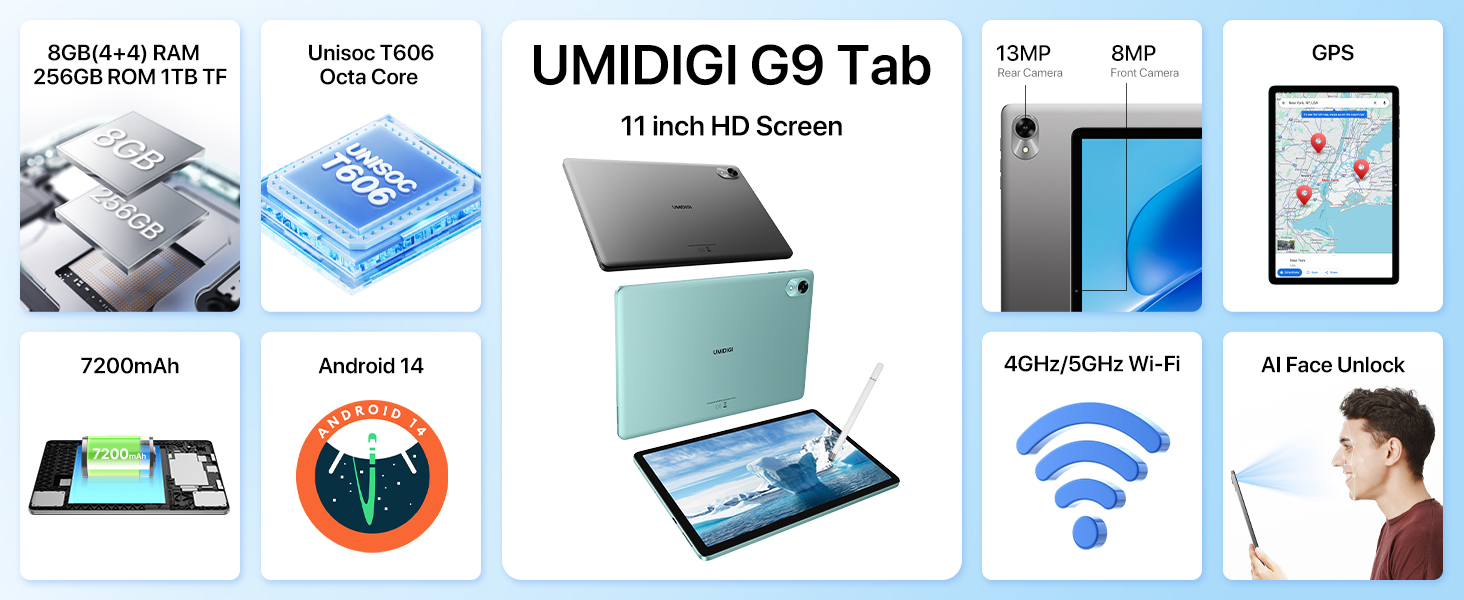
Image: Visual representation of the Android 14 operating system features on the UMIDIGI G9 Tab, highlighting privacy, efficiency, performance, and updates.
2.2 కనెక్టివిటీ
- Wi-Fi: Go to Settings > Network & internet > Wi-Fi to connect to available Wi-Fi networks. Supports 2.4GHz and 5GHz bands for faster transfer speeds.
- మొబైల్ డేటా (4G LTE): If a SIM card is installed, enable mobile data in Settings > Network & internet > Mobile network. The tablet supports 4G/3G/2G mobile phone calls and 4G LTE network.
- బ్లూటూత్ 5.0: Pair with Bluetooth devices (headphones, speakers, etc.) via Settings > Connected devices > Bluetooth.
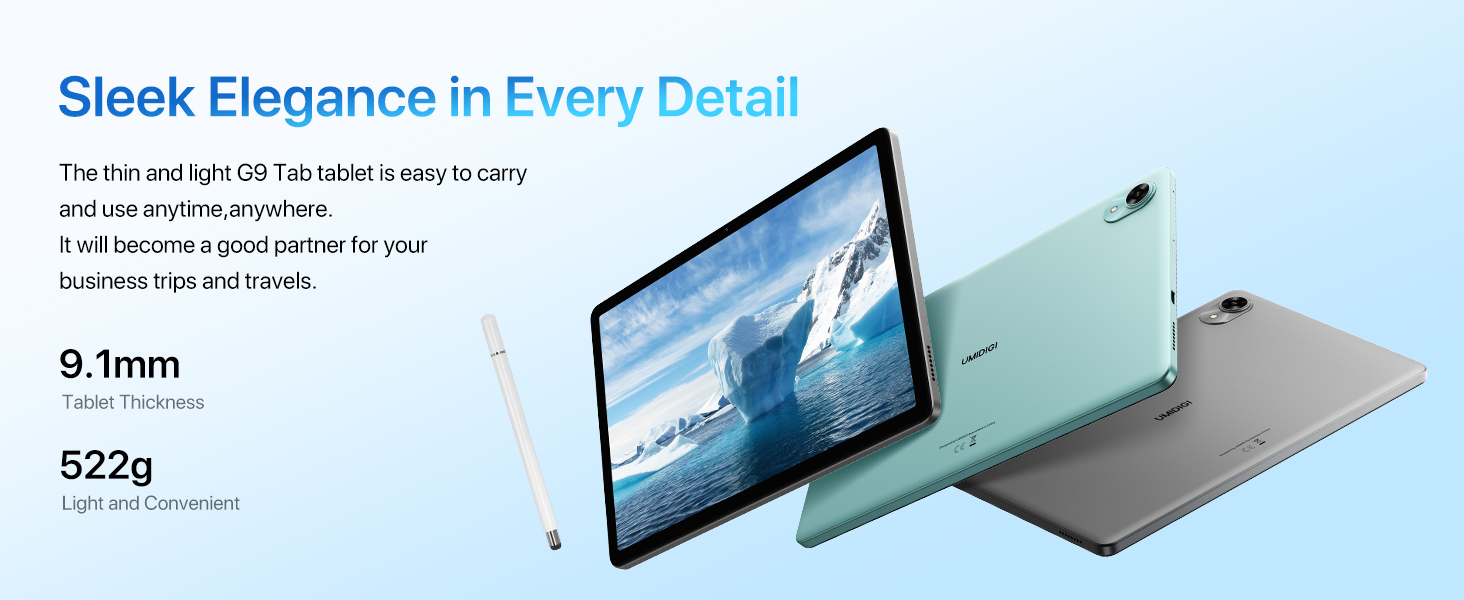
Image: Icons representing 2.4GHz/5GHz Wi-Fi and Bluetooth 5.0, indicating the tablet's wireless connectivity options.
2.3. ఫేస్ అన్లాక్
For convenient and secure unlocking, your tablet features Face Unlock.
- Go to Settings > Security & privacy > Device unlock > Face unlock.
- మీ ముఖాన్ని నమోదు చేయడానికి స్క్రీన్పై సూచనలను అనుసరించండి.
- Ensure good lighting conditions during registration and use.
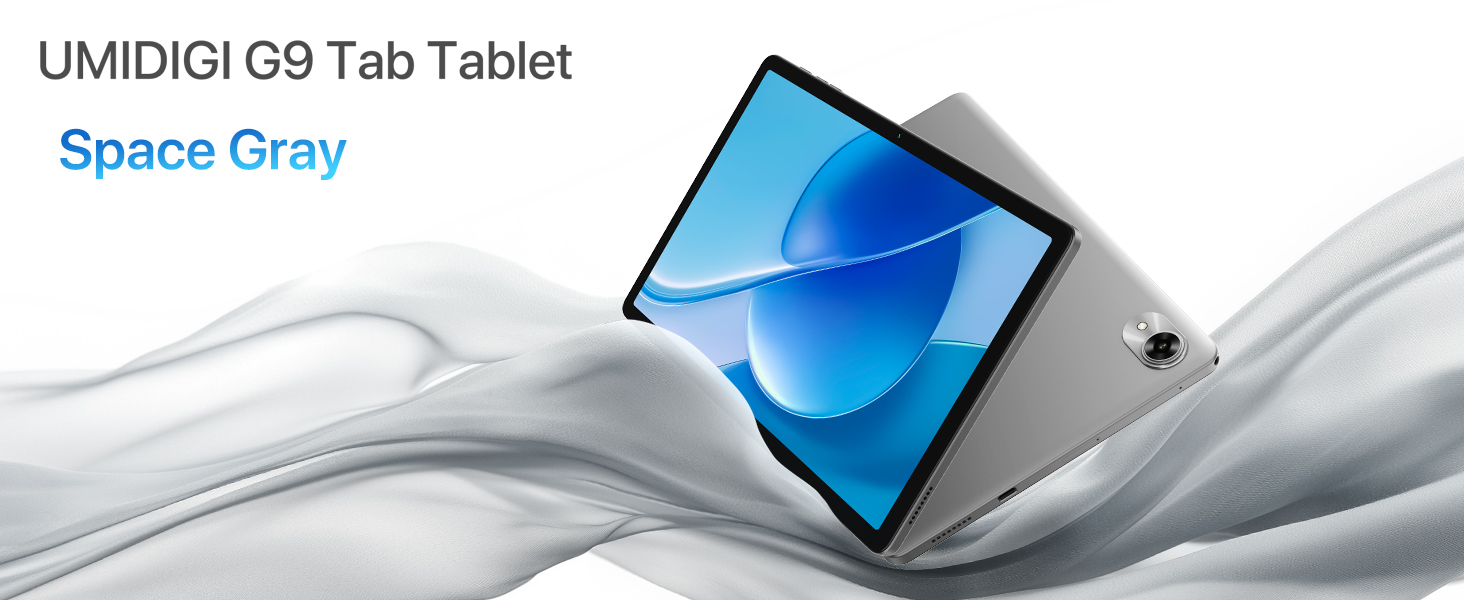
Image: A woman demonstrating the face unlock feature on the UMIDIGI G9 Tab.
2.4. కెమెరా వినియోగం
The UMIDIGI G9 Tab is equipped with a 13MP rear camera and an 8MP front camera for capturing photos and videos.
- మీ హోమ్ స్క్రీన్ లేదా యాప్ డ్రాయర్ నుండి కెమెరా యాప్ను తెరవండి.
- ఫోటో తీయడానికి షట్టర్ బటన్ను నొక్కండి.
- కెమెరా చిహ్నాన్ని ఉపయోగించి ముందు మరియు వెనుక కెమెరాల మధ్య మారండి.
- Explore different modes like video, portrait, or panorama if available.
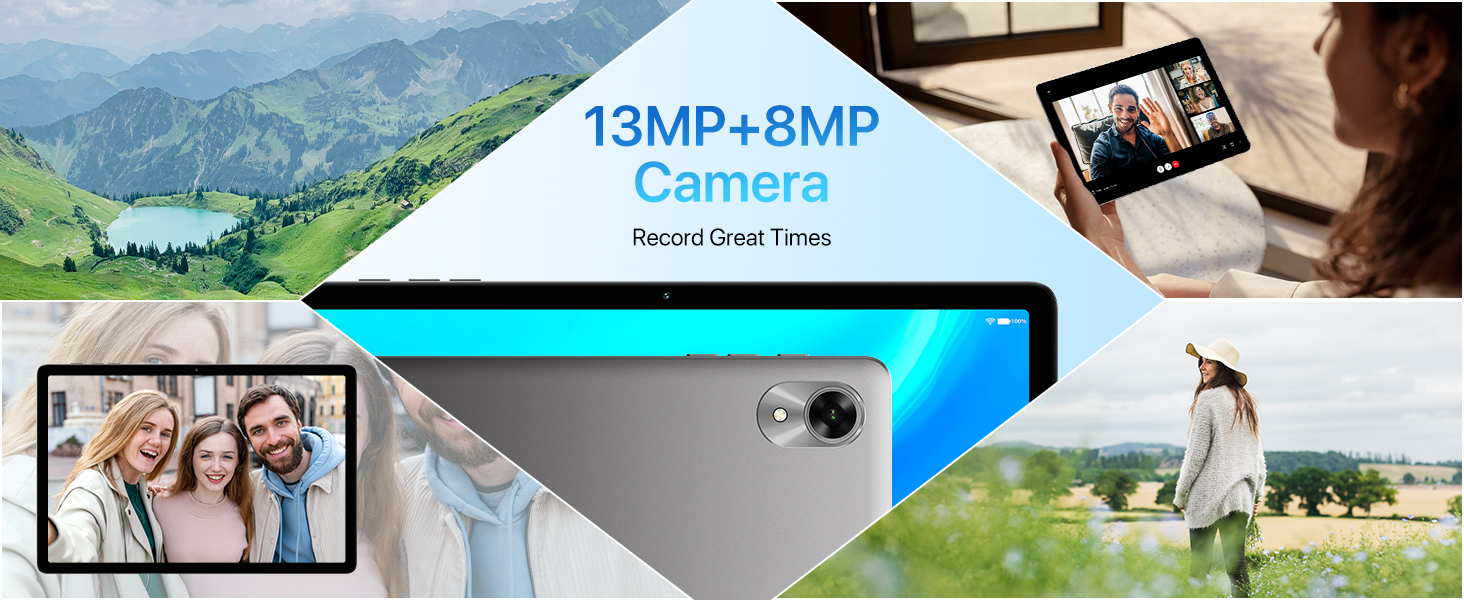
Image: The UMIDIGI G9 Tab highlighting its 13MP rear and 8MP front cameras, with sample చిత్రాలు.
2.5. స్టైలస్ కార్యాచరణ
The included passive capacitive stylus can be used for precise navigation, drawing, and note-taking on the tablet's screen. No pairing is required.
2.6. GPS నావిగేషన్
The tablet features built-in GPS, GLONASS, and Galileo for accurate location services and navigation.
- Ensure location services are enabled in Settings > Location.
- Use pre-installed map applications or download your preferred navigation app from the Google Play Store.
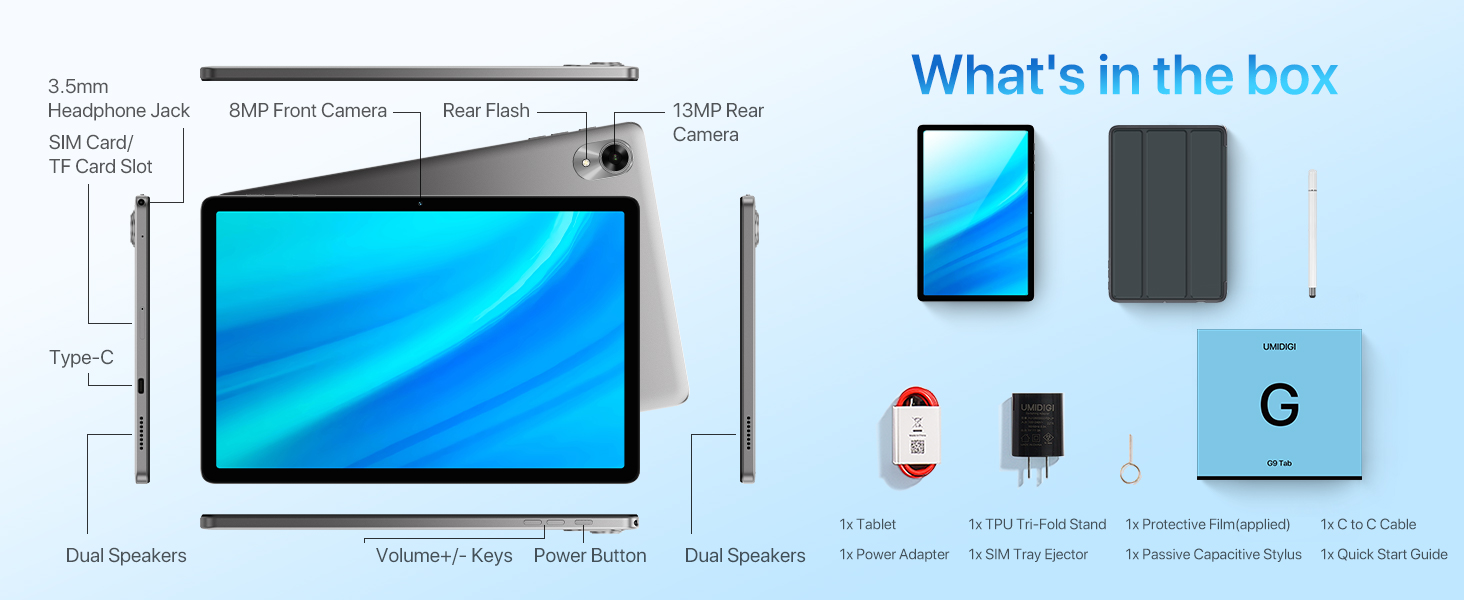
Image: The UMIDIGI G9 Tab showing a map application, with icons for GPS, GLONASS, and Galileo indicating navigation capabilities.
3. నిర్వహణ
3.1. బ్యాటరీ సంరక్షణ
- అధిక ఉష్ణోగ్రతలను నివారించండి, ఎందుకంటే అవి బ్యాటరీ జీవితకాలాన్ని క్షీణింపజేస్తాయి.
- Use only the provided charger and cable for optimal charging and safety.
- దీర్ఘకాలిక నిల్వ కోసం, బ్యాటరీని దాదాపు 50% వరకు ఛార్జ్ చేసి, పరికరాన్ని పవర్ ఆఫ్ చేయండి.
3.2. Cleaning Your Tablet
- స్క్రీన్ మరియు బాడీని శుభ్రం చేయడానికి మృదువైన, మెత్తటి బట్టను ఉపయోగించండి.
- మొండి మచ్చల కోసం, కొద్దిగా dampen నీటితో వస్త్రం లేదా స్క్రీన్ క్లీనర్.
- కఠినమైన రసాయనాలు, రాపిడి పదార్థాలు లేదా అధిక తేమను నివారించండి.
3.3. సాఫ్ట్వేర్ నవీకరణలు
మీ టాబ్లెట్ తాజా ఫీచర్లు, భద్రతా ప్యాచ్లు మరియు పనితీరు మెరుగుదలలను కలిగి ఉందని నిర్ధారించుకోవడానికి సాఫ్ట్వేర్ నవీకరణల కోసం క్రమం తప్పకుండా తనిఖీ చేసి, ఇన్స్టాల్ చేయండి.
- సెట్టింగ్లు > సిస్టమ్ > సిస్టమ్ నవీకరణకు వెళ్లండి.
- Connect to a stable Wi-Fi network before downloading updates.
4. ట్రబుల్షూటింగ్
4.1. Tablet is Slow or Unresponsive
- Restart the tablet: ఒక సాధారణ పునఃప్రారంభం తరచుగా తాత్కాలిక పనితీరు సమస్యలను పరిష్కరించగలదు.
- Close background apps: Too many apps running simultaneously can consume resources. Close unnecessary applications.
- కాష్ క్లియర్ చేయండి: Go to Settings > Apps > [App Name] > Storage & cache > Clear cache for apps that are frequently used or causing issues.
- Check storage: Ensure you have sufficient free storage space. Go to Settings > Storage.
- సాఫ్ట్వేర్ అప్డేట్: Make sure your tablet's software is up to date.
4.2. ఛార్జింగ్ సమస్యలు
- Check cable and adapter: Ensure the Type-C cable and power adapter are securely connected and undamaged. Try using a different compatible cable and adapter if available.
- Clean charging port: Gently inspect the charging port for dust or debris. Use a soft, dry brush to clean it if necessary.
- Restart tablet: Sometimes a software glitch can affect charging.
4.3. Network Connectivity Problems (Wi-Fi/4G)
- Toggle Wi-Fi/Mobile Data: Turn off and then turn on Wi-Fi or mobile data in quick settings or network settings.
- Restart router/modem: Wi-Fi సమస్యల కోసం, మీ Wi-Fi రూటర్ను పునఃప్రారంభించండి.
- Check SIM card: మీ క్యారియర్తో SIM కార్డ్ సరిగ్గా చొప్పించబడి, యాక్టివేట్ చేయబడిందని నిర్ధారించుకోండి.
- నెట్వర్క్ సెట్టింగ్లను రీసెట్ చేయండి: Go to Settings > System > Reset options > Reset Wi-Fi, mobile & Bluetooth. Note: This will erase all saved Wi-Fi passwords and Bluetooth pairings.
5. స్పెసిఫికేషన్లు
| ఫీచర్ | స్పెసిఫికేషన్ |
|---|---|
| బ్రాండ్ | UMIDIGI |
| మోడల్ పేరు | G9 ట్యాబ్ |
| ఆపరేటింగ్ సిస్టమ్ | ఆండ్రాయిడ్ 14 |
| స్క్రీన్ పరిమాణం | 11 అంగుళాలు |
| స్క్రీన్ రిజల్యూషన్ | 1280 x 800 పిక్సెల్లు |
| ప్రాసెసర్ | 1.6 GHz Octa-core (Unisoc T606) |
| గ్రాఫిక్స్ కోప్రాసెసర్ | మాలి-G57 |
| RAM | 8GB (4GB + 4GB extended memory) |
| అంతర్గత నిల్వ | 256 GB |
| విస్తరించదగిన నిల్వ | Up to 1TB via TF Card (not included) |
| వెనుక కెమెరా | 13MP |
| ఫ్రంట్ కెమెరా | 8MP |
| బ్యాటరీ కెపాసిటీ | 7200mAh లిథియం-అయాన్ |
| ఛార్జింగ్ | 18W Fast Charging, Type-C port |
| కనెక్టివిటీ | 4G LTE, 5GHz/2.4GHz Wi-Fi (802.11ac, 802.11n), Bluetooth 5.0 |
| నావిగేషన్ | GPS, GLONASS, Galileo, Beidou |
| ఆడియో | Dual Speakers, 3.5mm Headphone Jack |
| కొలతలు (LxWxH) | 9.64 x 6.39 x 0.37 అంగుళాలు |
| బరువు | 1.27 పౌండ్లు (522గ్రా) |
6. వారంటీ మరియు మద్దతు
UMIDIGI provides a 1-year after-sales service and support for your G9 Tab tablet.
6.1 మద్దతును సంప్రదిస్తోంది
If you encounter any issues or require assistance, you can contact UMIDIGI support through the following methods:
- Via Amazon Product Page:
- Amazonలో ఉత్పత్తి పేజీకి వెళ్లండి.
- Click on the store name "UMIDIGI Store".
- Click on "Ask a question" in the upper right corner of the store page.
- Via Amazon Order History:
- Navigate to your order history.
- Select the applicable order for your UMIDIGI G9 Tab.
- Contact the seller directly through the order details.


