Airiton AI-G7 4G POC Two-Way Radio User Manual
Model: AI-G7
1. పరిచయం
The Airiton AI-G7 is a state-of-the-art 4G Push-to-Talk Over Cellular (POC) two-way radio designed for seamless, long-distance communication. Leveraging 4G network technology, it offers unlimited communication range, covering distances up to 5000 miles, making it ideal for various professional and personal applications. This manual provides essential information for setting up, operating, and maintaining your AI-G7 radio.
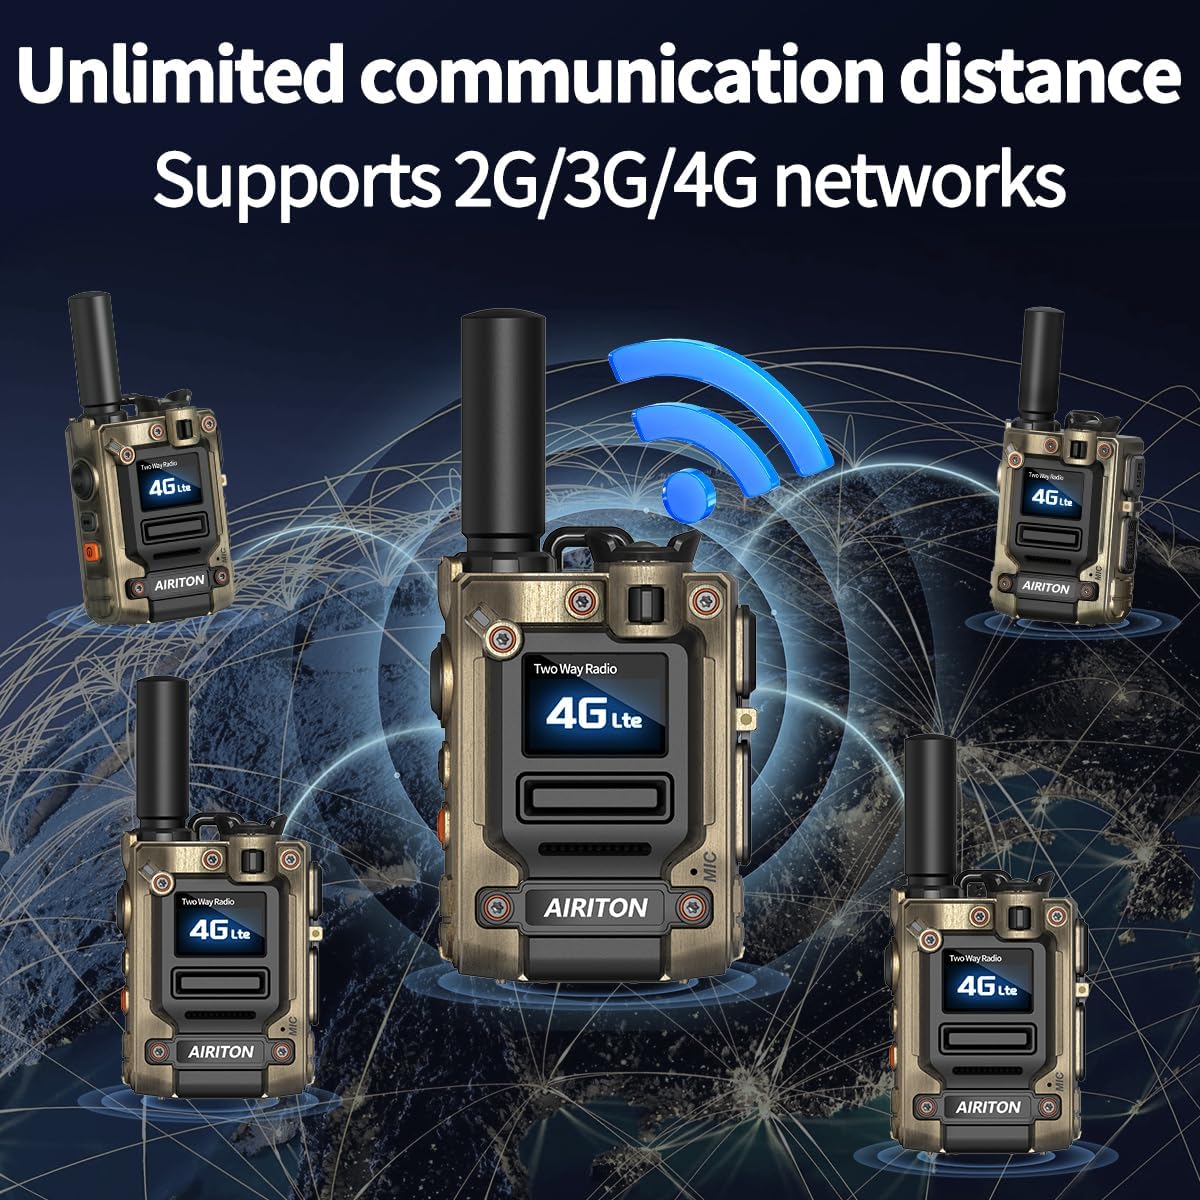
Figure 1.1: Airiton AI-G7 radios connected across a global network, illustrating unlimited communication distance via 4G POC technology.
2. పెట్టెలో ఏముంది
Upon unboxing your Airiton AI-G7 package, please verify that all the following components are included:
- 2 x Airiton AI-G7 Radio Body
- 2 x బ్యాటరీ
- 2 x Type-C USB Charger (Cable and Adapter)
- 2 x బెల్ట్ క్లిప్
- 2 x Hand Strap (Lanyard)
- 1 x స్క్రూడ్రైవర్
- 1 x యూజర్ మాన్యువల్ (ఈ పత్రం)
- 2 x SIM Card (pre-installed)
- 2 x ఇయర్పీస్

చిత్రం 2.1: పైగాview of the Airiton AI-G7 package contents, showing two radios, SIM cards, charging cables, power adapters, lanyards, and earpieces.
Video 2.1: An unboxing video demonstrating the contents of the Airiton AI-G7 package and initial setup steps.
3. సెటప్
3.1 SIM కార్డ్ ఇన్స్టాలేషన్
The AI-G7 radios come with SIM cards pre-installed in the side card slot. No manual installation is typically required for initial use. If you need to access or replace the SIM card:
- Locate the SIM card slot cover on the side of the radio.
- కవర్ జాగ్రత్తగా తెరవండి.
- Insert or remove the SIM card as needed, ensuring correct orientation.
- Securely close the SIM card slot cover to protect against dust and moisture.

Figure 3.1: Visual guide for SIM card installation, highlighting the side slot where the SIM card is inserted.
3.2 రేడియో ఛార్జింగ్
Before first use, fully charge your AI-G7 radio. Use the provided Type-C USB charger.
- Connect the Type-C USB cable to the charging port on the side of the radio.
- కేబుల్ యొక్క మరొక చివరను పవర్ అడాప్టర్కు కనెక్ట్ చేయండి.
- పవర్ అడాప్టర్ను ప్రామాణిక ఎలక్ట్రికల్ అవుట్లెట్లోకి ప్లగ్ చేయండి.
- The radio's display will indicate charging status. A full charge typically takes several hours.

Figure 3.2: Illustration of the Type-C charging process for the Airiton AI-G7 radio, demonstrating connection to a power source.
4. ఆపరేటింగ్ సూచనలు
4.1 Radio Controls and Display
Familiarize yourself with the main controls and indicators on your AI-G7 radio:

Figure 4.1: Detailed diagram of the AI-G7 radio, highlighting key components such as the PTT button, volume controls, charging port, and display.
- ఆన్/ఆఫ్ కీ: Press and hold to power the radio on or off.
- PTT (Push-to-Talk) Key: Press and hold to transmit your voice. Release to listen.
- Flashlight/Menu Key: Short press to activate/deactivate the flashlight. Long press to access menu options.
- Volume/Menu Up/Down: వాల్యూమ్ను సర్దుబాటు చేయండి లేదా మెనూ ఎంపికలను నావిగేట్ చేయండి.
- రంగు తెర: Displays current status, group information, battery level, and network signal.
- టైప్-సి ఛార్జింగ్ పోర్ట్: రేడియో ఛార్జింగ్ కోసం.
- SIM కార్డ్ స్లాట్: Houses the pre-installed SIM card.
4.2 కమ్యూనికేషన్ మోడ్లు
The AI-G7 supports both single and group call functions:
- సింగిల్ కాల్: For one-on-one private communication.
- గ్రూప్ కాల్: For broadcasting messages to a pre-defined group of radios. This is the primary mode for team communication.
To switch between groups or initiate a single call, use the menu navigation buttons. The radios are typically pre-set with default groups for immediate use.

Figure 4.2: Visual representation of the two primary communication modes: single call for private conversations and group call for team communication.
4.3 ఫ్లాష్లైట్ ఫంక్షన్
The AI-G7 radio includes a built-in flashlight for convenience in low-light conditions.
- To turn the flashlight on or off, short press the Flashlight/Menu Key.
- Some models may offer multiple brightness levels or a strobe mode, which can be cycled through by repeated short presses.
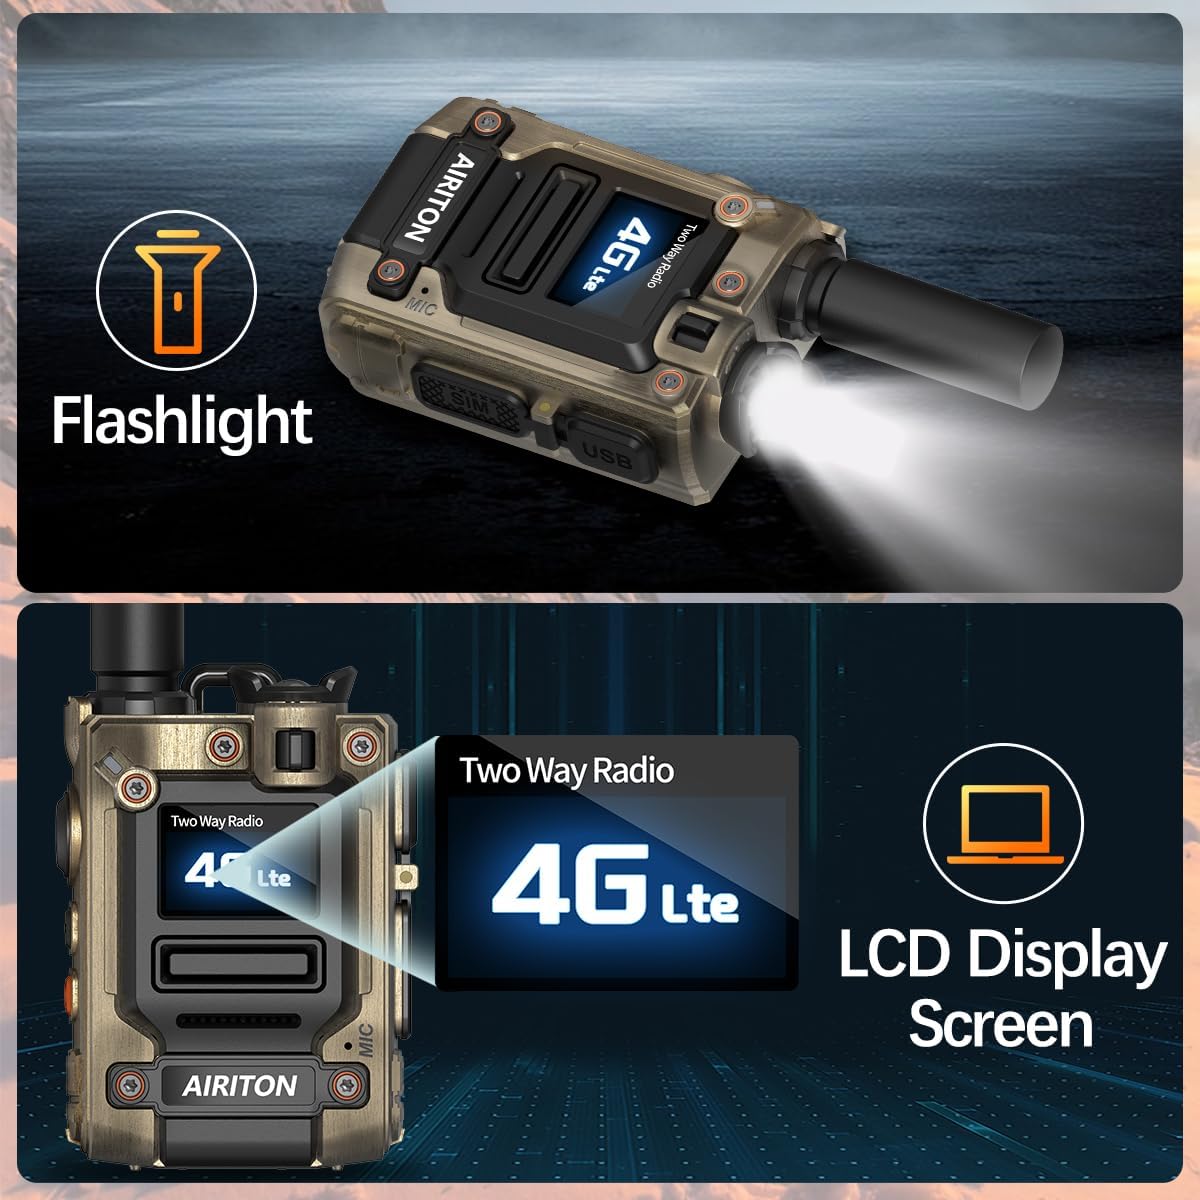
Figure 4.3: The AI-G7 radio demonstrating its integrated flashlight feature, useful for various environments.
5. నిర్వహణ
To ensure the longevity and optimal performance of your Airiton AI-G7 radios, follow these maintenance guidelines:
- శుభ్రపరచడం: ఒక మృదువైన ఉపయోగించండి, డిamp రేడియో బాహ్య భాగాన్ని శుభ్రం చేయడానికి వస్త్రం. కఠినమైన రసాయనాలు లేదా రాపిడి క్లీనర్లను నివారించండి.
- నిల్వ: రేడియోలను ప్రత్యక్ష సూర్యకాంతి మరియు తీవ్రమైన ఉష్ణోగ్రతలకు దూరంగా చల్లని, పొడి ప్రదేశంలో నిల్వ చేయండి.
- బ్యాటరీ సంరక్షణ: Fully charge the battery before long-term storage. Avoid completely draining the battery frequently.
- మన్నిక: The AI-G7 features a zinc alloy body designed to be shockproof and drop-resistant. While durable, avoid unnecessary drops or impacts to prevent damage.

Figure 5.1: The robust metal casing of the AI-G7 radio, designed for enhanced durability and resistance to wear and impact.
6. ట్రబుల్షూటింగ్
If you encounter issues with your Airiton AI-G7 radio, refer to the following common problems and solutions:
| సమస్య | సాధ్యమైన కారణం | పరిష్కారం |
|---|---|---|
| రేడియో పవర్ ఆన్ చేయదు. | తక్కువ లేదా క్షీణించిన బ్యాటరీ. | Charge the radio fully using the provided Type-C charger. |
| No signal or poor communication. | Out of 4G network coverage; SIM card issue. | Move to an area with better 4G coverage. Ensure SIM card is properly installed. Contact customer service if issues persist. |
| ఆడియో అస్పష్టంగా లేదా వక్రీకరించబడింది. | Weak signal; microphone obstruction; volume too low/high. | Check network signal strength. Ensure microphone is clear. Adjust volume. The AI-G7 has advanced noise-cancelling microphones for clear sound. |
| ఇతర రేడియోలతో కమ్యూనికేట్ చేయలేము. | Radios are not in the same group; pairing issue. | Ensure all radios are set to the correct communication group. If you purchased more radios, contact Airiton customer service with serial numbers for pairing assistance. |
7. స్పెసిఫికేషన్లు
Key technical specifications for the Airiton AI-G7 4G POC Two-Way Radio:
- మోడల్: AI-G7
- కమ్యూనికేషన్ టెక్నాలజీ: 4G POC (Push-to-Talk Over Cellular)
- కవరేజ్: National, up to 5000 miles (network dependent)
- FCC సర్టిఫికేషన్: FCC ID: 2BMG4-AI-G7
- ఫ్రీక్వెన్సీ పరిధి: 700 MHz నుండి 2.6 GHz
- ఛానెల్ల సంఖ్య: 200
- శక్తి మూలం: పునర్వినియోగపరచదగిన బ్యాటరీ
- ఛార్జింగ్ పోర్ట్: టైప్-సి యుఎస్బి
- శరీర పదార్థం: Zinc Alloy (shockproof, drop-resistant)
- ఆడియో ఫీచర్లు: Advanced noise-cancelling microphones
- నీటి నిరోధక స్థాయి: వాటర్ రెసిస్టెంట్ కాదు
- అదనపు ఫీచర్లు: Built-in flashlight, color LCD display, group and private call functions.
- కొలతలు (సుమారుగా): 3.1 అంగుళాలు (ఎత్తు) x 2.54 అంగుళాలు (వెడల్పు) x 1.6 అంగుళాలు (లోతు)
- బరువు: 1.92 పౌండ్లు
8. వారంటీ మరియు మద్దతు
Your Airiton AI-G7 radio comes with an annual SIM card service for the first year, providing unlimited high-speed data. After the first year, you have the option to renew the service or use your own compatible SIM card.
For technical guidance, pairing additional radios, or any other customer service inquiries, please contact Airiton customer support. Provide your radio's serial number for efficient assistance.
Note: The manufacturer provides no explicit warranty information beyond the SIM card service. Please refer to your purchase documentation or contact the seller for specific warranty terms.


