1. పరిచయం
This manual provides detailed instructions for the setup, operation, and maintenance of your SANZUCO Wireless Intercom System, Model F60-6BK. This system is designed for reliable two-way communication in various environments, including homes, offices, and for assisting the elderly. Please read this manual thoroughly before using the product to ensure proper function and longevity.

Figure 1: SANZUCO F60-6BK Wireless Intercom System (6-pack).
2. ప్యాకేజీ విషయాలు
మీ ప్యాకేజీలో అన్ని అంశాలు ఉన్నాయని ధృవీకరించండి:
- Wireless Intercom System (black) x 6
- Hands-Free Intercom Charging Cables x 6
- Intercom Chargers x 6
- Intercom System User Manual x 1
3. ఉత్పత్తి లక్షణాలు
The SANZUCO F60-6BK Wireless Intercom System offers the following key features:
- Full Duplex Communication: Allows simultaneous two-way conversation.
- విస్తరించిన పరిధి: Up to 5300 feet (approximately 1615 meters) in open areas.
- బహుళ ఛానెల్లు: 9 channels with two codes (A and B) for a total of 18 selectable communication paths.
- సర్దుబాటు చేయగల వాల్యూమ్: Control call volume directly on the unit.
- Group Call Function: Communicate with all connected intercom units simultaneously.
- స్వయంచాలక సమాధానం: Units can be set to automatically answer incoming calls after two rings.
- నిశ్శబ్ద మోడ్: Disables the ring tone for discreet operation.
- రీప్లే ఫంక్షన్: Allows replaying of recent messages.
- హ్యాండ్స్-ఫ్రీ ఆపరేషన్: Facilitates communication without needing to hold the unit.
- ఫ్లెక్సిబుల్ ప్లేస్మెంట్: Designed for both wall mounting and tabletop use.

Figure 2: Key features of the SANZUCO Intercom System.
4. సెటప్ సూచనలు
The SANZUCO Wireless Intercom System is designed for immediate use upon unboxing. Follow these steps for initial setup:
- అన్ప్యాక్: Remove all intercom units, charging cables, and chargers from the packaging.
- పవర్ కనెక్షన్: Connect each intercom unit to its respective charger using the provided USB Type C cable. Plug the chargers into standard electrical outlets. The units are powered by corded electric.
- ప్రారంభ పవర్ ఆన్: The units should power on automatically once connected to power.
- Assign Channels: Each intercom unit needs to be assigned a unique channel and code for individual communication. Refer to Section 5.1 for detailed channel selection. For example, assign Unit 1 to Channel 1 Code A, Unit 2 to Channel 2 Code A, and so on.
- ప్లేస్మెంట్: Place the intercom units in desired locations. They can be placed on a tabletop or mounted on a wall. Ensure units are within the operational range for optimal performance.

Figure 3: Intercom unit overview with labeled components and dimensions.
5. ఆపరేటింగ్ సూచనలు
5.1. Channel and Code Selection
To communicate with a specific unit, both the calling and receiving units must be set to the same channel and code.
- నొక్కండి మెనూ button. The channel number on the display will flash.
- Use the number pad (1-9) to select the desired channel.
- నొక్కండి మెనూ again to toggle between Code A and Code B. The display will show 'A' or 'B'.
- నొక్కండి మెనూ a third time to confirm your selection.
5.2. కాల్ చేయడం
To initiate a call to another intercom unit:
- Ensure your unit is set to the same channel and code as the target unit.
- నొక్కండి డయల్ చేయండి button (green phone icon). The receiving unit will ring.
- Once the call is connected, you can speak hands-free.
- కాల్ ముగించడానికి, నొక్కండి హాంగ్ అప్ బటన్ (ఎరుపు ఫోన్ చిహ్నం).

Figure 4: Using the intercom for automatic calls and long-range communication in a business setting.
5.3. Group Call Function
To broadcast a message to all connected intercom units:
- నొక్కండి సమూహం button. Your message will be transmitted to all other intercoms on the same system.
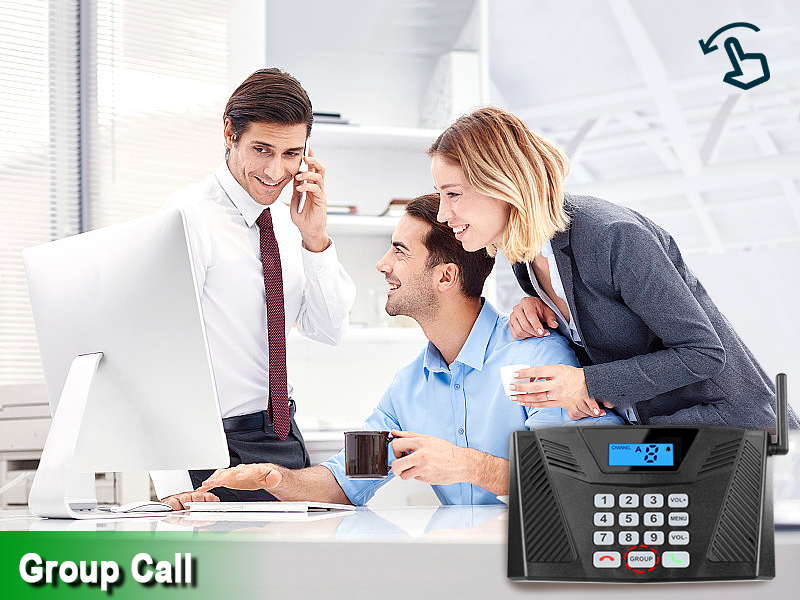
Figure 5: Demonstrating the group call function in an office environment.
5.4. Automatic Answer
When enabled, the receiving unit will automatically answer an incoming call after two rings, without requiring manual intervention. This feature is particularly useful for elderly care or in busy office environments.
- To activate Automatic Answer: Long press the VOL- button until you hear a beep. The display will show an 'Auto Answer' icon.
- To deactivate Automatic Answer: Long press the VOL- button again until the icon disappears.

Figure 6: Intercom unit with Automatic Answer feature enabled.
5.5. సైలెంట్ మోడ్
Silent Mode disables the ring tone on the receiving unit, allowing for quiet operation. The unit will still receive calls, but without an audible alert.
- To activate Silent Mode: Long press the VOL+ button until you hear a beep. The display will show a 'Silent Mode' icon.
- To deactivate Silent Mode: Long press the VOL+ button again until the icon disappears.

Figure 7: Silent Mode activated for discreet communication.
5.6. వాల్యూమ్ సర్దుబాటు
ఉపయోగించండి VOL+ మరియు VOL- buttons to adjust the speaker volume during a call or when the unit is idle.
6. నిర్వహణ
To ensure the longevity and optimal performance of your intercom system, follow these maintenance guidelines:
- శుభ్రపరచడం: మెత్తటి, పొడి గుడ్డతో యూనిట్లను తుడవండి. రాపిడి క్లీనర్లు లేదా ద్రావకాలను ఉపయోగించవద్దు.
- విద్యుత్ సరఫరా: Always use the original charging cables and adapters provided with the system.
- పర్యావరణం: Avoid exposing the units to extreme temperatures, direct sunlight, moisture, or dust.
- నిల్వ: If storing the units for an extended period, disconnect them from power and store them in a cool, dry place.
7. ట్రబుల్షూటింగ్
If you encounter issues with your SANZUCO Wireless Intercom System, refer to the following common problems and solutions:
| సమస్య | సాధ్యమైన కారణం | పరిష్కారం |
|---|---|---|
| No communication between units. | Units are on different channels/codes. | Ensure both units are set to the same channel and code (A or B). Refer to Section 5.1. |
| పేలవమైన ధ్వని నాణ్యత లేదా స్టాటిక్. | Units are out of range or obstructed. | Move units closer together or to locations with fewer obstructions. Avoid placing near large metal objects or other electronic devices that may cause interference. |
| యూనిట్ ఆన్ చేయడం లేదు. | Power cable not connected or faulty. | Check if the USB Type C cable is securely connected to both the intercom and the charger. Ensure the charger is plugged into a working electrical outlet. |
| Automatic Answer not working. | Feature is not activated. | Activate Automatic Answer by long-pressing the VOL- button until the icon appears on the display. Refer to Section 5.4. |
| Unit is ringing but no sound. | Silent Mode is activated. | Deactivate Silent Mode by long-pressing the VOL+ button until the icon disappears. Refer to Section 5.5. |
8. స్పెసిఫికేషన్లు
| ఫీచర్ | వివరాలు |
|---|---|
| బ్రాండ్ | సంజుకో |
| మోడల్ సంఖ్య | ZNN F60-6BK పరిచయం |
| రంగు | నలుపు |
| శక్తి మూలం | కార్డెడ్ ఎలక్ట్రిక్ |
| కనెక్టివిటీ టెక్నాలజీ | వైర్లెస్ |
| గరిష్ట పరిధి | 5300 అడుగులు (సుమారు 1615 మీటర్లు) |
| ఛానెల్లు | 9 Channels (Code A & B) |
| కనెక్టర్ రకం | USB టైప్ C |
| ఉత్పత్తి కొలతలు (L x W x H) | 10.5 x 9.4 x 5.1 అంగుళాలు (యూనిట్కు) |
| వస్తువు బరువు | 5.37 pounds (total for 6 units) |
| ప్రత్యేక లక్షణాలు | Hands Free, Two-way real-time call, Group Call, Automatic answering function, Mute function |
9. వారంటీ మరియు మద్దతు
For warranty information or technical support, please contact SANZUCO customer service. Refer to the product packaging or the official SANZUCO webసంప్రదింపు వివరాల కోసం సైట్.


