పరిచయం
This manual provides comprehensive instructions for the installation, operation, and maintenance of your HEATIT ET-72W Programmable Thermostat. Designed for electric radiant floor heating systems, this thermostat features dual voltage compatibility, dual sensing capabilities, and an interactive color touch screen interface. Please read this manual thoroughly before installation and use to ensure proper function and safety.
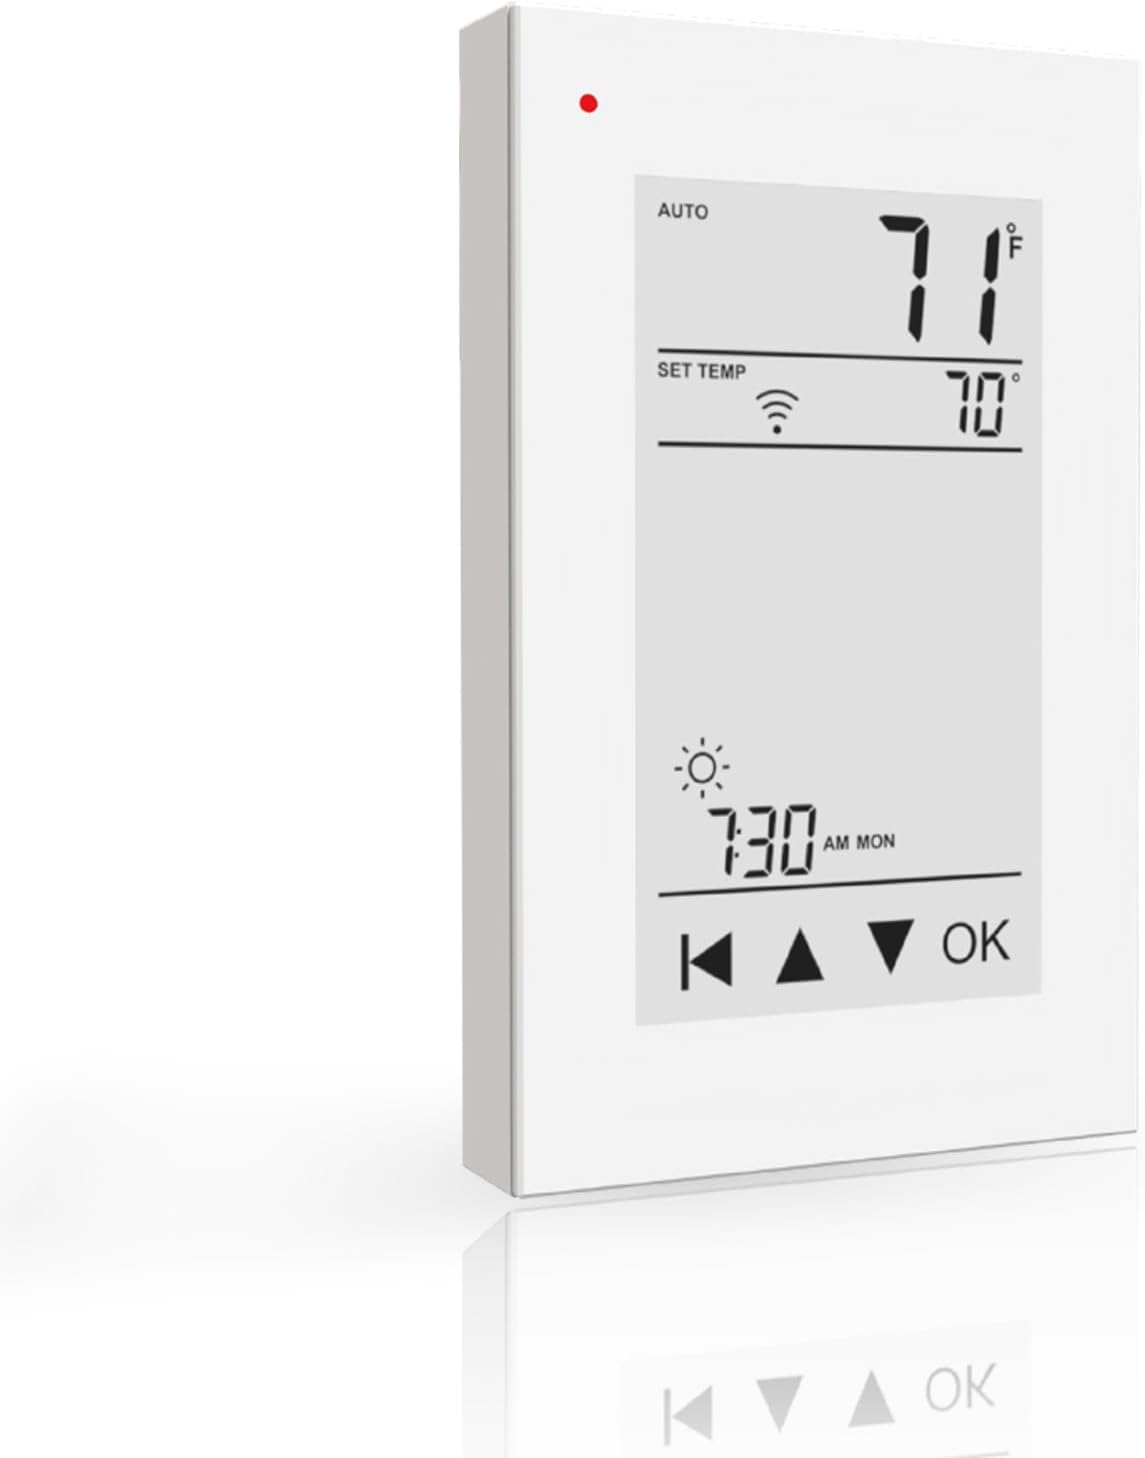
చిత్రం: ముందు భాగం view of the HEATIT ET-72W Programmable Thermostat, displaying its interactive color touch screen interface with current temperature, set temperature, time, and control buttons.
కీ ఫీచర్లు
- 7-Day Programmable Schedule: Customize heating with 4 or 2 stages per day for a full week.
- ETL Approved & Advanced GFCI Protection: ETL-certified for safety, dual voltage (120/240V), and built-in Class A GFCI protection.
- అప్రయత్నంగా ఇన్స్టాలేషన్: Designed for easy control of floor heating systems up to 15A.
- Triple Sensor Options: Choose from Room, Floor, or Room.Limit sensor modes for precise temperature management.
- Remote Control via WiFi: Manage settings from anywhere using the Warmme app on Android or iOS devices with 5G+2.4G WiFi connectivity.
భద్రతా సమాచారం
The HEATIT ET-72W thermostat is ETL-certified, ensuring compliance with North American safety standards. It features built-in Class A Ground Fault Circuit Interrupter (GFCI) protection to prevent electric shock. Always ensure power is disconnected before installation or maintenance. Installation should be performed by a qualified electrician in accordance with local electrical codes.
సంస్థాపన
The ET-72W thermostat is designed for easy installation with electric floor heating systems up to 15A. It supports dual voltage (120V/240V). Ensure the power supply matches the thermostat's requirements. The thermostat includes a 10ft sensor wire for floor temperature monitoring.
వైరింగ్ రేఖాచిత్రం

Image: Detailed wiring diagram showing connections for Line (L, N), Load (L, N), and Sensor (IN/SNR) terminals on the back of the thermostat, with representations of a heating mat and sensor wire.
- ఇన్స్టాలేషన్ ప్రారంభించే ముందు సర్క్యూట్ బ్రేకర్ వద్ద పవర్ ఆఫ్ చేయండి.
- Connect the Line (L, N) wires from your power supply to the corresponding terminals on the thermostat.
- Connect the Load (L, N) wires from your electric floor heating system to the designated terminals.
- Connect the floor sensor wire to the IN/SNR terminals. Ensure the sensor is properly placed within the floor heating area.
- Mount the thermostat securely in a standard electrical box.
- Restore power and proceed with initial setup.
అనుకూలత
This thermostat is exclusively designed for use with electric underfloor heating systems, including HEATIT Floor Heating Mats and HEATIT Heating Cables.

Image: Illustration showing the HEATIT ET-72W thermostat alongside a HEATIT floor heating mat and a spool of HEATIT heating cable, indicating compatibility.
సెటప్
Upon initial power-up, the thermostat will guide you through basic setup steps, including language selection, time and date settings, and initial temperature preferences. Follow the on-screen prompts.
ఆపరేటింగ్ సూచనలు
The ET-72W features an interactive color touch screen. Navigate menus and adjust settings by tapping the screen. The main display shows current room temperature, set temperature, time, and operating mode.
ఉష్ణోగ్రతను సర్దుబాటు చేస్తోంది
- On the main screen, use the Up మరియు క్రిందికి arrows to manually adjust the desired temperature.
- నొక్కండి OK కొత్త సెట్టింగ్ని నిర్ధారించడానికి.
Sensor Options for Precise Control
The thermostat offers three sensor modes:
- గది మోడ్: Relies on the built-in ambient air sensor to control the room temperature.
- ఫ్లోర్ మోడ్: Uses the external floor sensor to maintain a specific floor temperature.
- Room.Limit Mode: Balances room temperature control using the built-in sensor while monitoring the floor temperature via the external sensor to prevent overheating.
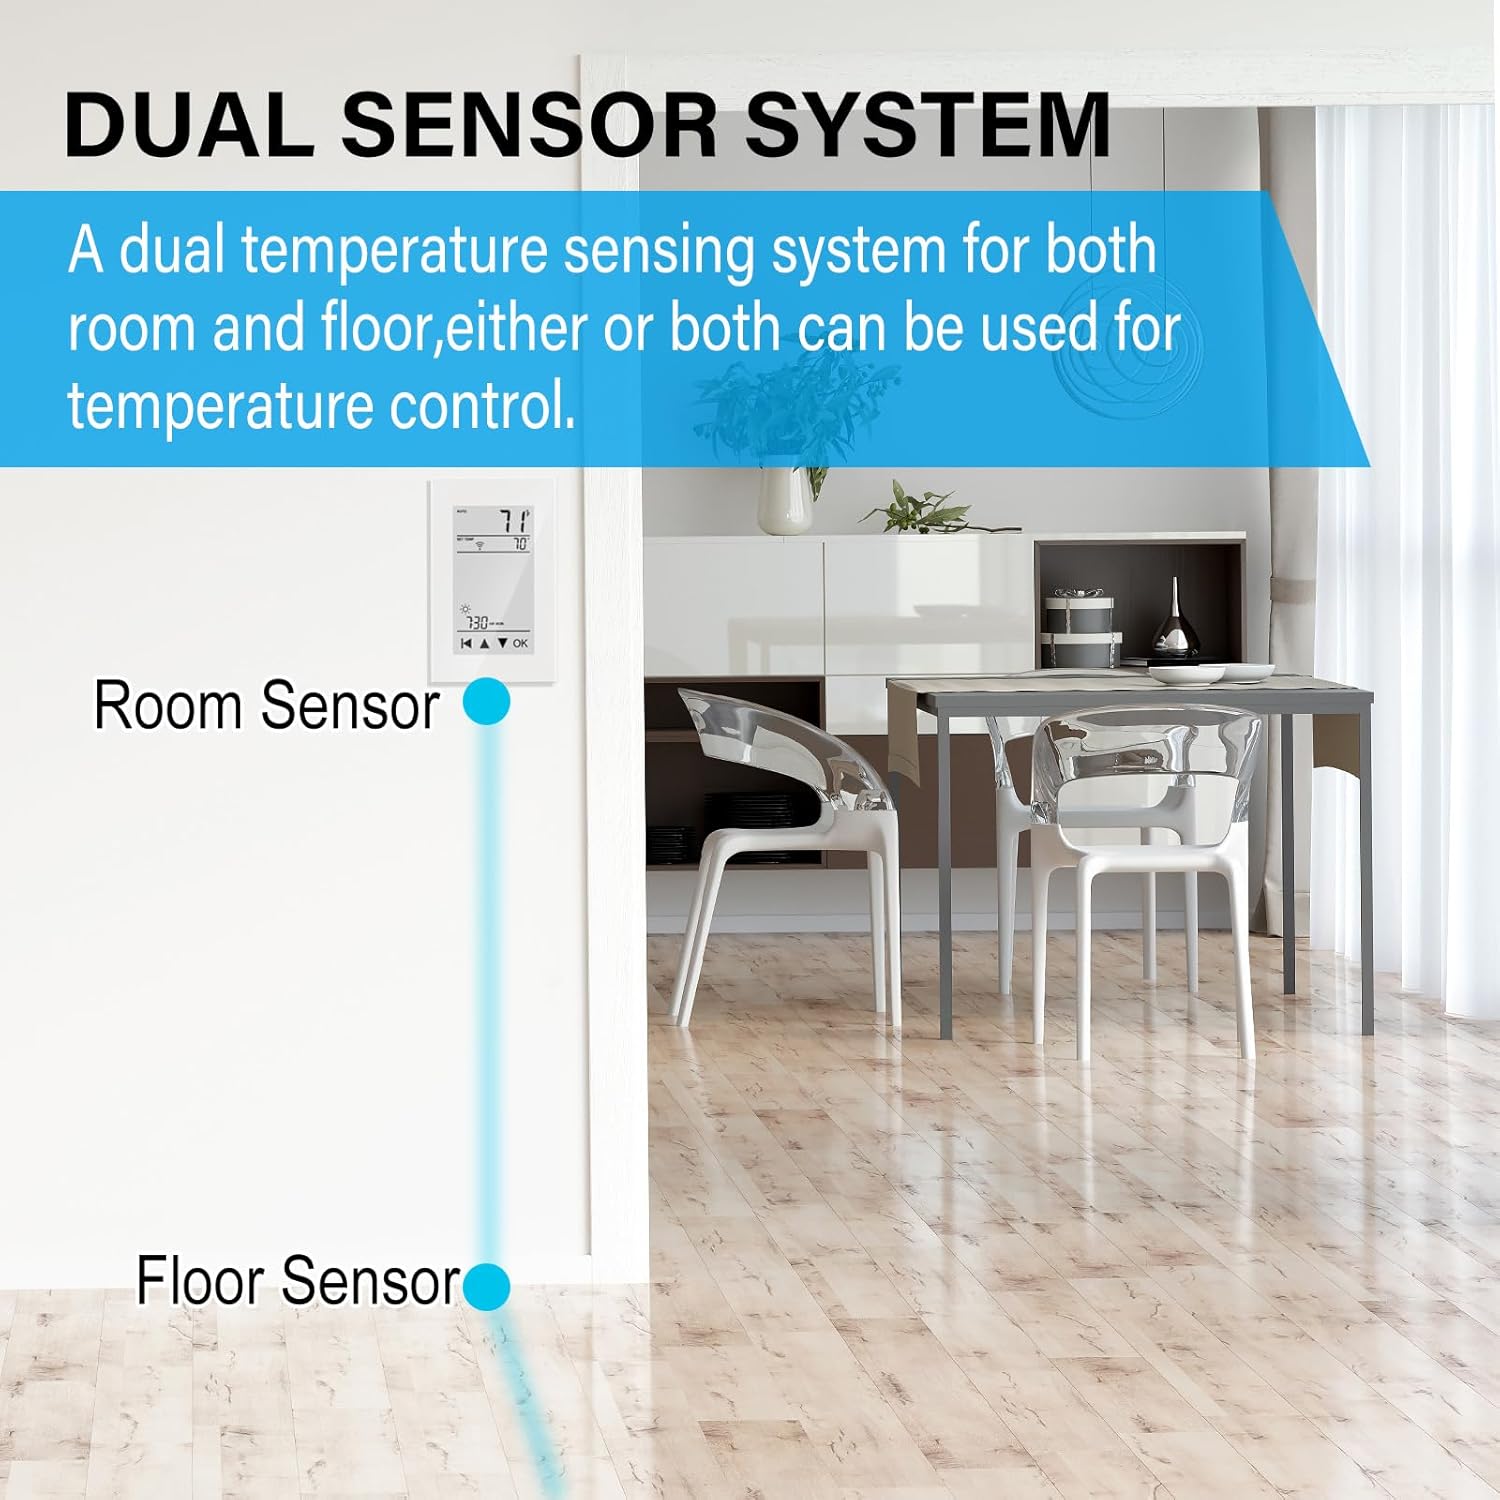
Image: Diagram illustrating the dual sensor system, showing the thermostat with an internal room sensor and an external floor sensor connected, allowing for flexible temperature control options.
ప్రోగ్రామింగ్ షెడ్యూల్
The ET-72W allows for a 7-day programmable schedule with up to 4 or 2 stagరోజుకు es. ఈ ఫీచర్ రోజులోని వివిధ సమయాల్లో మరియు వారంలోని రోజులకు వేర్వేరు ఉష్ణోగ్రతలను సెట్ చేయడానికి మిమ్మల్ని అనుమతిస్తుంది, సౌకర్యం మరియు శక్తి సామర్థ్యాన్ని ఆప్టిమైజ్ చేస్తుంది.
- Access the programming menu through the thermostat's touch screen interface.
- Select the day(s) you wish to program.
- Set the desired time and temperature for each stage (e.g., Wake, Away, Home, Sleep).
- మీ సెట్టింగ్లను సేవ్ చేయండి.
Remote Control and WiFi Connectivity
The thermostat can be controlled remotely via the Warmme app, available for download on the App Store (iOS) and Google Play (Android). It supports 5G+2.4G WiFi connectivity, allowing you to monitor and adjust your thermostat settings from anywhere with an internet connection.
WiFiకి కనెక్ట్ చేస్తోంది
- Ensure your thermostat is powered on and within range of your WiFi network.
- Download and install the "Warmme" app on your smartphone or tablet.
- Follow the in-app instructions to create an account and add your ET-72W thermostat. This typically involves putting the thermostat into pairing mode and connecting it to your home WiFi network.
- Once connected, you can control your thermostat remotely.


Image: Left: A person using the Warmme app on a smartphone to control the thermostat remotely. Right: The HEATIT ET-72W thermostat displayed next to a smartphone showing the Warmme app interface, demonstrating remote control capabilities.
నిర్వహణ
The HEATIT ET-72W thermostat requires minimal maintenance. To ensure optimal performance and longevity:
- Clean the screen and exterior with a soft, damp వస్త్రం. రాపిడి క్లీనర్లు లేదా ద్రావకాలను నివారించండి.
- Ensure the thermostat's vents are free from dust and obstructions to allow for accurate temperature sensing.
- Periodically check wiring connections for tightness, especially during annual system checks (performed by a qualified professional).
ట్రబుల్షూటింగ్
If you encounter issues with your HEATIT ET-72W thermostat, consider the following common solutions:
- పవర్ లేదు/ఖాళీ స్క్రీన్: Check the circuit breaker for the heating system. Ensure all wiring connections are secure.
- తాపన వ్యవస్థ స్పందించడం లేదు: Verify the thermostat is in the correct operating mode (e.g., Heat). Check the set temperature is above the current room temperature. Inspect wiring connections to the heating system.
- సరికాని ఉష్ణోగ్రత రీడింగ్లు: Ensure the thermostat's internal sensor is not obstructed and the external floor sensor is correctly installed and connected.
- వైఫై కనెక్టివిటీ సమస్యలు: Confirm your home WiFi network is operational and the thermostat is within range. Restart your router and the thermostat. Re-attempt the WiFi setup process via the Warmme app. Ensure you are connecting to a 2.4GHz network if your router supports both 2.4GHz and 5GHz, as some devices prefer 2.4GHz for initial setup.
- GFCI ట్రిప్: If the GFCI trips, indicating a ground fault, immediately turn off power to the heating system. This requires professional inspection to identify and resolve the electrical fault. Do not bypass GFCI protection.
For persistent issues, contact HEATIT customer support or consult a qualified electrician.
స్పెసిఫికేషన్లు
| మోడల్ సంఖ్య | ET-72W |
| వాల్యూమ్tage | 120V/240V (డ్యూయల్ వాల్యూమ్tage) |
| గరిష్ట లోడ్ | 15A |
| సెన్సార్ రకం | Room (built-in), Floor (external 10ft wire) |
| కనెక్టివిటీ | 5G+2.4G WiFi |
| ప్రోగ్రామింగ్ | 7-Day, 4 or 2 stagరోజుకు es |
| ధృవపత్రాలు | ETL Approved, Class A GFCI |
| వస్తువు బరువు | 14.4 ఔన్సులు |
| ప్యాకేజీ కొలతలు | 6.1 x 3.46 x 2.83 అంగుళాలు |
| తయారీదారు | Zhukeshi |
వారంటీ మరియు మద్దతు
The HEATIT ET-72W Programmable Thermostat comes with a 4-year limited warranty. For warranty claims, technical assistance, or further support, please contact HEATIT customer service through their official channels or the Warmme app support section.
For the latest information and support resources, visit the official HEATIT webసైట్: HEATIT Store on Amazon


