1. పరిచయం
This manual provides instructions for the installation, operation, and maintenance of your CAMECHO Android 15 car stereo head unit. Please read this manual thoroughly before installation and use to ensure proper function and safety.
2. వర్తించే కార్ మోడల్స్
This head unit is designed for specific vehicle models. Ensure your vehicle matches the compatibility list below:
- Dodge Journey: 2012-2020 models
- Fiat Freemont: 2011-2019 models
Note: After installation, the original CD player (if any) will no longer function.

Figure 2.1: Compatible vehicle dashboards and installation comparison. The image illustrates the head unit's fitment in a Dodge Journey, showing the original dashboard, the new head unit installed, and indicating that the original CD player is not supported while an original roof monitor is.
3. సెటప్ మరియు ఇన్స్టాలేషన్
3.1. What's in the Box (Packing List)
ఇన్స్టాలేషన్ ప్రారంభించే ముందు అన్ని భాగాలు ఉన్నాయని నిర్ధారించుకోండి:
- 1 x Android Head Unit
- 1 x AHD బ్యాకప్ కెమెరా
- 1 x బాహ్య మైక్రోఫోన్
- 1 x Canbus Decoder
- 1 x GPS యాంటెన్నా
- 1 x రేడియో యాంటెన్నా
- 1 x పవర్ కేబుల్
- 1 x RCA కేబుల్
- 1 x వెనుక కెమెరా ఇన్పుట్ కేబుల్
- 2 x USB కేబుల్
- 1 x Original USB Cable
- 1 x Rear Camera Adapter Cable
- 1 x సంస్థాపనా సాధనం
- 1 x ఇన్స్ట్రక్షన్ మాన్యువల్

Figure 3.1: Contents of the package and unit dimensions. This image details the physical size of the head unit and lists all included accessories with their corresponding labels.
3.2. వైరింగ్ మరియు కనెక్షన్లు
Follow these steps for proper wiring and connection of the head unit:
- విద్యుత్ తీగ: ప్రధాన పవర్ హార్నెస్ను వాహనం యొక్క వైరింగ్కు కనెక్ట్ చేయండి.
- RCA కేబుల్: Connect for audio/video output to external amplifiers or monitors.
- USB కేబుల్స్: Connect the provided USB cables for data transfer and charging.
- కెమెరా ఇన్పుట్: Connect the rear camera input cable.
- రేడియో యాంటెన్నా: వాహనం యొక్క రేడియో యాంటెన్నాను కనెక్ట్ చేయండి.
- GPS యాంటెన్నా: Connect the GPS antenna and mount it in a location with a clear view ఆకాశం యొక్క.
3.3. CANBUS Connection
The CANBUS decoder is essential for retaining steering wheel controls and other vehicle-specific functions.
- Ensure the CANBUS box is correctly connected to the wiring harness.
- Plug the 8-pin cable into the connector on the head unit. Failure to do so will result in non-functional steering wheel controls.

Figure 3.2: CANBUS wiring diagram. This image provides visual guidance for connecting the CANBUS decoder and the 8-pin cable, along with instructions for configuring steering wheel controls in the settings menu.
స్టీరింగ్ వీల్ కంట్రోల్ కాన్ఫిగరేషన్:
After connecting the CANBUS, you must set the protocol correctly for steering wheel controls to work. Navigate to: Settings > Factory Mode > Password: 8888 > 1 Vehicle > Automotive type. ఎంచుకోండి Raise - Dodge - 2014 Journey (High-End) మీ కారు కోసం.
3.4. Reversing Camera Installation
The reversing input must be plugged in even if a reversing camera is not used.
- Connect the positive pole of the camera's power supply to the car's reversing light positive.
- Connect the negative pole of the camera's power supply to the car's reversing light negative.
- The reversing trigger is controlled by the stereo; no separate connection is required for the trigger wire.

Figure 3.3: Reversing camera wiring. This diagram provides a visual guide for connecting the AHD backup camera, including power connections and the input to the head unit. It also highlights the importance of connecting the white plug for wireless signals.
Troubleshooting Camera Display:
If the camera still does not work, adjust the backup camera resolution through: Settings > Factory Mode > Password: 8888 > 3 Camera.
3.5. Original Backup Camera Connection (If Applicable)
If your vehicle has an original backup camera, connect the yellow AV connector ("CAM Video In") of the power cable to the Reversing Input cable.

Figure 3.4: Original backup camera connection. This diagram shows the specific wiring for integrating an existing vehicle backup camera with the new head unit, emphasizing the yellow AV connector and the white plug.
4. ఆపరేటింగ్ సూచనలు
4.1. ప్రాథమిక ఆపరేషన్
- పవర్ ఆన్/ఆఫ్: Press and hold the power button on the unit or use the vehicle's ignition.
- టచ్ స్క్రీన్: Navigate the interface by tapping, swiping, and pinching on the 9-inch touch screen.
- వాల్యూమ్ నియంత్రణ: Adjust audio volume using the physical buttons or on-screen controls.
4.2. వైర్లెస్ ఆపిల్ కార్ప్లే & ఆండ్రాయిడ్ ఆటో
నావిగేషన్, సంగీతం, కాల్స్ మరియు సందేశాల సజావుగా ఏకీకరణ కోసం మీ స్మార్ట్ఫోన్ను వైర్లెస్గా కనెక్ట్ చేయండి.
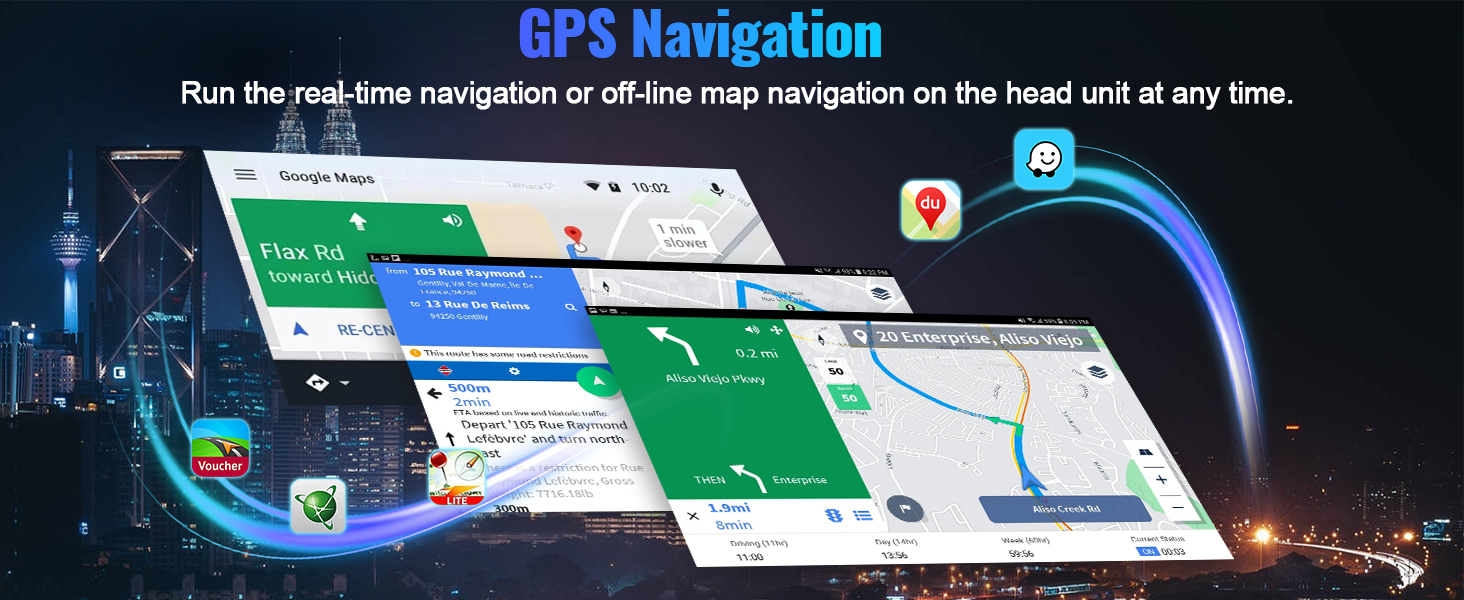
Figure 4.1: Wireless Apple CarPlay and Android Auto interface. This image displays the user interface for both CarPlay and Android Auto, highlighting their core functionalities like phone calls, music playback, and navigation.
కనెక్షన్ దశలు:
వైర్లెస్ ఆపిల్ కార్ప్లే
- Click the "ApplePlay" app on the head unit.
- Turn on Bluetooth on your iPhone and select the car radio's Bluetooth name.
- Allow access to Contacts and Favorite Sync.
- Wait briefly for CarPlay mode to activate.
వైర్లెస్ ఆండ్రాయిడ్ ఆటో
- Click the "Android Auto" app on the head unit.
- మీ Android ఫోన్లో బ్లూటూత్ని ఆన్ చేయండి.
- Select the car radio's Bluetooth name and pair.
- Wait briefly for Android Auto mode to activate.

Figure 4.2: Wireless CarPlay and Android Auto connection guide. This image provides a visual summary of the steps required to connect both Apple CarPlay and Android Auto wirelessly to the head unit.
4.3. GPS Navigation & WiFi Connection
The unit includes a built-in GPS module for navigation and supports WiFi for online services.
- GPS నావిగేషన్: Utilize pre-installed or downloaded navigation apps for online and offline routing.
- వైఫై కనెక్షన్: Connect to a mobile hotspot or available WiFi networks to access online content, download apps, and stream media.

Figure 4.3: GPS Navigation and WiFi functionality. This image illustrates the navigation interface and the availability of WiFi connectivity for various online services.
4.4. Bluetooth 5.0 & FM RDS Radio
Enjoy hands-free communication and a wide range of radio stations.
- బ్లూటూత్ 5.0: Pair your phone for hands-free calls and wireless audio streaming from apps like Spotify or Pandora.
- FM RDS రేడియో: Tune into FM/RDS radio with 18-station presets for live broadcasting and station information.

Figure 4.4: Bluetooth and FM RDS Radio interfaces. This image shows the on-screen controls for Bluetooth calls and the FM radio tuner with RDS information.
4.5. AHD Backup Camera
Enhance parking safety with the included AHD rear view కెమెరా.
- The camera provides a clear image on the touchscreen, even in low-light conditions, thanks to its stronger night vision effect.
- IP67 జలనిరోధిత రేటింగ్ వివిధ వాతావరణ పరిస్థితులలో మన్నికను నిర్ధారిస్తుంది.

Figure 4.5: Backup camera display and steering wheel controls. This image illustrates the clear view provided by the AHD camera and the integration of steering wheel controls for safe driving.
4.6. స్టీరింగ్ వీల్ నియంత్రణ
Retain your vehicle's factory steering wheel control functionality for convenience and safety.
- Control volume, track skipping, and answer/end calls directly from your steering wheel.
- Ensure CANBUS is correctly configured as described in Section 3.3.
4.7. 16-Band Equalizer (EQ)
Customize your audio experience with the built-in 16-band equalizer.
- Adjust sound frequencies to achieve desired bass, midrange, and treble levels.
- Multiple preset EQ modes are available for various music genres.

Figure 4.6: 16-Band Equalizer interface. This image displays the detailed audio customization options available through the equalizer, including frequency adjustments and sound field controls.
4.8. Home Page App Customization
Personalize your head unit's home screen by arranging and selecting your preferred applications.
- Drag and drop app icons to rearrange them.
- Choose which apps are displayed on the home page for quick access.

Figure 4.7: Home page app customization. This image demonstrates how users can personalize their home screen by selecting and rearranging application icons.
4.9. స్ప్లిట్ స్క్రీన్ ఫంక్షనాలిటీ
Run two applications simultaneously on the screen for enhanced multitasking.
- ఉదాహరణకుample, use navigation on one side while controlling music on the other.

Figure 4.8: Split screen in action. This image illustrates the ability to display two applications concurrently, such as navigation and a music player.
4.10. మిర్రర్ లింక్
Cast your smartphone's screen to the car stereo touchscreen.
- This function is supported wirelessly only.

Figure 4.9: Mirror Link functionality. This image demonstrates the wireless mirroring of a smartphone screen onto the car stereo display.
5. నిర్వహణ
To ensure the longevity and optimal performance of your CAMECHO car stereo, follow these maintenance guidelines:
- శుభ్రపరచడం: స్క్రీన్ మరియు బాహ్య భాగాన్ని శుభ్రం చేయడానికి మృదువైన, పొడి వస్త్రాన్ని ఉపయోగించండి. రాపిడి క్లీనర్లు లేదా ద్రావకాలను నివారించండి.
- సాఫ్ట్వేర్ అప్డేట్లు: Periodically check for and install software updates to improve performance and add new features. These are typically available via WiFi connection.
- ఉష్ణోగ్రత: యూనిట్ను ఎక్కువసేపు వేడి మరియు చలి రెండింటిలోనూ తీవ్రమైన ఉష్ణోగ్రతలకు గురిచేయకుండా ఉండండి.
- కనెక్షన్లు: Ensure all cables and connections remain secure. Loose connections can lead to intermittent issues.
6. ట్రబుల్షూటింగ్
మీ కారు స్టీరియోతో మీకు సమస్యలు ఎదురైతే, ఈ క్రింది సాధారణ సమస్యలు మరియు పరిష్కారాలను చూడండి:
| సమస్య | సాధ్యమైన కారణం | పరిష్కారం |
|---|---|---|
| యూనిట్ పవర్ ఆన్ చేయదు | Loose power connection, blown fuse, vehicle ignition issue. | Check power cable connections. Inspect vehicle fuses. Ensure vehicle ignition is on. |
| శబ్దం లేదు | Volume too low, incorrect audio source, speaker wiring issue. | వాల్యూమ్ పెంచండి. సరైన ఆడియో మూలాన్ని ఎంచుకోండి. స్పీకర్ కనెక్షన్లను తనిఖీ చేయండి. |
| స్టీరింగ్ వీల్ నియంత్రణలు పనిచేయడం లేదు | CANBUS not connected or incorrectly configured. | Verify CANBUS connection (Section 3.3). Configure CANBUS protocol in Factory Settings. |
| బ్యాకప్ కెమెరా ప్రదర్శించబడటం లేదు | Camera wiring issue, incorrect camera resolution setting. | Check camera power and video input connections (Section 3.4). Adjust camera resolution in Factory Settings (Section 3.4). |
| GPS signal weak or lost | GPS యాంటెన్నా అడ్డుపడింది లేదా సరిగ్గా ఉంచలేదు. | GPS యాంటెన్నా స్పష్టంగా ఉందని నిర్ధారించుకోండి view ఆకాశం వైపు. యాంటెన్నా కనెక్షన్ని తనిఖీ చేయండి. |
| వైర్లెస్ కార్ప్లే/ఆండ్రాయిడ్ ఆటో కనెక్ట్ కావడం లేదు | Bluetooth not enabled, incorrect pairing, phone compatibility. | Ensure phone Bluetooth is on and paired. Follow connection steps (Section 4.2). Restart phone and head unit. |
ఈ పరిష్కారాలను ప్రయత్నించిన తర్వాత కూడా సమస్య కొనసాగితే, దయచేసి కస్టమర్ మద్దతును సంప్రదించండి.
7. స్పెసిఫికేషన్లు
| ఫీచర్ | వివరాలు |
|---|---|
| ఆపరేటింగ్ సిస్టమ్ | ఆండ్రాయిడ్ 15 |
| RAM / ROM | 4GB RAM / 64GB ROM |
| స్క్రీన్ పరిమాణం | 9 అంగుళాలు |
| డిస్ప్లే రిజల్యూషన్ | 1280*720 |
| కనెక్టివిటీ | Wireless Apple CarPlay, Wireless Android Auto, Bluetooth 5.0, WiFi, GPS |
| రేడియో ట్యూనర్ | FM RDS with 18 presets |
| ఈక్వలైజర్ | 16-బ్యాండ్ EQ |
| బ్యాకప్ కెమెరా | AHD with IP67 waterproof, enhanced night vision |
| వీడియో ప్లేబ్యాక్ | Supports 1080P video |
| USB పోర్ట్లు | డ్యూయల్ USB పోర్ట్లు |
| అవుట్పుట్ పవర్ | 180 వాట్స్ |
| ఉత్పత్తి కొలతలు | 10.4 x 10.4 x 17.3 అంగుళాలు |
| వస్తువు బరువు | 3.53 పౌండ్లు |
8. వారంటీ మరియు మద్దతు
8.1. వారంటీ సమాచారం
This product comes with a standard manufacturer's warranty. Please refer to the warranty card included in your package for specific terms and conditions. Keep your proof of purchase for warranty claims.
8.2. కస్టమర్ మద్దతు
For technical assistance, troubleshooting, or any questions regarding your CAMECHO car stereo, please contact our customer support team.
ఇమెయిల్: CAMECHOVIP@126.com

Figure 8.1: Customer Support Contact. This image provides the email address for customer assistance.


