1. పరిచయం
This manual provides detailed instructions for the safe and effective use of your OLIGHT RN 400 LED Bike Headlight and SEEMEE 30 C Bicycle Taillight Set. Please read this manual thoroughly before operation and retain it for future reference.

Image 1.1: Comparison of RN 400 Headlight and SEEMEE 30 C Taillight, showing their respective maximum output, runtime, and throw distances.
2. భద్రతా సమాచారం
- తాత్కాలిక దృష్టి లోపాన్ని నివారించడానికి కాంతి పుంజంలోకి నేరుగా చూడకండి.
- Ensure lights are securely mounted before riding.
- పిల్లలకు దూరంగా ఉంచండి.
- Do not disassemble or modify the lights, as this may void the warranty and create safety hazards.
- స్థానిక నిబంధనల ప్రకారం బ్యాటరీలను పారవేయండి.
3. ప్యాకేజీ విషయాలు
మీ ప్యాకేజీలో అన్ని అంశాలు ఉన్నాయని ధృవీకరించండి:
- RN 400 Headlight x 1
- Seemee 30 C Taillight x 1
- Handlebar mount x 1
- Silicon strap x 4
- USB-C కేబుల్ x 1
- వినియోగదారు మాన్యువల్

Image 3.1: The complete package contents for the OLIGHT RN 400 Headlight and SEEMEE 30 C Taillight, including mounts, straps, and charging cable.
4. సెటప్
4.1 Unlocking the Lights (First Use)
Before initial use, both the RN 400 and SEEMEE 30 C are in a locked state to prevent accidental activation during shipping. To unlock:
- పవర్ బటన్ను సుమారు 3 సెకన్ల పాటు నొక్కి పట్టుకోండి.
- The indicator light will flash red and then turn green, indicating the light is unlocked and ready for use. If the button flashes red and the light does not turn on, it is still locked.

Image 4.1: Visual guide for unlocking the bike light by holding the power button for 3 seconds until the indicator turns green.
4.2 RN 400 Headlight Installation
The RN 400 can be installed on a handlebar, helmet, or under a camera using the provided mount.
- Attach the handlebar mount to your bicycle handlebar using the appropriate silicon strap. Ensure it is tight and secure.
- Slide the RN 400 headlight onto the mount until it clicks into place.
- Adjust the angle of the headlight to ensure optimal illumination without blinding oncoming traffic. The anti-glare lens design directs light downwards.
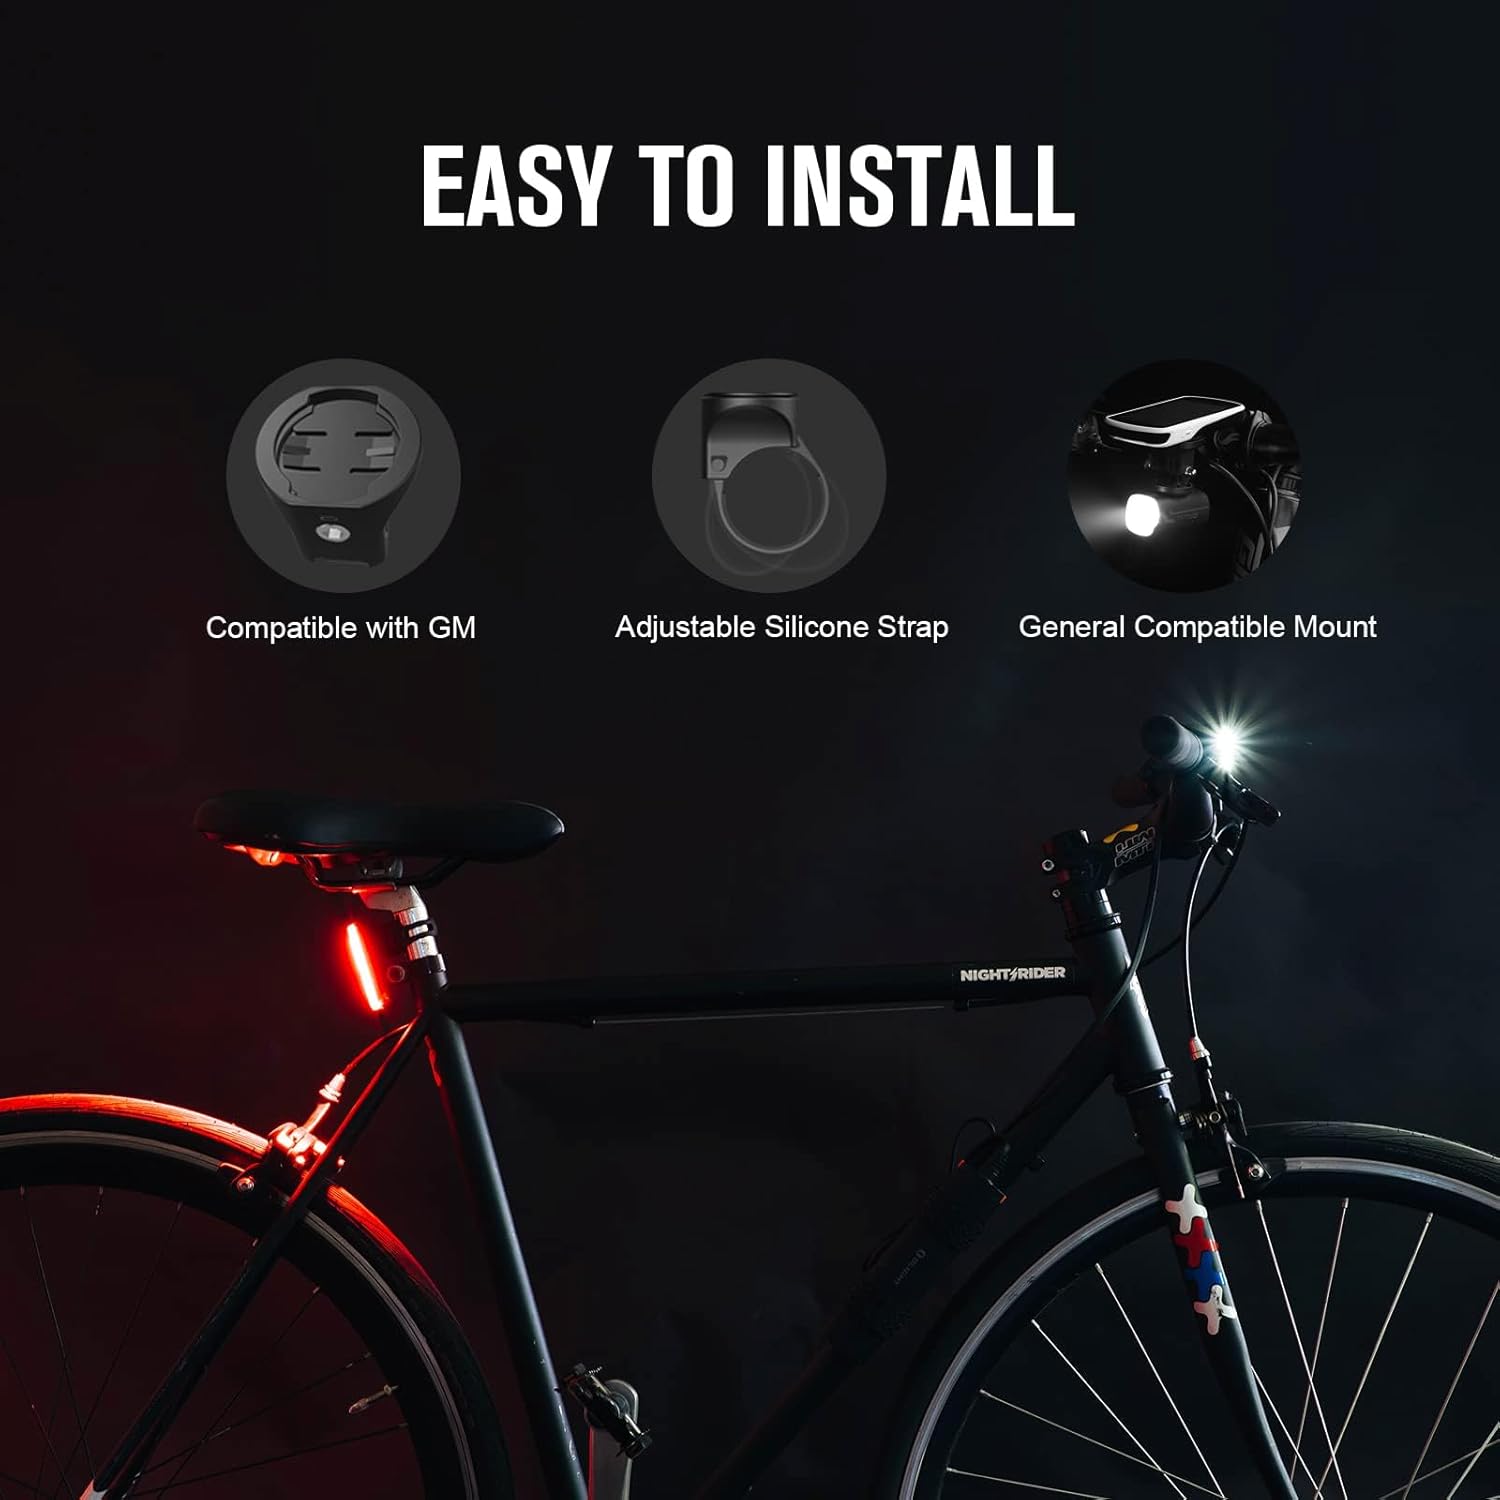
Image 4.2: Diagram showing the easy installation process for the RN 400 headlight on a handlebar, compatible with various mounts.
4.3 SEEMEE 30 C Taillight Installation
The SEEMEE 30 C taillight attaches to your seat post using a silicon strap.
- Select a suitable silicon strap for your seat post diameter.
- Hook one end of the strap to the taillight.
- Wrap the strap around the seat post and secure the other end to the taillight. Ensure the taillight is facing directly backward.

Image 4.3: Step-by-step guide illustrating how to install the SEEMEE 30 C taillight using the silicon strap on a bicycle seat post.
5. ఆపరేటింగ్ సూచనలు
5.1 పవర్ ఆన్/ఆఫ్
- ఆన్ చేయడానికి: పవర్ బటన్ను 1 సెకను నొక్కి పట్టుకోండి.
- ఆపివేయడానికి: పవర్ బటన్ను 1 సెకను నొక్కి పట్టుకోండి.
5.2 మోడ్ ఎంపిక
- RN 400 Headlight: Short press the power button to cycle through different brightness modes (e.g., Low, Mid, High, Flash 1, Flash 2).
- SEEMEE 30 C Taillight: Short press the power button to cycle through various lighting modes (e.g., Constant, Flash, Smart modes).
5.3 Battery Indicator (RN 400)
When the RN 400 is in standby mode, a short press of the power button will display the battery status for three seconds:
- ఆకుపచ్చ: 21%-100% battery remaining.
- ఎరుపు: 11%-20% battery remaining.
- ఎరుపు (ఫ్లాషింగ్): 1%-10% battery remaining.

Image 5.1: Visual representation of the RN 400's battery indicator colors (Green, Red, Flashing Red) corresponding to different charge levels.
5.4 Ambient Light Sensor (SEEMEE 30 C)
The SEEMEE 30 C features an ambient light sensor that automatically adjusts the light mode and output based on surrounding conditions, optimizing visibility and battery life. It also has a low battery mode to extend runtime.
6. ఛార్జింగ్
Both the RN 400 and SEEMEE 30 C are equipped with USB-C charging ports for convenient and fast recharging.
- Connect the provided USB-C cable to the charging port on the light.
- కేబుల్ యొక్క మరొక చివరను USB పవర్ సోర్స్కి కనెక్ట్ చేయండి (ఉదా., కంప్యూటర్, వాల్ అడాప్టర్).
- RN 400: The indicator light will show a red 'breathing' light during charging and turn green when fully charged.
- SEEMEE 30 C: సూచిక lamp will be on during charging and turn off when fully charged.

Image 6.1: Illustration of the USB-C fast charging ports on both the RN 400 and SEEMEE 30 C, showing charging indicators.
7. నిర్వహణ
- శుభ్రపరచడం: లైట్లను మృదువైన, డి-స్క్రీన్తో తుడవండి.amp గుడ్డ. రాపిడి క్లీనర్లు లేదా ద్రావకాలు ఉపయోగించవద్దు.
- నిల్వ: Store the lights in a cool, dry place when not in use. For long-term storage, charge the batteries every 3-6 months to maintain battery health.
- నీటి నిరోధకత: The RN 400 has an IPX7 rating, and the SEEMEE 30 C has an IPX6 rating, making them suitable for use in rainy conditions. Ensure charging port covers are securely closed to maintain water resistance.

Image 7.1: Visual representation of the superior waterproof ratings for the RN 400 (IPX7) and SEEMEE 30 C (IPX6), demonstrating their reliability in wet conditions.
8. ట్రబుల్షూటింగ్
| సమస్య | సాధ్యమైన కారణం | పరిష్కారం |
|---|---|---|
| లైట్ ఆన్ చేయదు. | Light is locked. | Hold the power button for 3 seconds to unlock (refer to Section 4.1). |
| లైట్ ఆన్ చేయదు. | బ్యాటరీ క్షీణించింది. | Charge the light using the USB-C cable (refer to Section 6). |
| కాంతి ఉత్పత్తి తక్కువగా ఉంది. | తక్కువ బ్యాటరీ. | కాంతిని ఛార్జ్ చేయండి. |
| లైట్ ఊహించని విధంగా మిణుకుమిణుకుమంటుంది లేదా ఆరిపోతుంది. | Loose connection or low battery. | Ensure the light is securely mounted. Charge the light. |
9. స్పెసిఫికేషన్లు
RN 400 Headlight
- గరిష్ట అవుట్పుట్: 400 ల్యూమెన్స్
- గరిష్ట రన్టైమ్: 7 గంటలు
- Max Throw: 89 మీటర్లు
- నీటి నిరోధకత: IPX7
- మౌంటు రకం: హ్యాండిల్బార్ మౌంట్ (గార్మిన్ అనుకూలమైనది)
- మెటీరియల్: అల్యూమినియం, పాలికార్బోనేట్
SEEMEE 30 C Taillight
- గరిష్ట అవుట్పుట్: 30 ల్యూమెన్స్
- గరిష్ట రన్టైమ్: 90 గంటలు
- Visibility Angle: 260°
- Max Throw: 6 Meters (visible from 800 meters)
- నీటి నిరోధకత: IPX6
- బరువు: 22 గ్రా
- కొలతలు: 65.5 x 25 x 22.5 మిమీ
జనరల్
- శక్తి మూలం: బ్యాటరీ పవర్డ్ (USB-C ద్వారా రీఛార్జ్ చేసుకోవచ్చు)
- రంగు: నలుపు
10. వారంటీ
OLIGHT provides a lifetime warranty for products purchased after January 1st, 2023. Please refer to the official OLIGHT website or contact customer support for detailed warranty terms and conditions.
11. మద్దతు
For further assistance, technical support, or warranty claims, please visit the official OLIGHT website or contact their customer service department. You can find contact information on the OLIGHT webసైట్ లేదా మీ ఉత్పత్తి ప్యాకేజింగ్ లోపల.


