పరిచయం
This manual provides detailed instructions for the setup, operation, and maintenance of your ELECROW 5-inch Resistive Touch Screen and 7-inch Capacitive Touchscreen Mini Portable Monitors. These displays are designed for broad compatibility with various devices, including Raspberry Pi, Banana Pi, Jetson Nano, and Windows systems, offering versatile visual and interactive experiences.

Image: The ELECROW 5-inch resistive touchscreen (top) and 7-inch capacitive touchscreen (bottom) displays, showcasing their respective resolutions and touch features.
ఉత్పత్తి లక్షణాలు
- HD Visual Enjoyment: The 5-inch display features an 800x480 resolution, while the 7-inch display supports 1024x600 resolution. Both IPS screens provide consistent colors and a 170° wide viewing కోణం.
- Industrial-Grade Resistive Touchscreen (5-inch): Comes with a touch pen for easy use. Supports gloved hands or non-conductive tools, suitable for harsh environments with a 1 million touch lifespan.
- Sensitive Capacitive Touch Screen (7-inch): Supports up to 5-point multi-touch. No driver installation is required; simply connect via Micro USB and HDMI for immediate use.
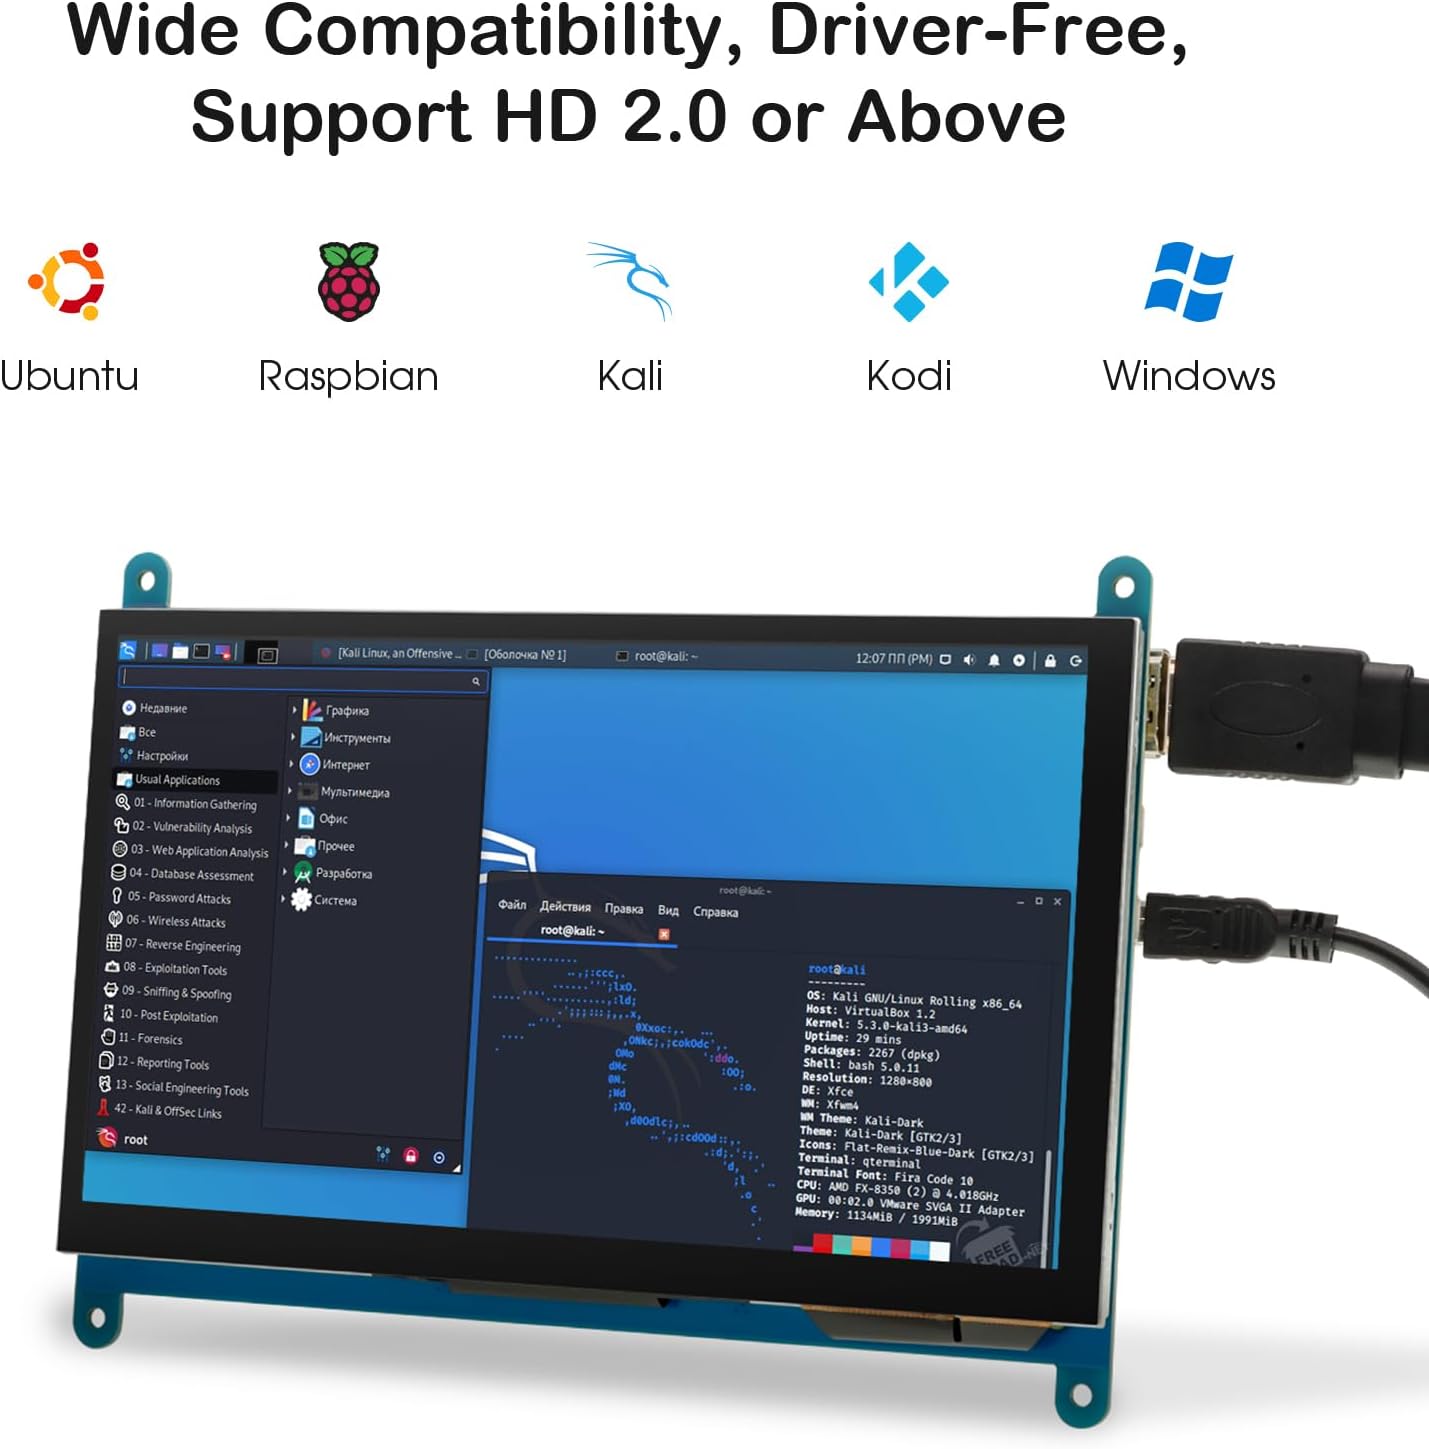
- విస్తృత అనుకూలత: Supports Raspberry Pi (all models), Banana Pi, Jetson Nano, and standard HDMI devices. Can also function as a secondary screen for TV boxes, Switch gaming displays, or extra Windows monitors.
- Plug and Play Display: Connect the screen to your device via the HDMI port and power it via the USB port for immediate functionality. Features a bezel-free design.
ప్యాకేజీ విషయాలు
Please verify that all components are present in your package. Typical contents include:
- ELECROW 5-inch Resistive Touchscreen Monitor
- ELECROW 7-inch Capacitive Touchscreen Monitor
- HDMI Cable(s)
- USB పవర్ కేబుల్(లు)
- Touch Pen (for 5-inch resistive screen)
- మౌంటు హార్డ్వేర్ (వర్తిస్తే)
Note: Specific accessories may vary. Refer to your product packaging or listing for exact details.
సెటప్ సూచనలు
1. Parts Introduction (7-inch Display Exampలే)
చిత్రం: వివరణాత్మక view of the 7-inch LCD display's circuit board, highlighting the Backlight, USB Touch/Power, and HD Interface ports with dimensions.
Familiarize yourself with the ports on your monitor. Typically, you will find a Micro USB port for power and touch input, and an HDMI port for video input.
2. Connecting to Raspberry Pi (5-inch Display Exampలే)

Image: The 5-inch LCD display connected to a Raspberry Pi board, illustrating the necessary HDMI and USB power/touch connections. Note: Raspberry Pi board is not included.
- Connect the HDMI cable from your Raspberry Pi's HDMI output to the monitor's HDMI input.
- Connect the Micro USB cable from a USB port on your Raspberry Pi (or an external 5V power adapter) to the monitor's Micro USB port for power and touch functionality.
- Ensure your Raspberry Pi's operating system is configured to output to the correct resolution (800x480 for 5-inch, 1024x600 for 7-inch). For touch functionality, no additional drivers are typically needed for standard Raspberry Pi OS distributions.
3. Connecting to Other Devices (Windows, Jetson Nano, etc.)

Image: The ELECROW monitors demonstrating compatibility with various applications, including connection to a Jetson Nano, a Raspberry Pi setup, and integration as a 3D printer interface.
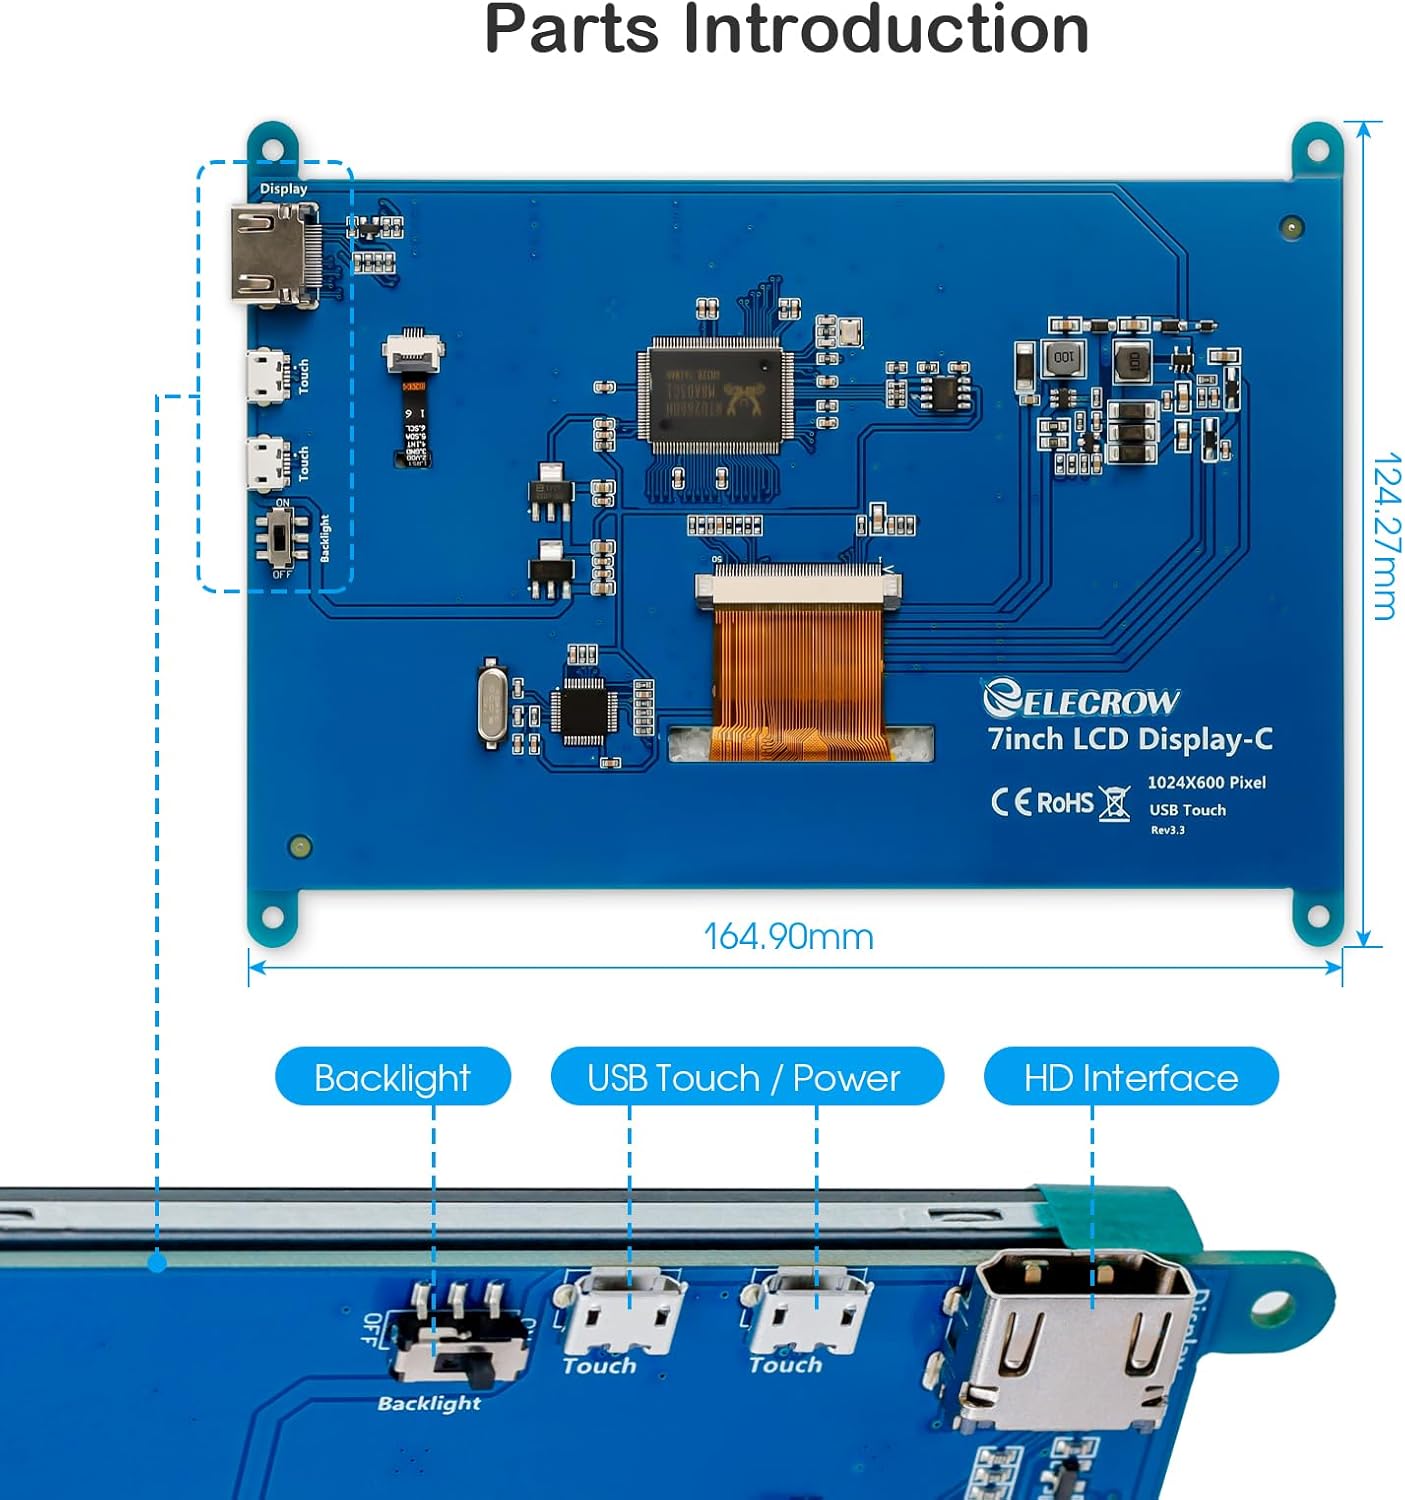
Image: The ELECROW monitor showcasing its wide compatibility by displaying interfaces from Ubuntu, Raspbian, Kali, Kodi, and Windows operating systems.
- Connect the HDMI cable from your device's HDMI output to the monitor's HDMI input.
- Connect the Micro USB cable from a USB port on your device (or an external 5V power adapter) to the monitor's Micro USB port for power and touch functionality.
- For Windows systems, the monitor should be recognized automatically as a secondary display. Touch functionality is typically plug-and-play. Adjust display settings in Windows to extend or duplicate your desktop.
ఆపరేటింగ్ సూచనలు
పవర్ ఆన్/ఆఫ్
The monitor powers on automatically when it receives power through the Micro USB port and a video signal through the HDMI port. To power off, simply disconnect the power cable or shut down the connected device.
టచ్స్క్రీన్ని ఉపయోగించడం
- 5-inch Resistive Touchscreen: Use the provided touch pen or a non-conductive tool for precise input. Apply light pressure to register touches.
- 7-అంగుళాల కెపాసిటివ్ టచ్స్క్రీన్: Supports up to 5-point multi-touch. Use your fingers for gestures like tapping, swiping, pinching, and zooming, similar to a smartphone or tablet.
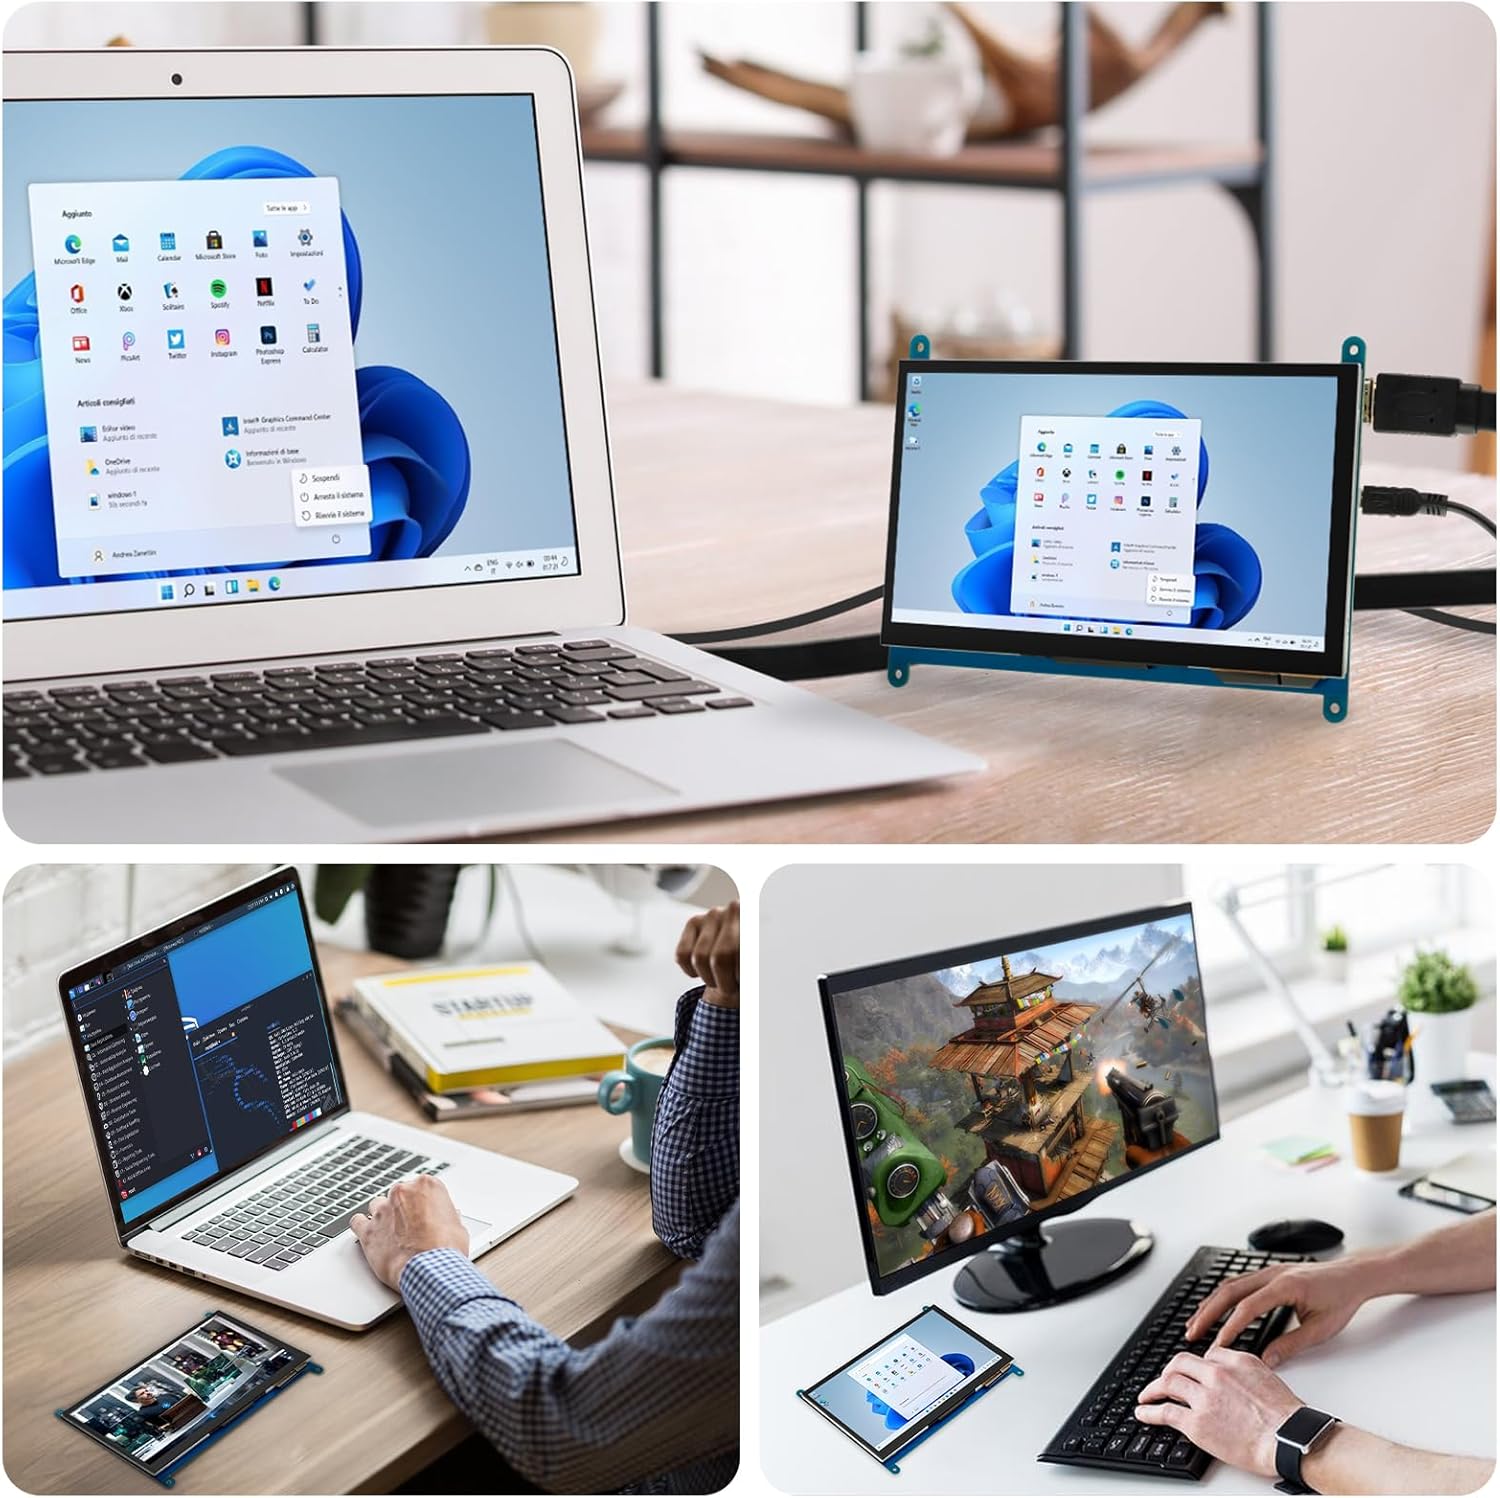
చిత్రం: ఉదాamples of the ELECROW monitors in use, serving as a secondary display for a laptop, a dedicated screen for coding, and a compact monitor for gaming.
ప్రదర్శన సెట్టింగ్లు
Most display settings, such as resolution and screen orientation, are managed through the operating system of your connected device (e.g., Raspberry Pi OS, Windows Display Settings). The monitors are designed to be plug-and-play, automatically adapting to common resolutions.
నిర్వహణ
- శుభ్రపరచడం: స్క్రీన్ను సున్నితంగా తుడవడానికి మృదువైన, మెత్తటి బట్టను ఉపయోగించండి. మొండి మరకల కోసం, కొద్దిగా dampనీటితో లేదా స్క్రీన్-సేఫ్ క్లీనర్తో వస్త్రాన్ని తుడవండి. కఠినమైన రసాయనాలు లేదా రాపిడి పదార్థాలను నివారించండి.
- నిల్వ: When not in use, store the monitor in a cool, dry place away from direct sunlight and extreme temperatures.
- నిర్వహణ: Handle the monitor by its edges. Avoid applying excessive pressure to the screen or dropping the device.
ట్రబుల్షూటింగ్
| సమస్య | సాధ్యమైన కారణం | పరిష్కారం |
|---|---|---|
| డిస్ప్లే లేదు/నలుపు స్క్రీన్ లేదు | No power; No video signal; Incorrect resolution. | Ensure USB power cable is connected and receiving power. Verify HDMI cable is securely connected to both devices. Check your device's display settings to ensure the correct resolution is outputted. |
| టచ్స్క్రీన్ స్పందించడం లేదు | USB cable not connected; Driver issue (rare); Calibration needed. | Ensure the Micro USB cable is connected for both power and touch data. For Raspberry Pi, ensure the OS is configured for touch. For Windows, check Device Manager. Recalibrate touch if necessary (refer to OS documentation). |
| మినుకుమినుకుమనే డిస్ప్లే | Insufficient power; Loose cable connection. | Ensure the monitor is receiving stable 5V power. Check all cable connections for looseness. Try a different USB power source or cable. |
| Image is distorted or off-center | Incorrect resolution or aspect ratio setting. | Adjust the display resolution and scaling settings on your connected device to match the monitor's native resolution (800x480 for 5-inch, 1024x600 for 7-inch). |
స్పెసిఫికేషన్లు
- బ్రాండ్: ఎలక్క్రో
- ASIN: B0F9PB1NX7
- 5-అంగుళాల డిస్ప్లే:
- Resolution: 800x480
- టచ్ రకం: రెసిస్టివ్
- Viewing Angle: 170° IPS
- 7-అంగుళాల డిస్ప్లే:
- Resolution: 1024x600
- Touch Type: Capacitive (5-point multi-touch)
- Viewing Angle: 170° IPS
- ఇంటర్ఫేస్: HDMI for video, Micro USB for power and touch
- అనుకూలత: Raspberry Pi (all models), Banana Pi, Jetson Nano, BB Black, Windows, standard HDMI devices.
- పవర్ ఇన్పుట్: 5V via Micro USB

Image: Specifications for the 5-inch Resistive Touchscreen Monitor, detailing its features and dimensions.
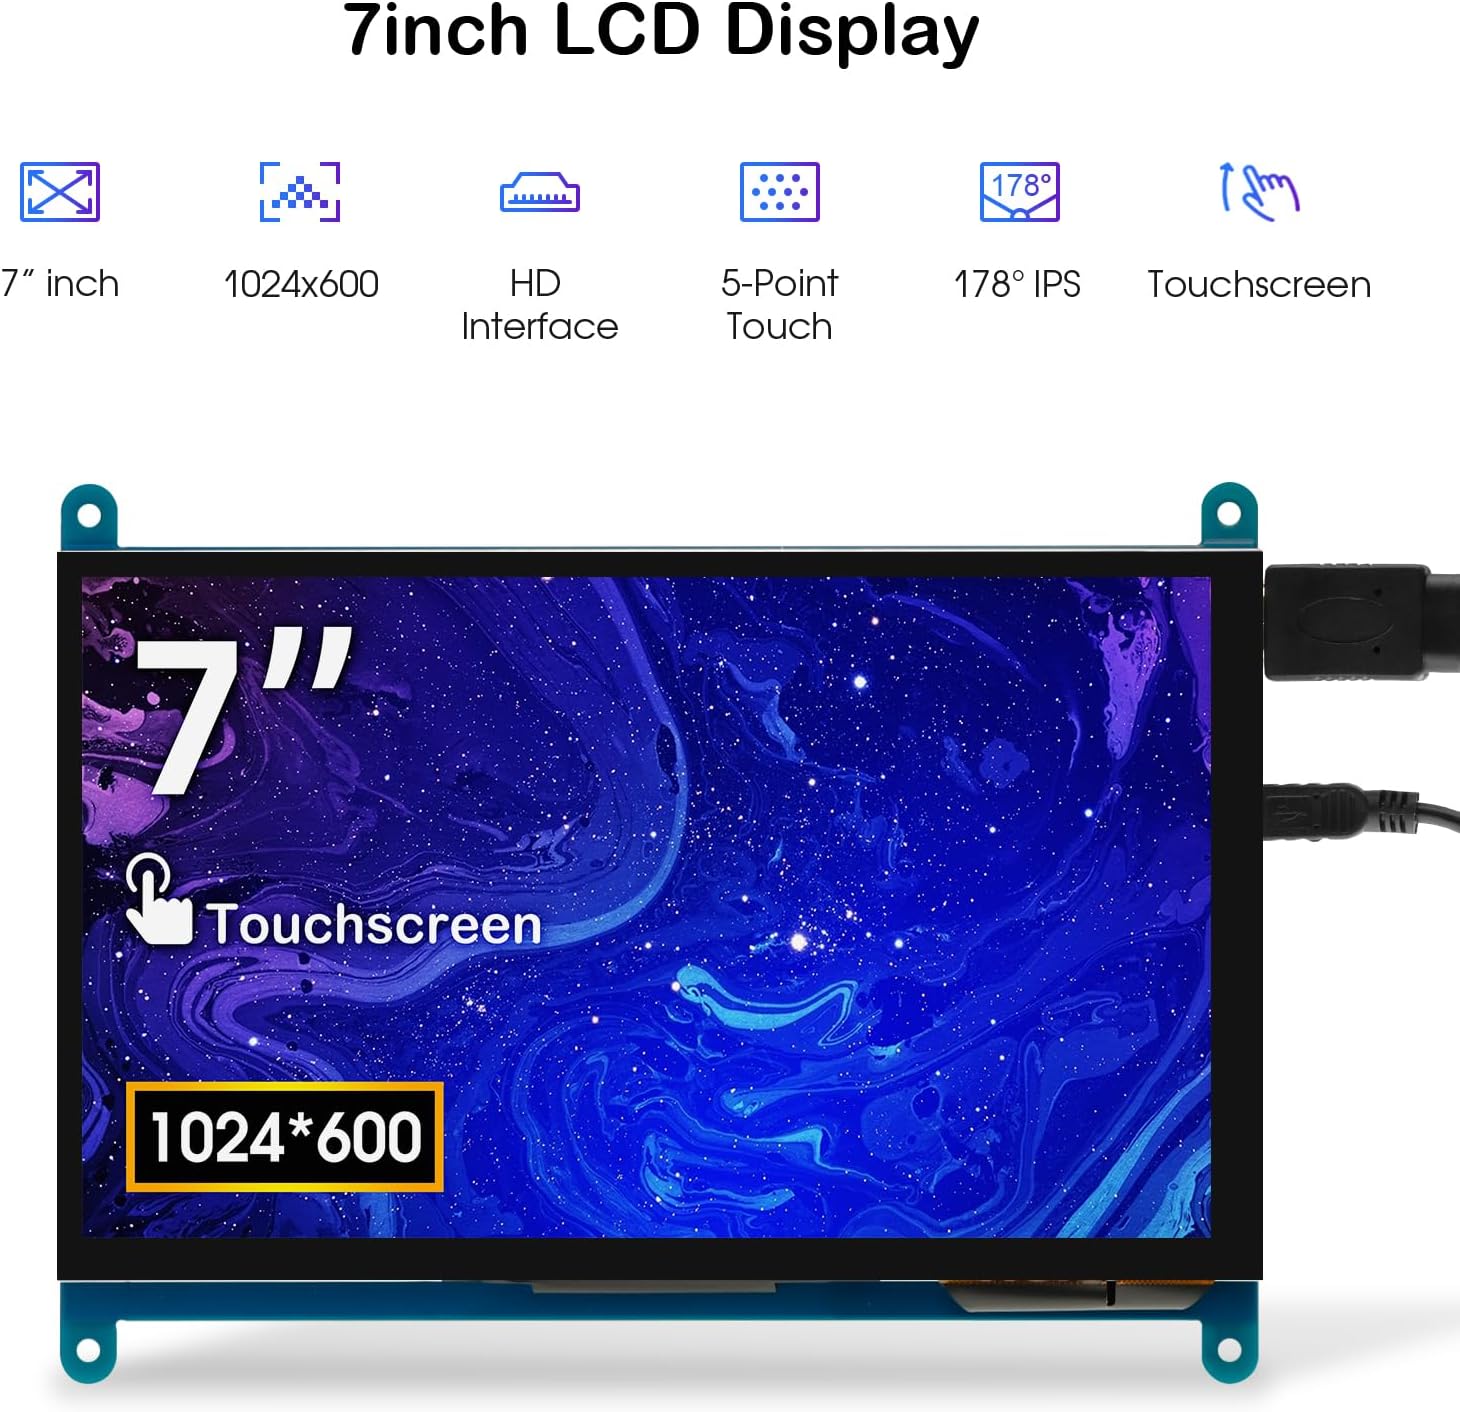
Image: Specifications for the 7-inch LCD Display, detailing its features and viewing కోణం.
వారంటీ మరియు మద్దతు
ELECROW products are designed for reliability and performance. For warranty information, technical support, or service inquiries, please refer to the official ELECROW webసైట్ లేదా వారి కస్టమర్ సర్వీస్ను నేరుగా సంప్రదించండి. వారంటీ క్లెయిమ్ల కోసం మీ కొనుగోలు రసీదును ఉంచండి.
సంప్రదింపు సమాచారం: దయచేసి సందర్శించండి Amazon లో ELECROW స్టోర్ లేదా వారి అధికారి webఅత్యంత తాజా మద్దతు వనరుల కోసం సైట్.


