1. ఉత్పత్తి ముగిసిందిview
The GAMDIAS ATHENA M4M is a compact micro-ATX case designed for high-performance gaming PCs. It features a mesh front panel with an RGB strip, three pre-installed 120mm fans, and supports dual 360mm radiators. Its design prioritizes clean builds with a front-mounted PSU and cable-friendly layout, including support for connector-hidden (BTF) motherboards. Modern I/O includes USB 3.2 Gen2 Type-C and USB 3.0 ports, along with an integrated RGB hub for synchronized lighting.
ముఖ్య లక్షణాలు:
- Compact Yet Powerful Design: Supports Mini-ITX and micro-ATX motherboards.
- Superior Cooling & Hardware Support: Three built-in 120mm NOTUSM1 fans, perforated mesh front with RGB strip, dual 360mm radiator support, and GPU clearance up to 395mm.
- Clean Build & Cable Management: Front-mounted PSU with downward-facing connectors and support for BTF motherboards.
- Modern I/O & Connectivity: USB 3.2 Gen2 Type-C, USB 3.0 ports, audio jacks, and an integrated RGB hub.
- Fully Ventilated & Easy Maintenance: Extensive dust filters (top, front, bottom) and easy-access panels.
2. సెటప్ మరియు ఇన్స్టాలేషన్
2.1 అన్ప్యాకింగ్ మరియు తయారీ
Carefully remove the PC case from its packaging. Inspect for any damage. Ensure all accessories are present. The case features easy-access panels secured by thumb screws and clasps for tool-free disassembly.
Before beginning installation, remove the side panels and any internal brackets that may obstruct component installation. The top panel can be removed by pressing a clip, allowing access to the top fan/radiator mounts.
2.2 మదర్బోర్డ్ సంస్థాపన
Install the appropriate standoffs for your Mini-ITX or Micro-ATX motherboard. Carefully place the motherboard into the chassis, aligning it with the standoffs, and secure it with screws.
వీడియో: JONSBO/JONSPLUS Z20 Black Micro-ATX Mini Tower PC Case installation guide. This video demonstrates the process of installing a motherboard and other components into a similar micro-ATX case, providing a visual reference for the ATHENA M4M.
2.3 విద్యుత్ సరఫరా యూనిట్ (PSU) సంస్థాపన
The ATHENA M4M features a front-mounted PSU design. Install your ATX, SFX, or SFX-L power supply into the designated bracket. Route the necessary power cables to the motherboard and other components, utilizing the cable management features for a clean build.
వీడియో: PC Crazy - A3 Front and Side PSU Installation Guide. This video illustrates the installation of a power supply in a front-mounted configuration, which is relevant to the ATHENA M4M's design.

చిత్రం: Illustration of the front-mounted PSU design, showing how the power supply is positioned at the front side of the case with connector ports oriented downward for easier cable management.
2.4 గ్రాఫిక్స్ కార్డ్ (GPU) ఇన్స్టాలేషన్
The ATHENA M4M supports GPUs up to 395mm in length. Install your graphics card into the appropriate PCIe slot on the motherboard and secure it. Ensure proper power connections are made.

చిత్రం: Diagram showing the interior accommodation of the case, highlighting support for m-ATX motherboards, VGA cards up to 395mm, and air coolers up to 180mm (H).
2.5 కూలింగ్ సిస్టమ్ ఇన్స్టాలేషన్ (ఫ్యాన్లు & రేడియేటర్లు)
The case comes with three pre-installed 120mm NOTUSM1 fans. It supports extensive airflow configurations, including dual 360mm radiators on the top and bottom. Additional fans can be installed as needed.

చిత్రం: Visual representation of the extensive airflow configuration, showing one 120mm ARGB PWM fan, two 120mm PWM fans, and an ARGB PWM fan hub.

చిత్రం: Diagram illustrating the dual 360mm radiator support on both the top and bottom of the ATHENA M4M case for superior cooling performance.

చిత్రం: Detailed diagram showing fan and radiator compatibility, including support for up to 9 fans and flexible radiator options at the front, top, bottom, and rear.
2.6 నిల్వ సంస్థాపన
The interior configuration provides ample room for cable management and storage space. The case supports multiple SSDs and HDDs. Refer to the diagram for mounting locations.
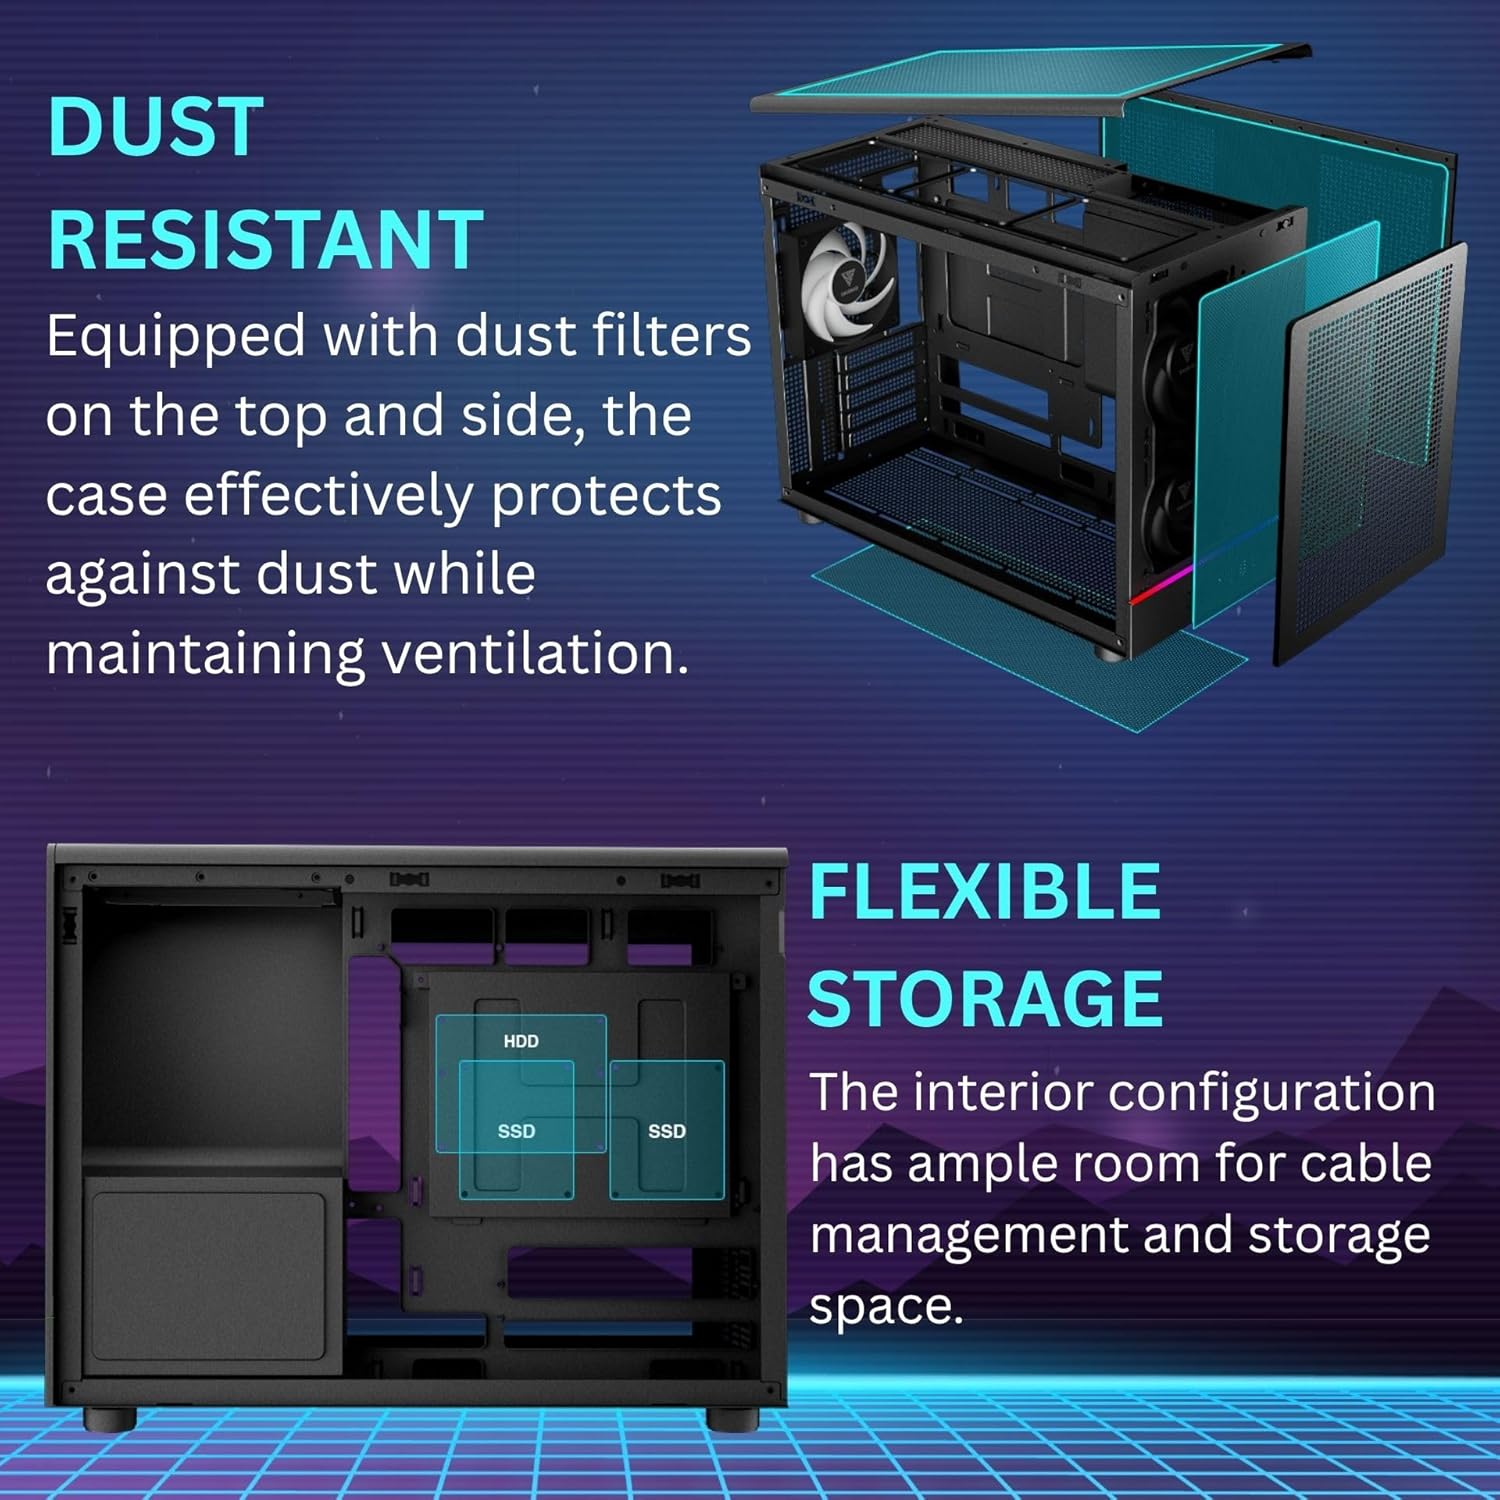
చిత్రం: Diagram showing flexible storage options within the case, including designated areas for HDD and SSD installations.
2.7 Connecting I/O Ports
Connect the front panel I/O cables (USB 3.2 Gen2 Type-C, USB 3.0, audio jacks, power button, RGB hub) to their respective headers on your motherboard. Ensure all connections are secure.

చిత్రం: క్లోజ్-అప్ view of the simple and accessible I/O panel, featuring one USB 3.2 Gen 2 Type-C port, two USB 3.0 ports, a reset button, and audio connectivity.
3. ఆపరేటింగ్ సూచనలు
3.1 Powering On Your PC
Once all components are installed and cables are connected, replace the side panels. Connect your monitor, keyboard, mouse, and power cable to the PC. Press the power button on the front I/O panel to start your system.
3.2 RGB లైటింగ్ నియంత్రణ
The integrated RGB hub allows for synchronized lighting. Connect the 5V3-pin header from the RGB strip and fans to your motherboard's ARGB header. Use your motherboard's software or a compatible RGB controller to customize lighting effects.
4. నిర్వహణ
4.1 డస్ట్ ఫిల్టర్ క్లీనింగ్
The ATHENA M4M is equipped with extensive dust filters on the top, front, and bottom. Regularly clean these filters to maintain optimal airflow and prevent dust buildup inside the case. Filters can be easily detached for cleaning.

చిత్రం: పేలింది view of the case highlighting the dust-resistant design with easily removable dust filters on the top and side panels, ensuring effective protection against dust while maintaining ventilation.
4.2 సాధారణ శుభ్రపరచడం
Use a soft, dry cloth to wipe down the exterior of the case. For internal cleaning, use compressed air to remove dust from fans and components. Ensure the PC is powered off and unplugged before performing any internal cleaning.
5. ట్రబుల్షూటింగ్
5.1 Cooling Performance Issues
If you experience higher than expected component temperatures, ensure all fans are spinning correctly and are free from obstructions. Verify that radiators are properly installed and not clogged with dust. The mesh side panel generally offers better thermal performance compared to a tempered glass side panel due to improved airflow.
5.2 Cable Connection Difficulties
Some users have reported tight angles for front USB 3.2 case connectors. Consider using a 90-degree adapter if you encounter difficulty connecting these to your motherboard. Ensure all power and data cables are securely connected and not obstructing airflow.
5.3 Physical Damage or Misalignment
In rare cases, the case may arrive with minor manufacturing imperfections or slight panel misalignment. If panels do not sit flush, gently adjust them. For significant damage, contact customer support.
6. స్పెసిఫికేషన్లు
| ఫీచర్ | వివరాలు |
|---|---|
| బ్రాండ్ | గామ్డియాస్ |
| సిరీస్ | ATHENA M4M |
| అంశం మోడల్ సంఖ్య | ATHENA M4M |
| కేసు రకం | Micro-Tower |
| మదర్బోర్డు మద్దతు | Mini-ITX, Micro-ATX |
| GPU Length Support | 395 మిమీ వరకు |
| రేడియేటర్ మద్దతు | Dual 360mm (Top & Bottom) |
| ముందే ఇన్స్టాల్ చేసిన అభిమానులు | 3 x 120mm NOTUSM1 (RGB) |
| PSU Mounting | Front-mounted (ATX, SFX, SFX-L) |
| I/O పోర్ట్లు | 1 x USB 3.2 Gen2 Type-C, 2 x USB 3.0, Audio Jacks, Reset Button, RGB Hub |
| డస్ట్ ఫిల్టర్లు | Top, Front, Bottom |
| మెటీరియల్ | మెటల్, స్టెయిన్లెస్ స్టీల్, టెంపర్డ్ గ్లాస్ |
| వస్తువు బరువు | 12.19 పౌండ్లు (5.54 కిలోలు) |
| ఉత్పత్తి కొలతలు (LxWxH) | 17.56 x 9.25 x 13.66 అంగుళాలు (44.6 x 23.5 x 34.7 సెం.మీ.) |
7. వారంటీ మరియు మద్దతు
For warranty information and technical support, please refer to the official GAMDIAS webసైట్లో లేదా మీ రిటైలర్ను సంప్రదించండి. కొనుగోలు రుజువుగా మీ కొనుగోలు రసీదును ఉంచండి.


